

Create Journeys Using Shopify Activities
Last updated July 4, 2025
Overview
In this document, you will learn all about how to build a journey that can be triggered by any Shopify activity, i.e. when customers of your Shopify store perform certain actions. You can learn more about these events here: Importing data from Shopify to Mailmodo .
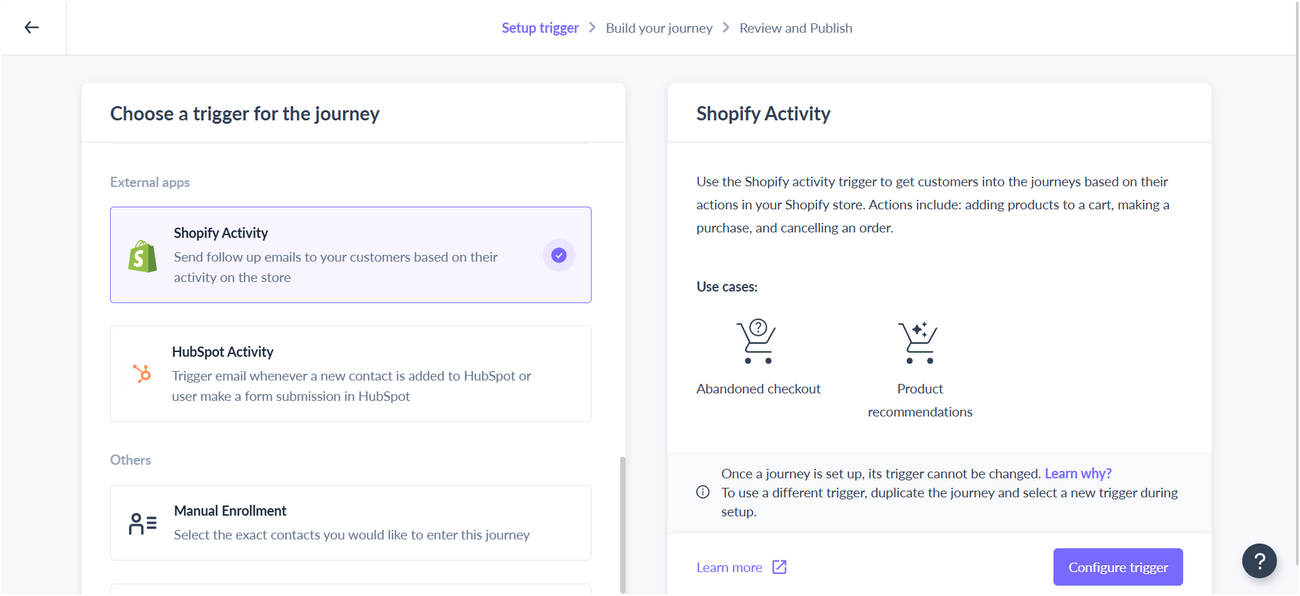
This option is available under the “Custom Events” section while selecting the journey trigger.
The “Shopify Activity” trigger will only be available when you successfully integrate your Shopify store with Mailmodo. Click here to learn more about Shopify integration.
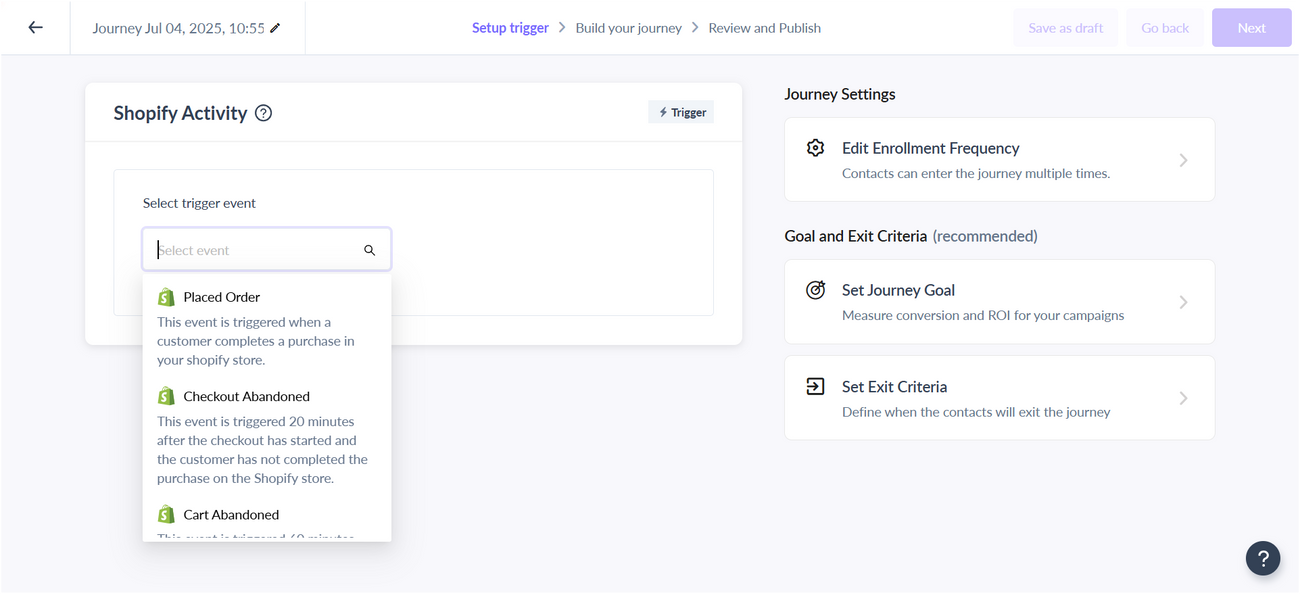
Here is the list of events available in the Shopify activity trigger:
- Placed Order: This event is triggered whenever a customer completes a purchase on the Shopify store.
- Cancelled Order: This event is triggered when an order is marked as "canceled" in your Shopify store.
- Fulfilled Order: This event is triggered when an order is marked as "fulfilled" in your Shopify store.
- Refunded Order: This event is triggered when an order is marked as "refunded" in your Shopify store.
- Checkout Abandoned: This is a derived event that gets triggered 20 minutes after the Checkout Started event has happened and the customer has still not completed the purchase for the given checkout on the Shopify store.
- Cart Abandoned: This event is triggered 60 minutes after the user has left something in the cart but has not started checkout.
- Updated Shipment Status: This event is triggered whenever there’s an update in the delivery status of a particular order. It works best if your store has integration with services like Shiprocket or Clickpost.
When someone performs any action in your store, for example, placing an order then they will be enrolled into the journey where you have set “Placed Order” as a trigger under Shopify activity.
How to set journey trigger using Shopify activity
Towards the end just mentioned if you want to learn more about the journey feature, check out the journey articles for all available functionality (not specific to Shopify).
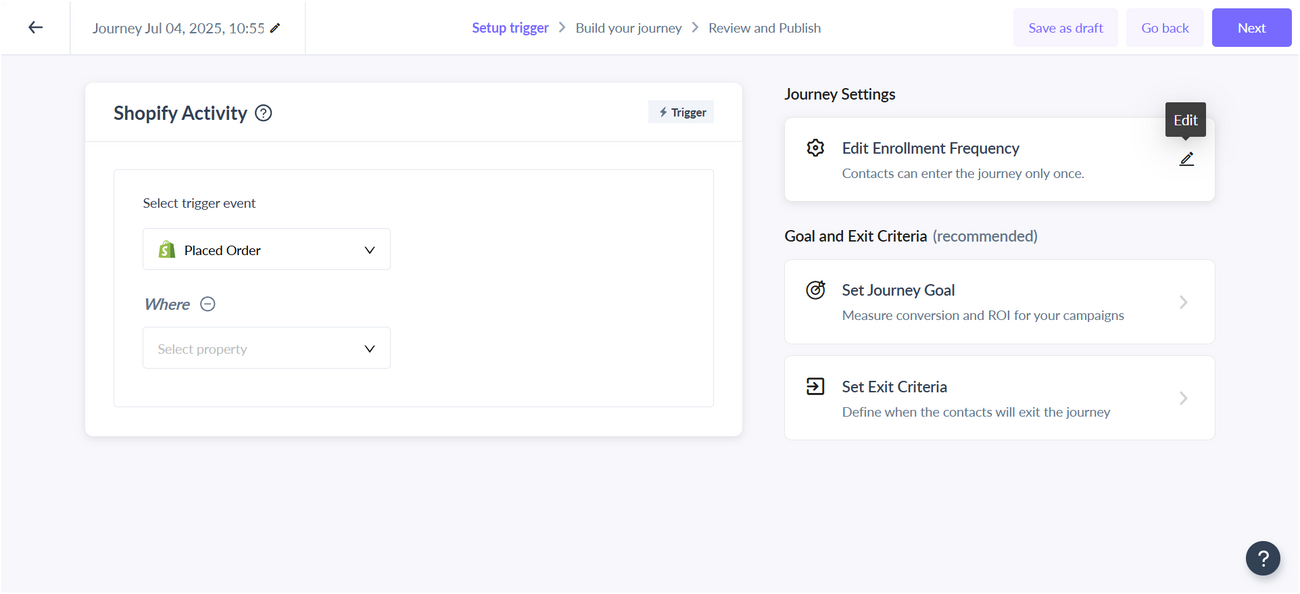
Step 1: Once you choose to create a journey scratch, select “Shopify Activity” as the journey trigger from the “Custom Events” category.
Step 2: In the Shopify activity trigger, you can select any one of the Shopify events:
Optionally, you can also add filters to further refine the enrollment criteria of contacts added. These are additional details about the event.
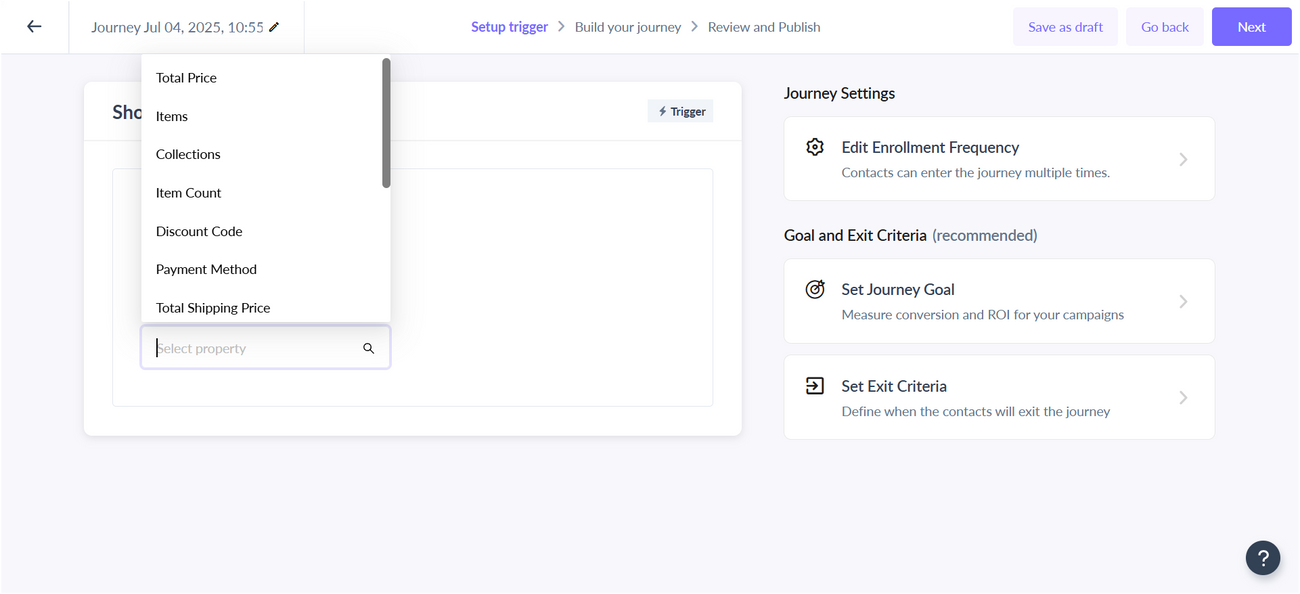
For example, you can trigger the journey when a customer abandons the cart with high-value or low-value products based on the total price of the order. This can be achieved by adding “Abandoned Checkout” as the event and filtering it by “Total Price”.
Step 3: Configure Time delays.
Decide on the timing of your email reminders. Consider sending the first email shortly after the checkout abandonment and follow up with strategically timed messages. You can do so by adding delay nodes after the trigger and before sending emails.

You can learn more about journey blocks under Additional Resources .
Step 4: Create emails with templates and subject lines.
Design compelling email templates that align with your brand's style and tone. Craft engaging subject lines and persuasive content.
Remember to include personalization parameters that will help you to make these emails more personal and relevant.
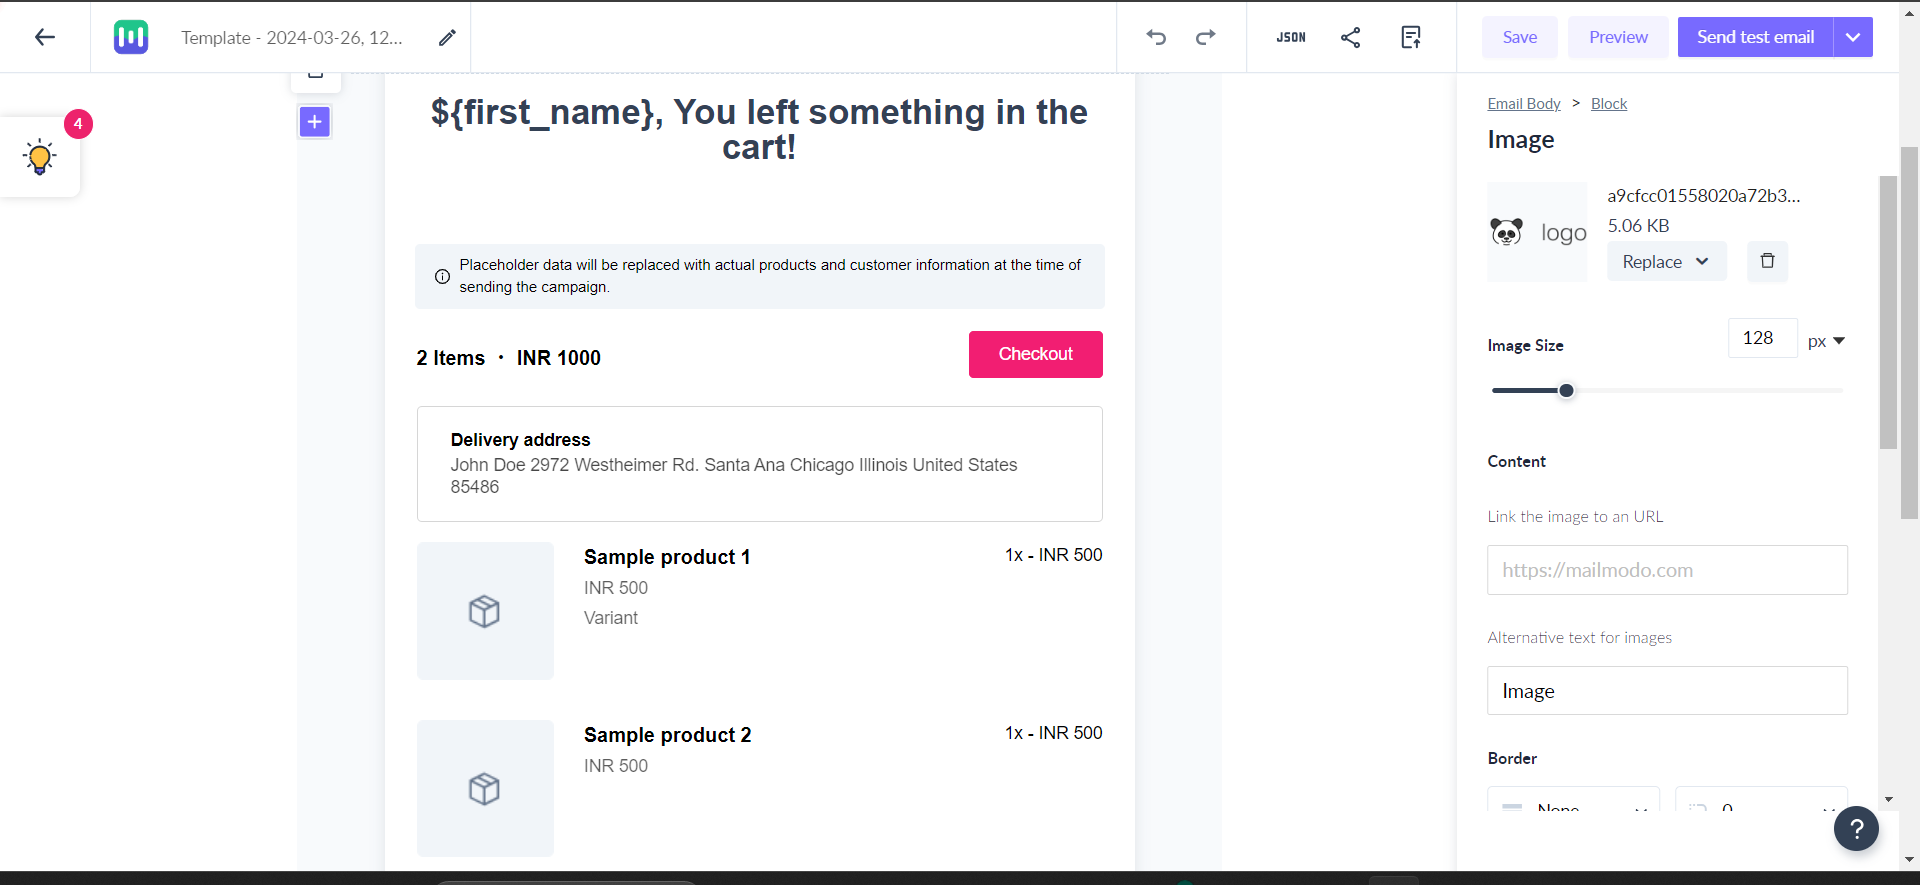
Mapping personalization : While sending an email with personalization, you are required to map the personalization after adding your contacts. You can either map the parameters to the respective Shopify events or contact properties in the platform. If you have used any Shopify widgets in your email template, we will automatically map the personalization parameters for you.
Step 5: Add more blocks to split the journey further.
You can add a “Wait for an event” block in the journey and select from the list of the Shopify events or other custom events and split the journey further. You can learn more about this block, here.
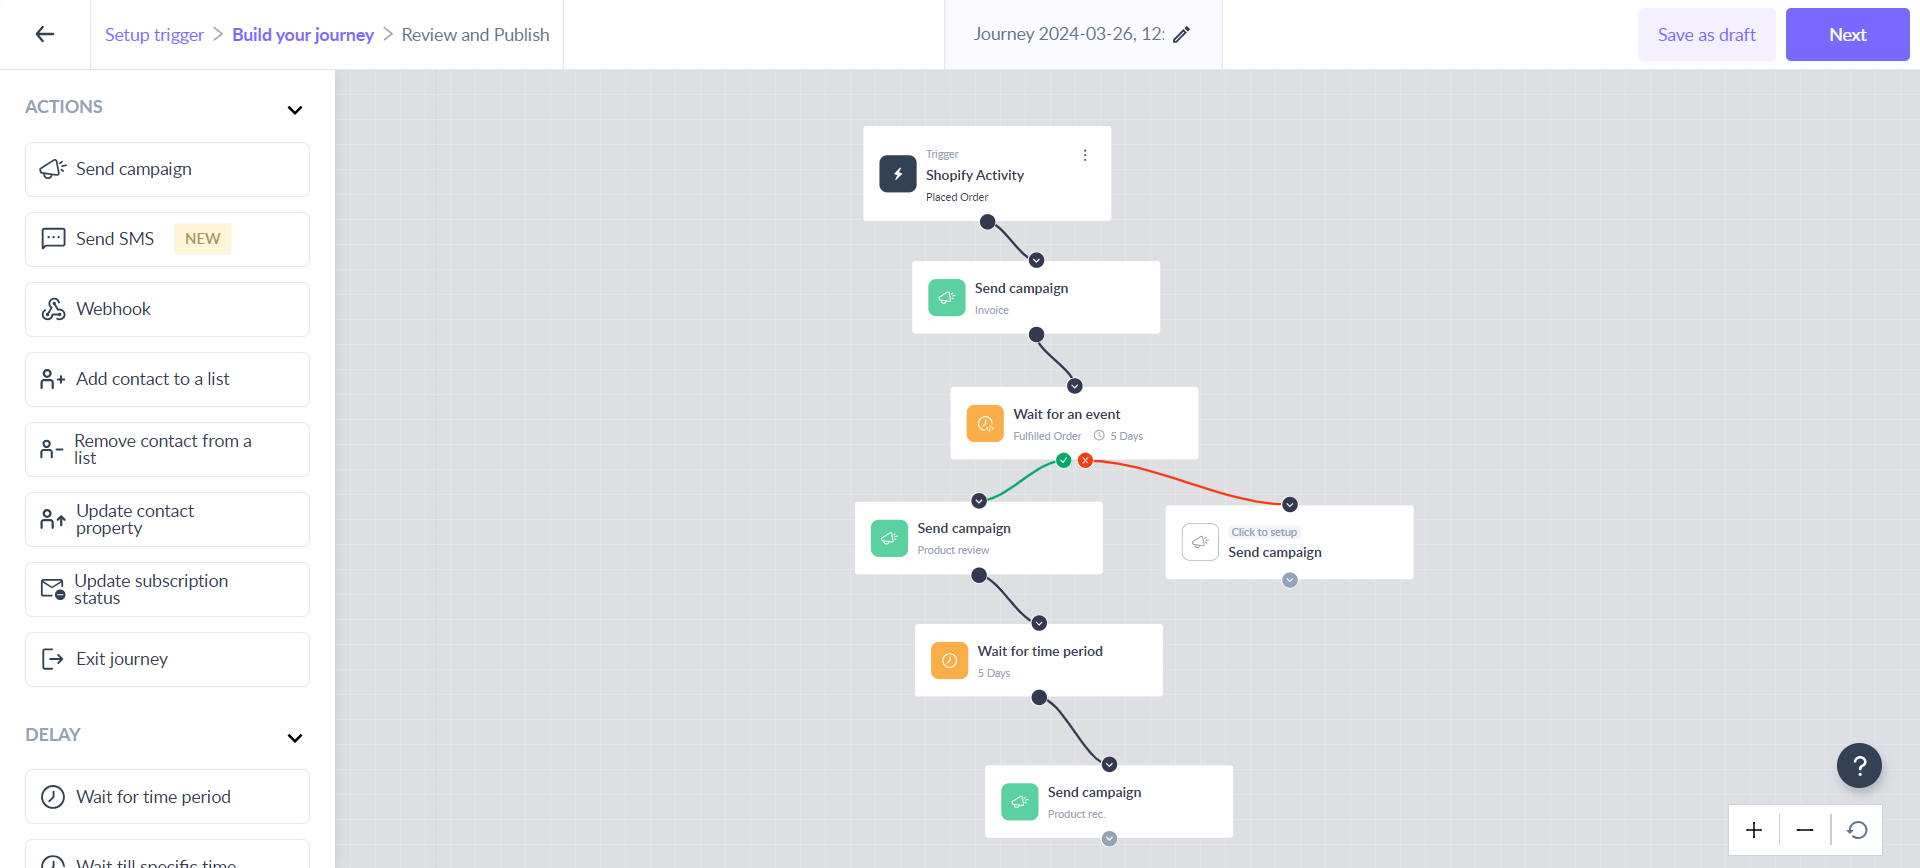
You will be able to split the journey further using the “Shopify event condition” block added in the advanced condition section. This block will split the journey based on specific properties of the event that triggered it. You can learn more about this block, here.
How will the Shopify activity trigger journey work?
When a contact performs an activity on your Shopify store that matches the trigger condition, they will be enrolled in the journey.
If you take an example of post-purchase feedback flow, you can select “Placed order” as a trigger, and any customer who places an order in your store will enter this journey.
Setting Goals in Shopify Email Flows
When creating email campaigns with Shopify integration, you have the option to set goals based on specific events. Goals help you track the success of your email campaigns and allow you to measure their effectiveness.
By default, goal setting is enabled for Shopify integration, making it easy for you to get started with goal-oriented email marketing.
You will be able to see the total number of orders, average revenue, and total revenue from the campaigns in the journey dashboard where Shopify activity is a trigger.
You can learn more about goal setting in a journey here.
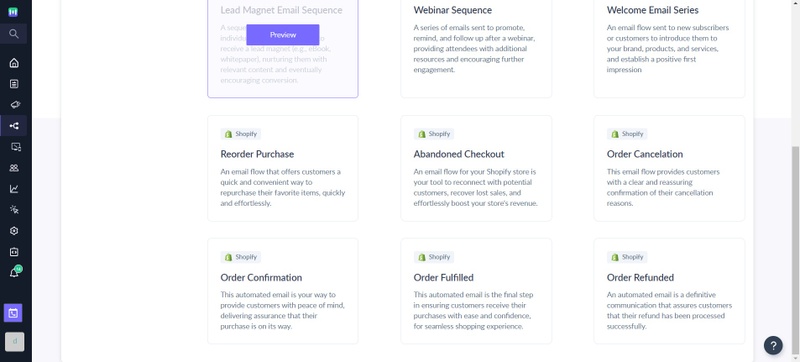
Additional Resources
Read more on how to create some common e-commerce flows:
Learn about
If you face any problem then reach out to us at Mailmodo Support or share your thoughts at Mailmodo Product Feedback .