

How to trigger journeys in Mailmodo via Make?
Last updated June 29, 2025
Overview
Make (formerly known as Integromat) is a no code workflow automation tool, with which you can connect Mailmodo to 1000+ apps. You can integrate Make with Mailmodo to implement the following use cases-
Actions
2. Trigger journey
Triggers
In this article, we will cover-
1. How to create a journey in Mailmodo
2. How to get the API key in Mailmodo
3. How to create a scenario in Make
Step-by-step guide to trigger journey via Make
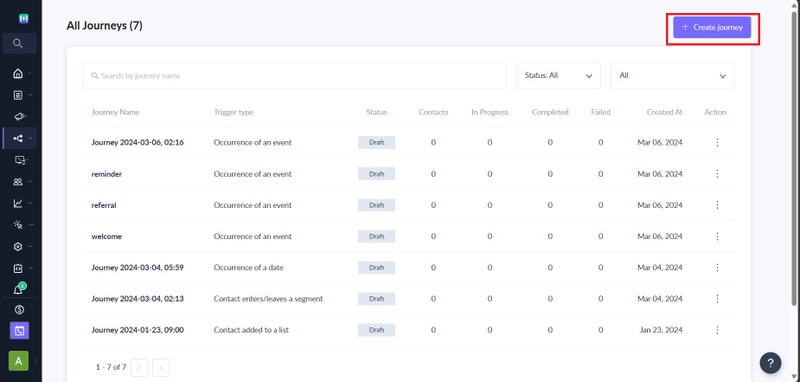
How to create a journey in Mailmodo?
Step 1: Go to journeys from the vertical menu on the left. Create a new journey.
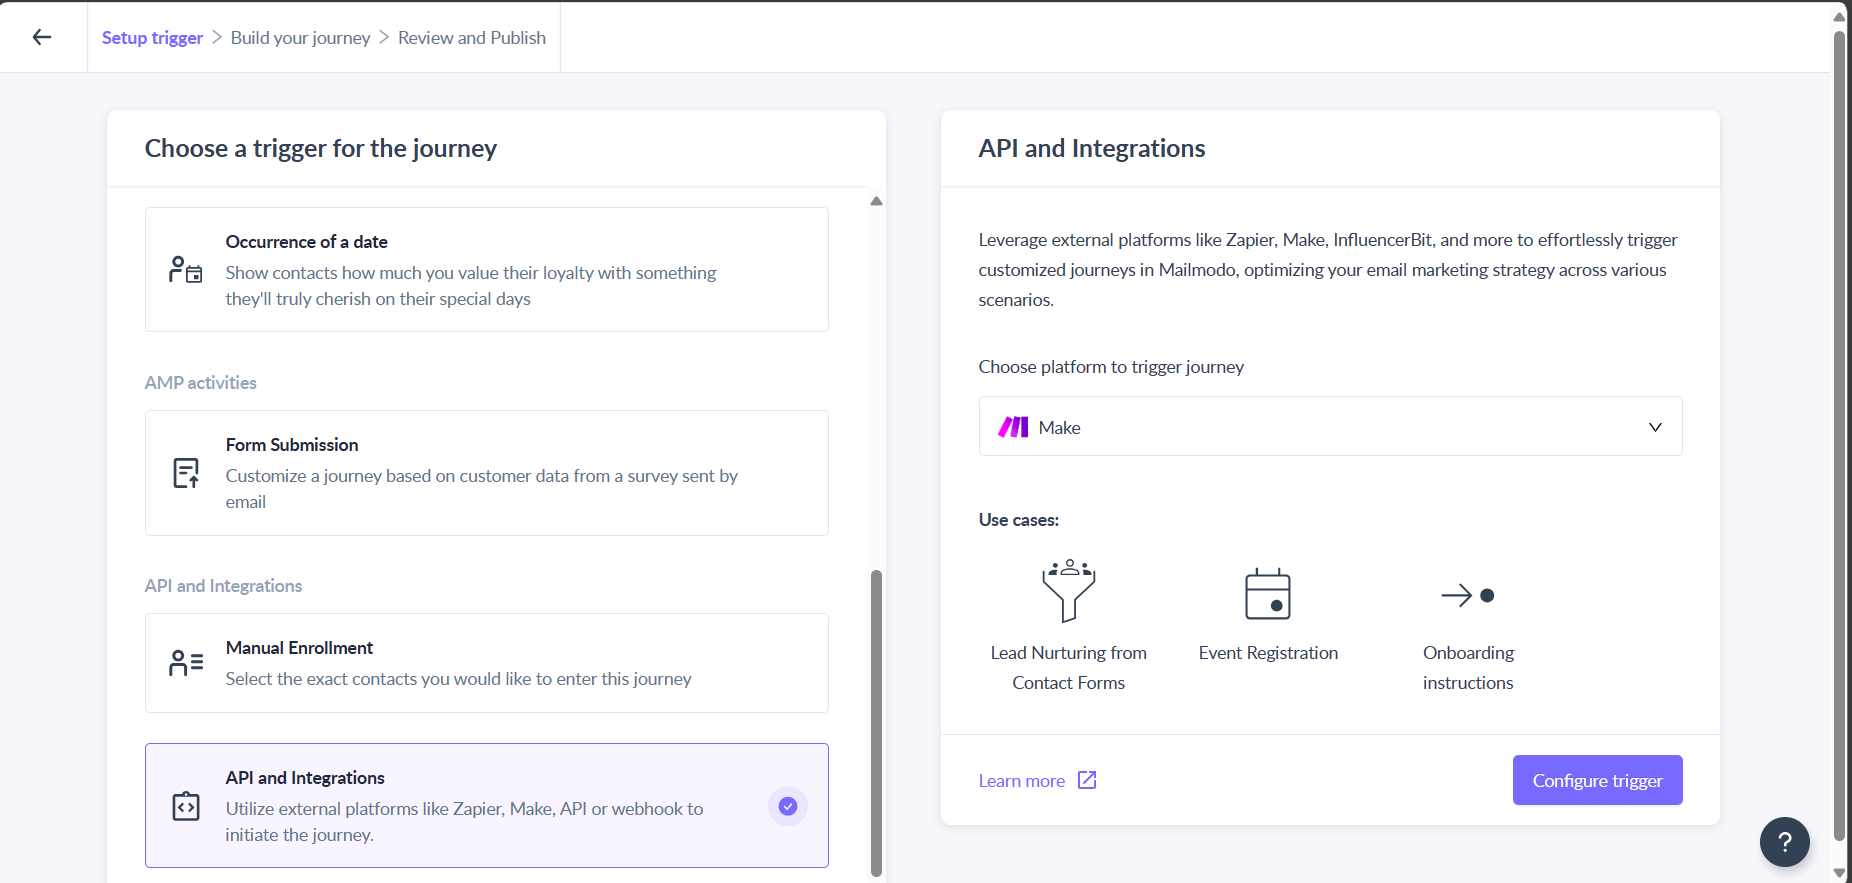
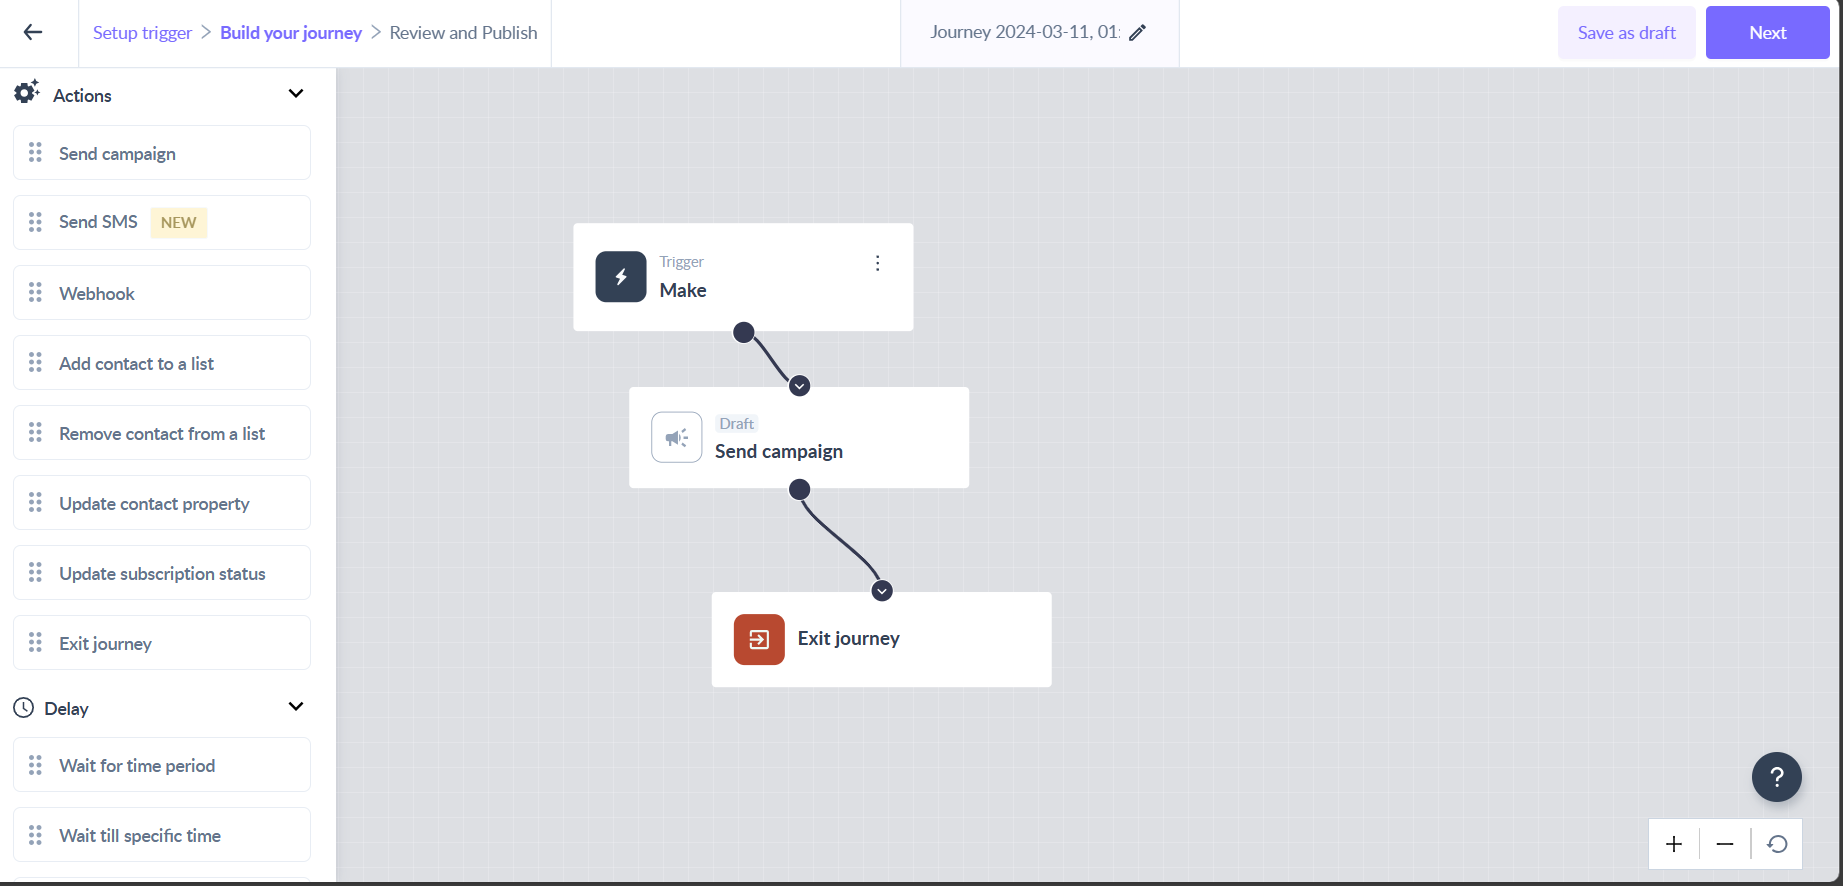
Step 2: The journey builder will open. Select Make as the trigger app. Add the relevant actions, delays and conditions.
You can learn more about journeys here .
Step 3: Once done, publish the journey.
How to get the API key in Mailmodo?
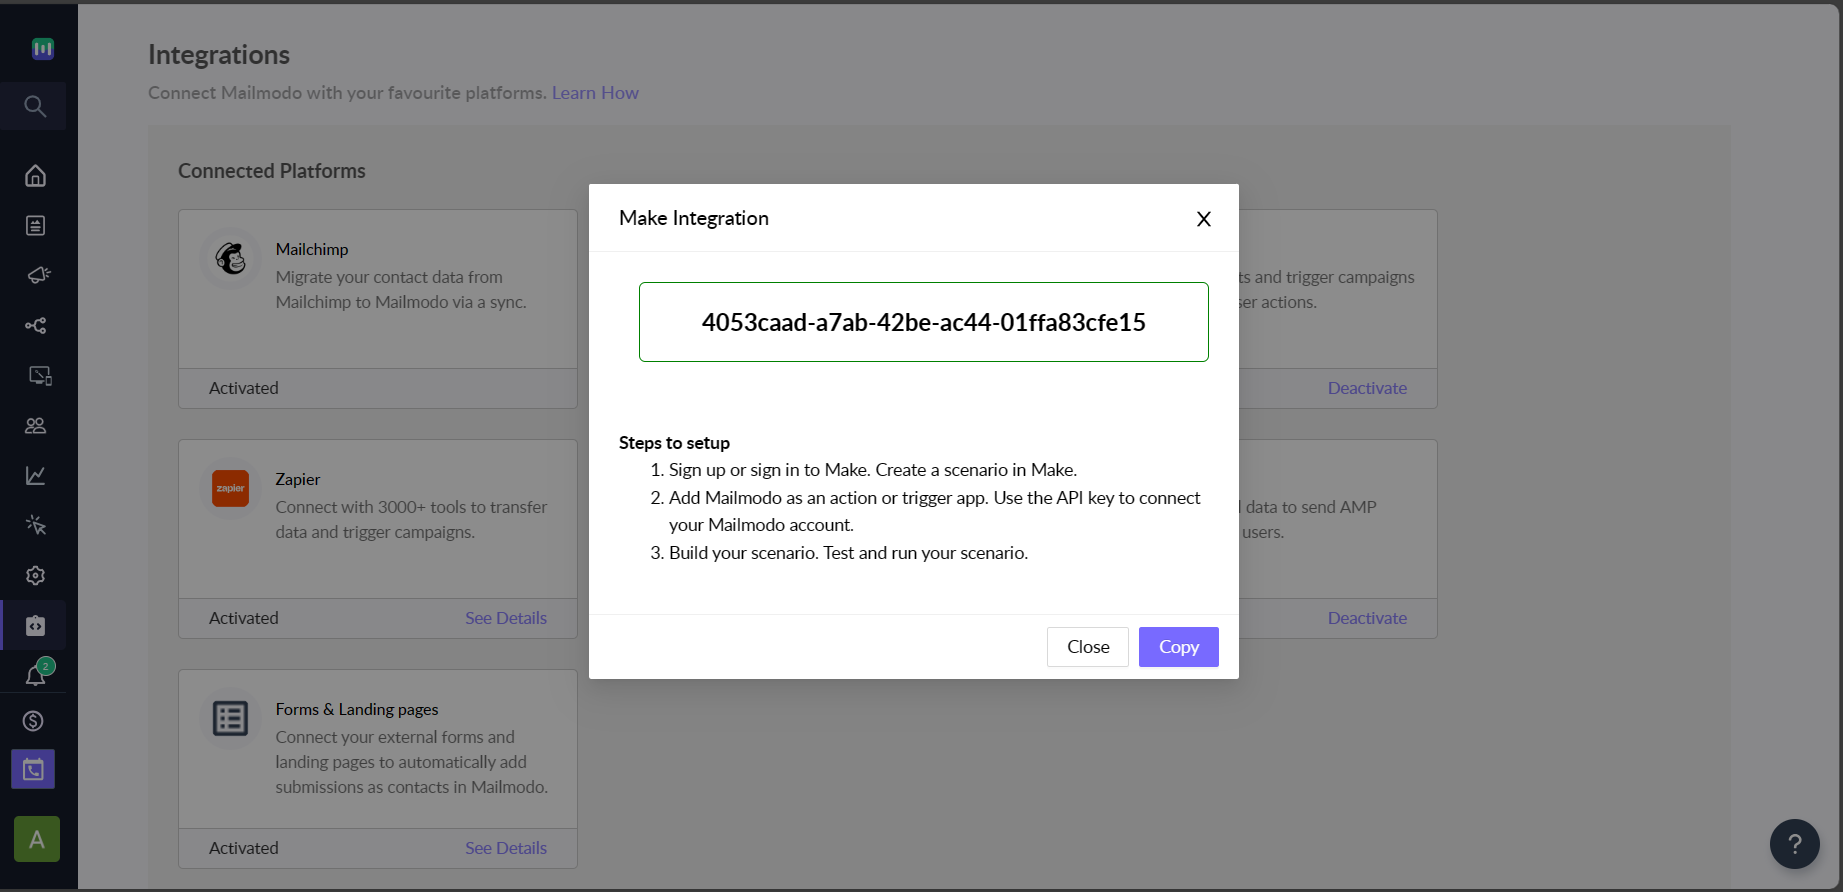
Step 1: Go to integrations from the vertical menu on the left. Locate Make (under Available for connection) and click on the authentication CTA. A modal will open. Copy the API key.
If you have previously integrated Make with Mailmodo, then Make would be visible under Connected platforms. Click on See details to open the modal and copy the API key.
We will use this API key in Make setup.
How to create a scenario in Make?
Step 1: Login to your Make account and Create a new scenario.
Step 2: New scenario builder will open. Add the trigger app. An event recorded in this app will trigger the journey in Mailmodo. For the purpose of this tutorial, we are going to select Google sheet as the trigger app. Addition of a new email id in the Google sheet will trigger the journey.
The steps mentioned below are for Google sheet. They can vary depending on the trigger app you use.
Select Watch Rows as the trigger.
Step 3: Configure the trigger app. Connect your Google account. Select the spreadsheet from which you would want to push data. If there are headers, click on Next. Select the row range you have the headers on. Enter the maximum number of rows that would be worked on in one execution cycle.
In ‘Choose where to start’, you can select the options based on your data set in the google sheet. If you want to start the cycle from a particular data element, you can select it by using its ID or choosing manually from the list.
Click on the clock icon to configure the frequency of scenario.
Step 4: Click on the semi circle to add another module. Search for ‘Mailmodo’ to add it as a module. Select Trigger journey as the action.
Step 5: Connect your Mailmodo account. Click on Add (under Connections). Paste the API key copied from Mailmodo.
Step 6: Map the Email field to the column in your spreadsheet containing Email ID's.
Step 7: Enter the list name to which the contacts will be added in Mailmodo. You can enter the name of a pre existing list or create a new list.
Step 8: Select the journey you created in Mailmodo.
Step 9: Once done, click on Ok. You can test your scenario by running it once. When you click on Run once, the journey will be executed for any new email id added to the Google sheet.
If there are any errors, you would be able to see them by clicking on the bubbles present at the top of the modules.
Once the scenario is successfully tested, you can schedule it as per your requirements.
That's it! You have successfully configured a journey which will be triggered every time a new contact is added to the Google sheet.
If you face any problem then reach out to us at Mailmodo Support or share your thoughts at Mailmodo Product Feedback .