

How to use Live Price Ticker in your Emails?
Last updated July 12, 2024

Use live price ticker widget to keep your customers updated with real-time data of the market.
Let's configure the sample Live Price Ticker widget to help you understand how to do it for yourself. Also, please note that the data and the item values in the screenshots are examples, it would differ for different data sets.
Step 1: Click on the “Templates” icon on the sidebar. Click on "Create new template" on the top right corner.

Step 2: If you want to begin your email with a Live Price Ticker block, click on Building Blocks and select Interactive Widgets.
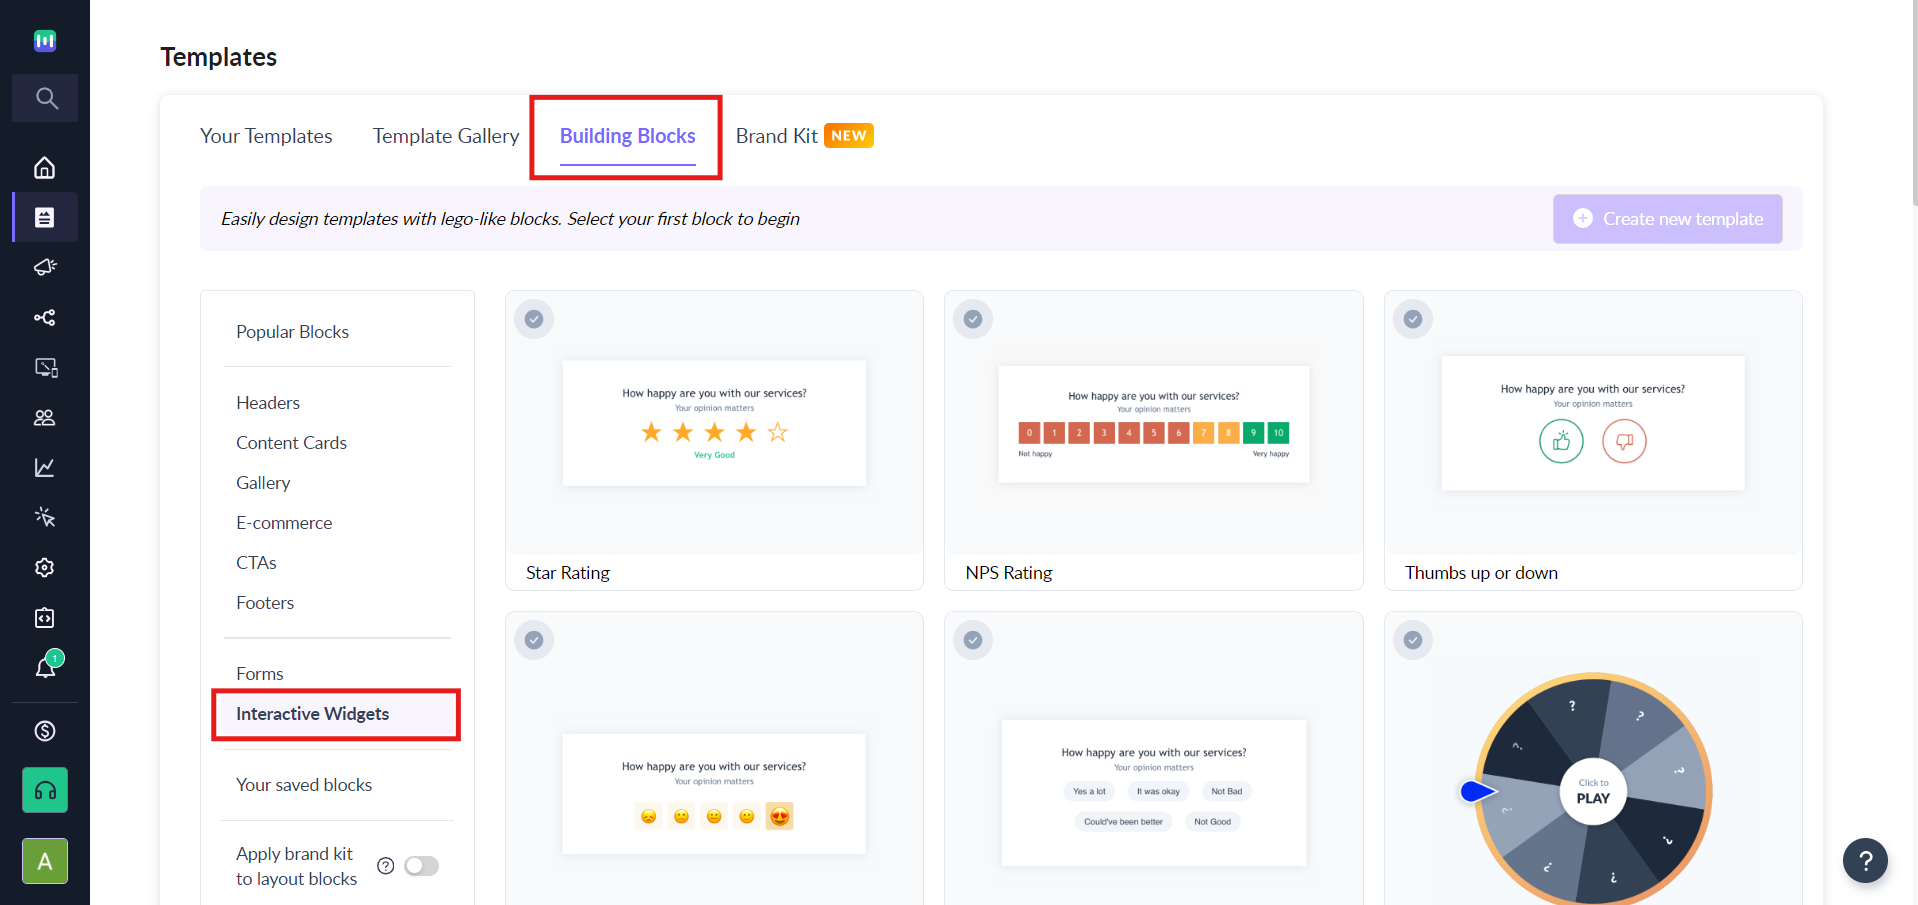
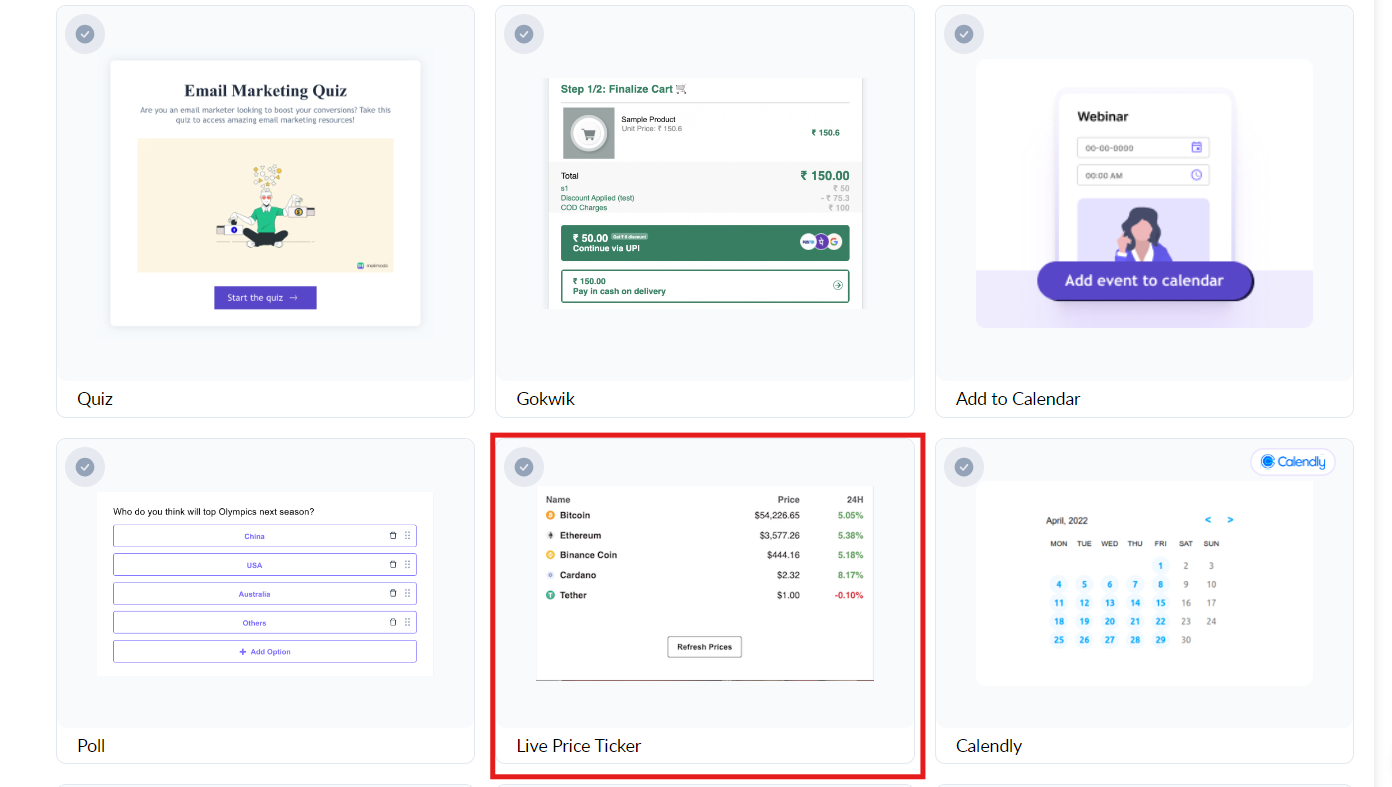
Select on Live Price Tricker.
Then click on Create new template.

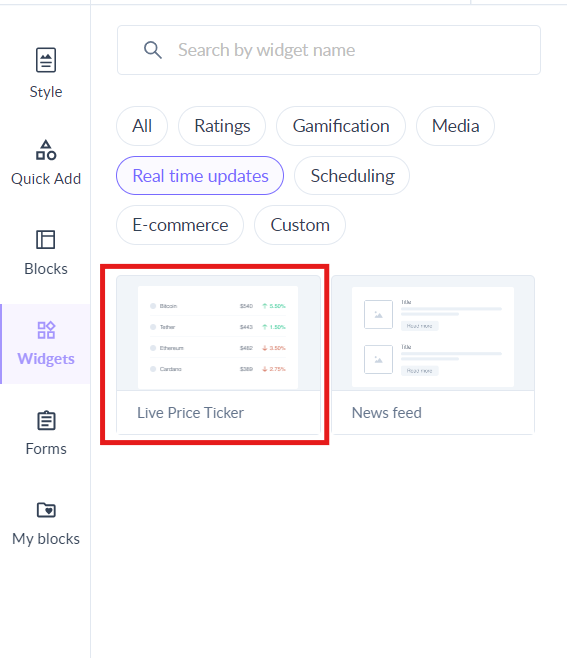
If you want to add Live Price Ticker below an existing block, click on the Widgets and choose Real time updates. Under this, you can drag and drop the Live Price Ticker widget in editor.
The user can also select the currency as per their needs from the dropdown before configuring the Live Price Ticker.
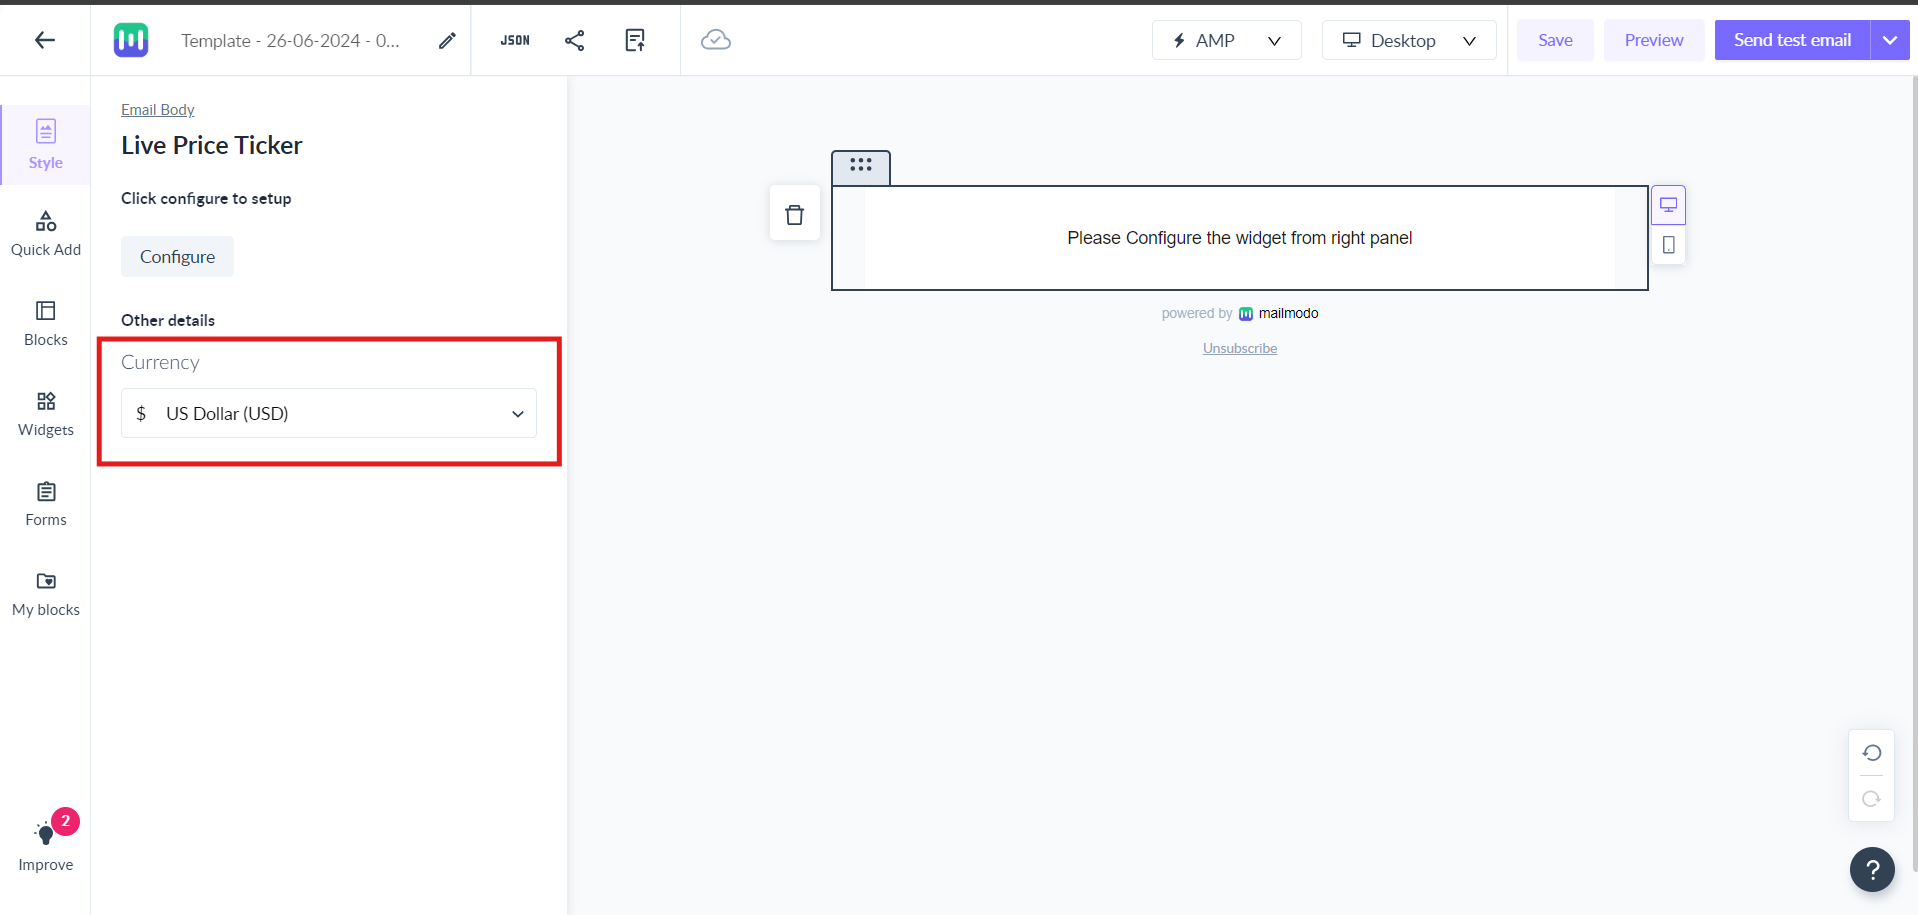
Step 3: Click on the Configure button to set up the configuration.
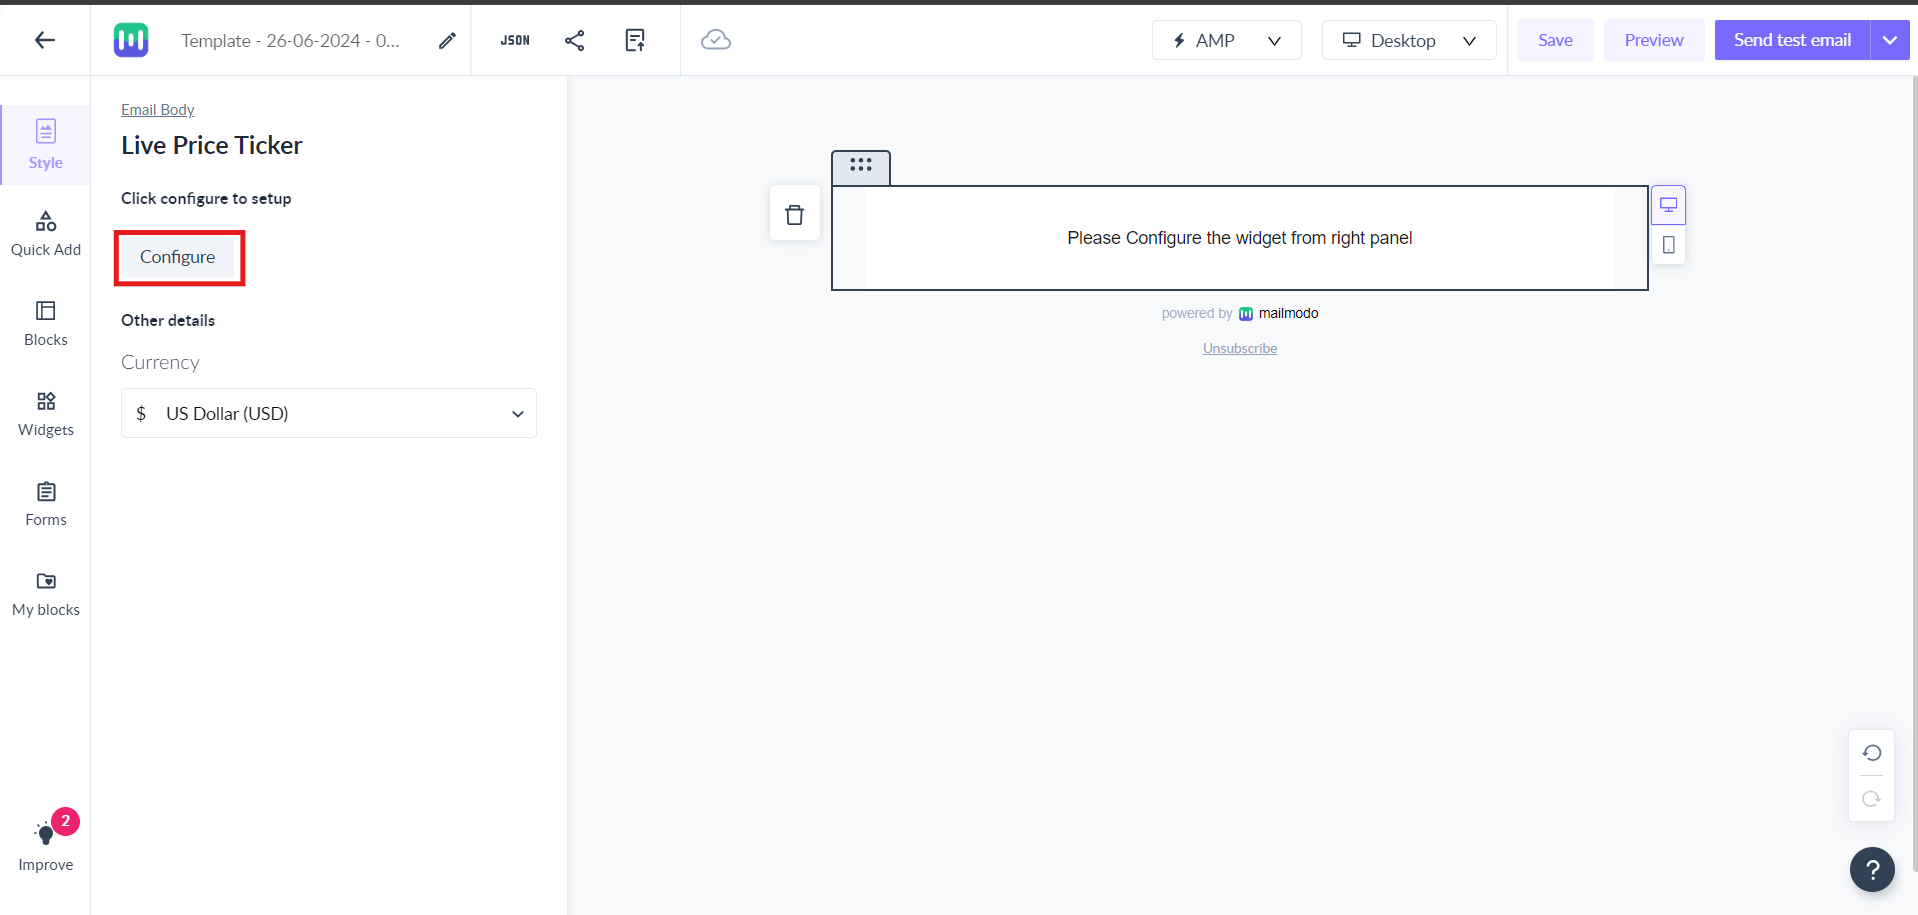
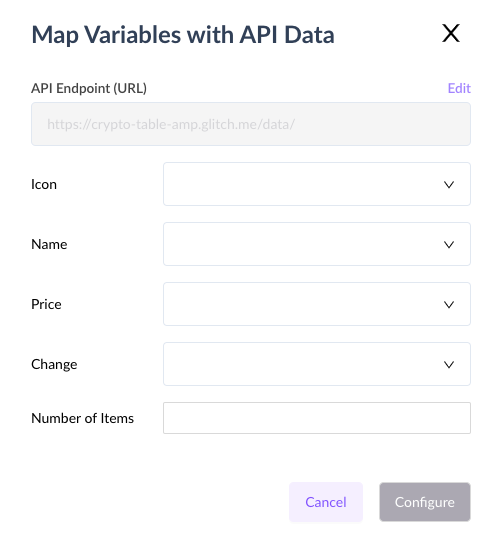
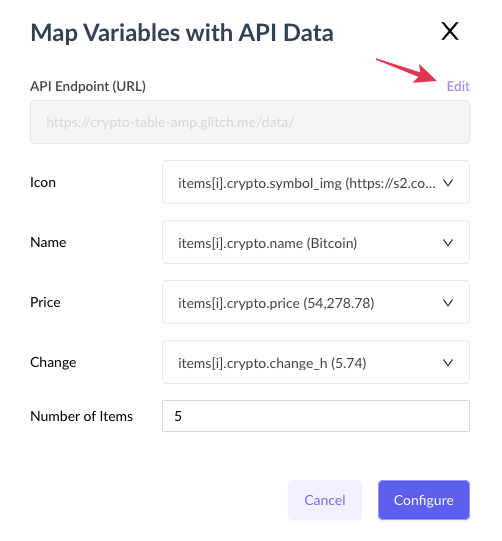
Step 4: In the pop-up box, enter the API endpoint which has the data you want to show to your customers.
We expect an array where each element of the array should correspond to its variable. And, the array's length would define the maximum number of items.
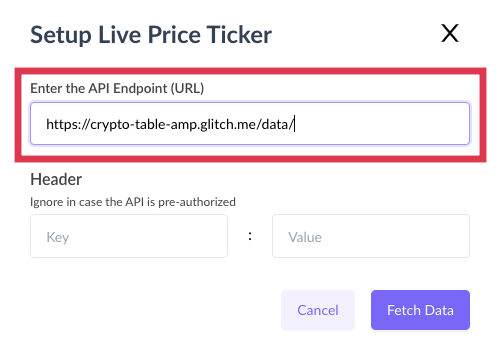
Step 5: You can ignore the 'header' fields if you have the API pre-authorized, otherwise enter the respective value.
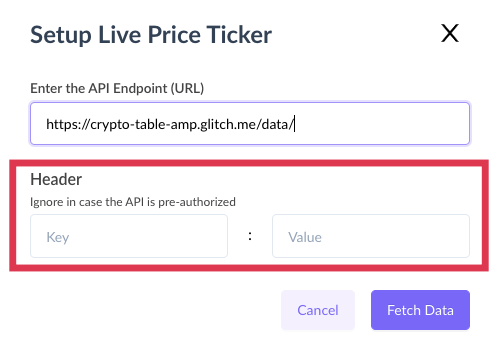
Step 6: Next, click on Fetch Data to map the variables with API data.
Map each of the variables with the relevant items in the respective text field.
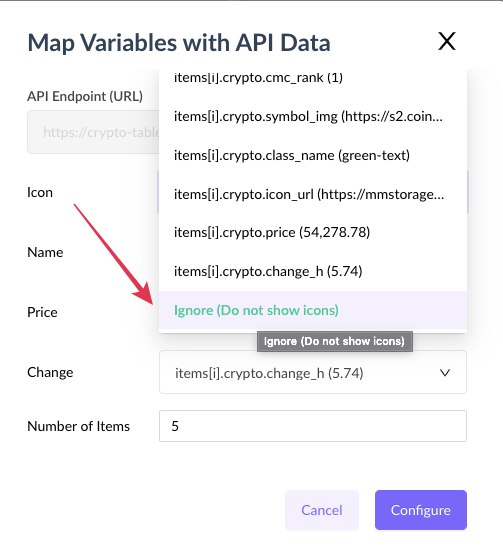
Step 7: Map Icon to show the logo/symbol or icons of the items.
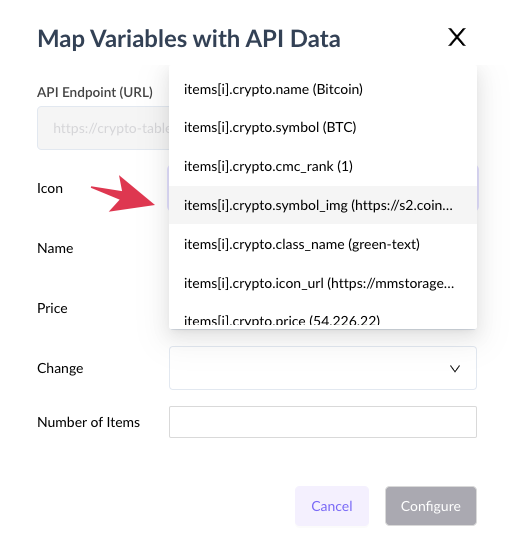
It can be ignored by selecting the ignore option at the end of the dropdown.
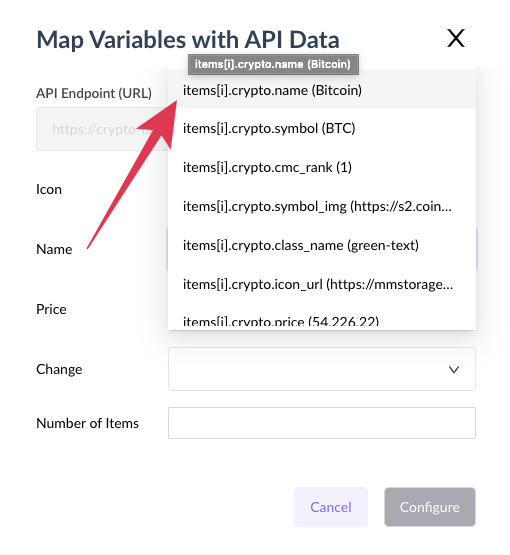
Step 8: Map Name to show the Name of the item.
Step 9: Map Price to show the real-time price of the item.
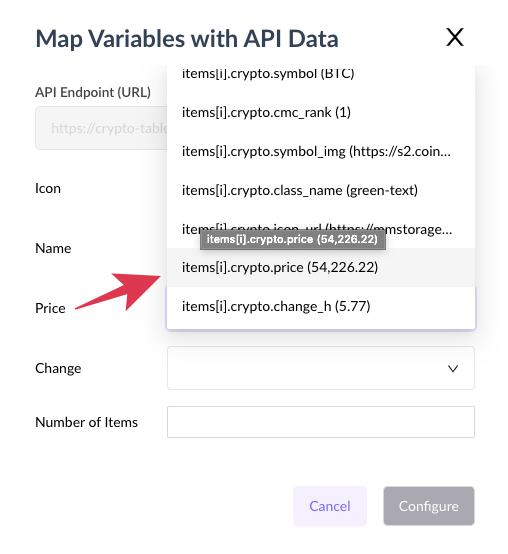
Step 10: Map Change to show the change in the value of the item based on a period.

Step 11: Enter the Number of Items to set a limit on the number of items you want to show in the template.
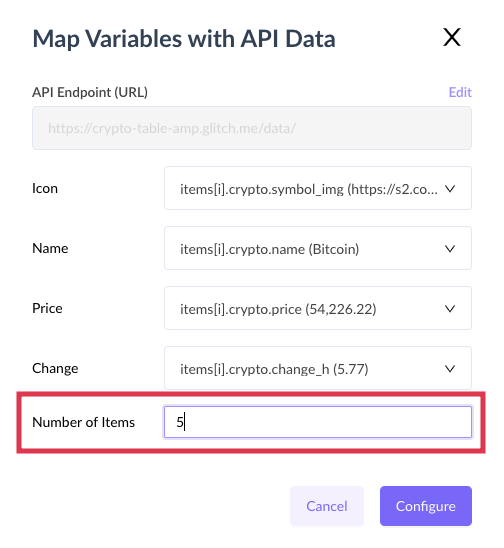
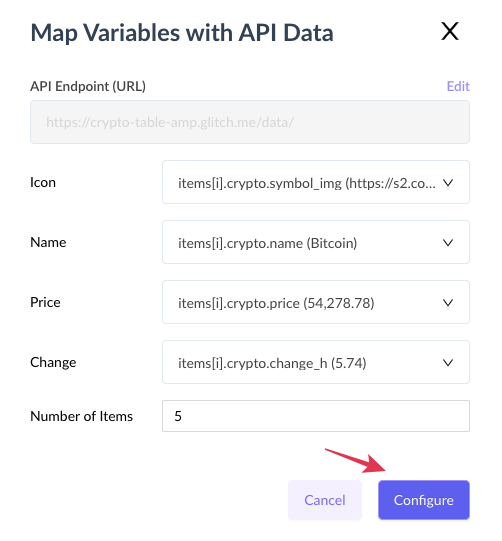
Step 12: Click on the Configure button to complete the setup.
Save the template before sending a test email, else widget will not render in the email.
Your Live Price Ticker is configured and ready for your customers!
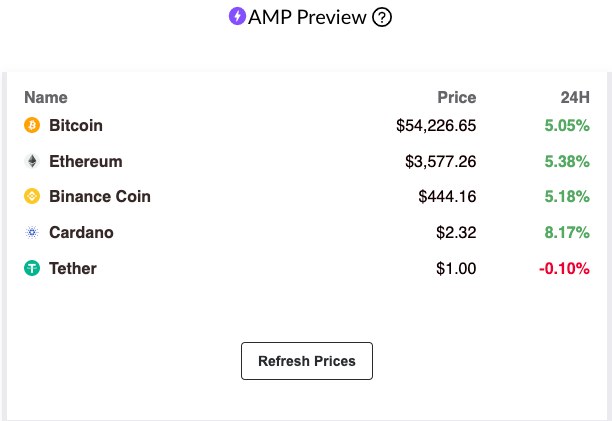
Here's the Preview of the Price Ticker we configured in the above steps.
You can reconfigure the setup, by clicking on the reconfigure button in the left menu.
You can even edit the endpoint by clicking on the edit option on the top.
Use the search bar in our Help Center to find quick guides and walkthroughs. If you have any queries, then reach out to us via the chat icon on the bottom right corner of your screen while using Mailmodo. Or reach out to us at Mailmodo Support and share your thoughts at Mailmodo Product Feedback.