Email sending API to send Product catalogues
Last updated July 14, 2024
Email sending API for Product Cart Emails
Mailmodo's transactional API can be used to dynamically send a product catalogue to the users with a Purchase option inside the email itself. The product can be personalized for individual users at the time of sending the emails.
A cart can be of two types:
- Single product cart: It can be used to show recommended products or offers. Users can purchase that particular product.
- Dynamic Cart: A user can leave one or more products in the cart. To show all the products in one cart along with the total price, data need to be sent through an API
Creating a Single Product Cart
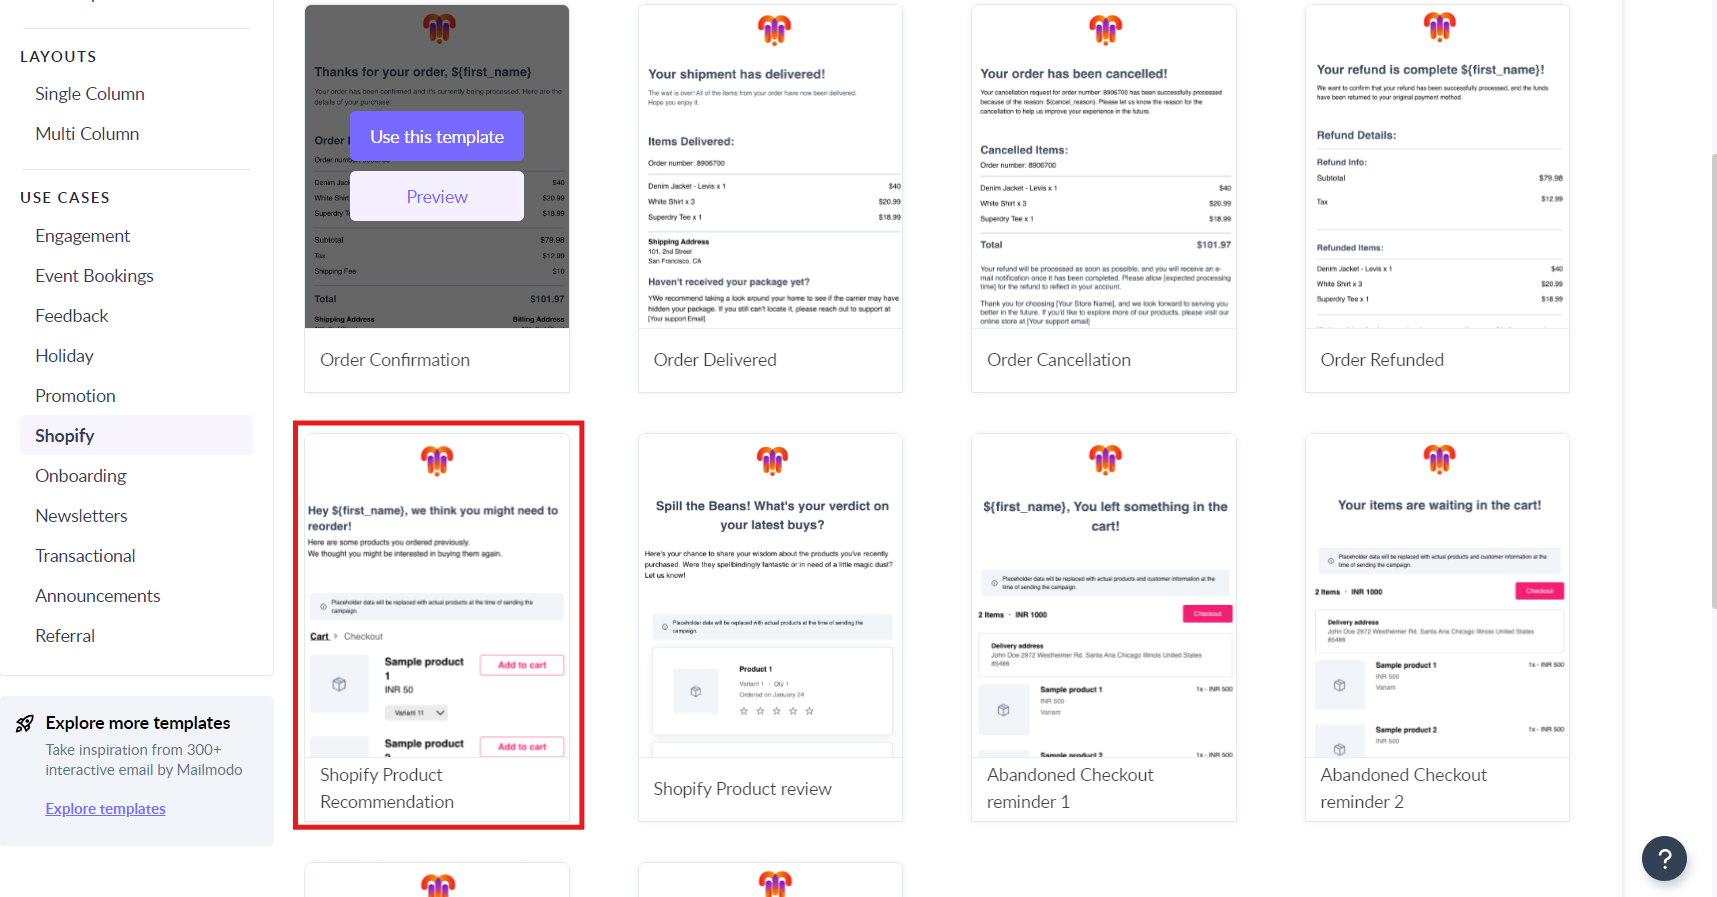
Step 1: Create a template with a product block. Our e-commerce sample template could be a good starting point. If a specific design is required, our team can code a custom block as well.
Step 2: Edit the template as per your requirement e.g. Product Name, Price, Description etc.
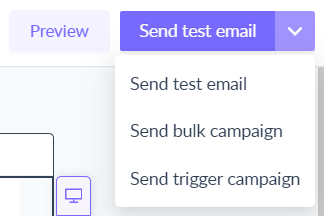
Step 3: Create a campaign using the template, choose 'Send Trigger Campaign'.
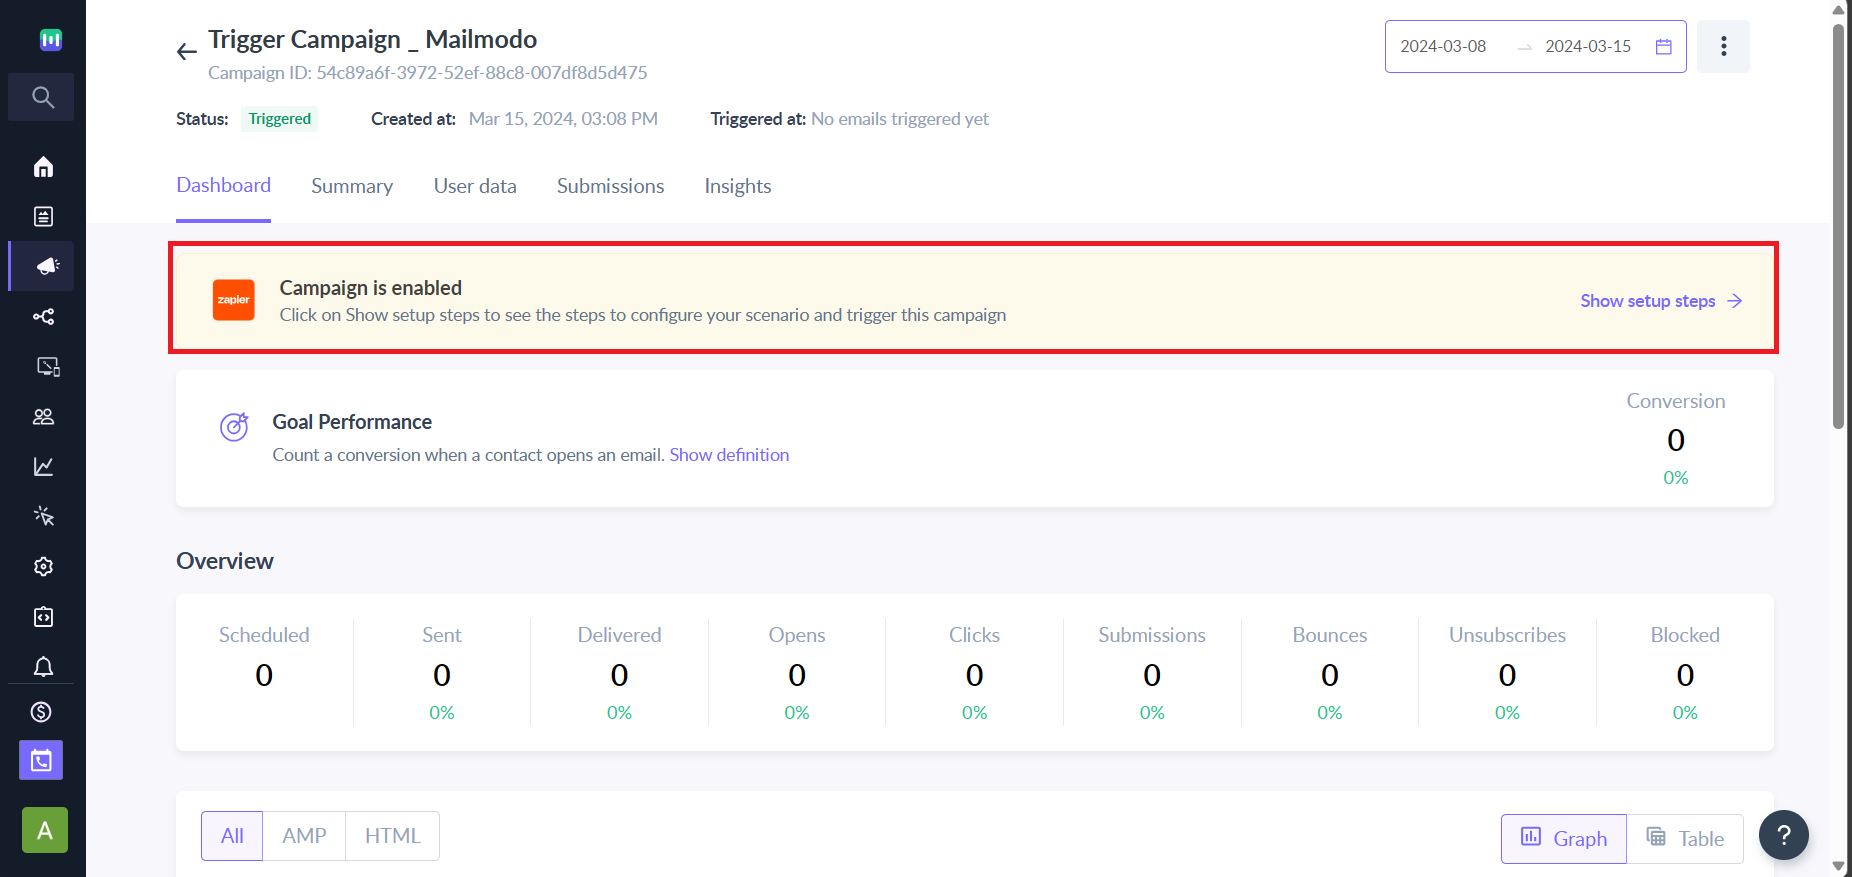
Step 4: Once the campaign is enabled, you will get the webhook URL. You can use this URL to set up a trigger campaign in your desired platform.
The campaign will be triggered by events recorded in your platform eg. A new user signs up.
Note- You will most likely need to set up a journey/ workflow in your CRM.
Once the campaign is created, the personalisation parameters and the webhook URL are visible under Show setup steps.
Integration with Website or Other tools
The endpoint for the campaign can work as a webhook for sending action-based emails from other tools like MoEngage, WebEngage, Clevertap etc. It can also be used to send emails on user activity events such as registration or cart drop. Here is an example of integrating CleverTap.
Endpoint
https://api.mailmodo.com/api/v1/triggerCampaign/<campaign id>
This URL can be obtained from the Trigger Info tab.
Go to Dashboard -> Select the campaign from the list -> Integration
API key
Set header mmApiKey: <api key value>
API key can be obtained from API Keys tab in Settings
Go to Settings -> API Keys
Request
Note:
- Subject is optional, if not provided, the original subject set in the campaign will be used
- Campaign Id can be provided in the URL path or in the payload with ‘campaignId’ key
Sample CURL
curl --location --request POST 'https://api.mailmodo.com/api/v1/triggerCampaign/<campaign id>' \
--header 'mmApiKey: <api key>' \
--header 'Content-Type: application/json' \
--data-raw '{
"subject":"Hi, here is the perfect grill from your family",
"email": "user@example.com", "data":{
"firstName" : "John",
"userId" : "U123",
"product_name" : "The Super Grill",
"product_price" : "$300.00",
"product_description" : "The perfect size to grill up a couple of burgers for everyone in the family"
}
}'
Sample axios
var axios =require('axios'); var data = JSON.stringify( {"subject":"Hi, here is the perfect grill from your family",
"email":"user@example.com", "data":{
"firstName" : "John",
"userId" : "U123",
"product_name" : "The Super Grill",
"product_price" : "$300.00",
"product_description" : "The perfect size to grill up a couple of burgers for everyone in the family"
}
});


var config = {
method: 'post',
url: 'https://api.mailmodo.com/api/v1/triggerCampaign/<campaign id>',
headers: {
'mmApiKey': '<api key>',
'Content-Type': 'application/json'
},
data : data
};


axios(config)
.then(function (response) {
console.log(JSON.stringify(response.data)); })
.catch(function (error) {
console.log(error); });
Dynamic product catalogue and cart abandonment
Dynamic product catalogues can be enabled via an API. The user would be able to see dynamic products every time they open their email.
Step 1: Create a template with a dynamic product widget. It’s only available in V2 templates. Please contact us if it’s not enabled in your account.
Step 2: Personalise the parts of the template e.g. Product Name, Price, Description etc.
Step 3: Provide the Endpoint Url that will be used to fetch the catalogue. It can be optionally personalized to provide the cart id. This URL must return an array of objects containing the above keys.
Step 4: Create a campaign using the template, choose Trigger on Events while selecting the contact list.
Step 5: Once the campaign is created, the personalisation parameters and trigger endpoint is available in the Show setup steps section of the campaign.
Step 6: These details can be used to send the email on any kind of trigger.
Step 7: Every time a user opens the email the Endpoint URL will be fetched and the user will be shown products based on their response.
Sample Personalization data
"data":{ "firstName" : "John",
"userId" : "U123",
"cartId" : "C876"
}
Sample Catalog endpoint response
"data":[{ "product_name" : "The Super Grill",
"product_price" : "$300.00",
"product_description" : "The perfect size to grill up a couple of burgers for everyone in the family" ,
"Quantity" : 1
},
{
"product_name" : "The ultimate skewers",
"product_price" : "$5.00",
"product_description" : "The perfect companion for your grill",
"Quantity" : 8
}]
]
Use the search bar in our Help Center to find quick guides and walkthroughs. If you have any queries, then reach out to us via the chat icon on the bottom right corner of your screen while using Mailmodo. Or reach out to us at Mailmodo Support and share your thoughts at Mailmodo Product Feedback.


