

How to use ‘Advanced Configuration’ for forms
Last updated July 4, 2025
Advanced configuration for forms lets you create dynamic forms that add or change questions based on triggers in your website or app. For example, a purchase on your website would trigger an email with form questions related to the product purchased by the user.
Following is the step-by-step process to use Advanced Configuration for forms in your template:
Step 1: Add a form to your template from the editor
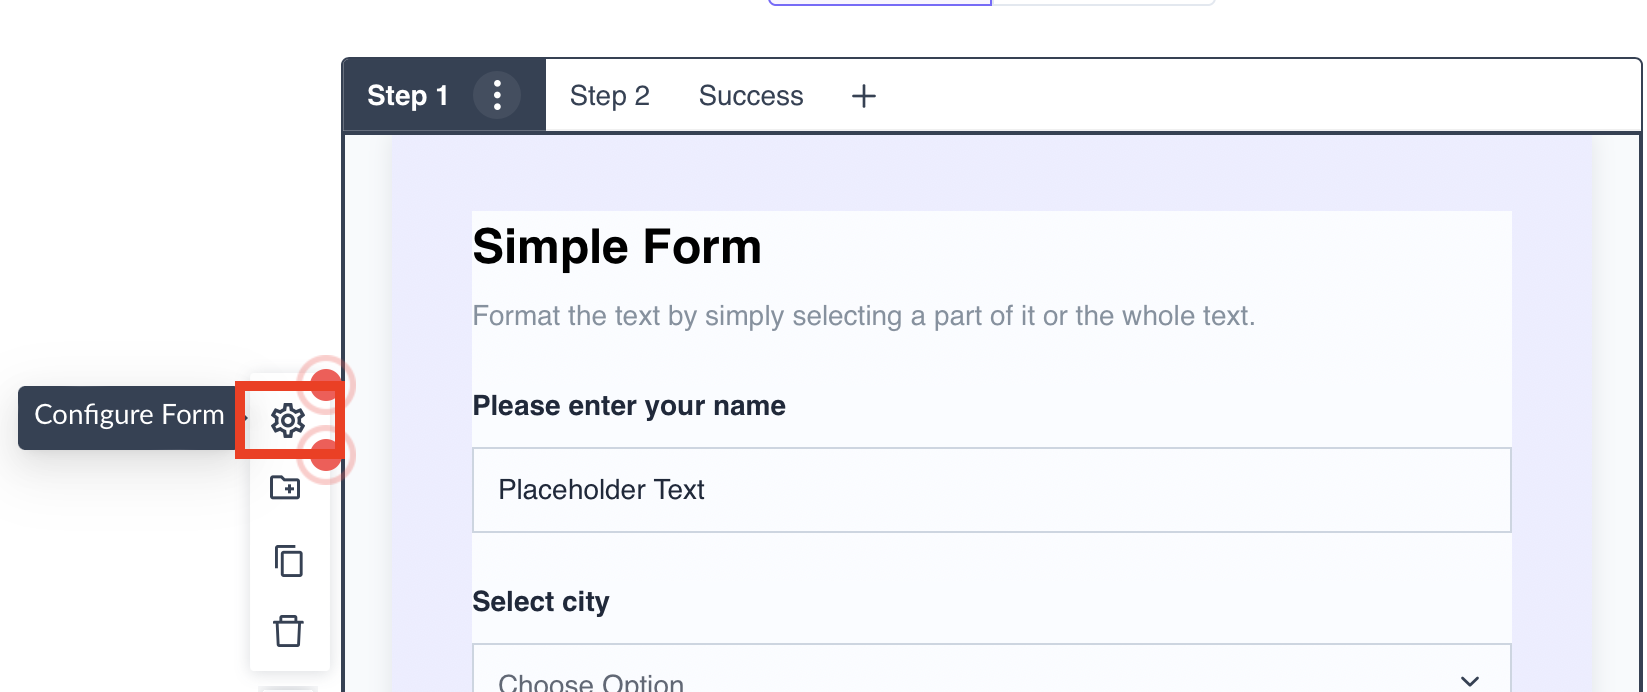
Step 2: Click on Gear Icon (Configure Form)
Step 3: A pop-up will open. Go to Advanced and toggle Dynamic form to Yes.

Step 4: Copy the JSON of the form and configure it according to your requirements in the backend.
You can view the API Documentation for dynamic forms here .

Step 6: Once your template is ready, save it and create a transactional campaign.
Step 7: Enable the transactional campaign. The trigger emails with the dynamic form will be sent to users following trigger actions on your selected platforms.