

How to trigger Emails in Mailmodo via Zapier
Last updated July 3, 2025
Zapier’s integration with Mailmodo allows you to:
- Import contacts from your software stack to Mailmodo ( guide )
- Export email form submissions to your web applications
- Trigger an email campaign through Mailmodo
Pre-requisites: To carry out the aforementioned functions, you need to first integrate Zapier with Mailmodo. To do that, follow the steps mentioned in this guide .
Now, to trigger mails in Mailmodo through your software stack via Zapier, follow these steps:
Creating a transactional campaign in Mailmodo
Let's demonstrate this by setting up a transactional campaign in Mailmodo that will be triggered whenever an entry is made (a row is appended) in Google Sheets
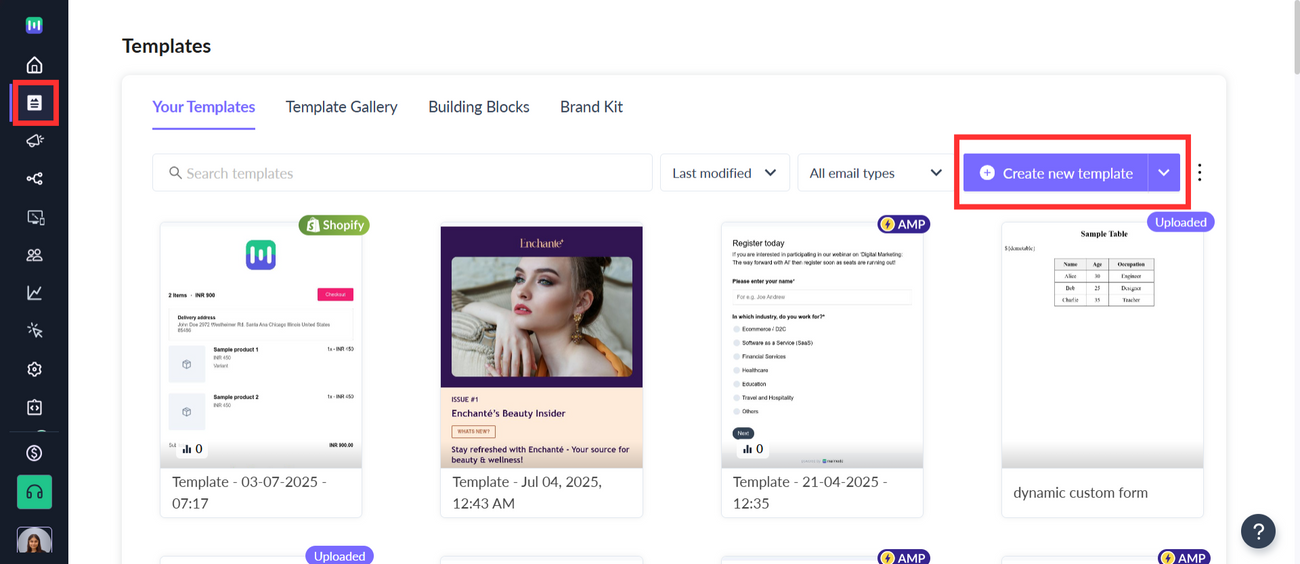
Step 1: Go to templates from the vertical menu on the left side. Click on create new template.
Step 2: Either select a blank template or a pre made Template Gallery.

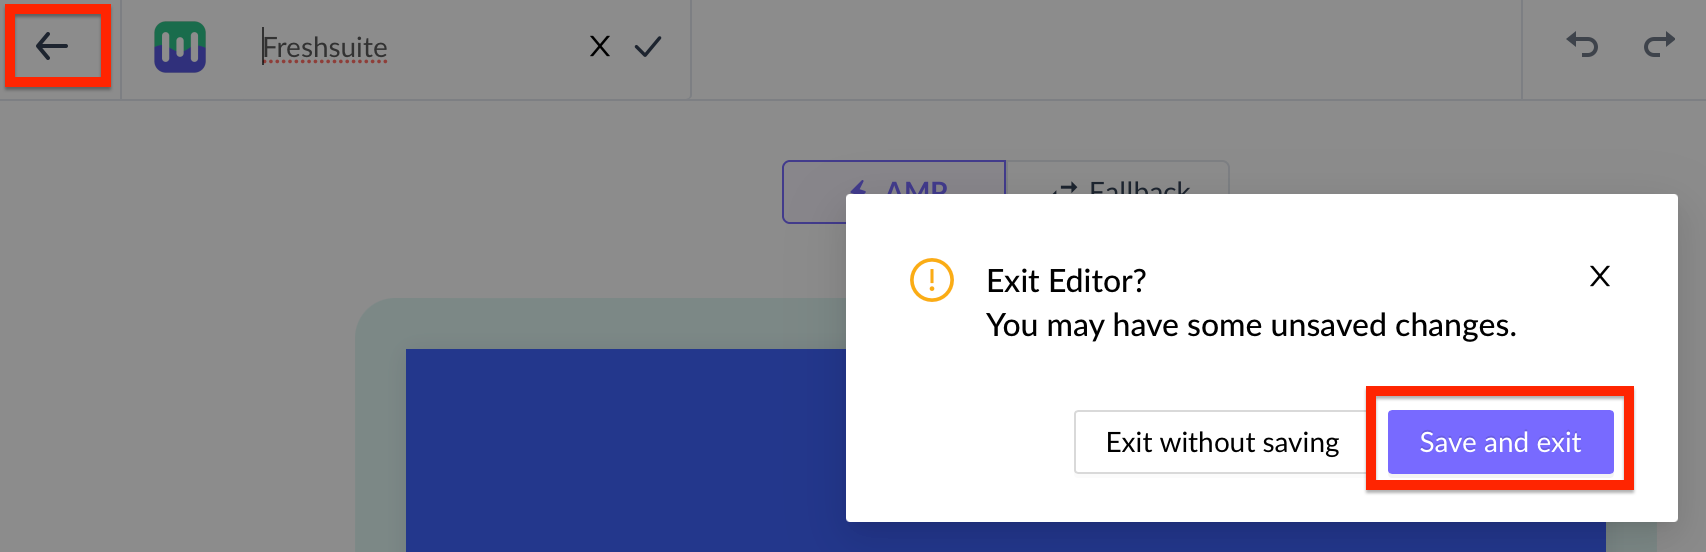
Step 3: Use the editor to edit the template. Save and rename the template upon completion. After saving, click on back arrow.

Step 4: Click on save and exit.
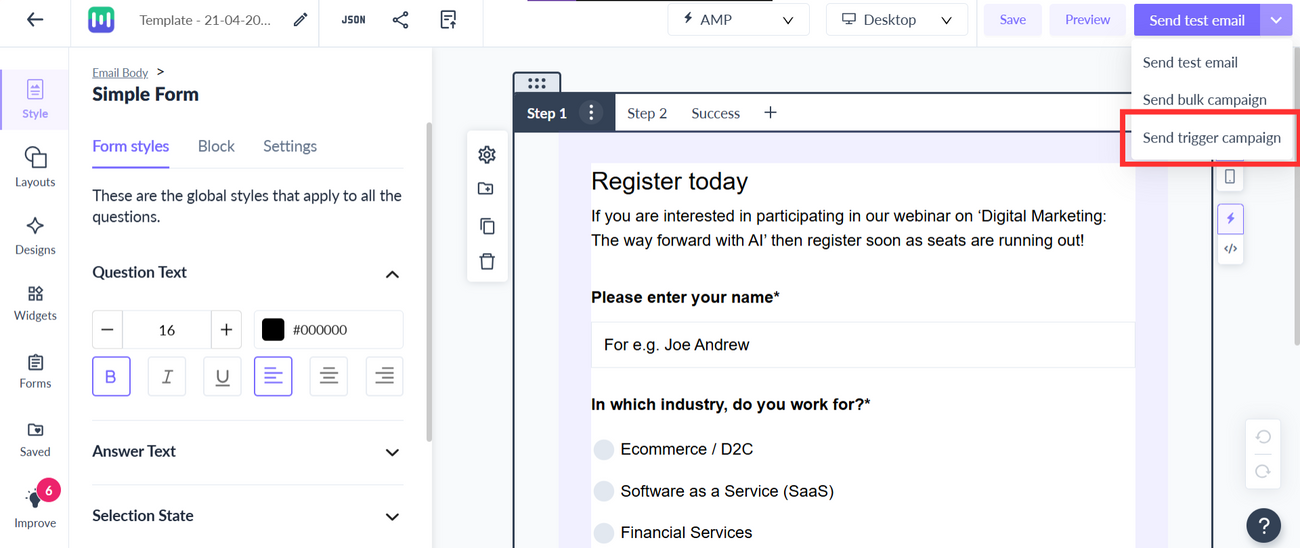
Step 5: On the right corner, select Send Trigger Campaign.
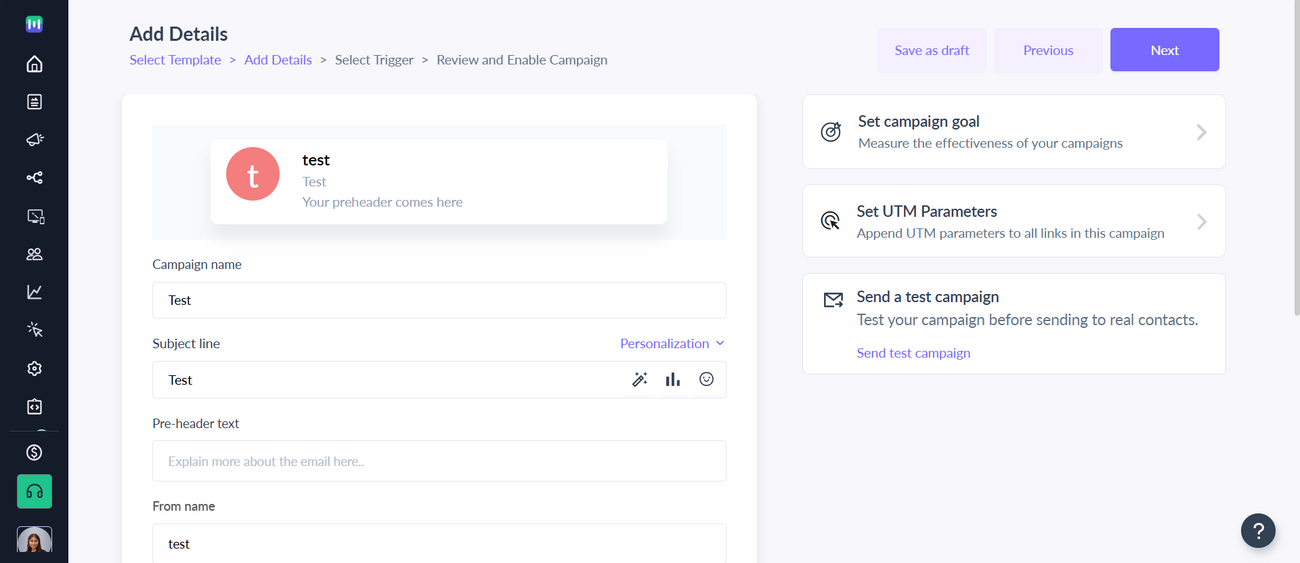
Step 6: Add the campaign details.
Step 7: Click on next.

Step 8: You will be redirected to trigger on events. Select Zapier from the list of platforms. Click on next.

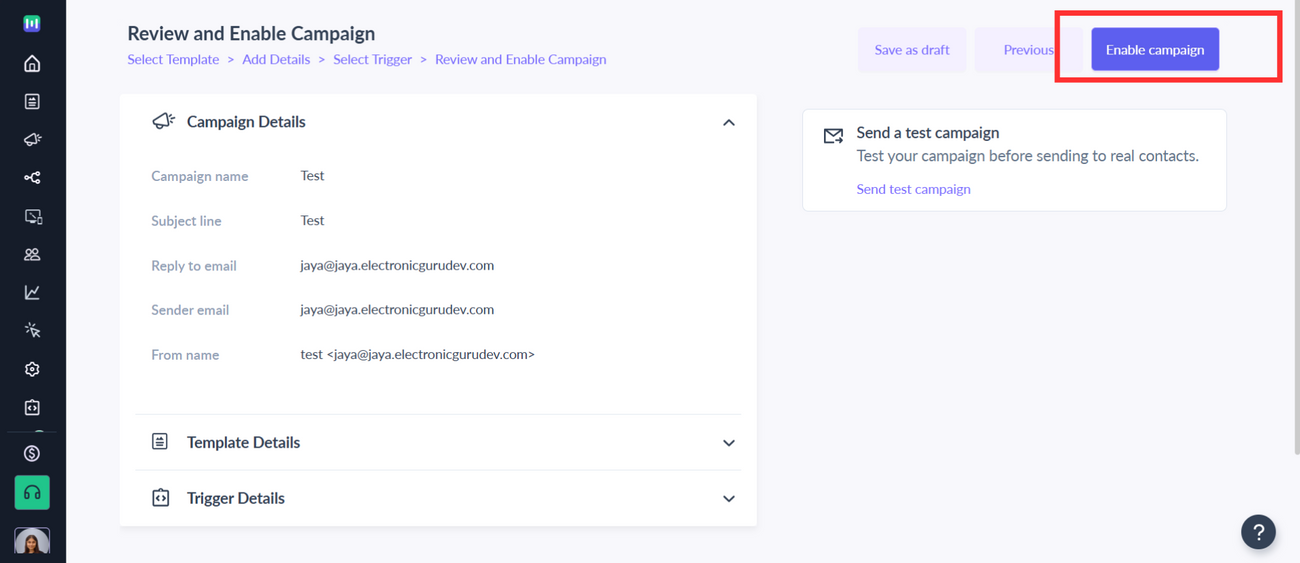
Step 9: Review and test your campaign. To test, click on send test campaign->enter email ID->send test email.
Once tested and reviewed, click on Enable campaign.
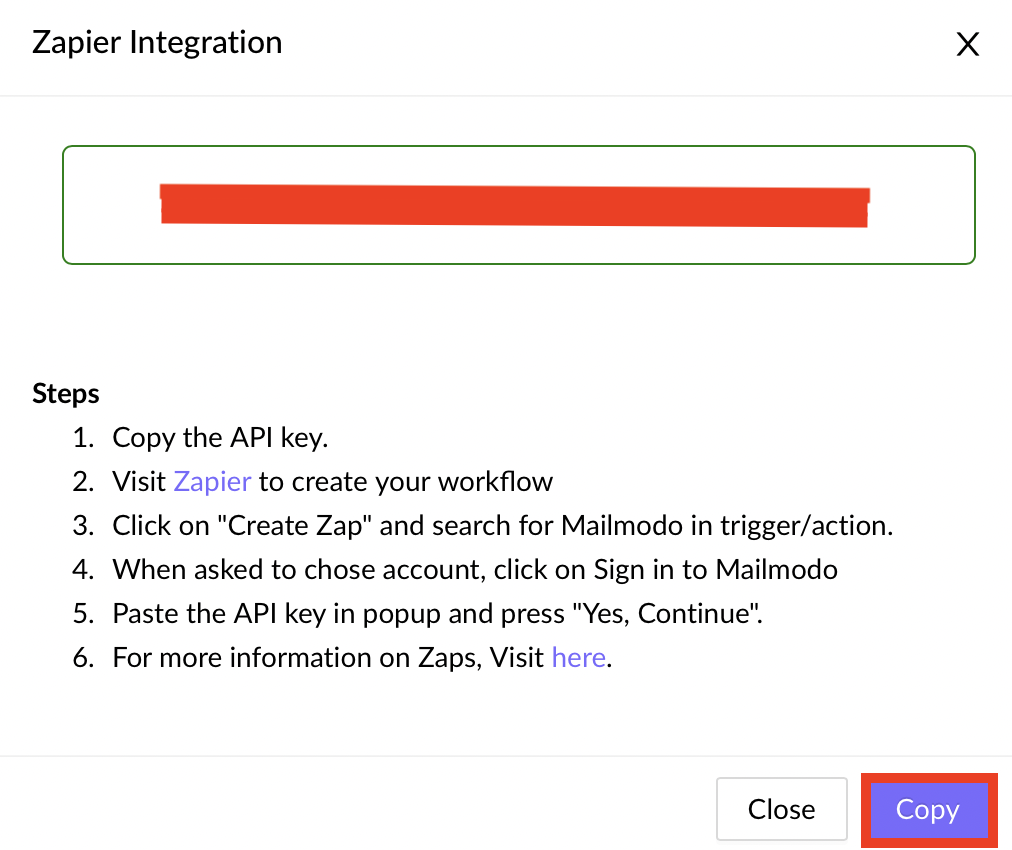
Step 10: You will be redirected to Trigger campaign section. Click on Show setup steps -> Show API key -> Copy the API key.
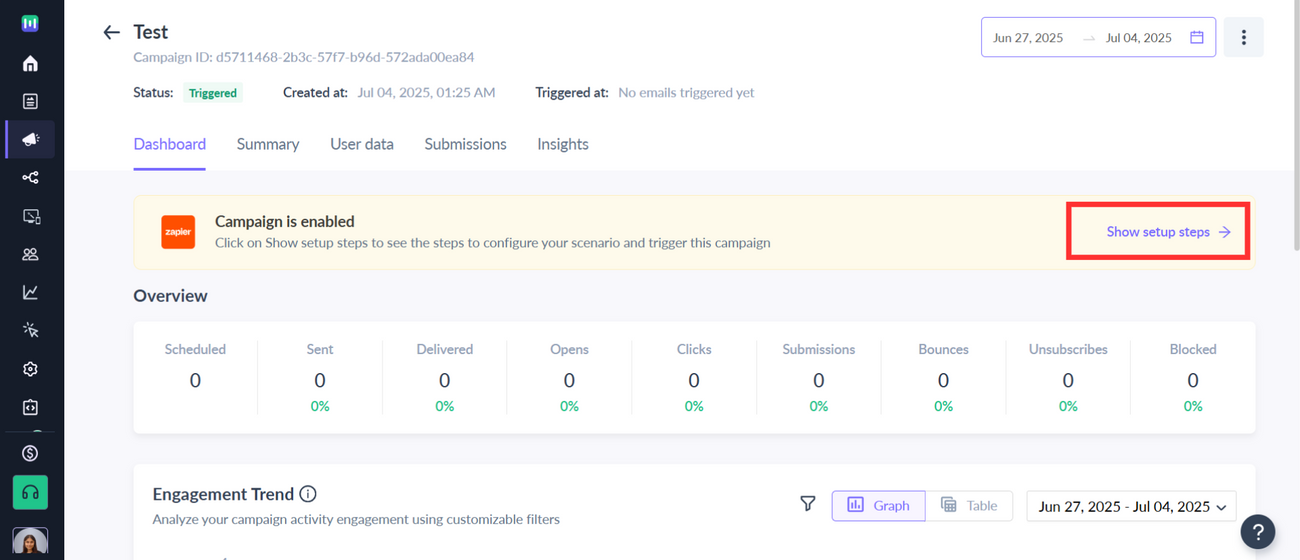

To access this page in future, go to transactional in the vertical menu (left side)->select the campaign-> Show setup steps
Zapier setup
We will create a Zap in Zapier to trigger the above campaign in Mailmodo whenever a row in appended in a Google Sheet.
Trigger
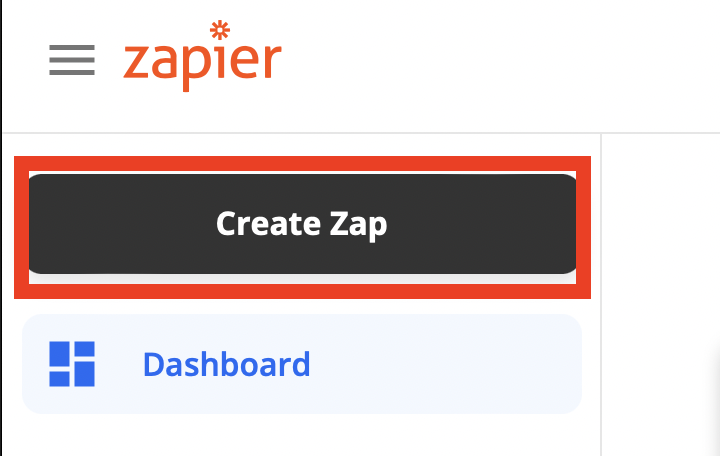
Step 1: On the Zapier homepage, click on Create Zap.
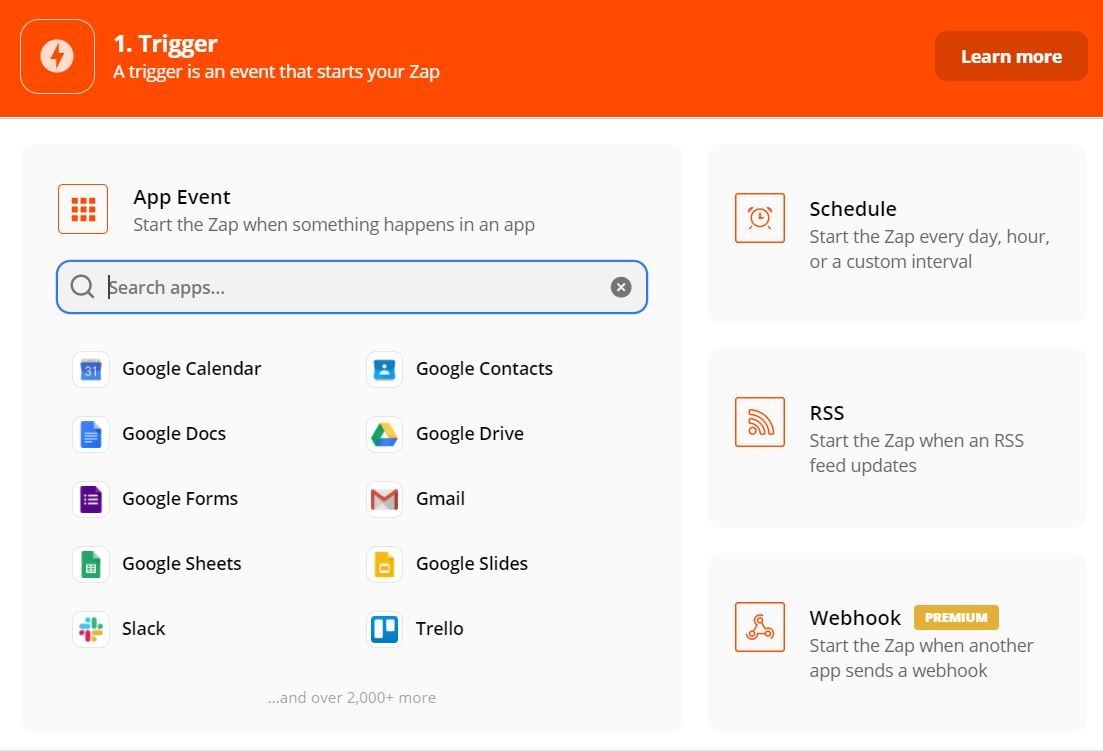
Step 2: Since the trigger event will be addition of a row in your Google Sheets, in the trigger tab, choose Google Sheets.
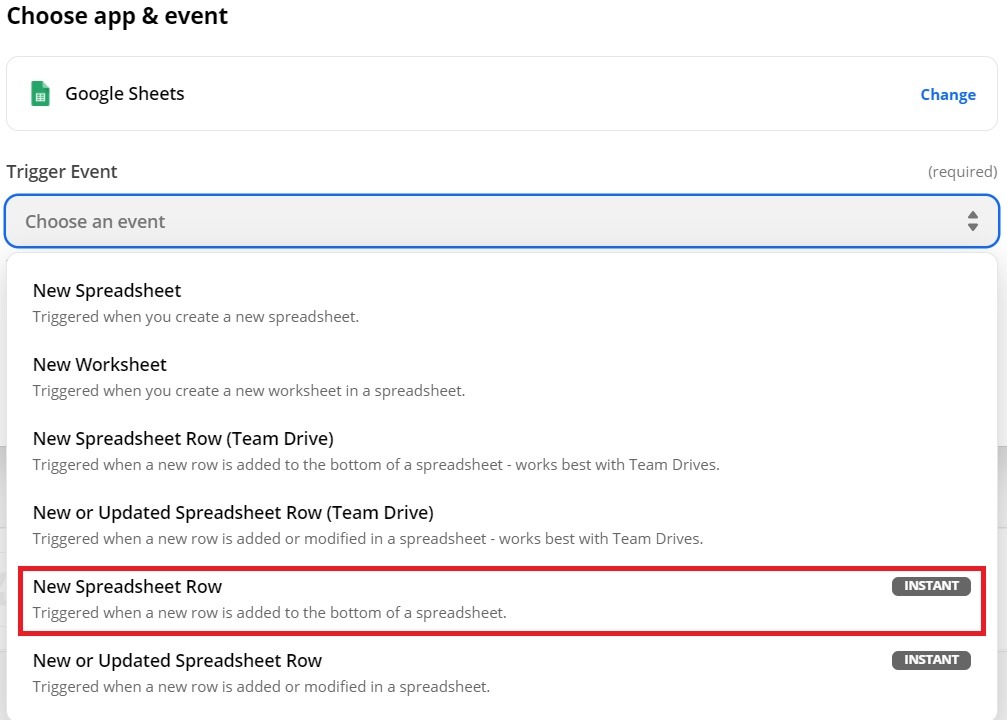
Step 3: In the Trigger Event section, choose 'New Spreadsheet Row'. Then click on 'Continue'

Step 4: Select the Google account you want to use.
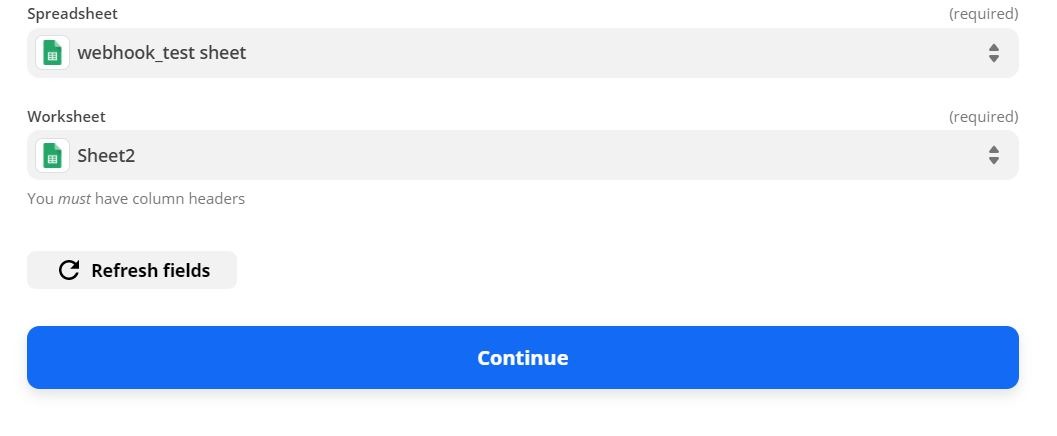
Step 5: Select the Spreadsheet and Worksheet where the row will be appended.
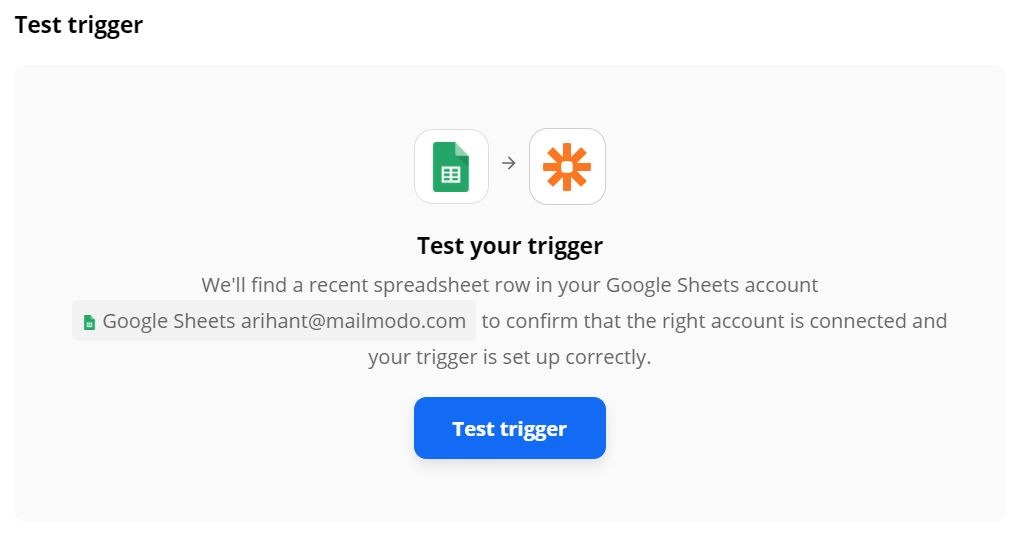
Step 6: Once the trigger setup is complete, click on 'Test trigger'.
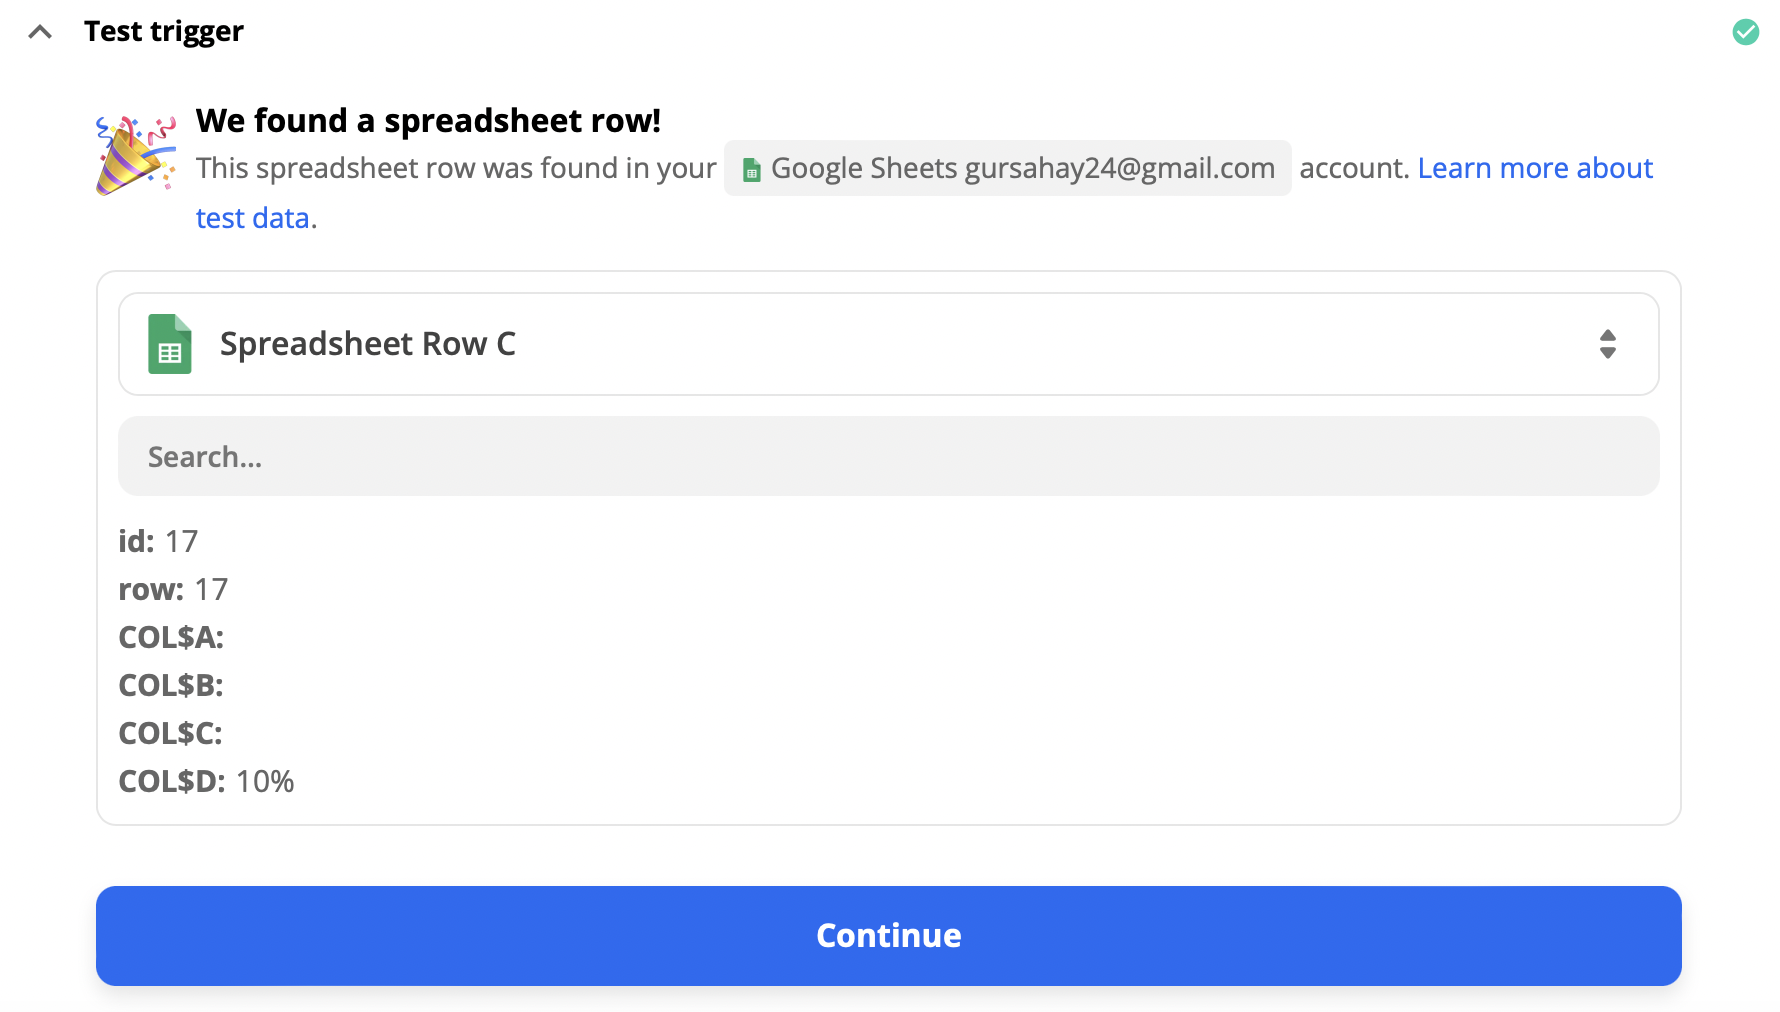
Upon successful testing, click on Continue.
Action
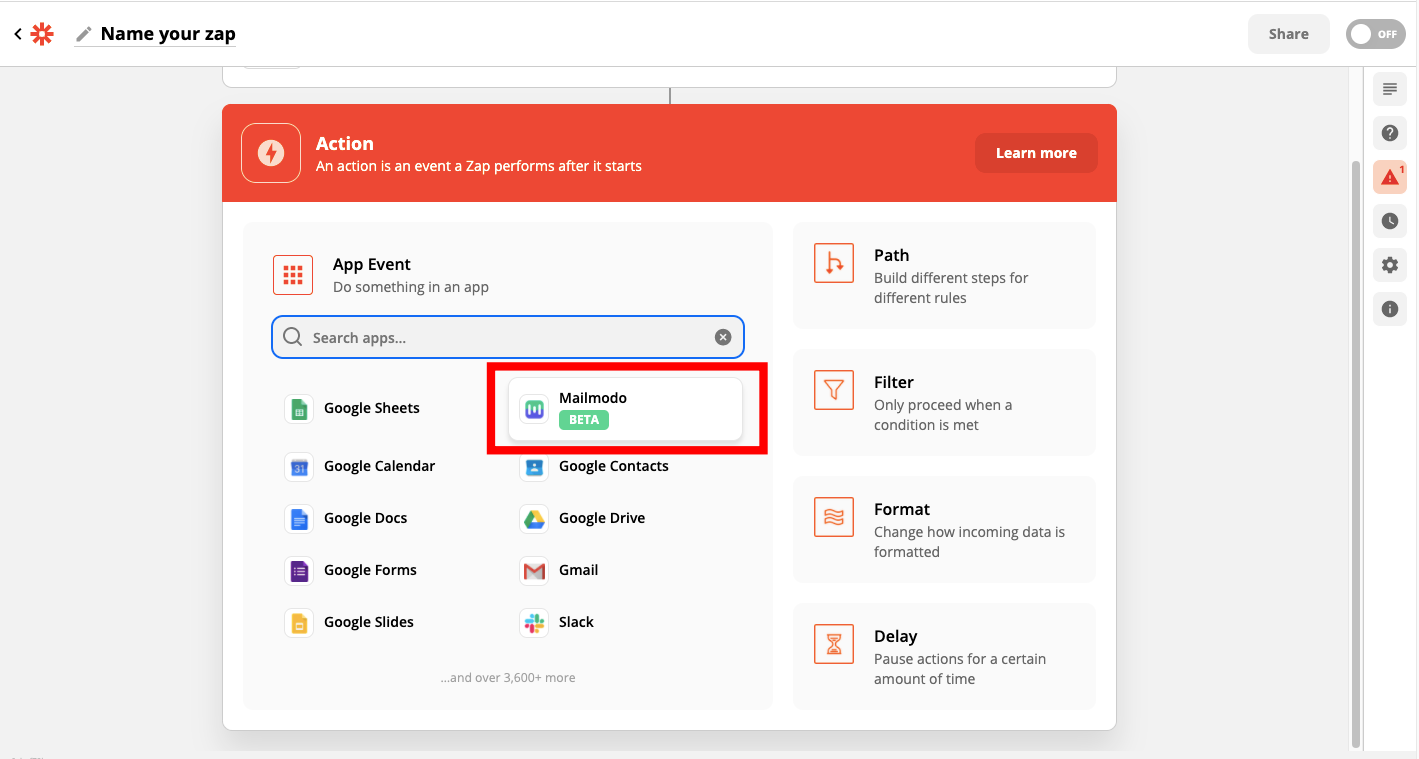
Step 1: The action will be performed in Mailmodo. In the App Event tab, search for Mailmodo and add it as an app.
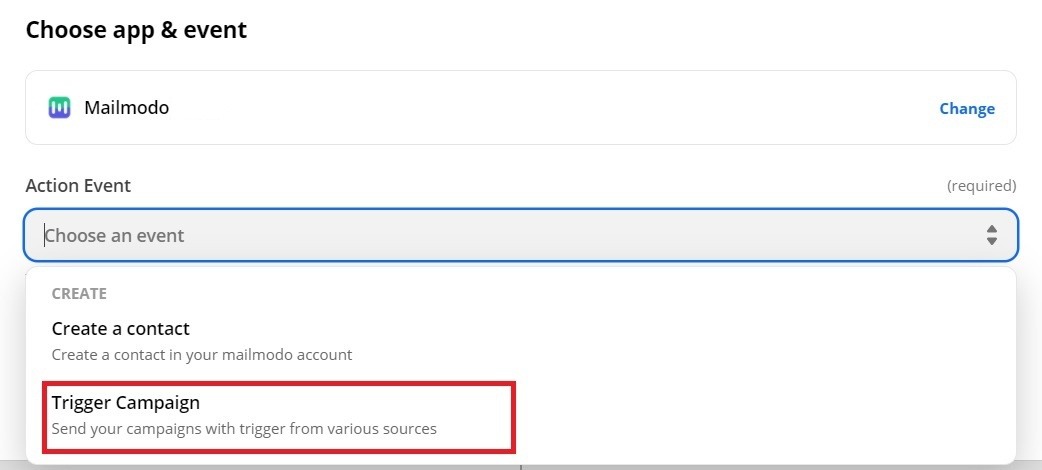
Step 2: In the Action Event tab, select 'Trigger Campaign' and click on 'Continue'
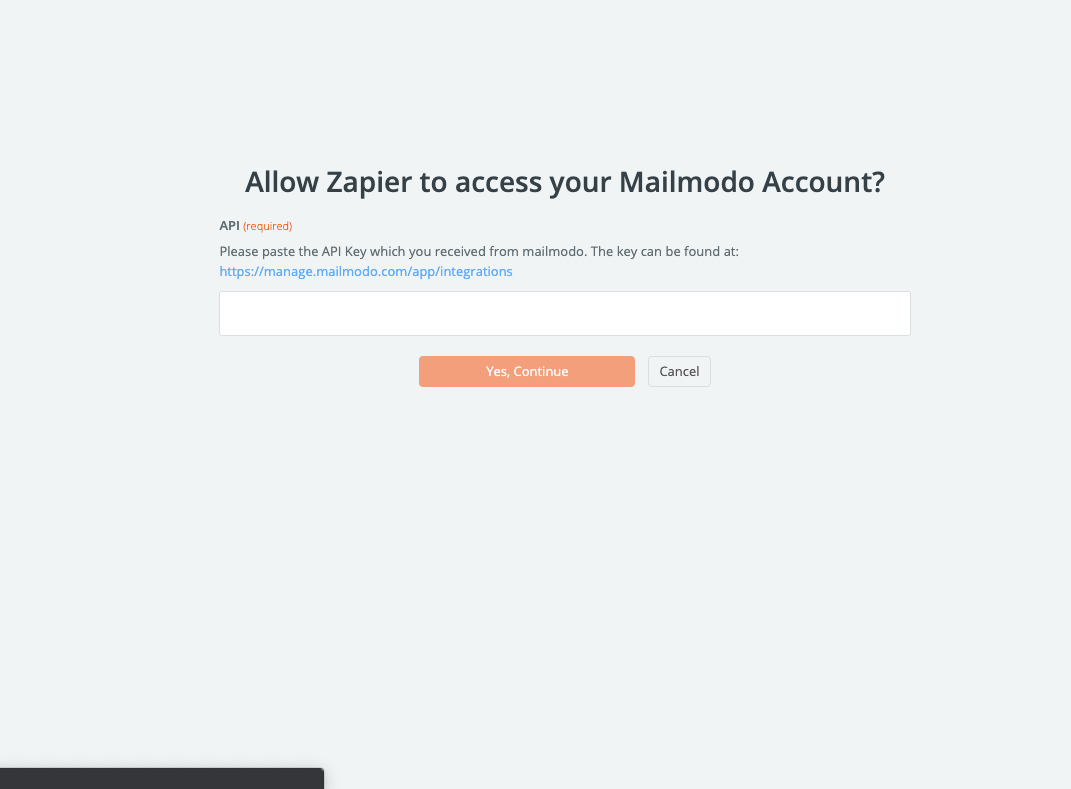
Step 3: Next, select your Mailmodo account. You will be asked to sign-in. Here, you need to paste the API key that you copied from Mailmodo.
You can access the API key anytime by going to the 'Integrations' tab in Mailmodo, and clicking on 'See details' under Zapier.
Step 4: Paste the API key in the box. Then click on 'Yes, Continue'.
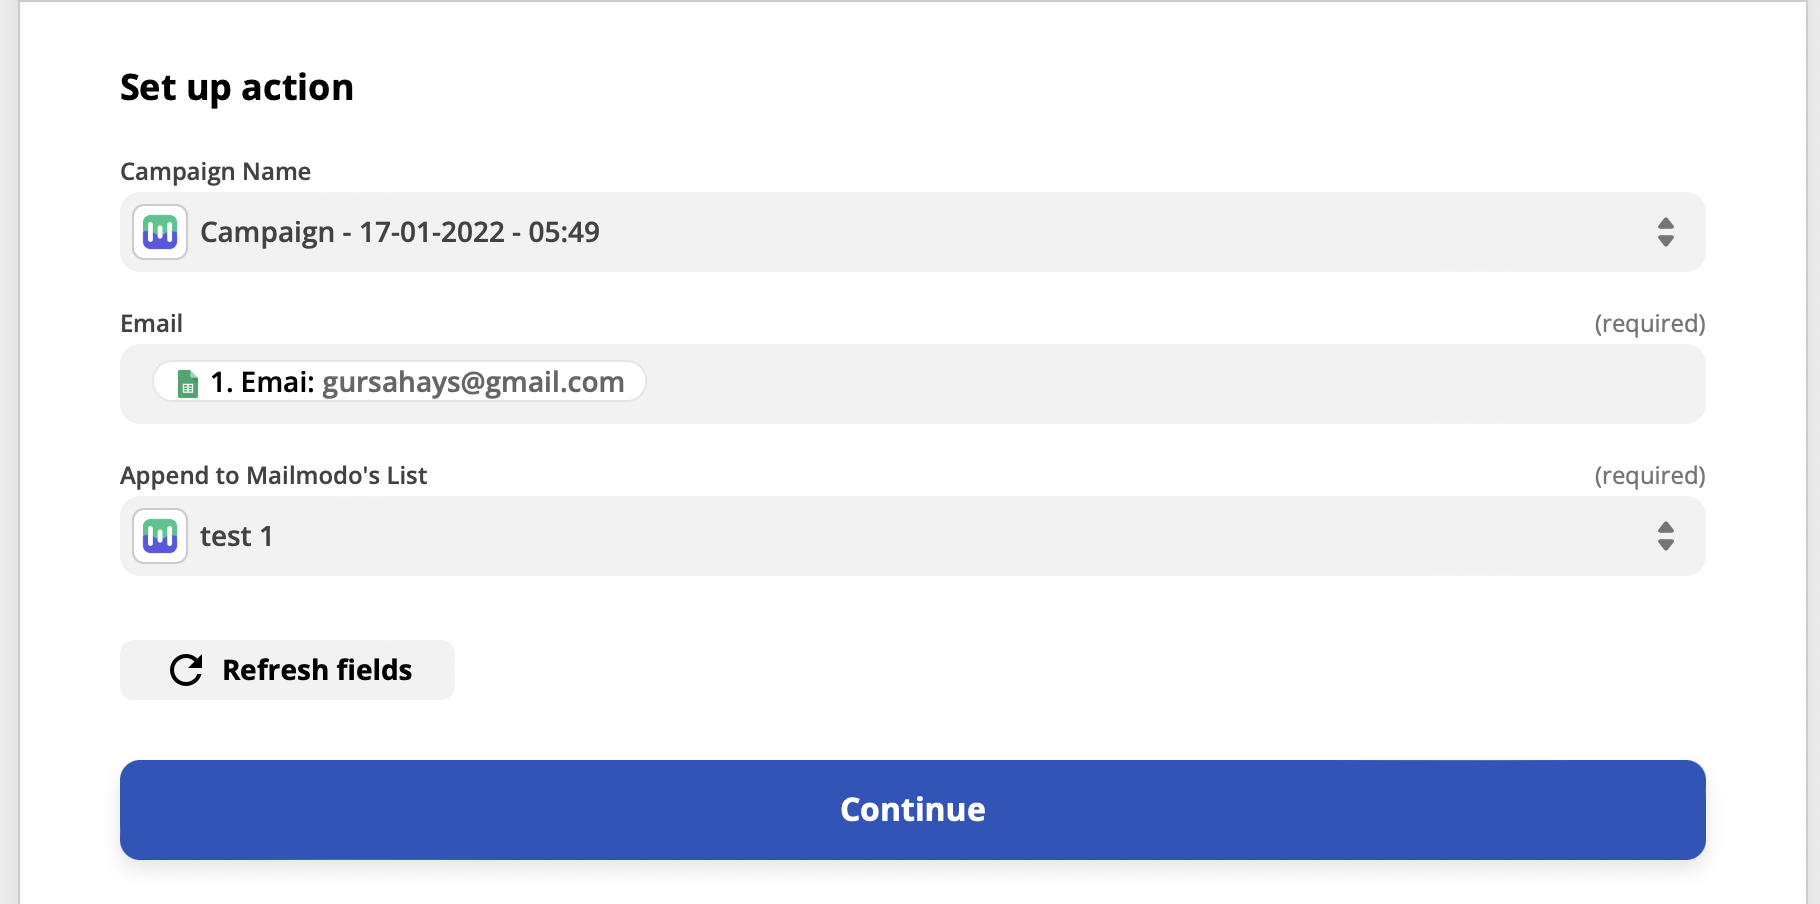
Step 5: Set up the Action Event
Campaign Name: Select the transactional campaign to be triggered
Email: Enter the Email ID to which the mail is to be sent, or map it to the column header containing the mail IDs in the Google Sheet.
Append to Mailmodo's list: Select the contact list in Mailmodo to which the mail IDs will be appended.
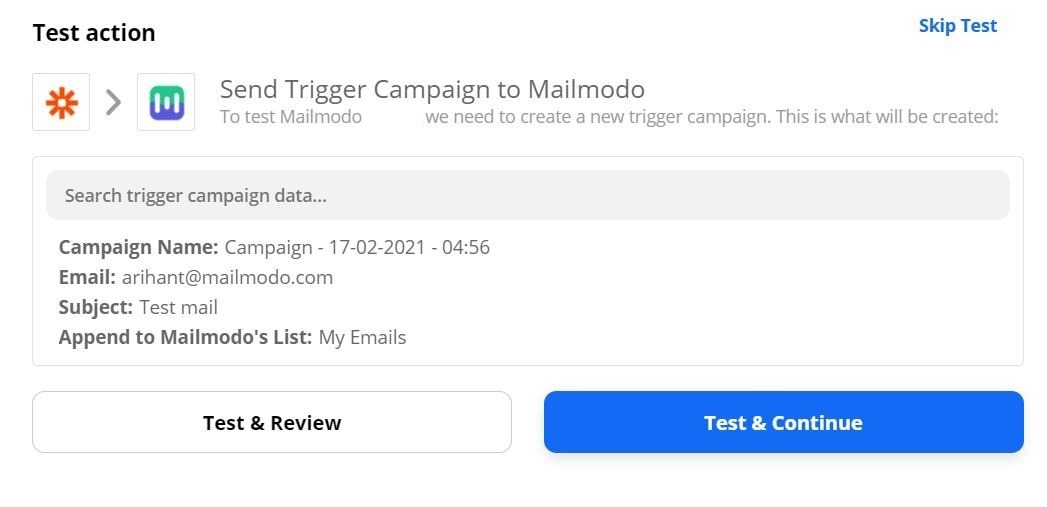
Step 6: Once Action Event is setup, test your trigger by clicking on 'Test & Continue'
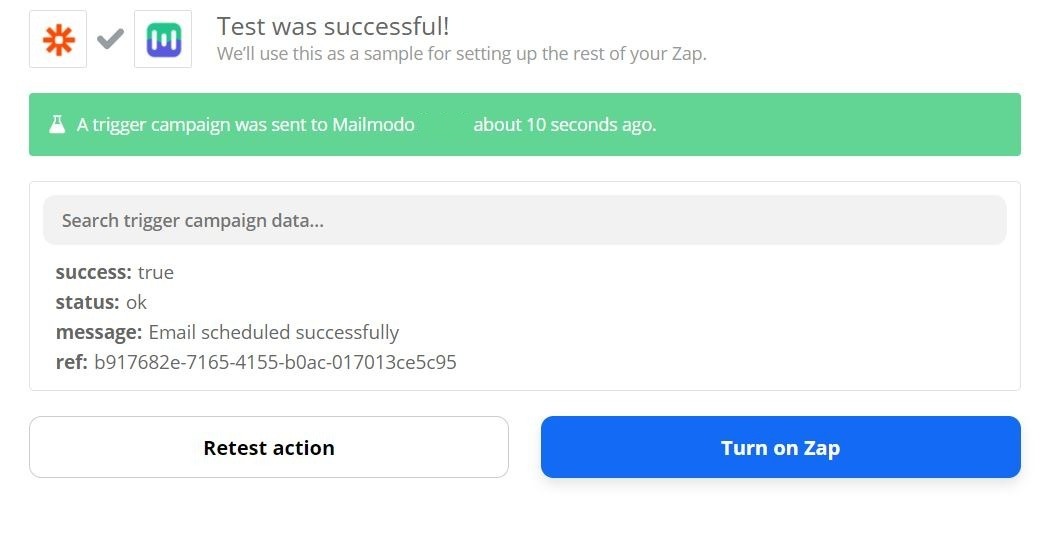
Step 7: If the events have been correctly setup, following screen will appear. Click on 'Turn on Zap' and the Zap will be successfully configured
Henceforth, any row appended in the selected Google Sheet will trigger a mail in Mailmodo.