How to add a card/box to a block
Last updated November 4, 2025
You can now enhance the design of your email by adding a card or box around your blocks. This feature adds structure and allows you to apply additional styling options to make your content stand out. Follow these steps to add a card/box to your email blocks.
1. Access the card settings
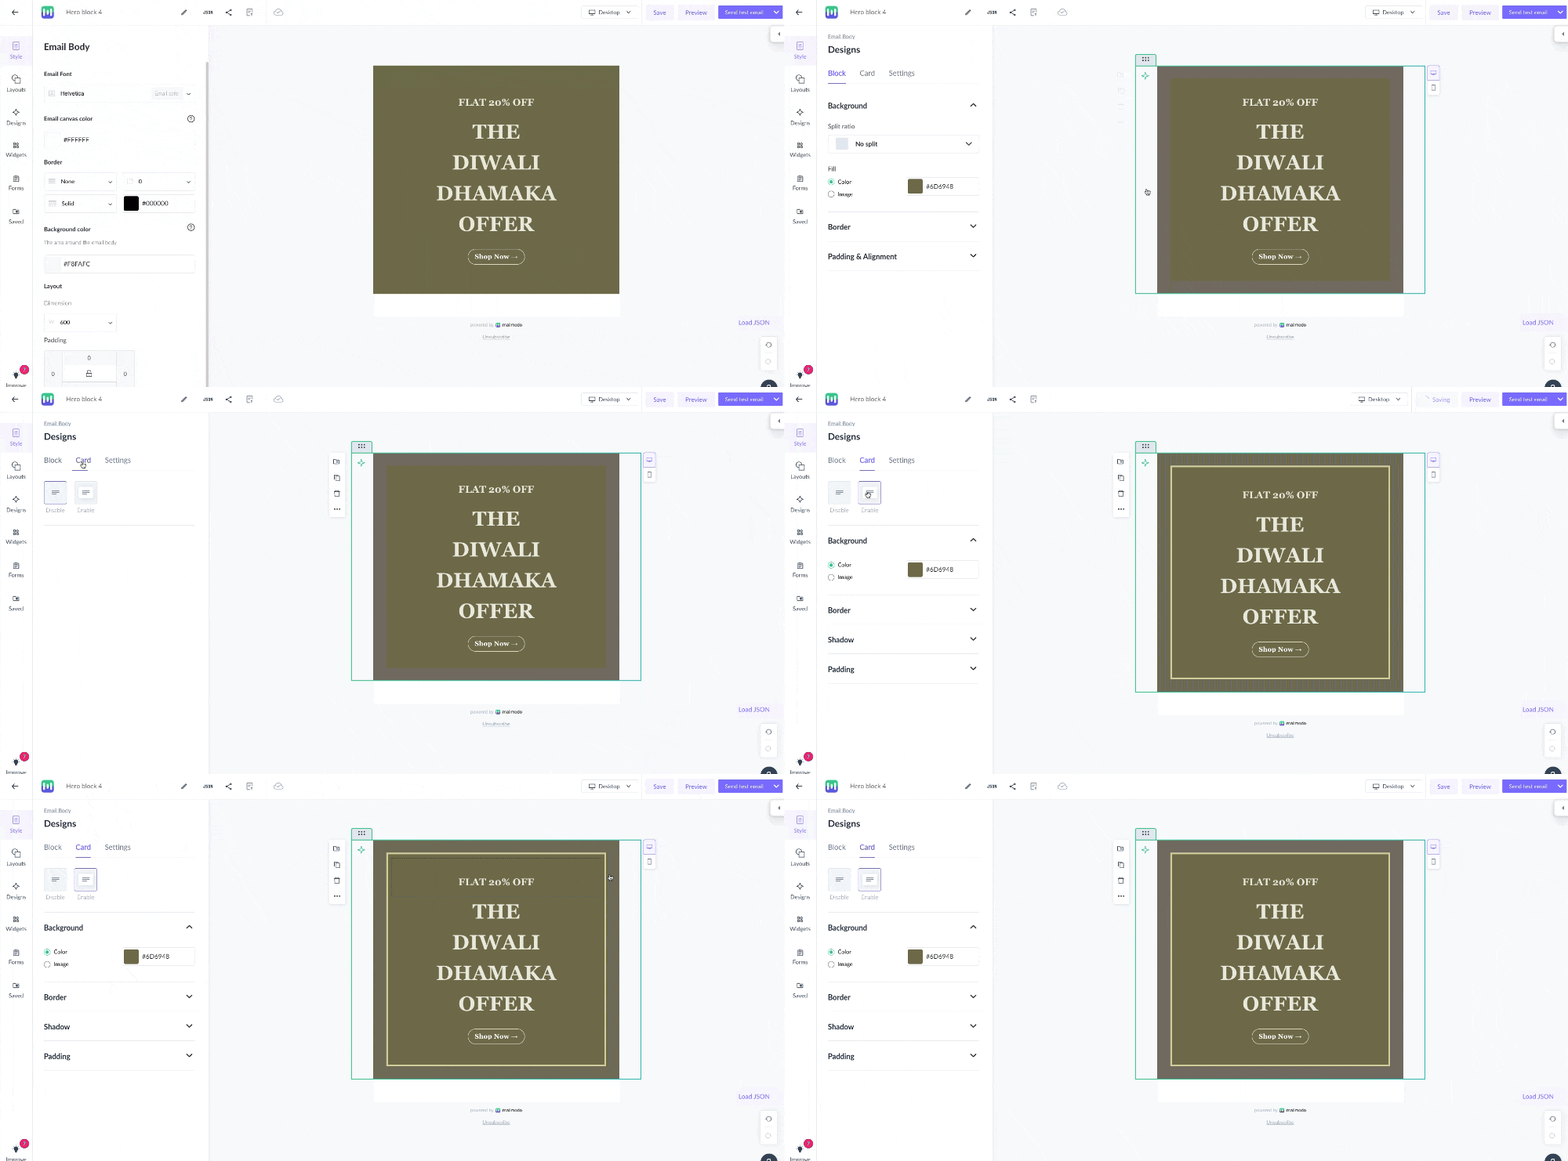
- Open your email template in the editor.
- Select the block from the "Design" tab where you'd like to add the card/box.
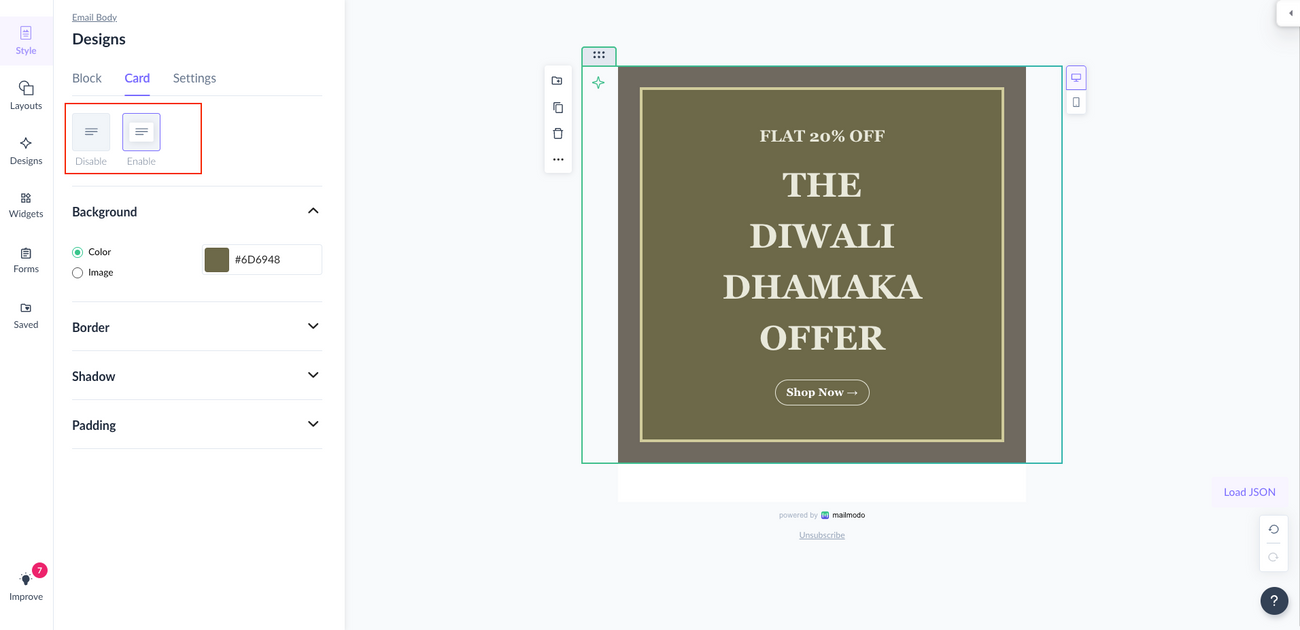
- In the left panel, look for the option labelled Card.

2. Enable the card option
- Toggle the Add Card switch to enable the card/box feature.
- A visible box will now be added around the block.

3. Customize the card design
After enabling the card, you can customize its appearance with the following options:
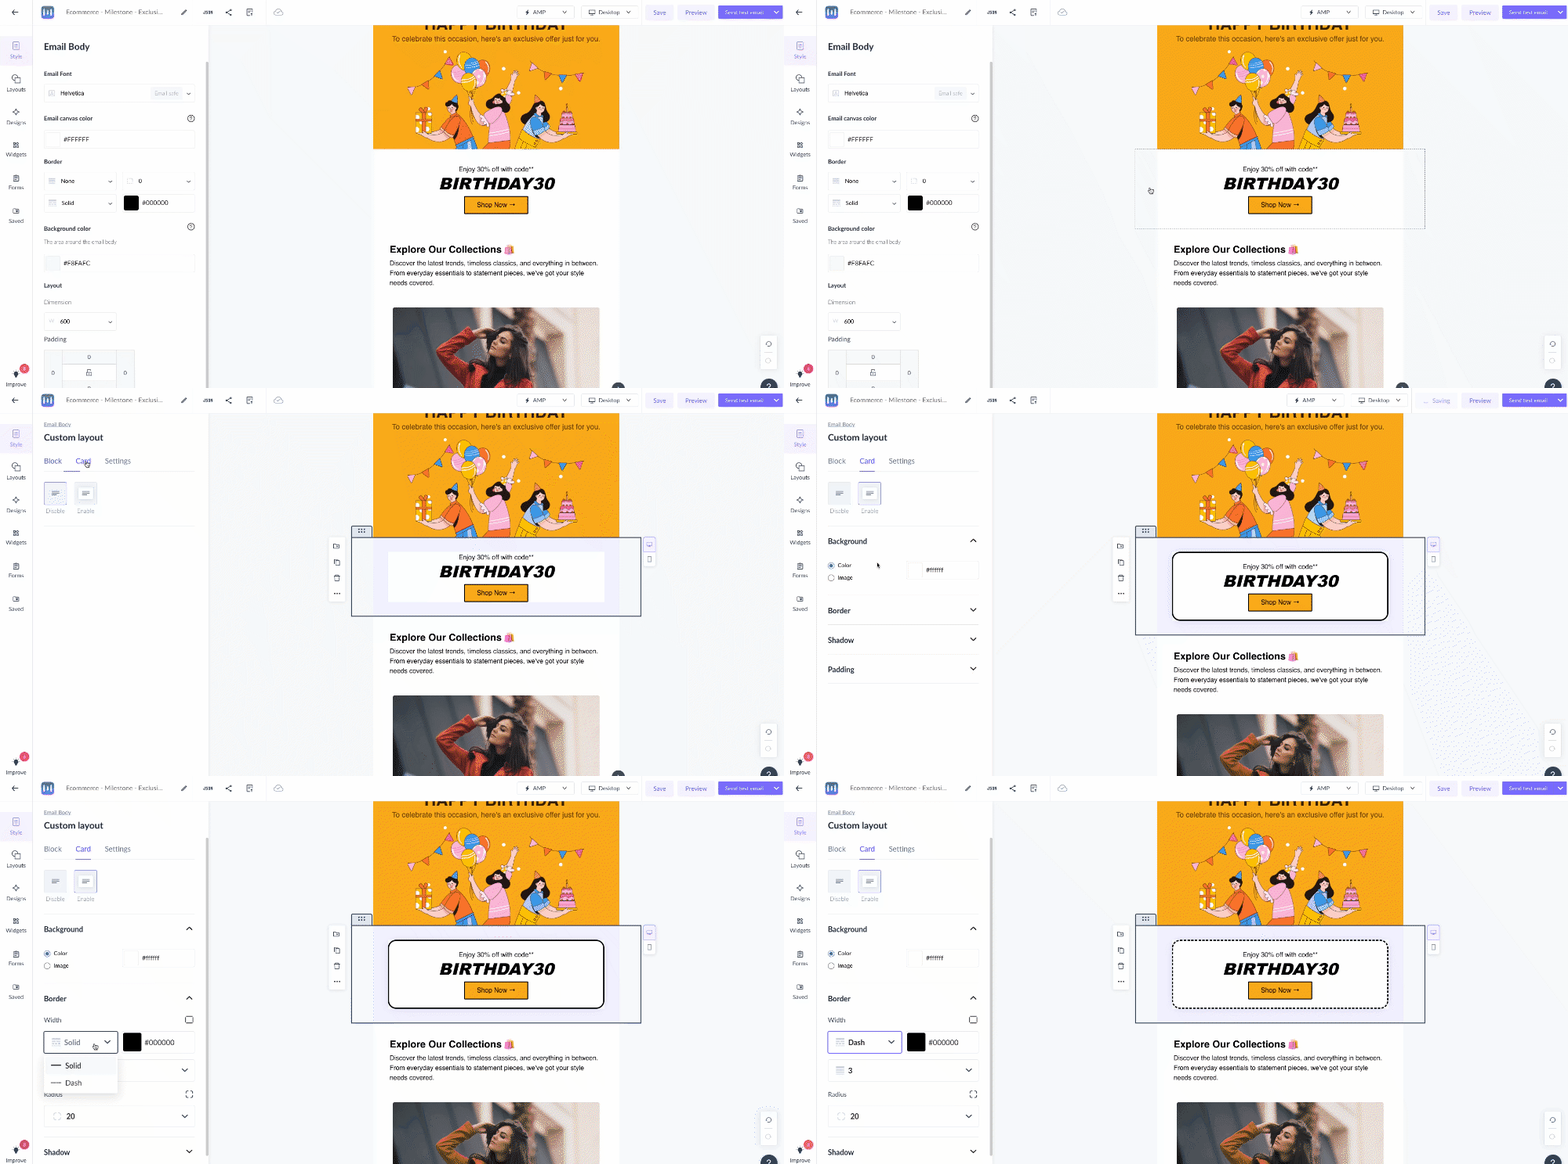
- Border: Choose a border style (solid, dashed, dotted, etc.) and adjust its thickness and color to match your design.
- Border Radius: Set the radius to control how rounded the edges of the card/box are.
- Background Color: You can set a background color for the card/box to make it stand out.
- Padding: Adjust the padding to create space between the content inside the card/box and the edges of the box itself.
You can achieve designs with cards using normal or blank blocks:

4. Preview Your Design
- As you customize the card/box, the editor will update your email design in real-time.
- Review the changes and make any necessary adjustments to achieve your desired look.
Certain CSS properties such as card might not work on some email clients such as Outlook, Yahoo etc.
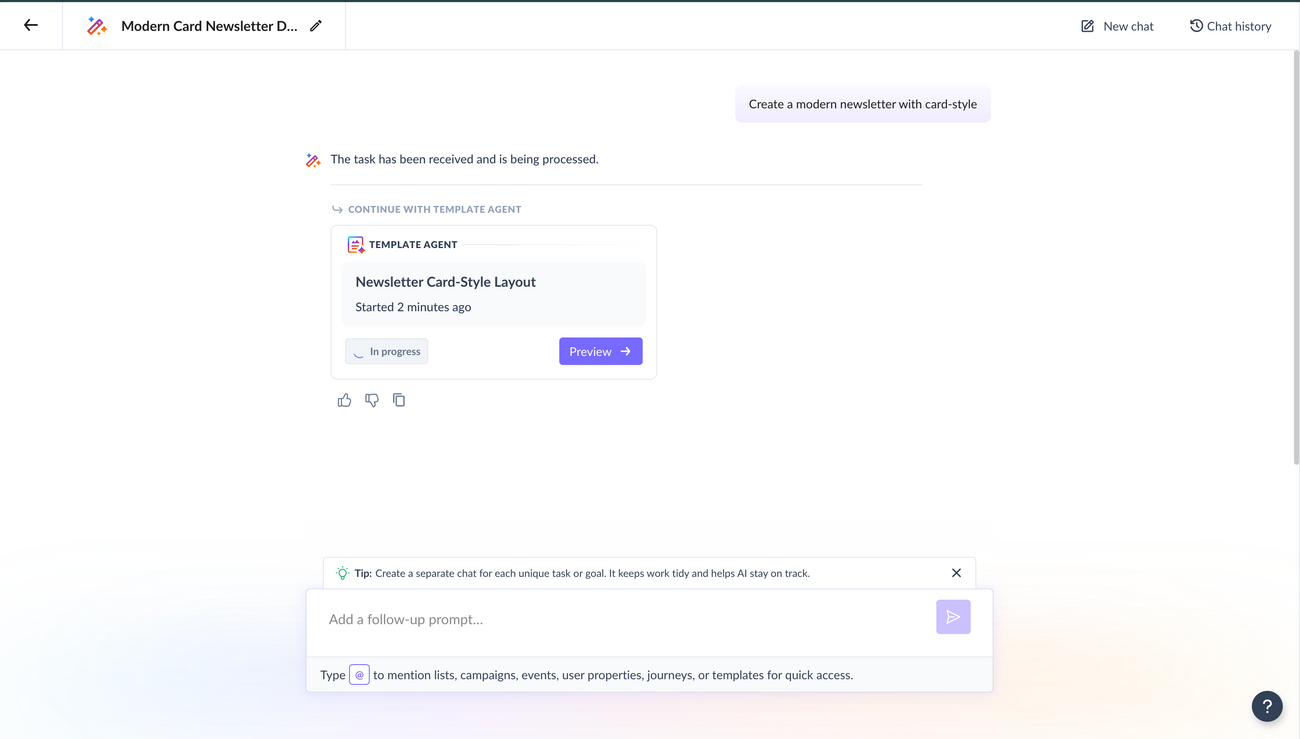
With Mailmodo AI✨, you can now automatically generate stunning email designs that include cards, layout suggestions, and more — all tailored to your campaign goals. Simply type a prompt like “Create a modern newsletter with card-style sections” and watch Mailmodo AI build it instantly for you. Try it out today.

Was this article helpful?

