

How to use personalization parameter in your template?
Last updated July 1, 2024
Personalisation in an email is both a process and an outcome. It is the process by which you add an individual user’s details in the email. The outcome is that it feels more personal and relevant upon delivery.
There are two broad steps required for personalization: adding a personalization parameter and mapping. Let’s look into these in more detail:
Adding a personalization parameter
Adding this tag indicates to Mailmodo that there is personalized information to be entered here. It is always written within the characters ${}. Here are a few instances where you can add personalization parameter.
Note that apostrophe and double quotes cannot be used in personalisation parameters. If you use apostrophe or double quotes in personalisation, then mapping will not work.
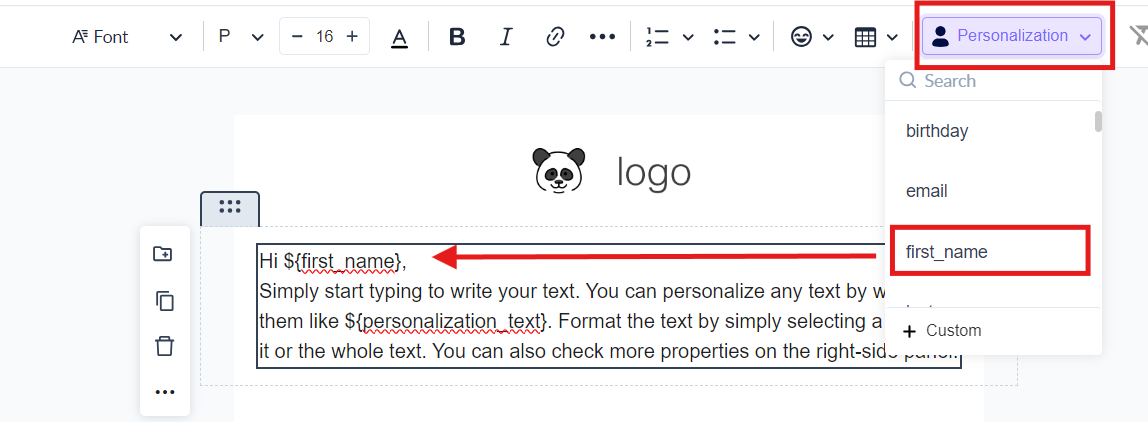
Email Content
This is simple text personalization that you can add to different parts of your email body. For example, to show a contact's first name in the email, click on first_name from the Personalization.
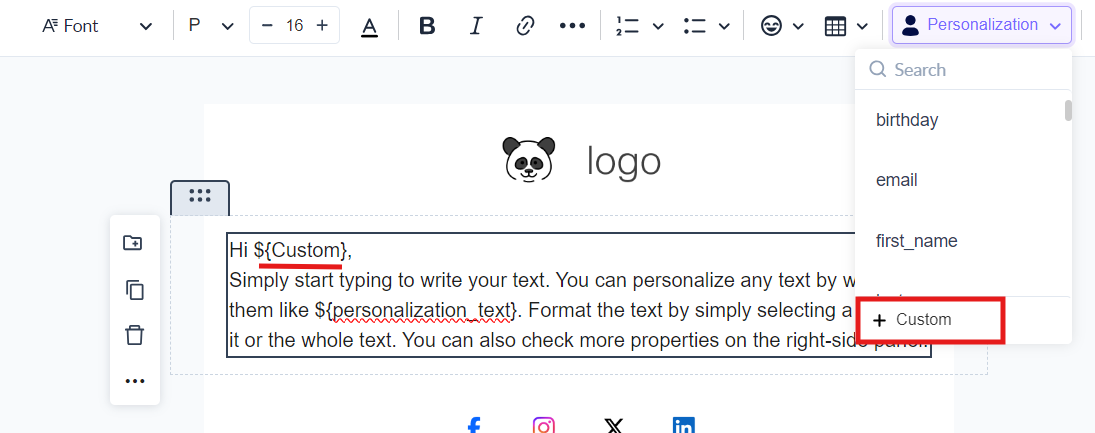
In case you want to create a custom personalisation. Click on the custom option and edit the text with the right parameter.
Once added, while mapping the parameter, you need to make sure that the selected contact list while creating the campaign should have the relevant data for that attribute.
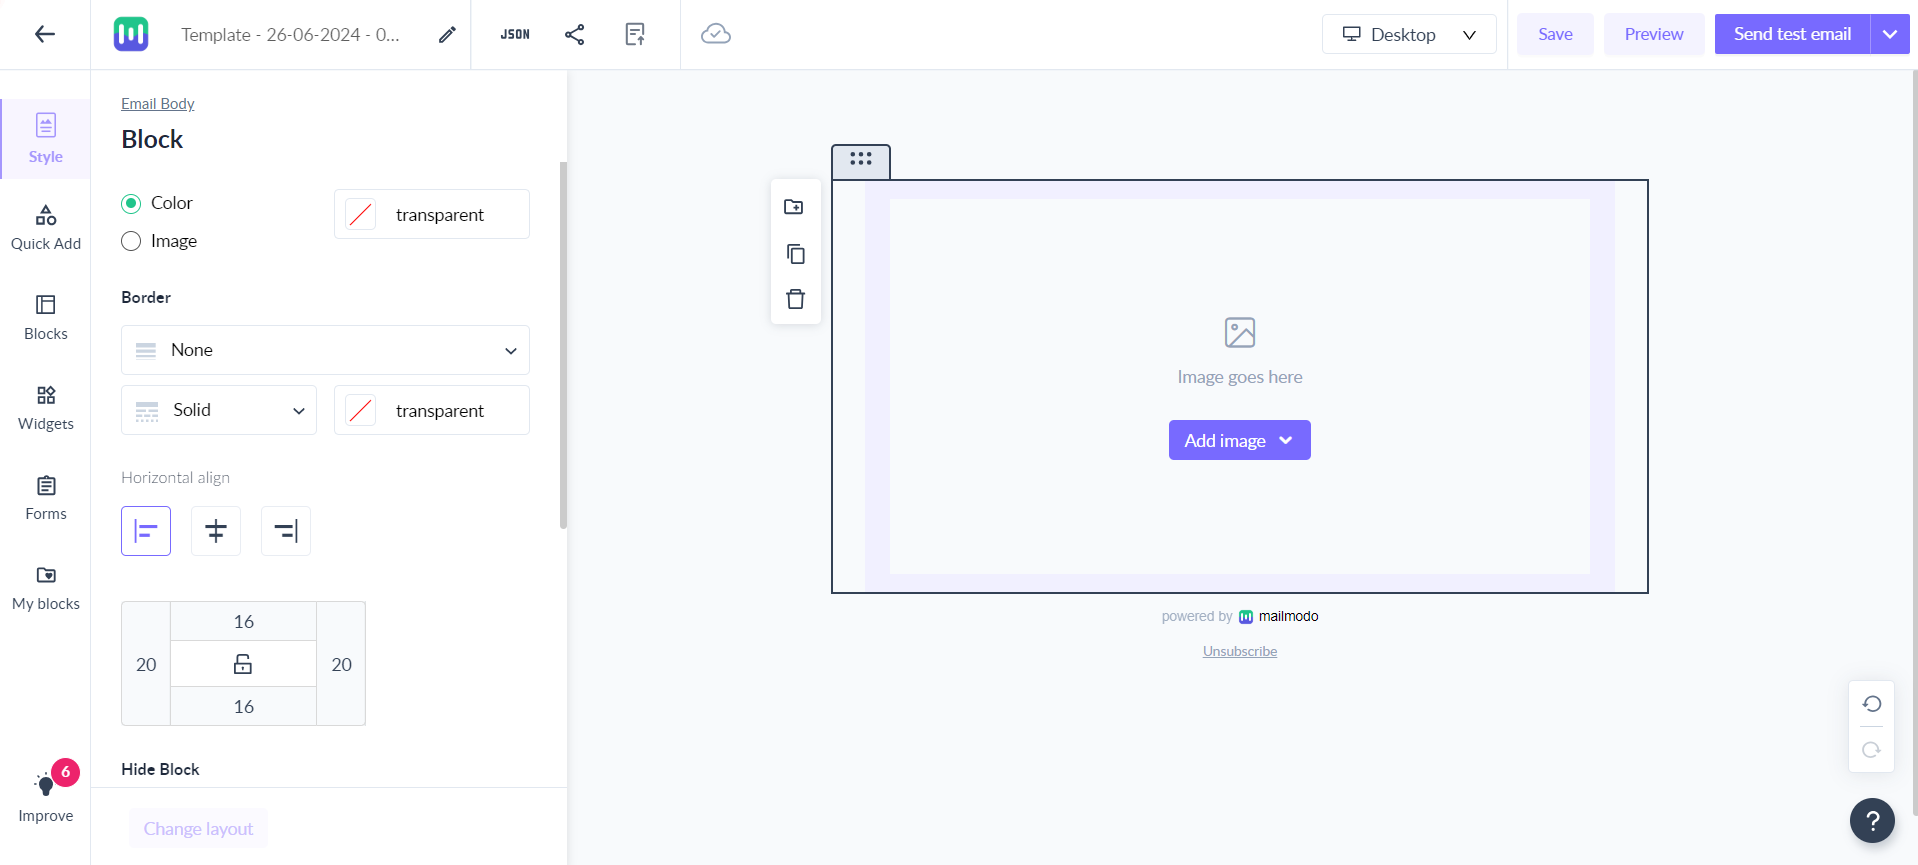
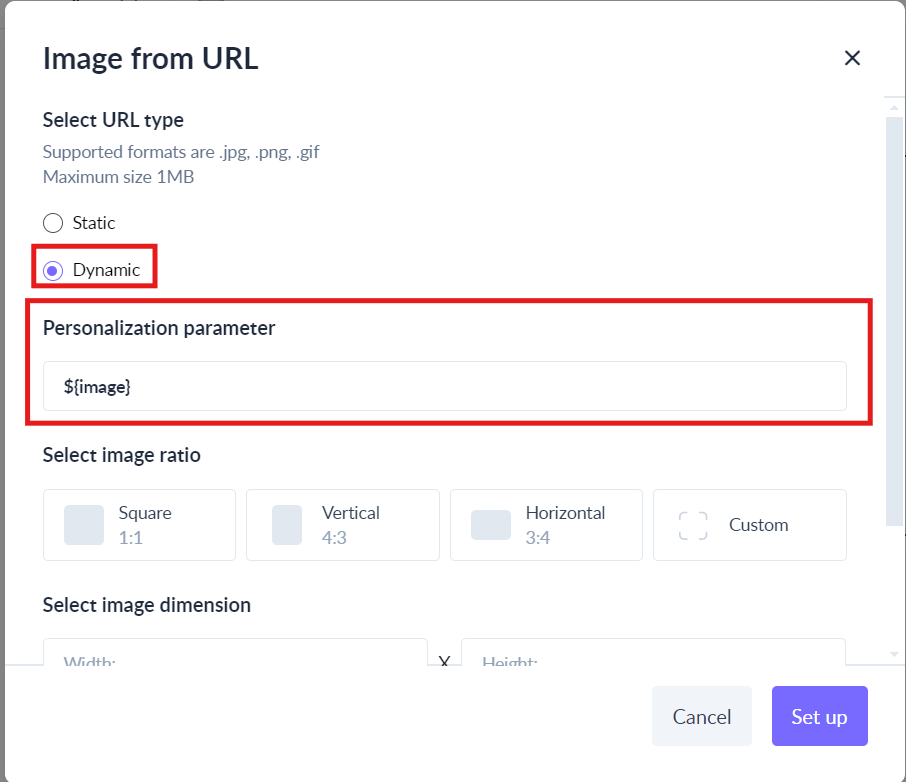
Images
Use a dynamic URL to display personalised images to each user.
Step 1: Add an image block and click on Add Image.
Step 2: In the pop-up, go to ‘Image from URL’.
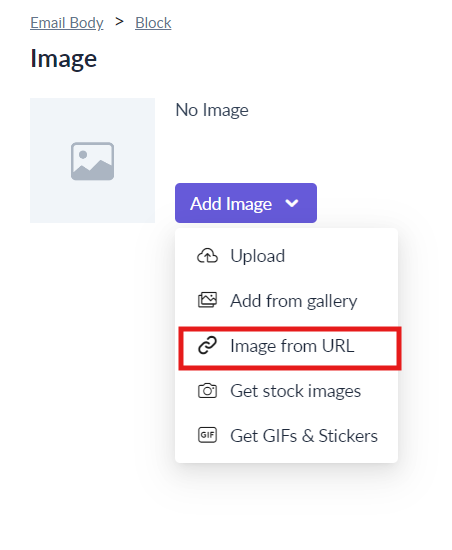
Step 3: Select Dynamic URL. Add the personalization parameter in the respective field.
To learn more about image personalization, refer to this article.
Buttons/CTA
Use personalized buttons to redirect your users to different landing pages.
Step 1: Select the button you wish to personalize.
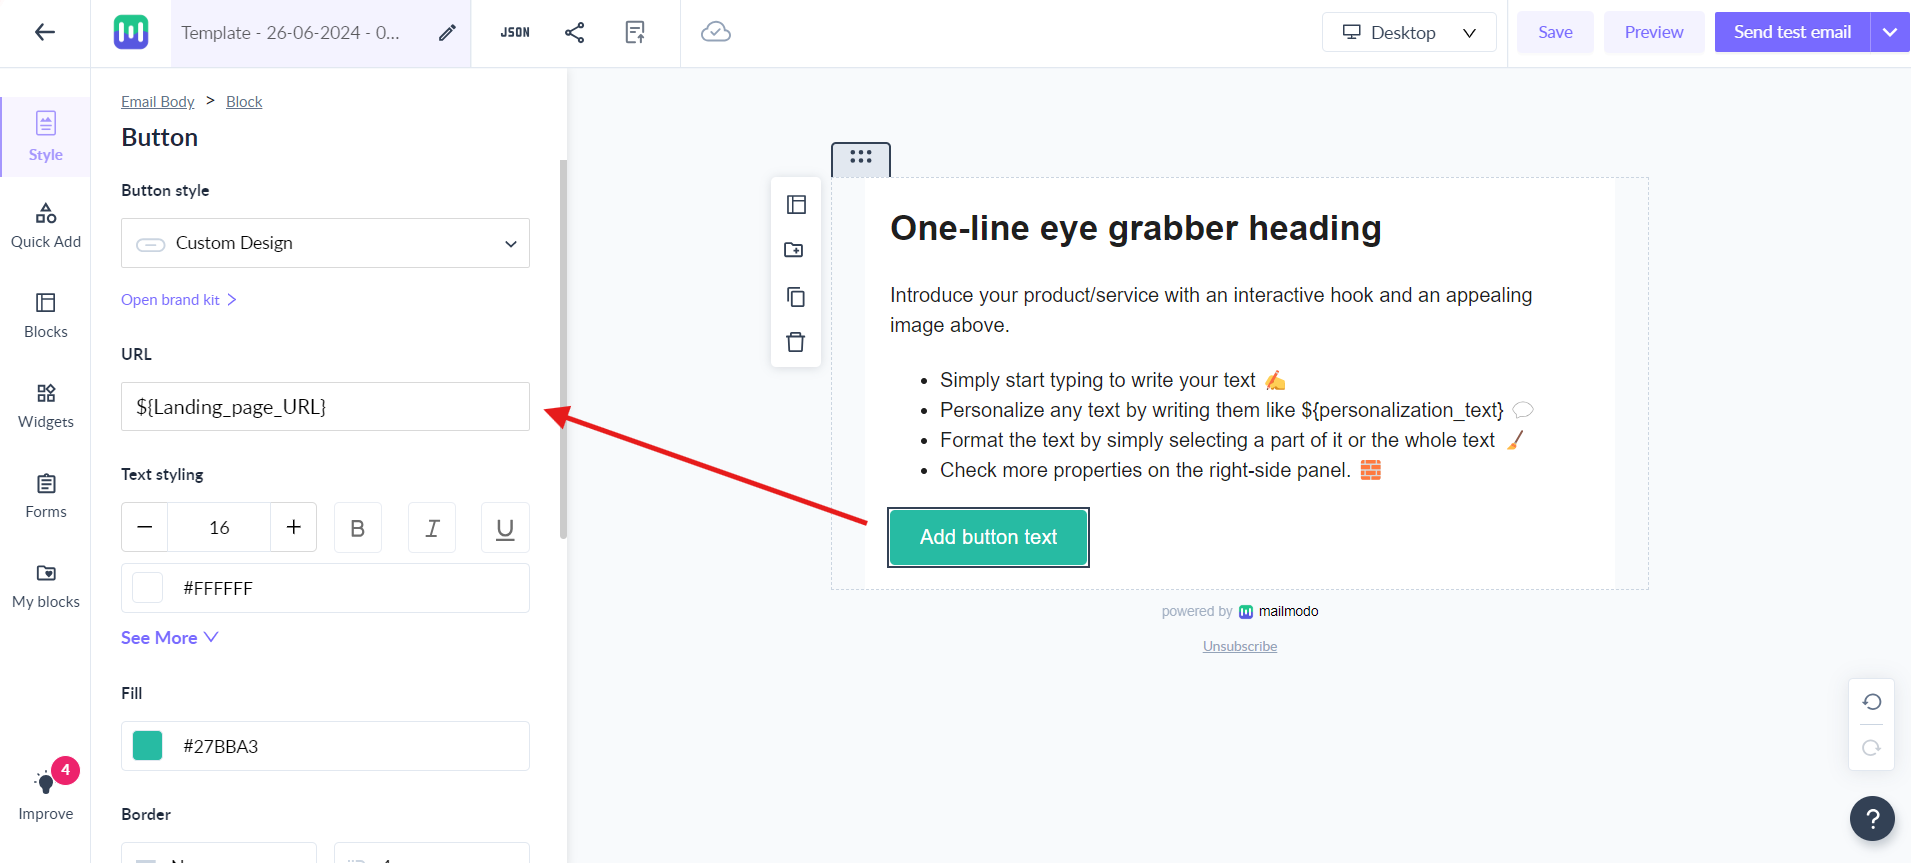
Step 2: Use a personalization tag in the URL field in the right-side panel.
Mapping Personalization
While sending an email with personalization, you are required to map the personalization after adding your contacts.
This is the step where you match each of the personalization to its corresponding column in the database. This column has to be the source of the data using which each personalization parameter will be replaced with the individual personal details.
Step 1: After selecting your contacts, click on Next. A dialogue box will open. Map the personalization parameters used in the template or subject line.
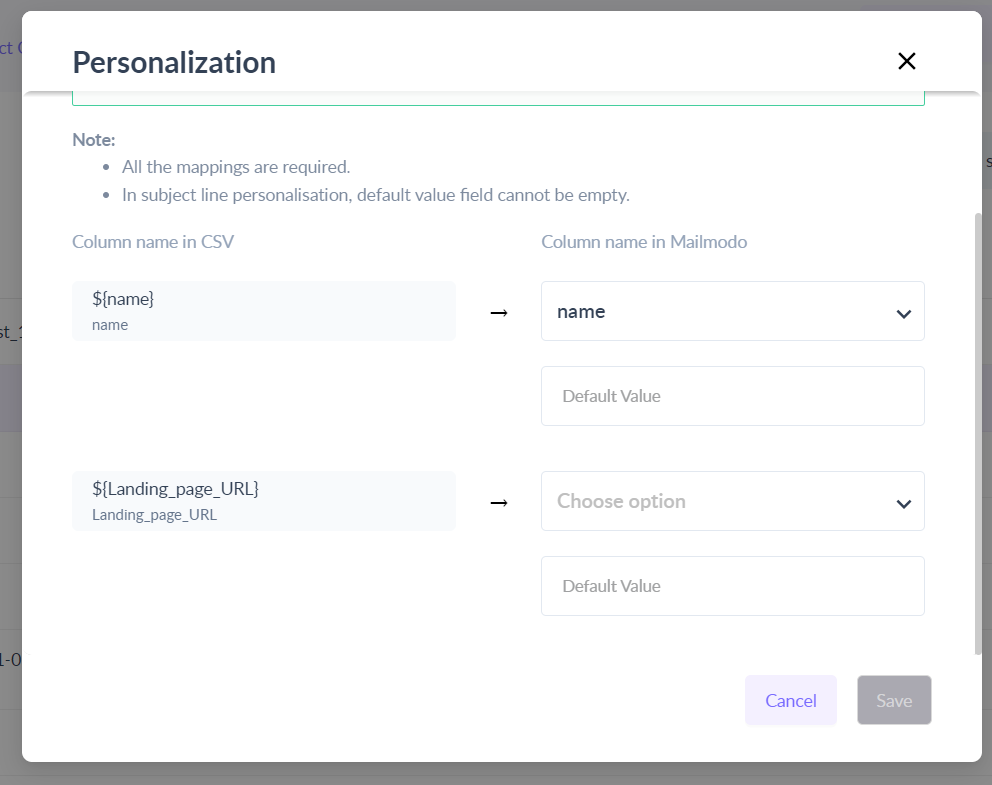
This dialogue box will only open if you have used any personalization parameter in your template or subject line.
Step 2: For each personalization parameter added, map the correct column header from the contact list under which the corresponding data is stored.
For example, for ${image}, your database requires a column that has all the image URLs present. The text within the tag and the column header need not be an exact match.
This completes the personalization in your template. You can now proceed with the next steps and set your campaign live.
Additional Resources
Use the search bar in our Help Center to find quick guides and walkthroughs. If you have any queries, then reach out to us via the chat icon on the bottom right corner of your screen while using Mailmodo. Or reach out to us at Mailmodo Support and share your thoughts at Mailmodo Product Feedback.