Use table in emails
Last updated January 27, 2025
Use tables in your emails to show important information clearly.
Here is the step-by-step process to add tables to your emails.
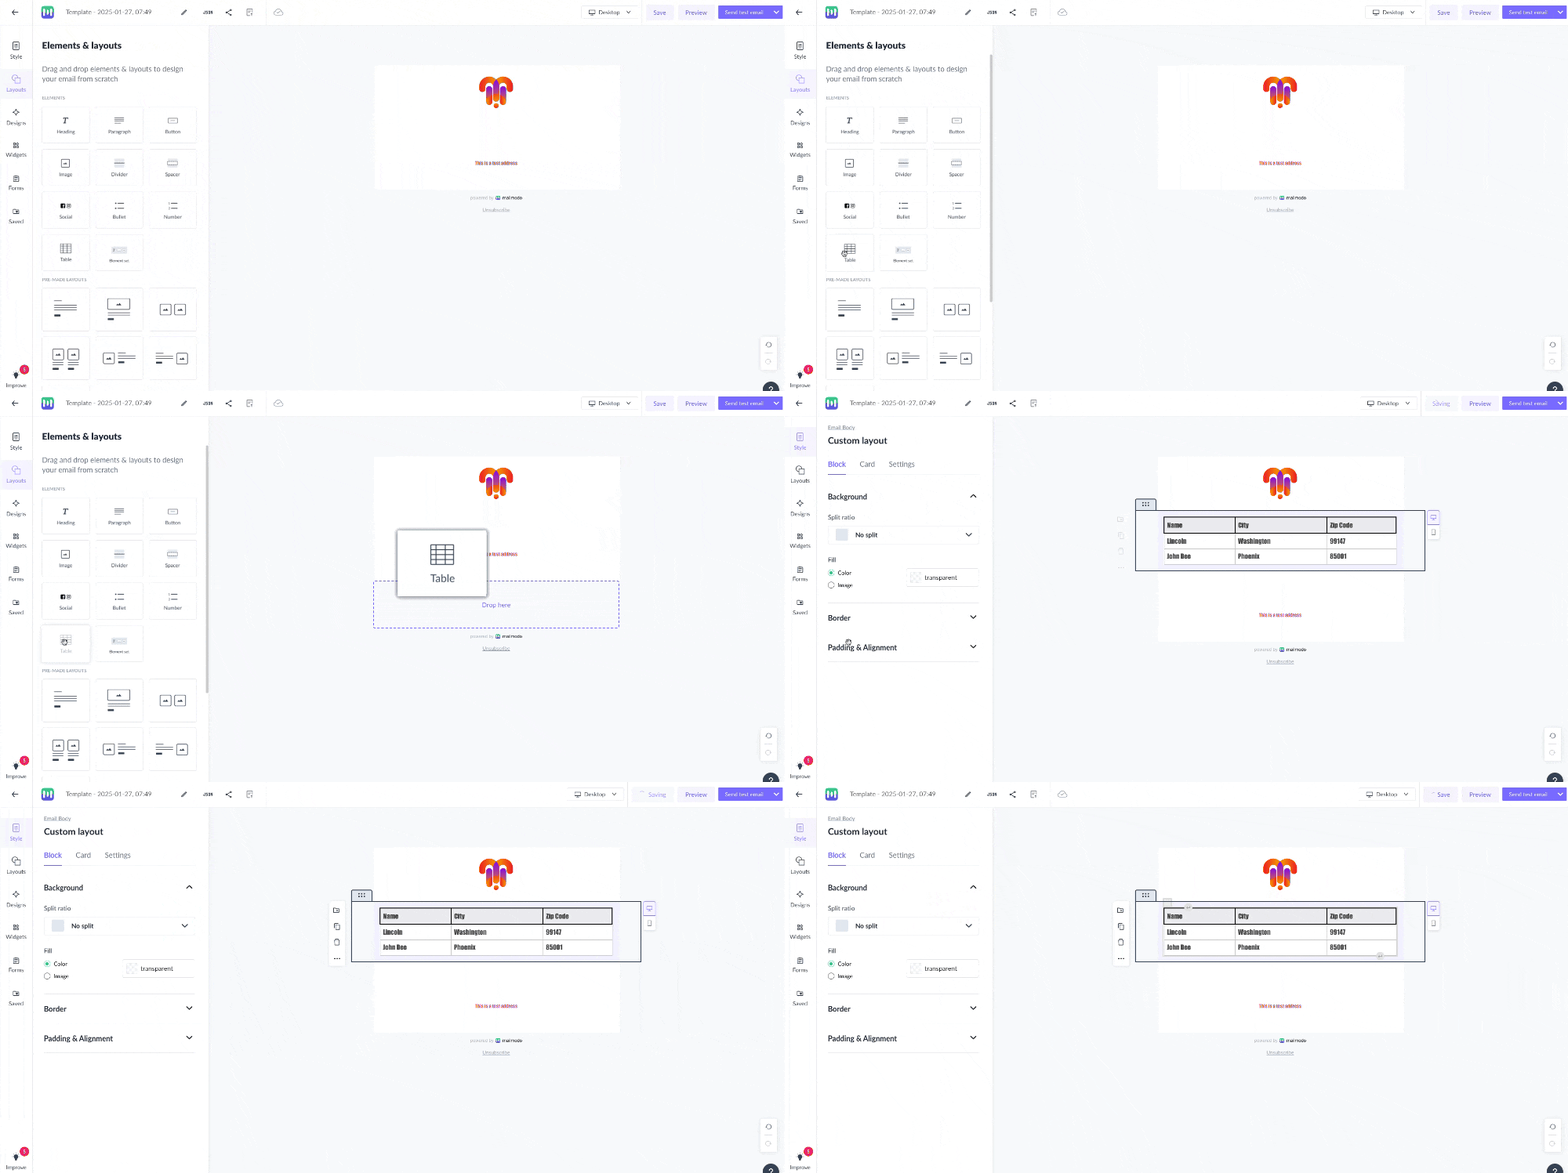
Step 1: Open a new/saved template. Go to "Layouts" option and drag and drop the table where you want to place it.

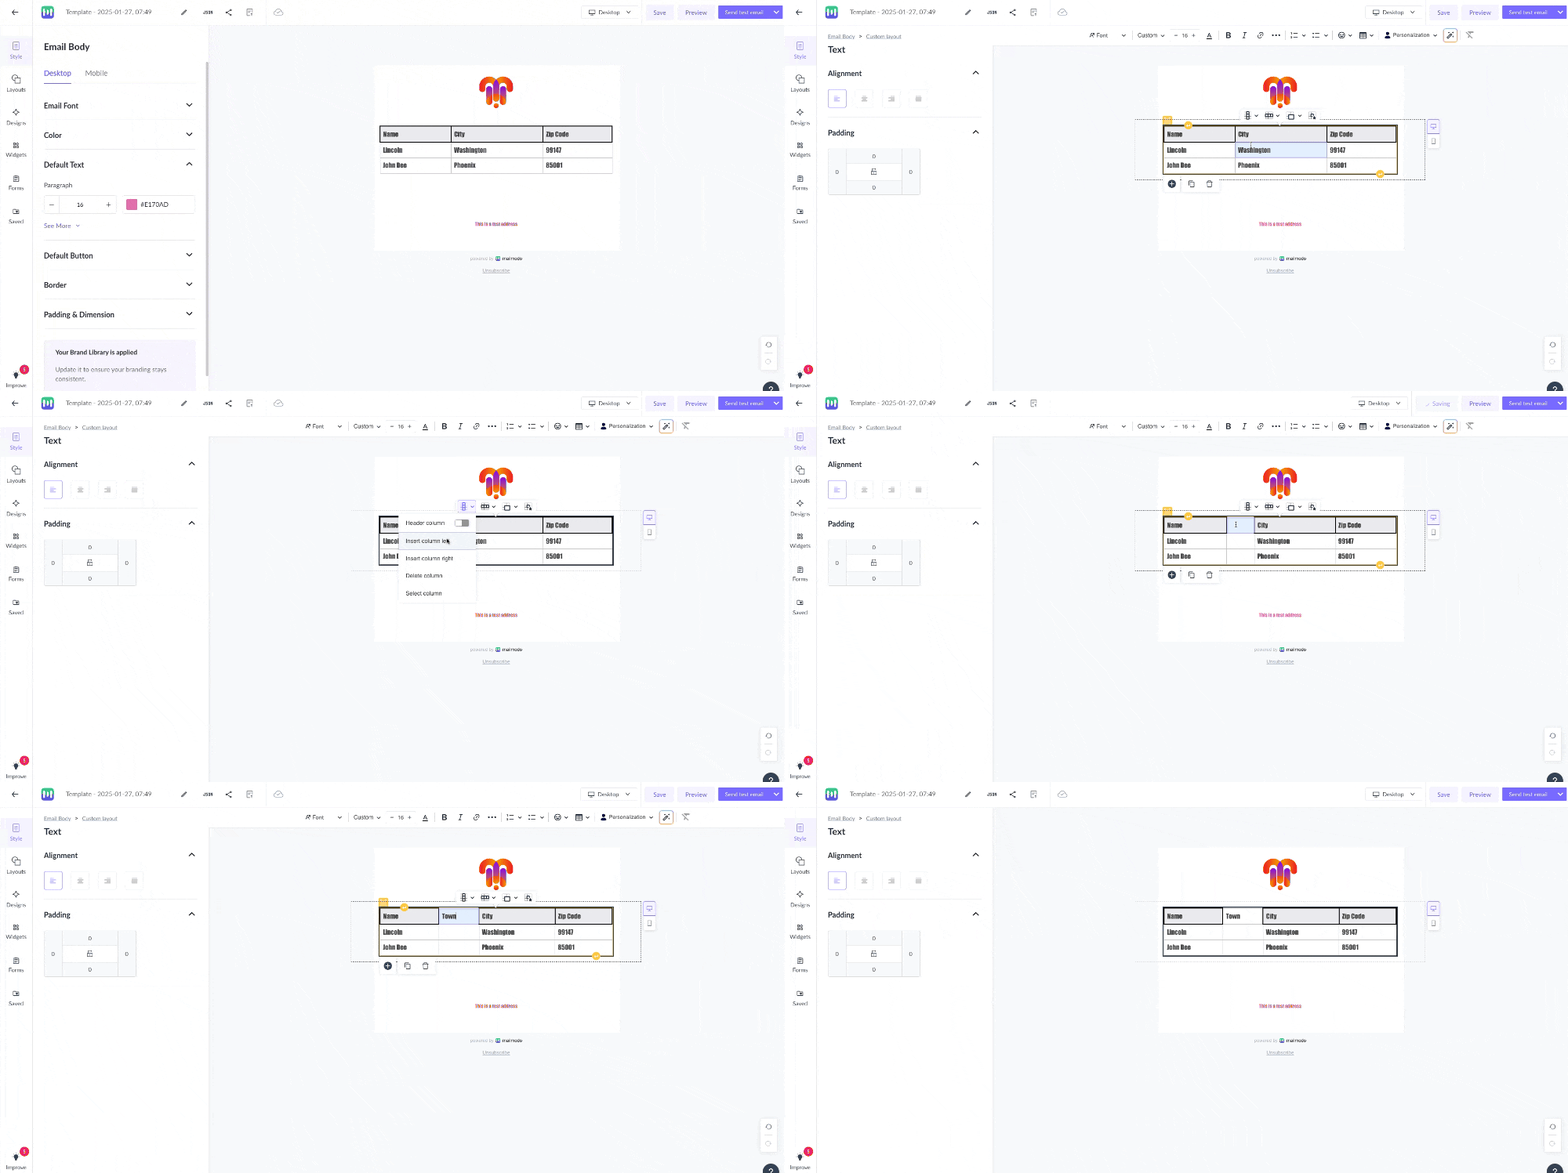
You can edit the text by clicking on the respective cell.
Step 2: You can add/delete rows and columns, merge cells, and style borders using the table options. You just need to click on the table and the options will appear.
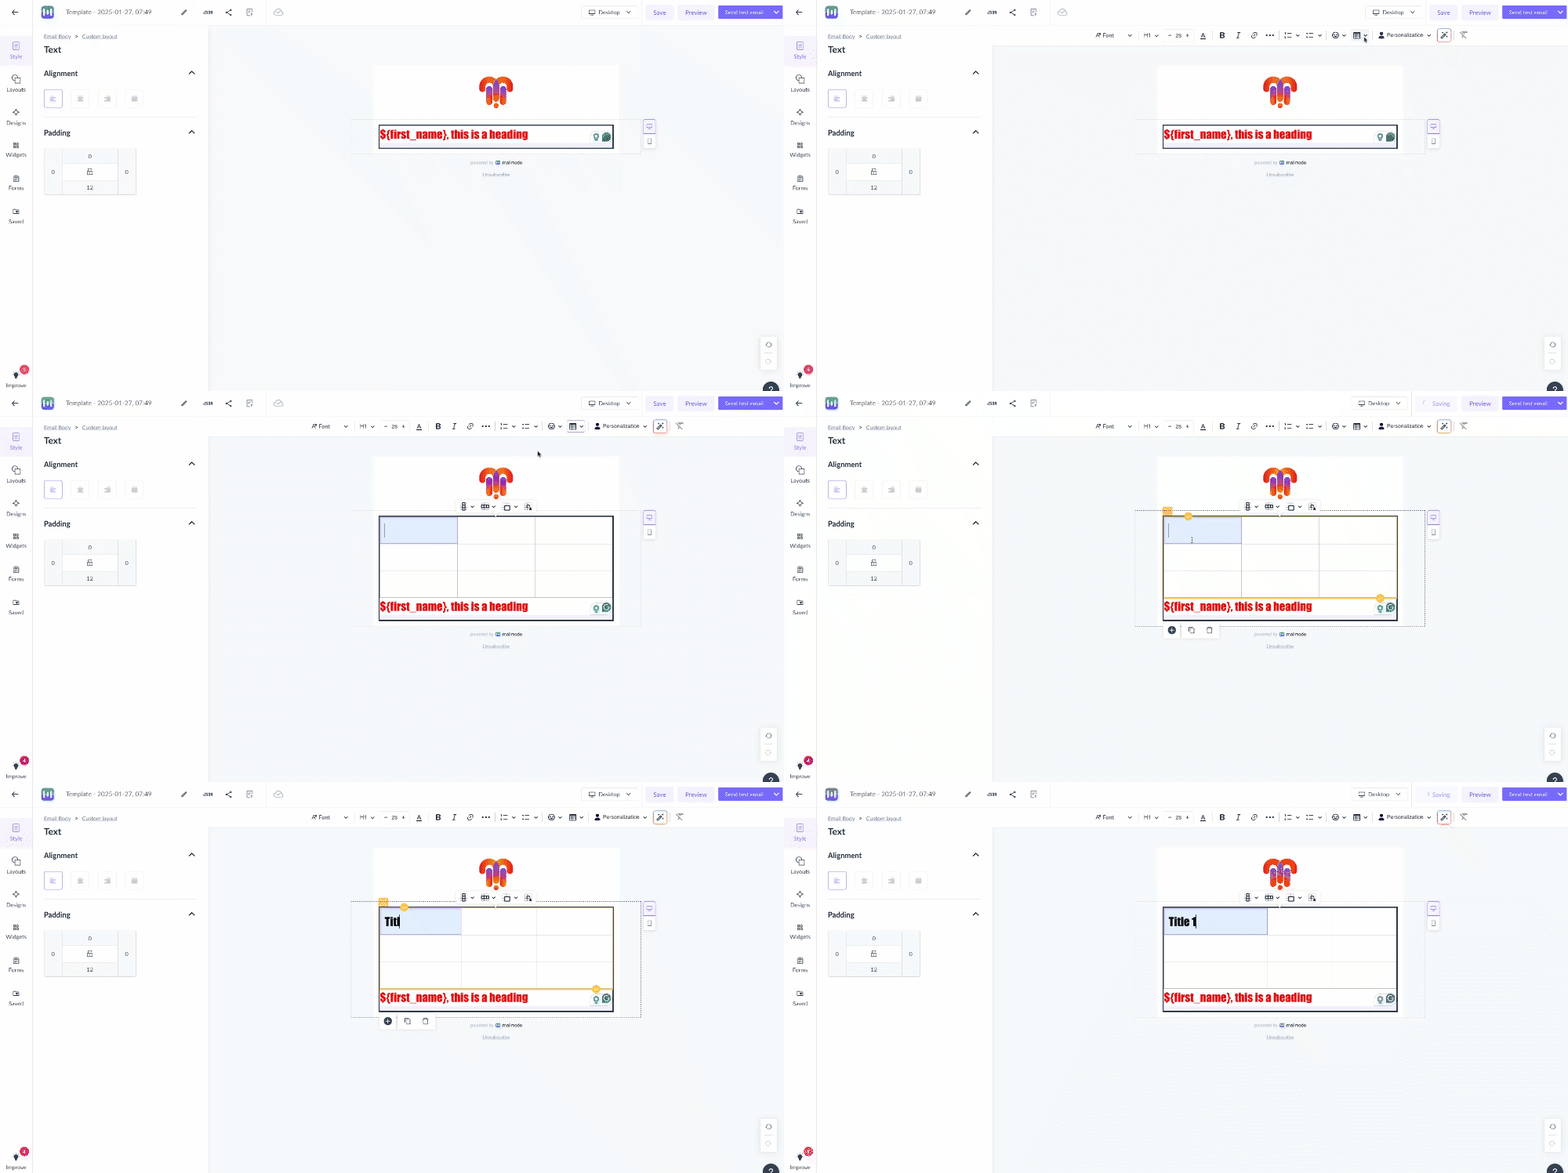
Alternatively, you can create a new table in the text edit options.
Step 1: Place your cursor where you want to insert the table in text.

Step 2: Click on table icon on upper bar.

Step 3: Create a table of desired size.
Start using tables in your emails! Try Now!
Use the search bar in our Help Center to find quick guides and walkthroughs. If you have any queries, reach out to us using Mailmodo via the chat icon at the bottom right corner of your screen. Or contact us at Mailmodo Support and share your thoughts at Mailmodo Product Feedback.
