Trigger Campaign in Mailmodo using Marketo
Last updated June 25, 2025
In this article we will see how to send trigger campaigns in Mailmodo from your Marketo CRM account.
How to create a trigger campaign in Mailmodo?
You can create a template on Mailmodo from Scratch using Create new template article.
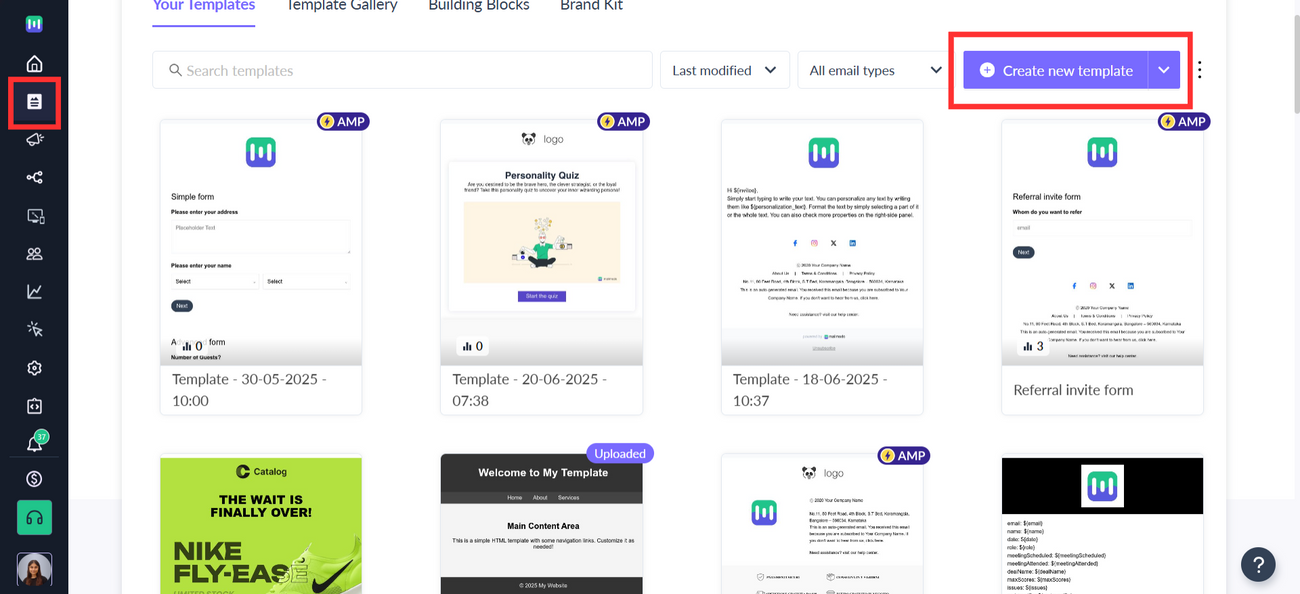
Step 1: Go to templates from the vertical menu on the left side. Click on create new template.
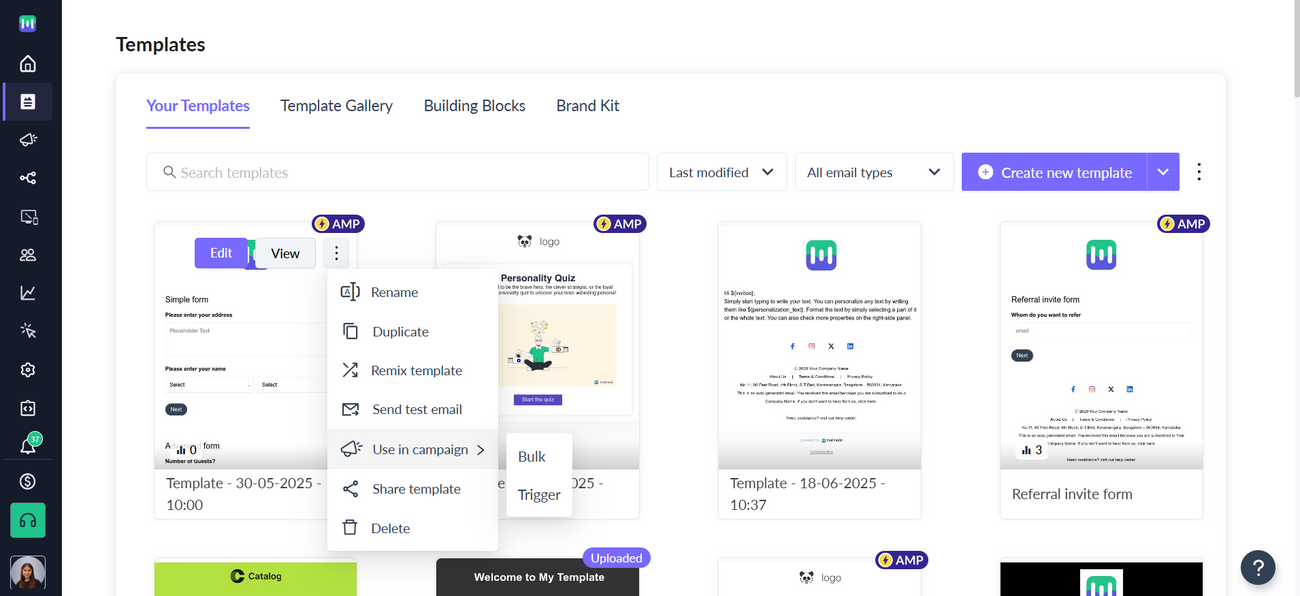
Step 2: Either select a blank template or a pre-existing template. You can create a new template using Create new template option or use the pre-existing one using Use in campaign -> Trigger.
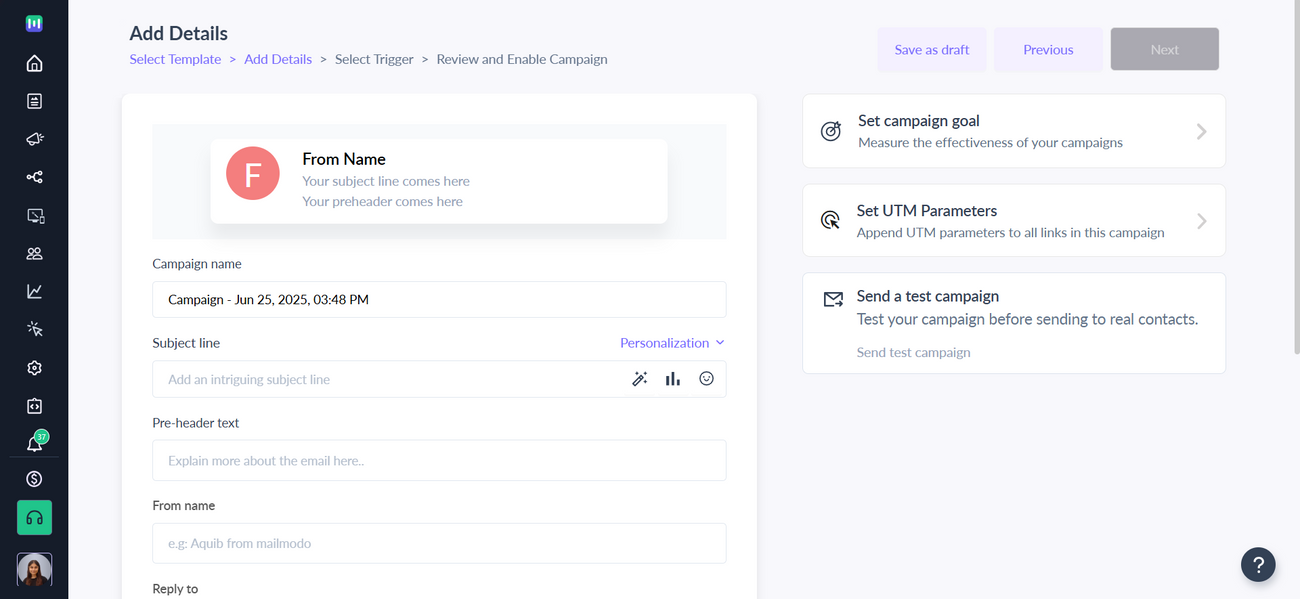
Step 3: Add Subject Line, Pre-header text, From name and Reply to email. Click on next.
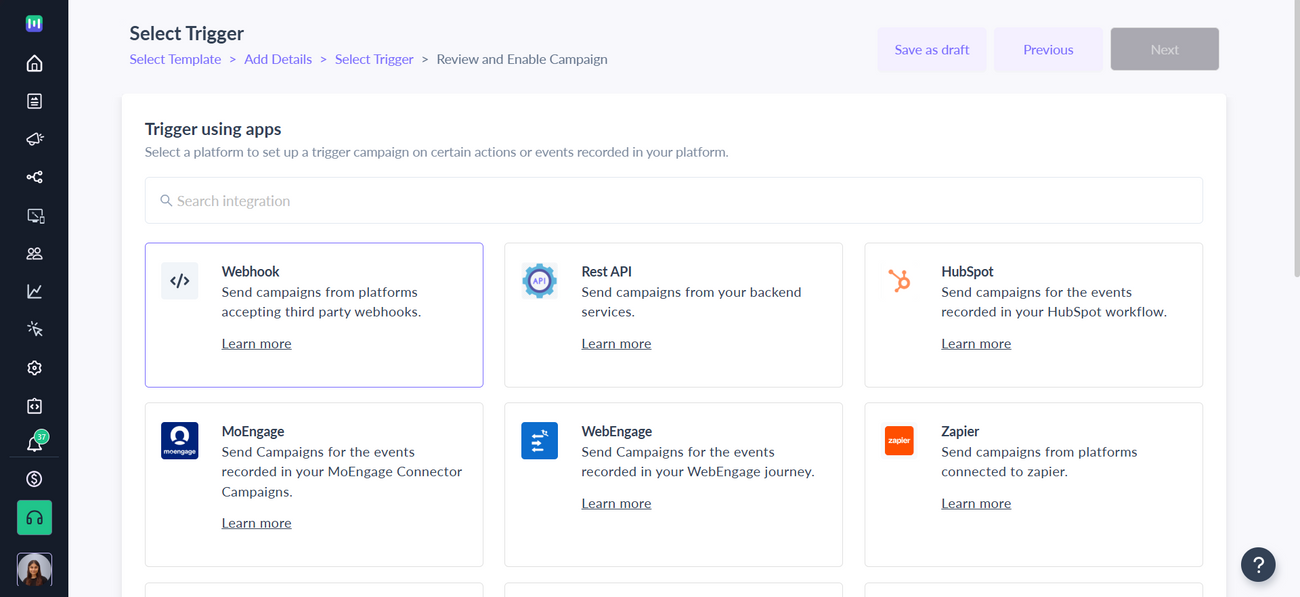
Step 4: You will be redirected to trigger on events. Select Webhook from the list of platforms. Click on next.
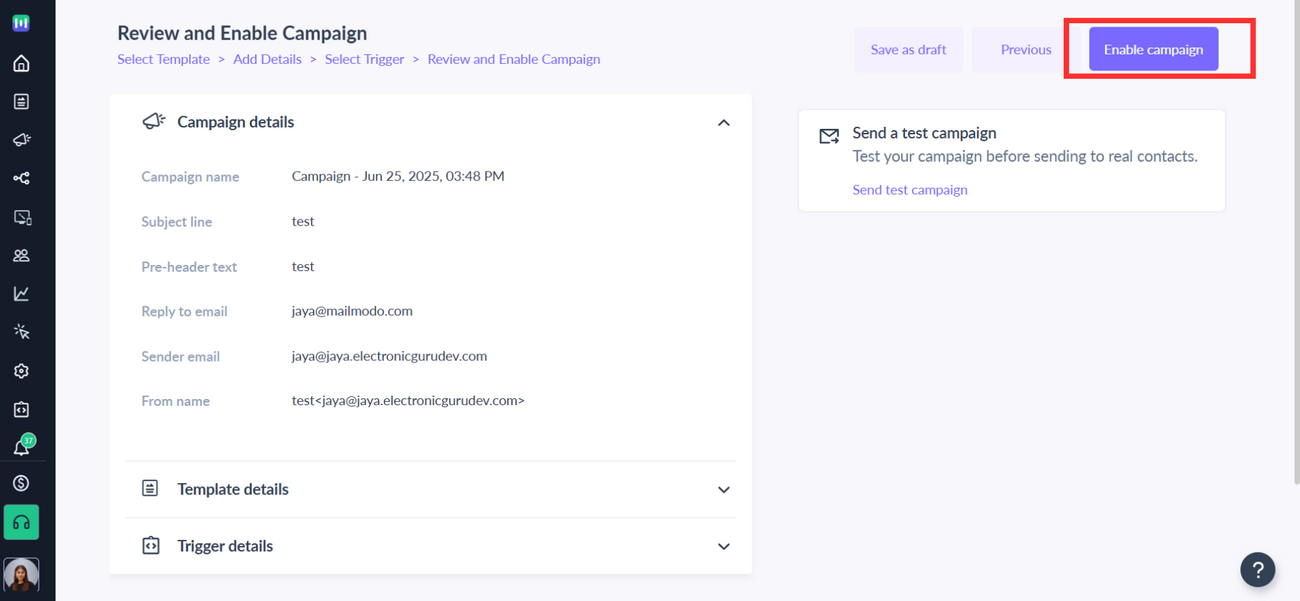
Step 5: Review and test your campaign. To test, click on send test campaign->enter email ID->send test email.
Once tested and reviewed, click on enable campaign.
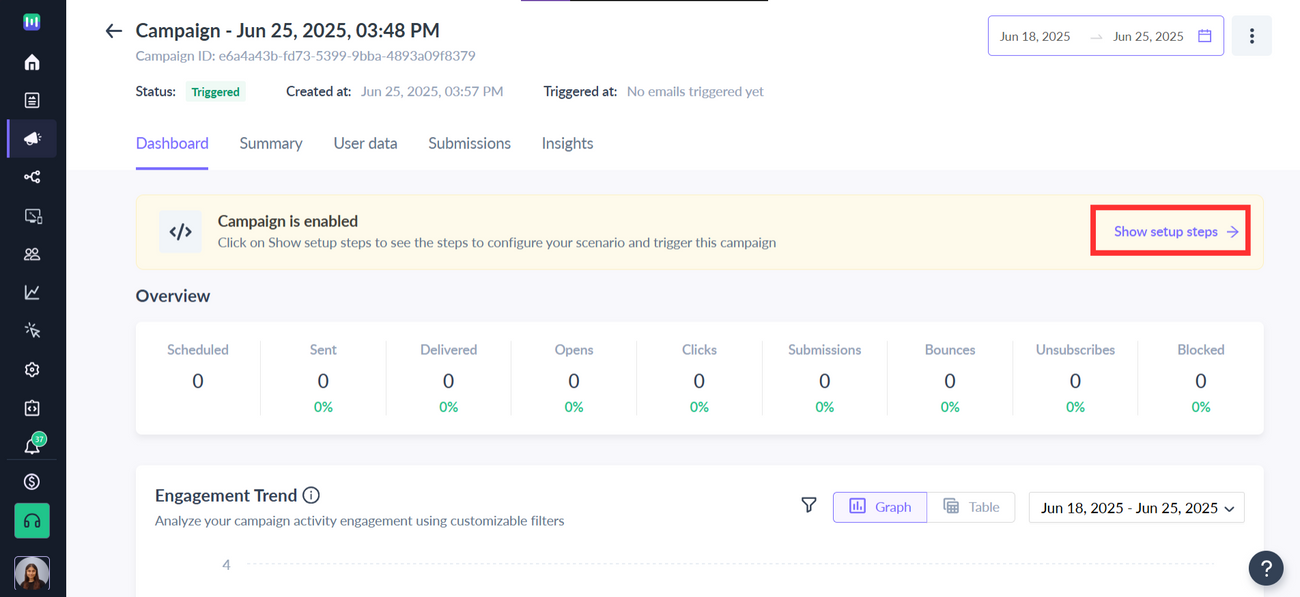
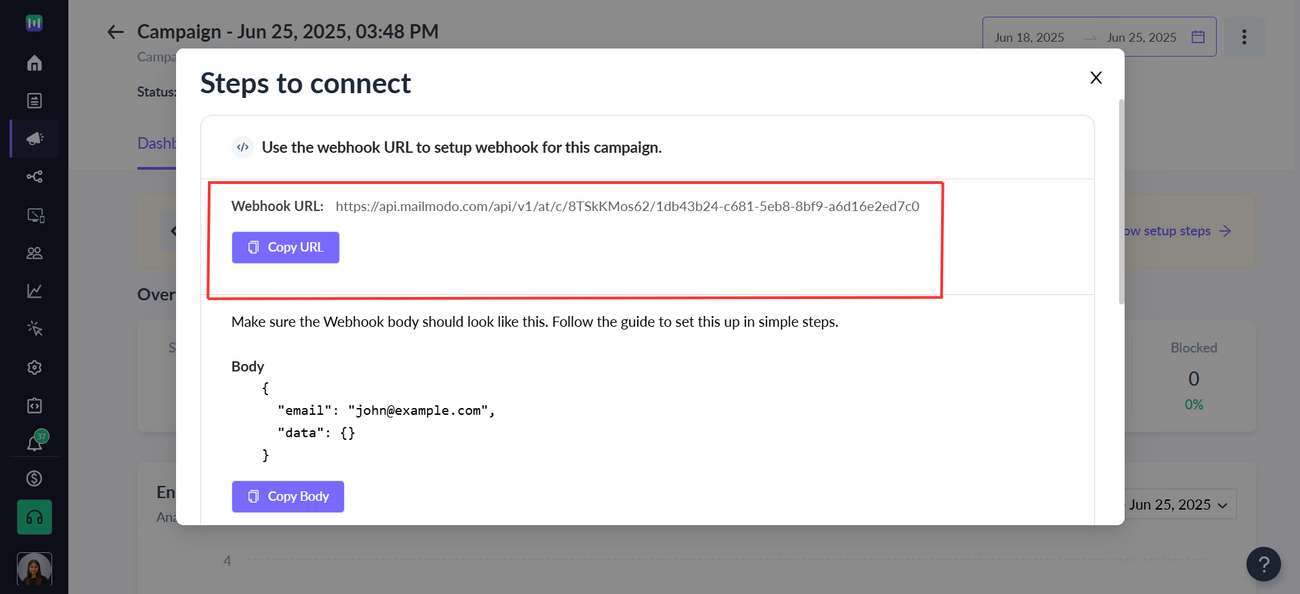
Step 6: You will be redirected to Campaign page. Select setup steps -> Click on Copy URL button. We will use this webhook url in Marketo CRM.
To access this page in future, go to trigger in the vertical menu (left side)->select the campaign-> setup steps
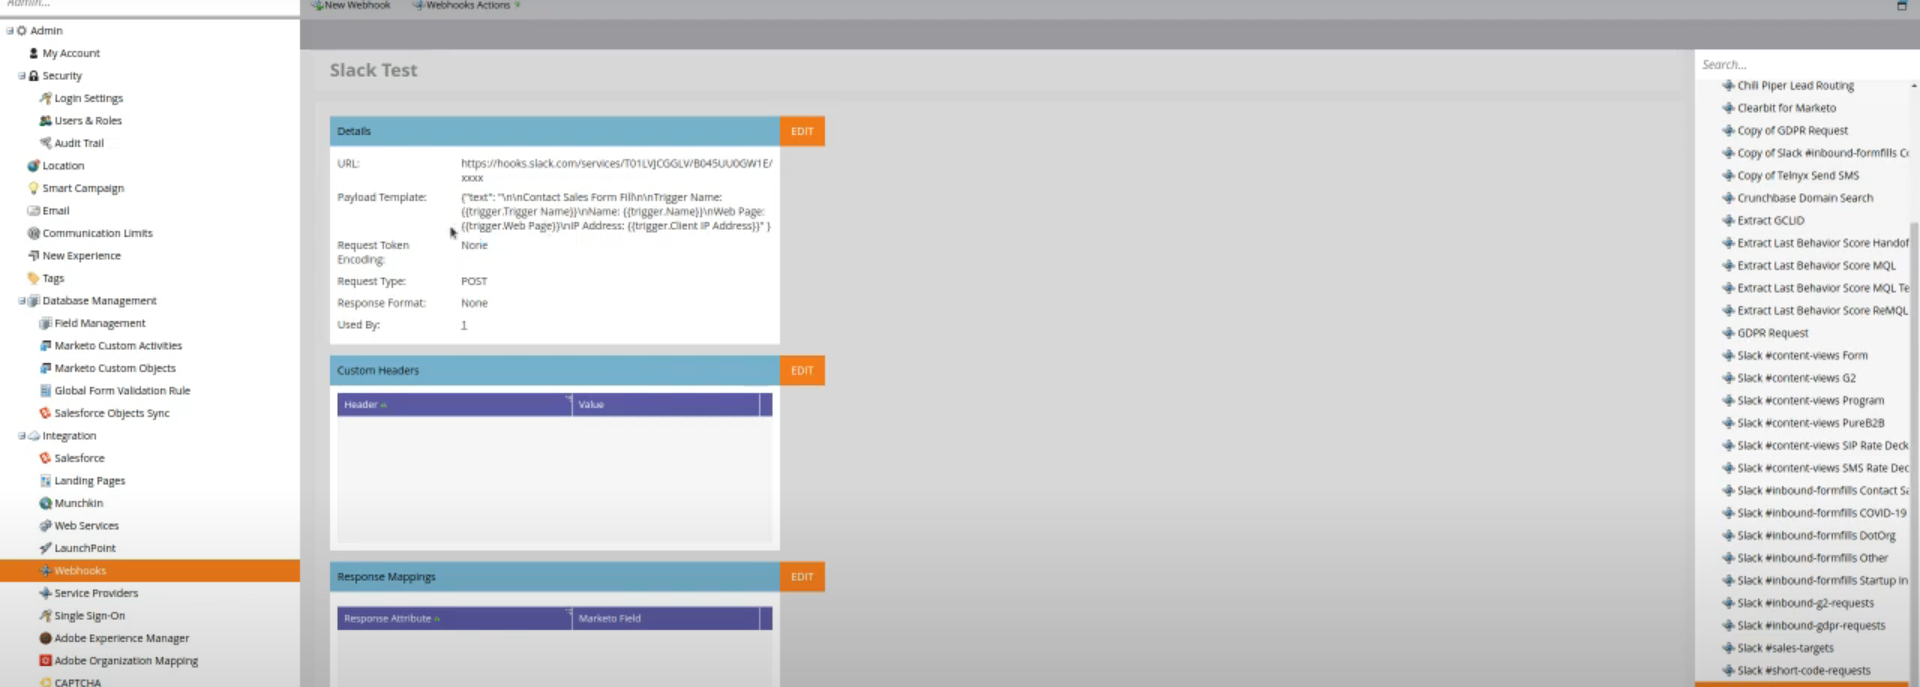
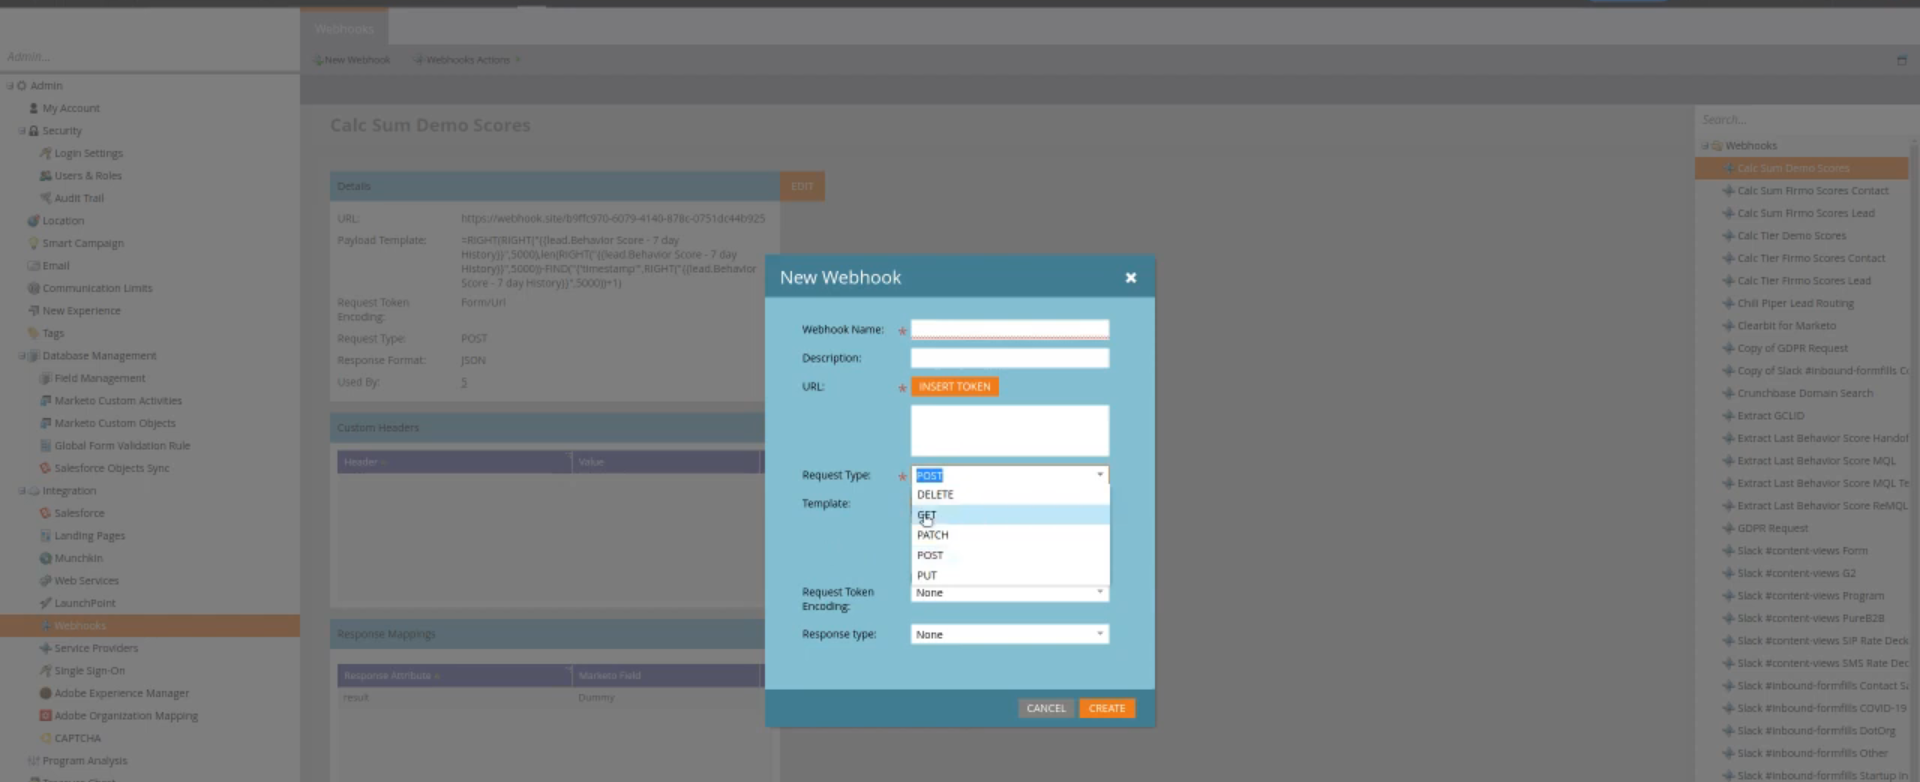
To configure the webhook details in Marketo follow below steps. Login to Marketo Account >> Navigate to Integrations >> Webhooks >> New Webhook
Now you can edit webhook details, just click on edit copy the webhook URL and Payload from the Mailmodo and paste it here.
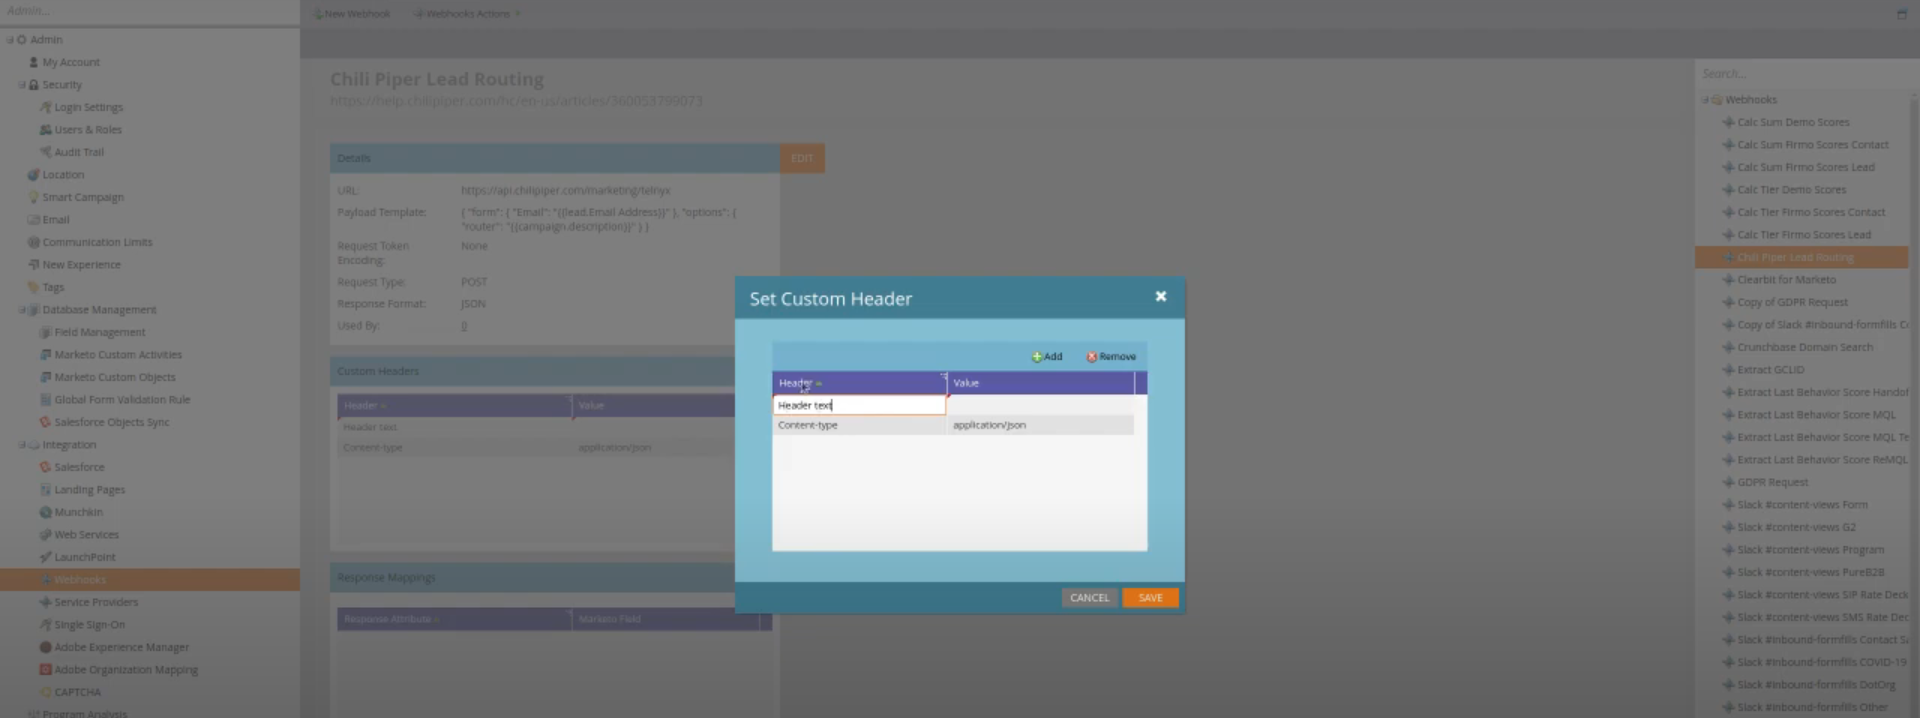
In a similar way, you can edit to headers as well and click on Save.
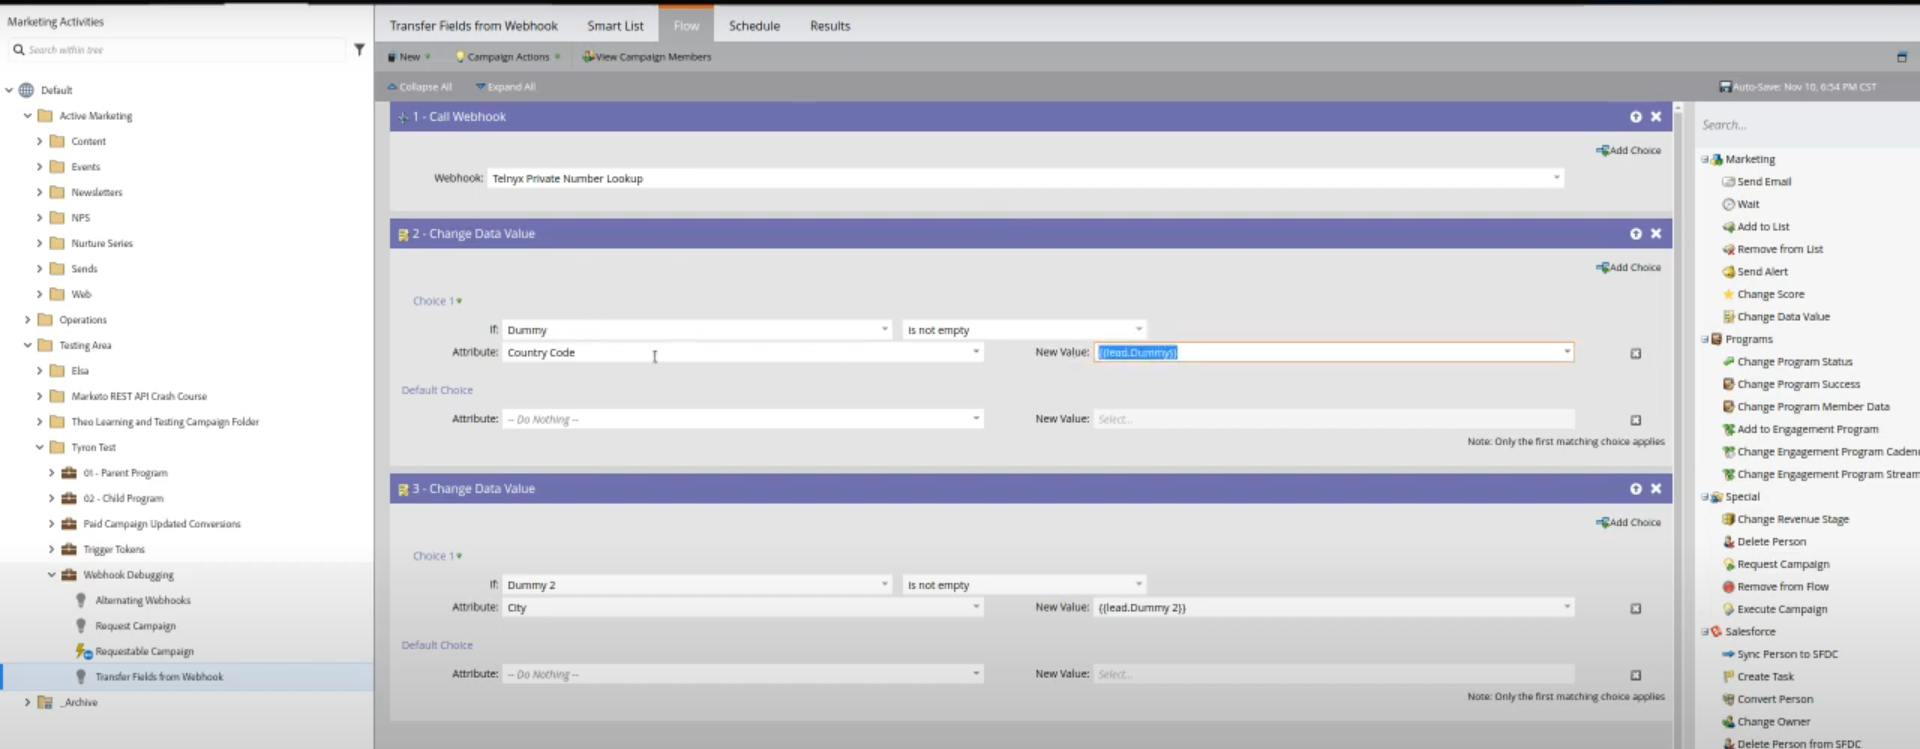
Navigate to Webhook Debugging >> Transfer Data Type >> Flow to map the required data field and configure with the required webhook.
If you need any further help related to Marketo - Mailmodo integration please feel free to reach out at support@mailmodo.com


