

Step by Step guide to Create and publish your first journey
Last updated April 16, 2024
Use the drag-and-drop functionality to add elements to the builder. Connect the components with links and complete the desired journey.
Let us build a simple journey that will send a welcome email to customers who have signed up for your newsletter and send a follow-up email a few hours after the welcome email.
1. Setting up the trigger
Setup the ‘Start’ by selecting the trigger. Defining the trigger would mean that you want to run the journey when the particular trigger condition is met.
In our example, let's select the trigger "Contact added to a list" as the trigger for this journey.
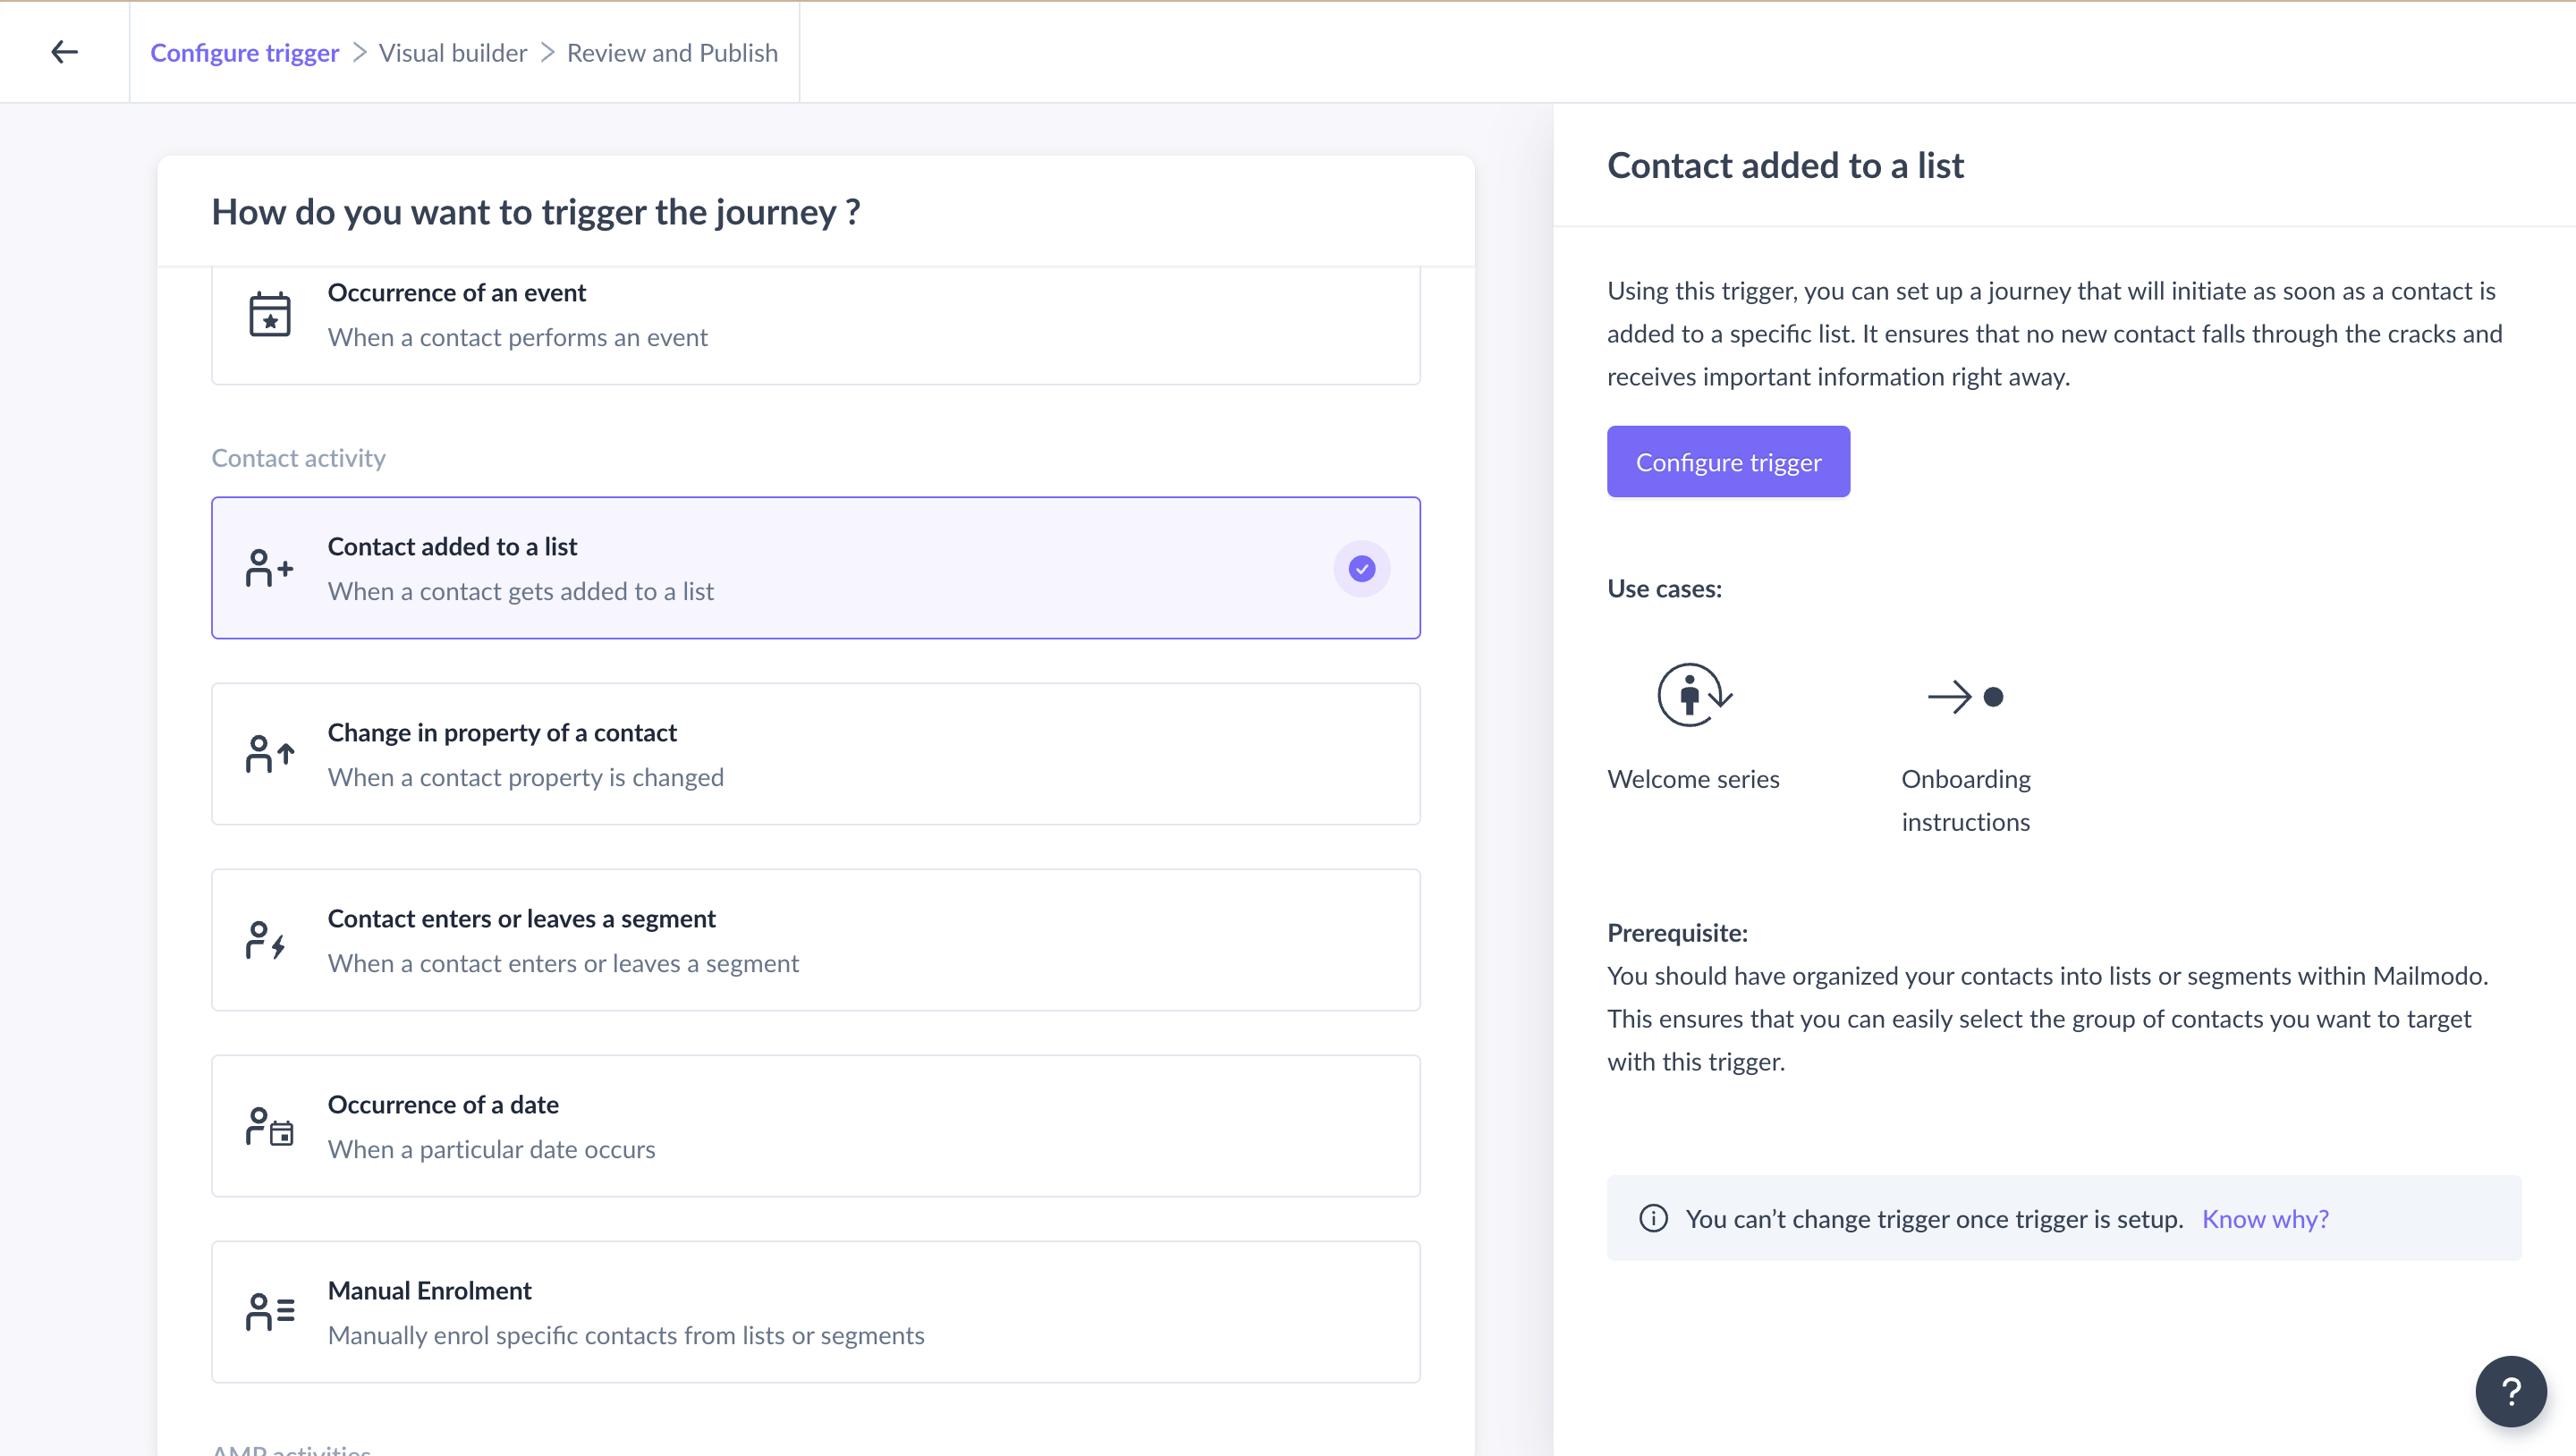
Learn more about all the triggers that can be used in the journey.
2. Configuring and Editing the trigger
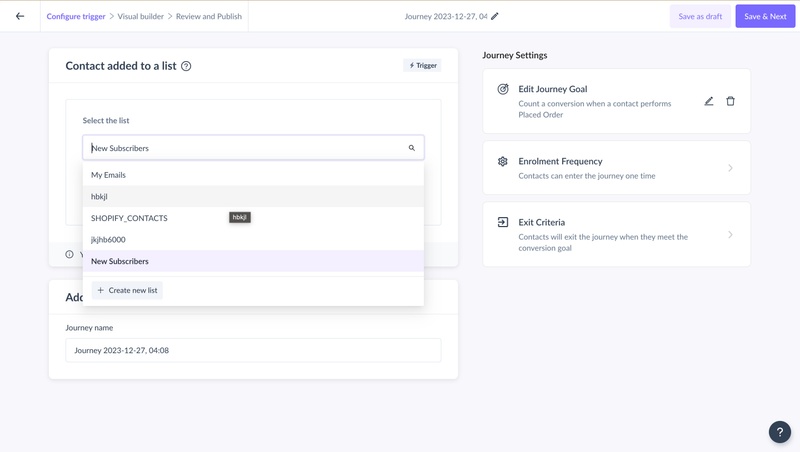
Once you have selected the trigger, set up the trigger by selecting the "New subscribers" list from the dropdown. Or create a new one by clicking the "Create a new list" button.
Click on the "Save & Next" button once you are satisfied with the configuration.
In case you want to edit the configuration, click on the "Edit trigger" text in the trigger block in the journey.
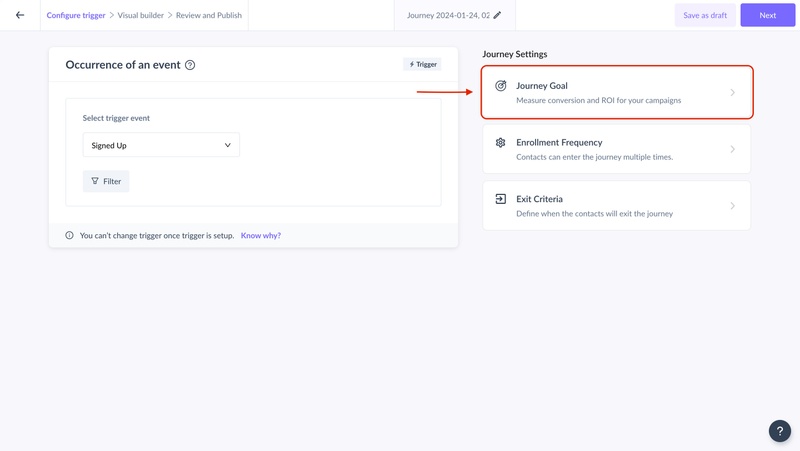
3. Settings of goals and exit criteria
Goal tracking is important to measure the ROI on your email marketing. It can help to assess how your journey campaigns performed over time.
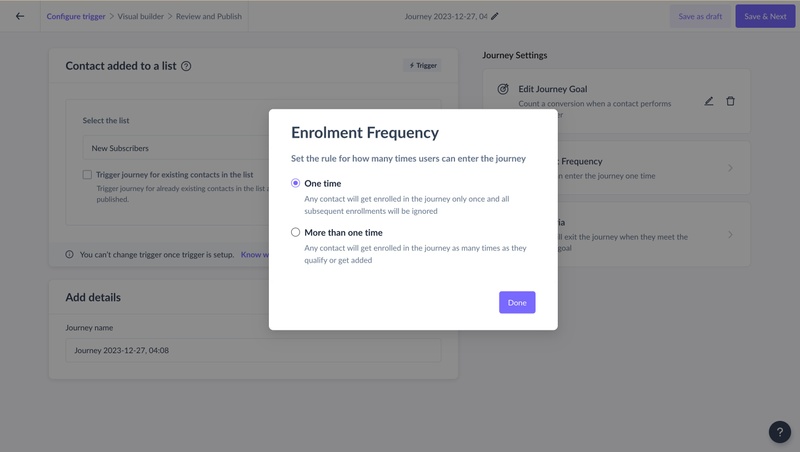
Contacts entry to the journey will be selected as Only once by default for all the journeys. You can select More than once and click Save for the contacts to be able to go through the journies multiple times.
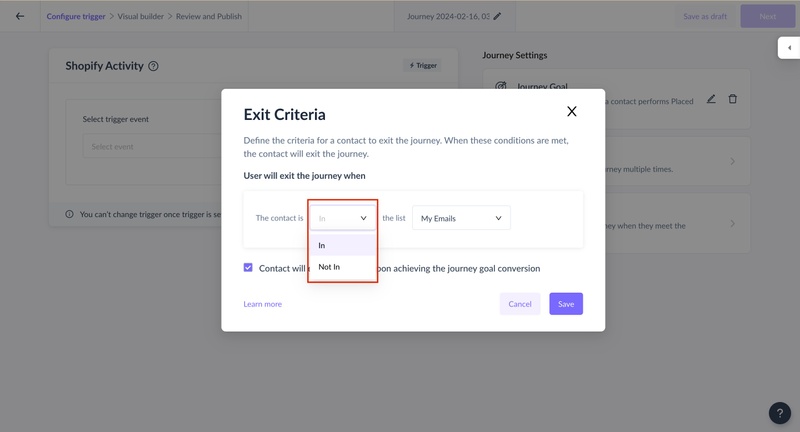
Set exit criteria to determine when a contact leaves a journey or if they should continue even when they match the journey conversion goal.
A contact will go through the journey until they match the exit criteria or meet the conversion goal (only if you have selected this option while setting up the exit criteria).
4. Adding and Editing ‘Actions’, ‘Delays’ & ‘Conditions’ in the builder
After setting up the trigger, the left panel would open up to select elements. The left consists of ‘Actions’, ‘Delays’, and ‘Conditions’. You can drag and drop the elements in the builder and set up their configuration in the right panel as done with the selected trigger.
You can learn about various components of the visual builder, here.

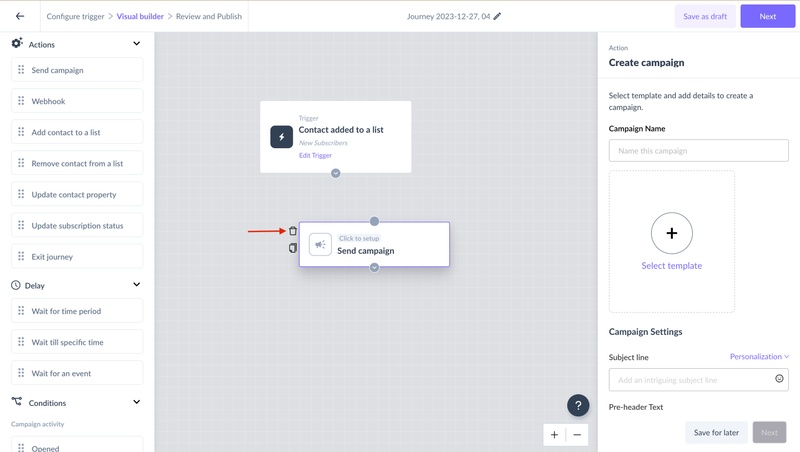
To send the welcome email to any new subscriber added to the list: You can drag and drop the " Send Campaign " block from the left and configure it. To configure, follow these steps:
- Add a campaign name
- Choose a template
- Add a subject line for your email
- Add email ID to which you want them to reply to
- Select the sender ID
- Click on the "Save" button
Connect the trigger link to the ‘send campaign’ card as a flow which would mean that - Send a campaign when a contact gets added to a list.
Learn more about all the action nodes that can be used in the journey.
To add a delay of five minutes:
- Drag and drop the "wait for time period" block on the builder
- Select "minutes" from the dropdown
- Enter the number of minutes to 5
- Click on save
Learn more about all the delay blocks that can be used in the journey.
To send a follow-up email:
You can drag and drop the "Send Campaign" block from the left and configure it. To configure, follow these steps:
- Add a campaign name
- Choose a template
- Add a subject line for your email
- Add email ID to which you want them to reply to
- Select the sender ID
- Click on the "Save" button
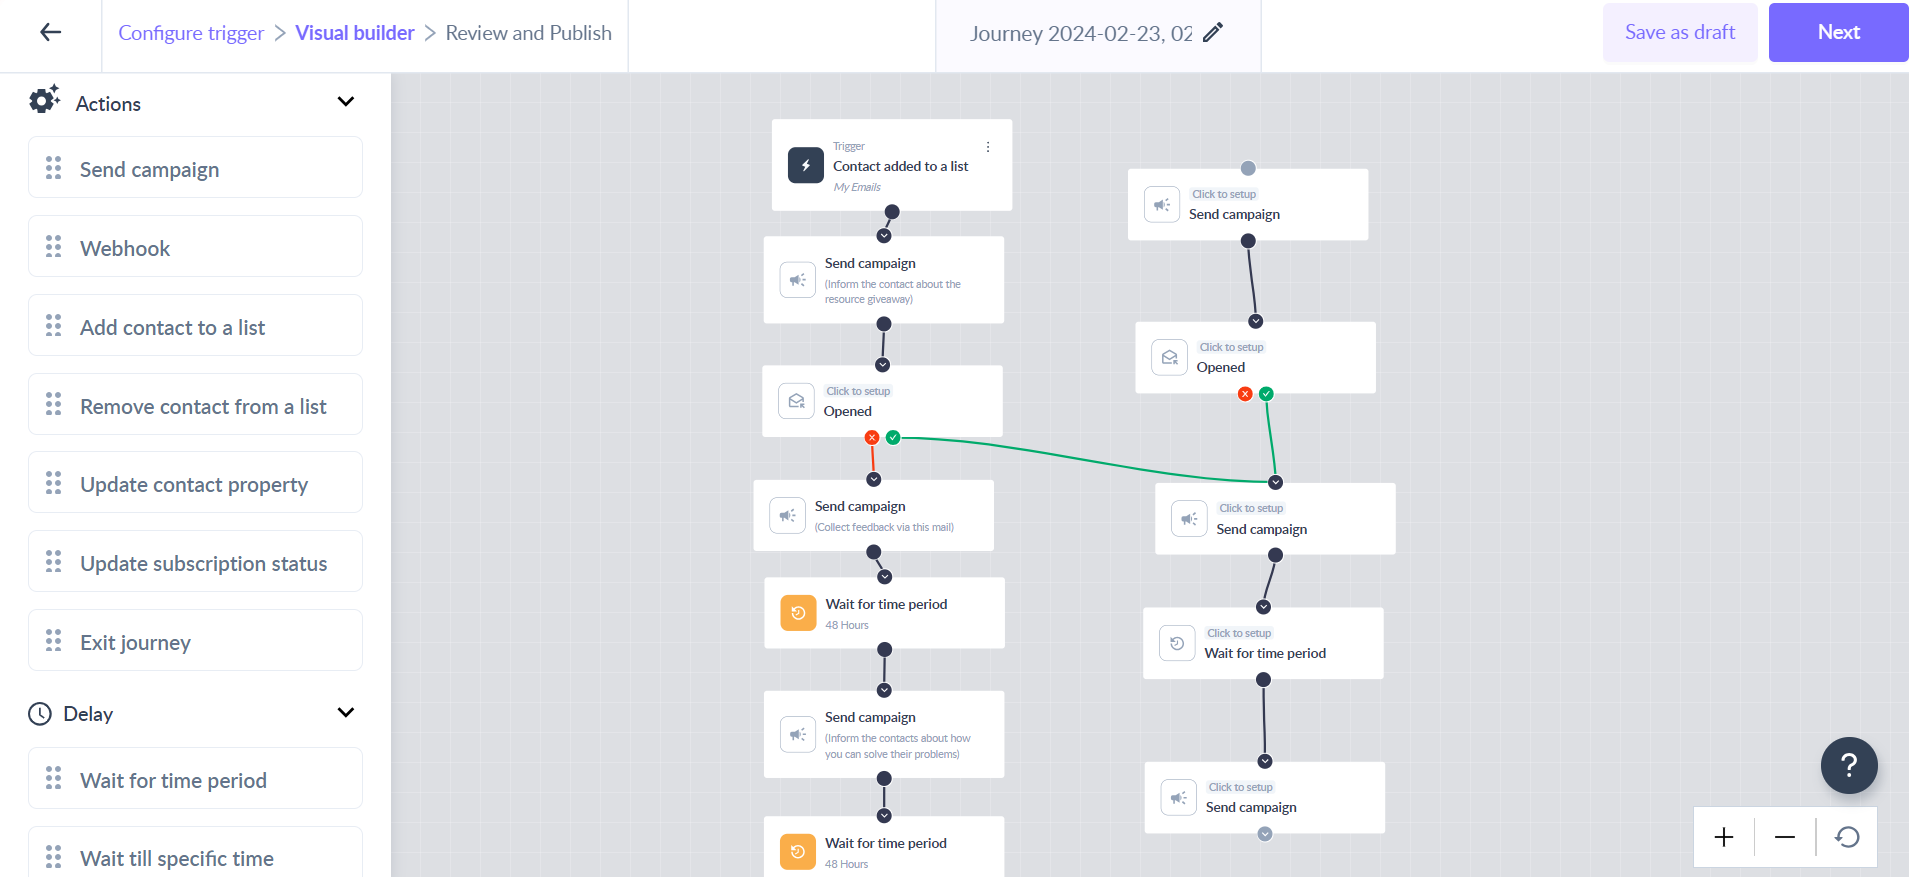
Instead of adding a new send campaign block, you can duplicate the previously created send campaign block by clicking on the copy icon.
Once you are done, add an "Exit journey" block.
You can also connect multiple input connections to a single action node within a journey. This will streamline journey management, reduce unnecessary duplication of the same flow, and allow for more sophisticated and efficient journey design.
5. Delete or duplicate an already configured card in the builder
Deleting a configured card would mean upon deletion, you would lose all the configurations set up in the right panel for that card. You can delete a block by hovering over the card and clicking on the ‘delete’ icon. To delete a non-configured card, hover on the card and click on the delete icon to remove it from the builder.
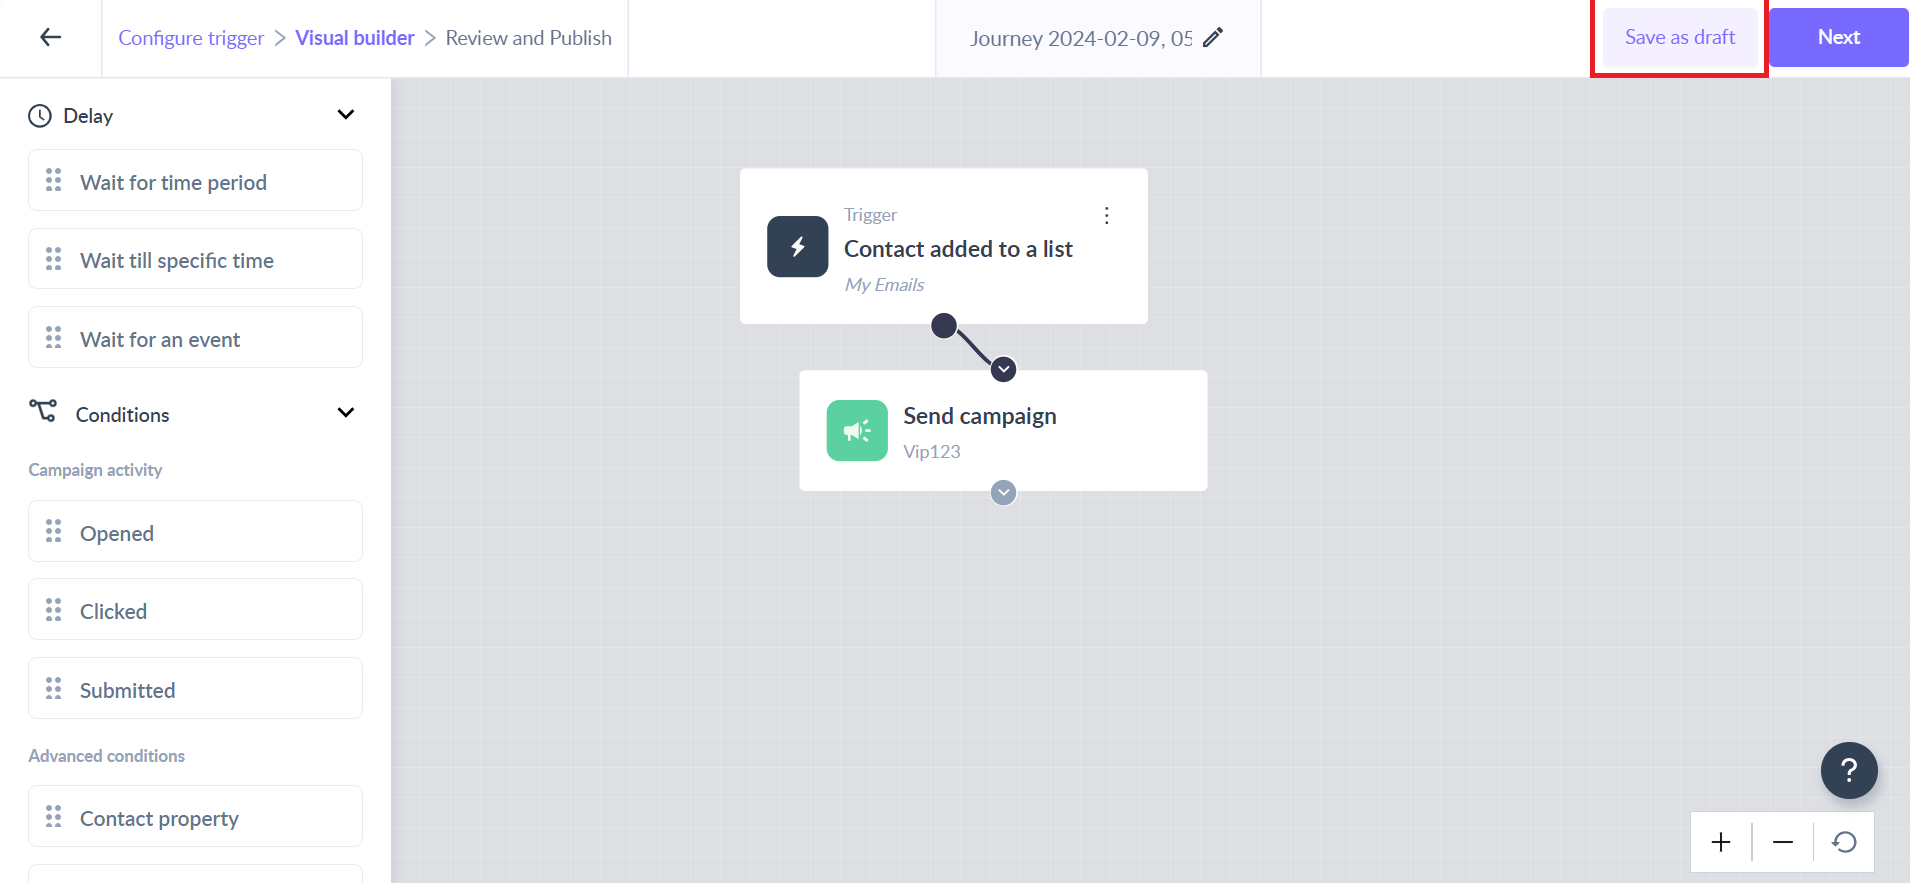
6. Saving the journey as a Draft
Click on the ‘Save as draft’ button to save the journey in draft mode.
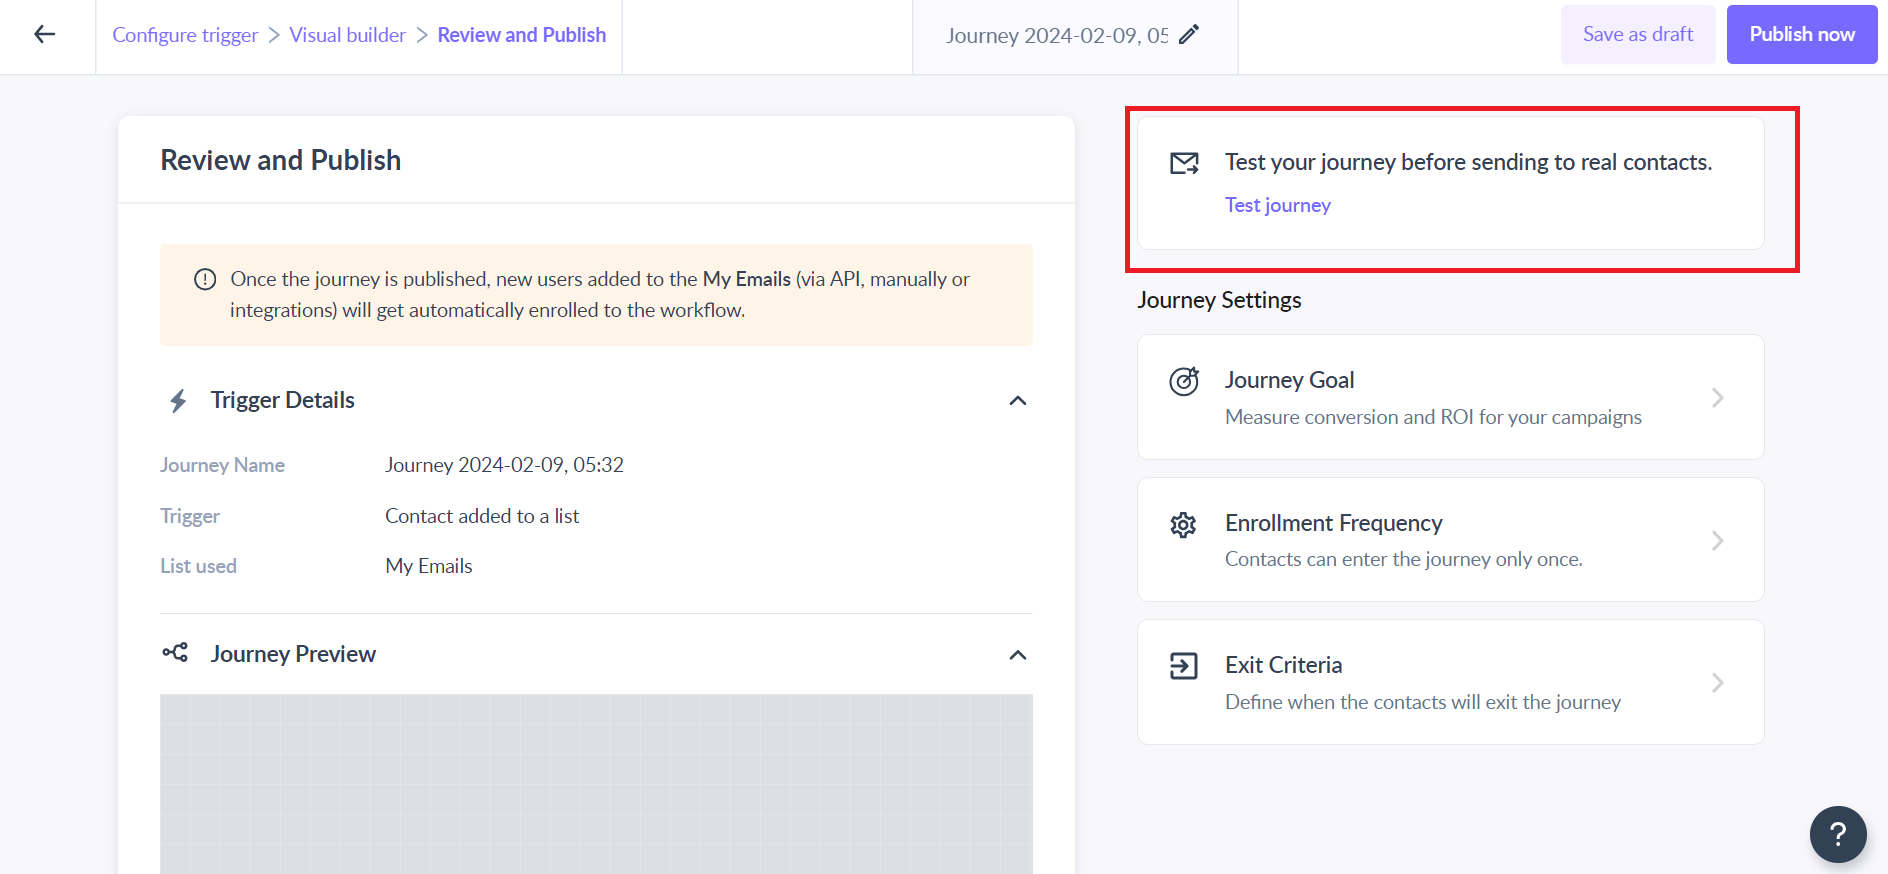
7: Review your journey and publish it
You can review all the important details of the journey at one glance, such as the list selected, nodes used, testing the journey, and so on to see if they match your requirements perfectly. Once you have reviewed the journey, click on the "Publish Now" button
The journey being published would mean that the journey is running for the existing contacts if selected and is waiting for the new contacts to get added to the list.
7. Testing the journey
While reviewing the journey, you can test it by clicking on the "Test Journey" button. You can enter an email (preferably yours) and simulate the journey for that email ID.
Please avoid entering your customer's email addresses as the journey actions will be executed for them.
The testing functionality in the journey helps you test all the ‘send campaign’ actions in the builder. Once you add the email you will get all the email campaigns in the ‘send campaign’ actions.
8. Pausing, editing, and canceling the journey
In the actions column click on the Pause button to pause the journey. Pausing the journey means that it would stop taking new contacts in the journey, but the already added contacts would complete the journey.
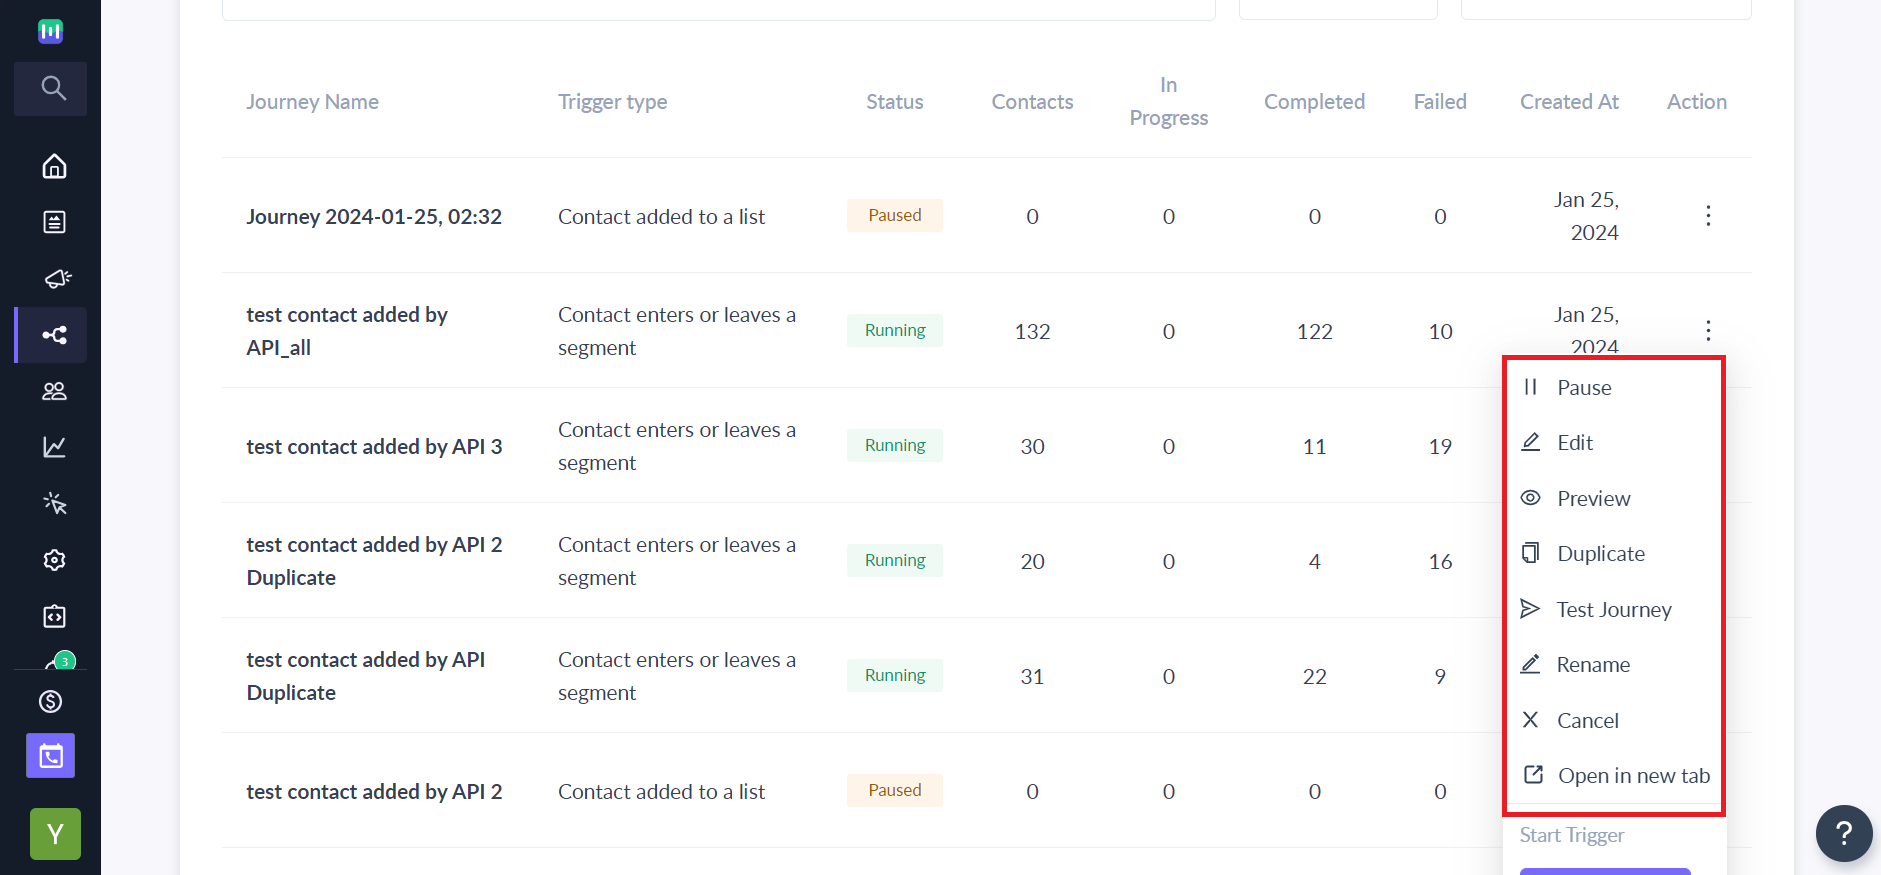
To edit the published journey, click on the pause button to pause the journey and click on the edit button to open the builder. Update the required changes and click on the Publish button to publish the journey.
Click on the cancel button in the actions column to cancel the journey. Canceling the journey means that it would permanently stop new contacts from entering the journey but the contacts already added to the journey would complete the journey.
FAQs:
- Can I connect two campaign blocks one after the other? No, You cannot connect two send campaign blocks back to back. You will see an "Invalid connection" error if you do this. You must add a delay block between these two campaign blocks.
- What does the "invalid connection" error mean? An invalid connection error means you are trying to configure the wrong blocks and connecting two blocks that should not connected one after the other. Try adding delay blocks between two blocks.
- All the nodes should be connected and configured to publish the journey