

Trigger Campaigns through MoEngage in Mailmodo
Last updated June 29, 2025
In this article we will see how to send transactional campaigns in Mailmodo from your MoEngage account.
How to create a transactional campaign in Mailmodo?
Step 1: Go to templates from the vertical menu on the left side. Click on create new template.

Step 2: Either select a blank template or a pre made Template Gallery

Step 3: Use the editor to edit the template. Save and rename the template upon completion. After saving, click on back arrow.

Step 5: You will be redirected to the home page. Click on Trigger under Campaigns from the vertical menu on the left. Next, click on Create trigger campaign.

Step 6: Select the template you saved before. Click on next.

Step 7: Add Subject Line, Pre-header text, From name and Reply to email. Click on next.

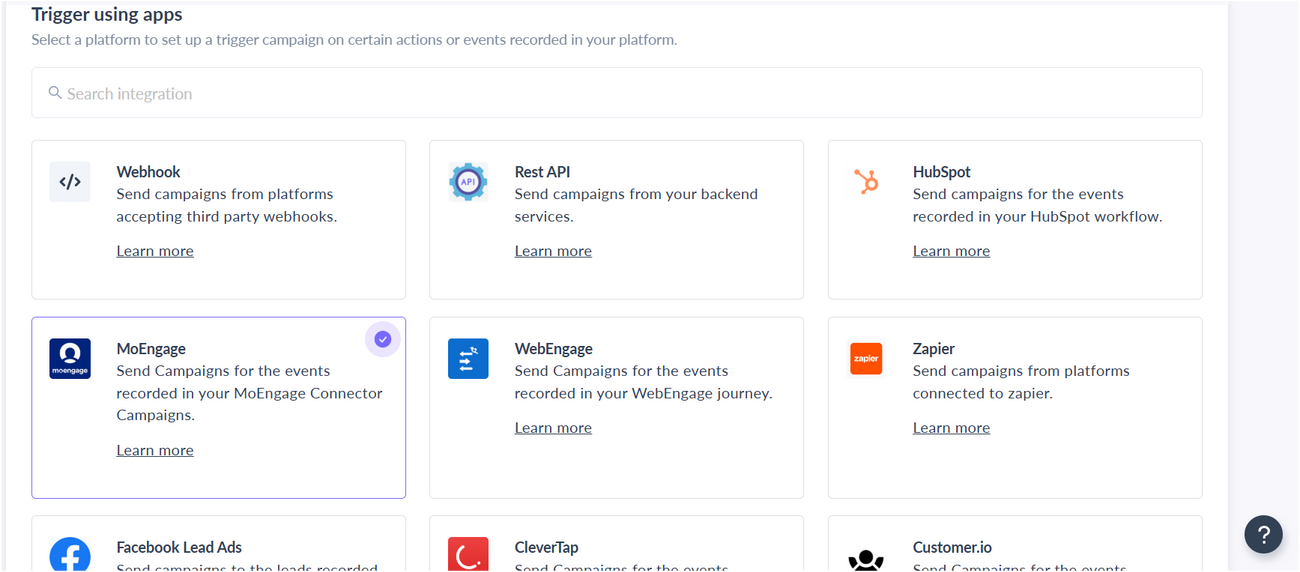
Step 8: You will be redirected to trigger on events. Select MoEngage from the list of platforms. Click on next.
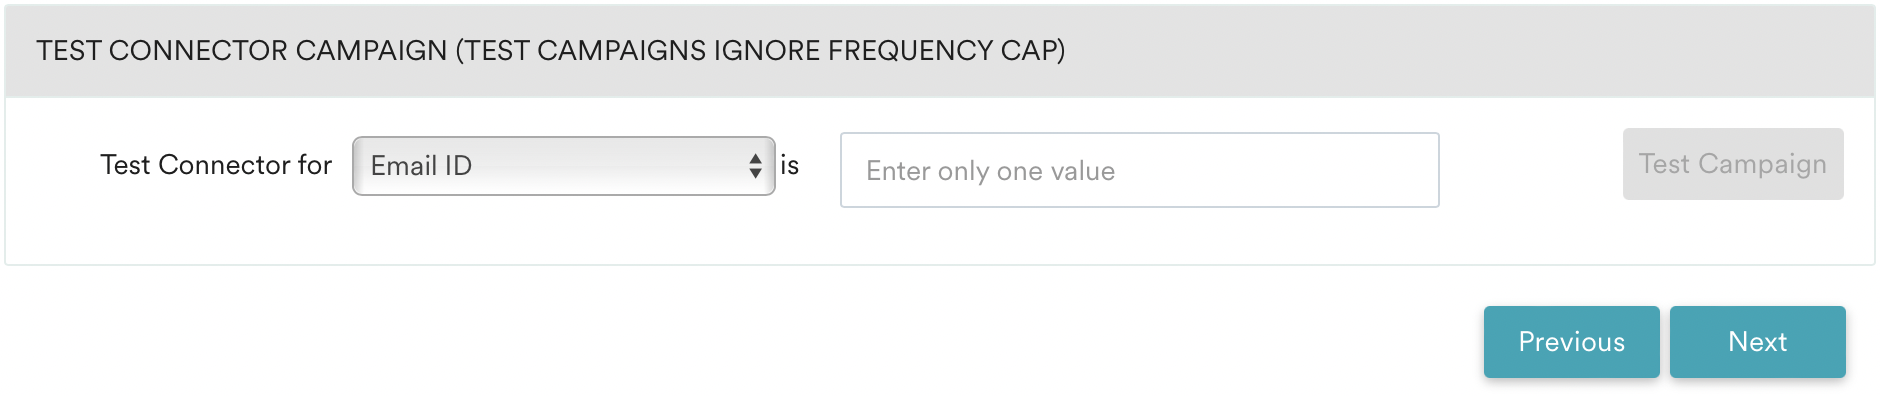
Step 9: Review and test your campaign. To test, click on send test campaign->enter email ID->send test email.
Once tested and reviewed, click on enable campaign.
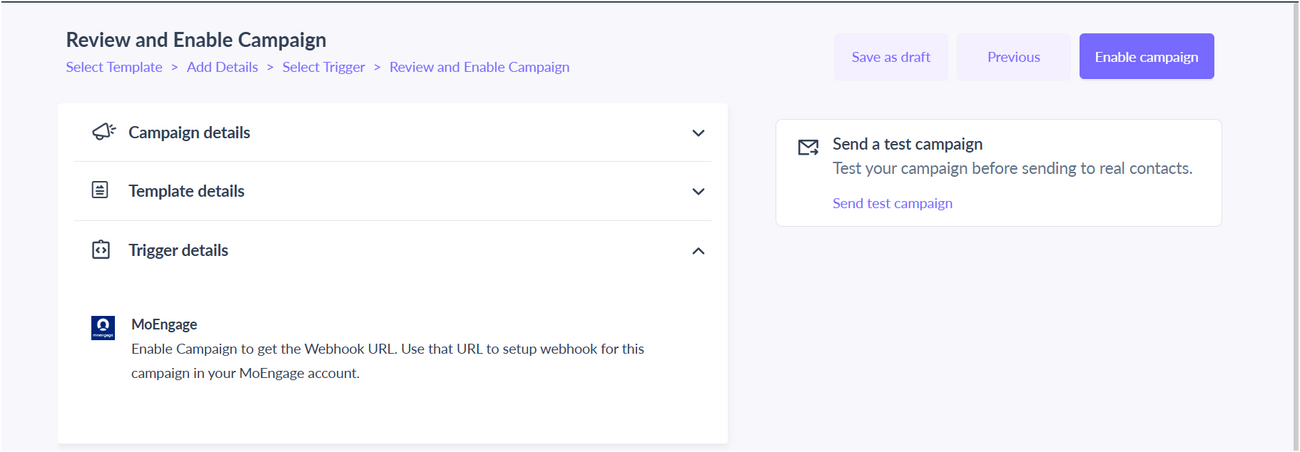
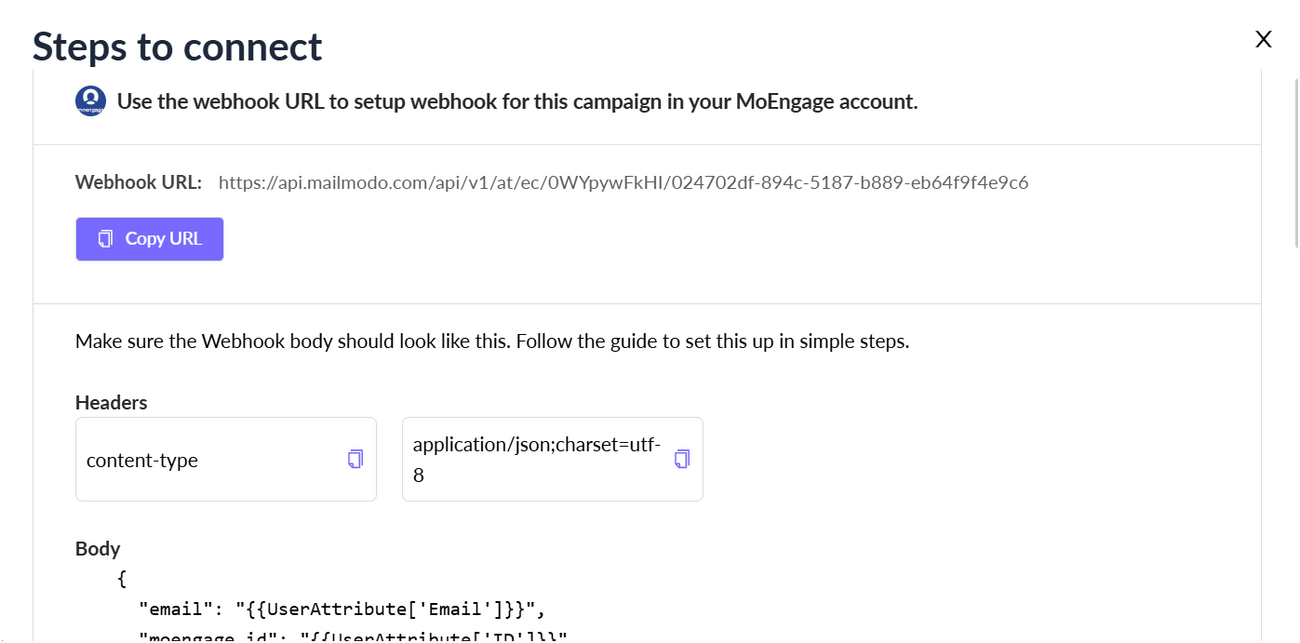
Step 10: You will be redirected to Trigger campaign section. Click on Copy URL button after selecting Show setup steps. We will use this webhook url in MoEngage.
To access this page in future, go to transactional in the vertical menu (left side)->select the campaign-> Show setup steps
MoEngage Setup
Step 1: In MoEngage Click Create New → Connector → Custom and select one-time, periodic, or event-triggered as per your requirement
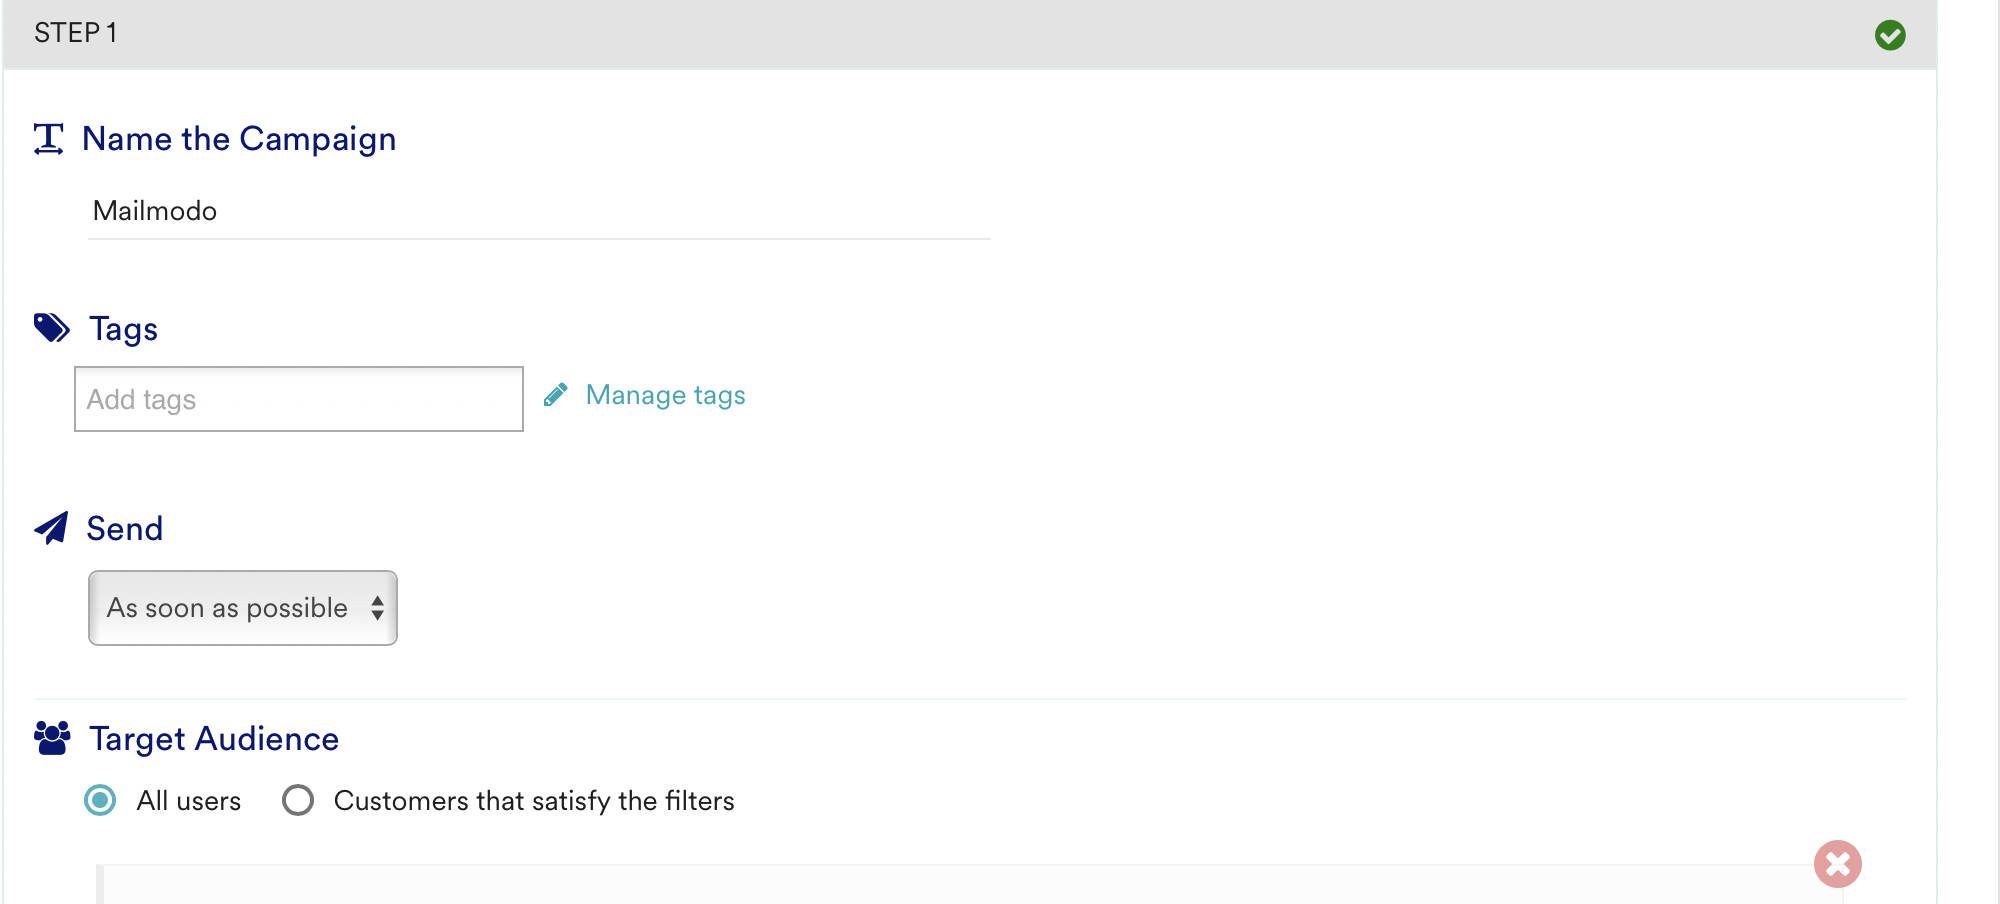
Step 2: Add Campaign Name and Tags and Select Audience as per your requirement and Click on Next.

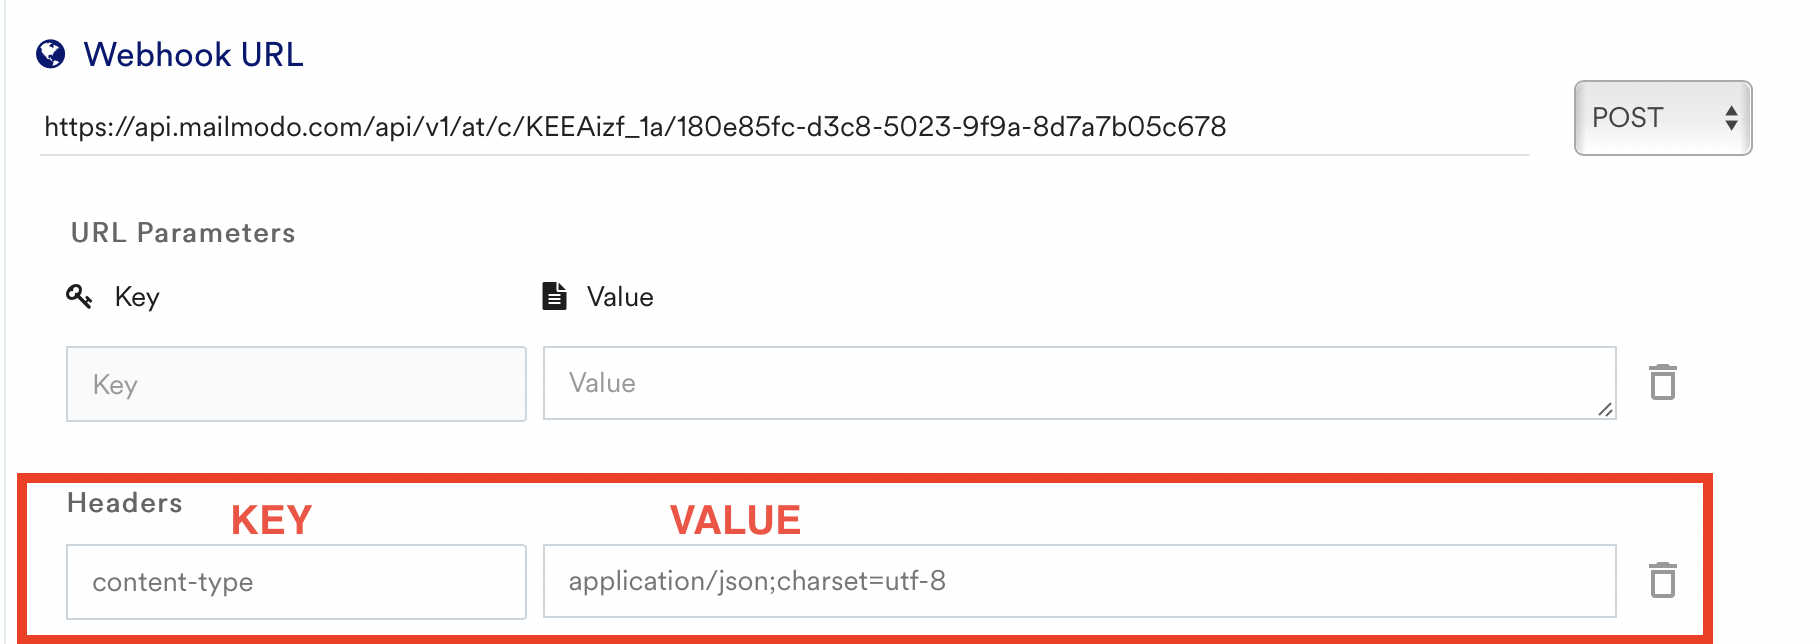
Step 3: Select POST under Method and from the Mailmodo Trigger Info section, copy and paste
- The Webhook URL from Mailmodo under Webhook URL in MoEngage
- The Headers from Mailmodo under Headers in MoEngage
- Key : content-type
- Value : application/json;charset=utf-8
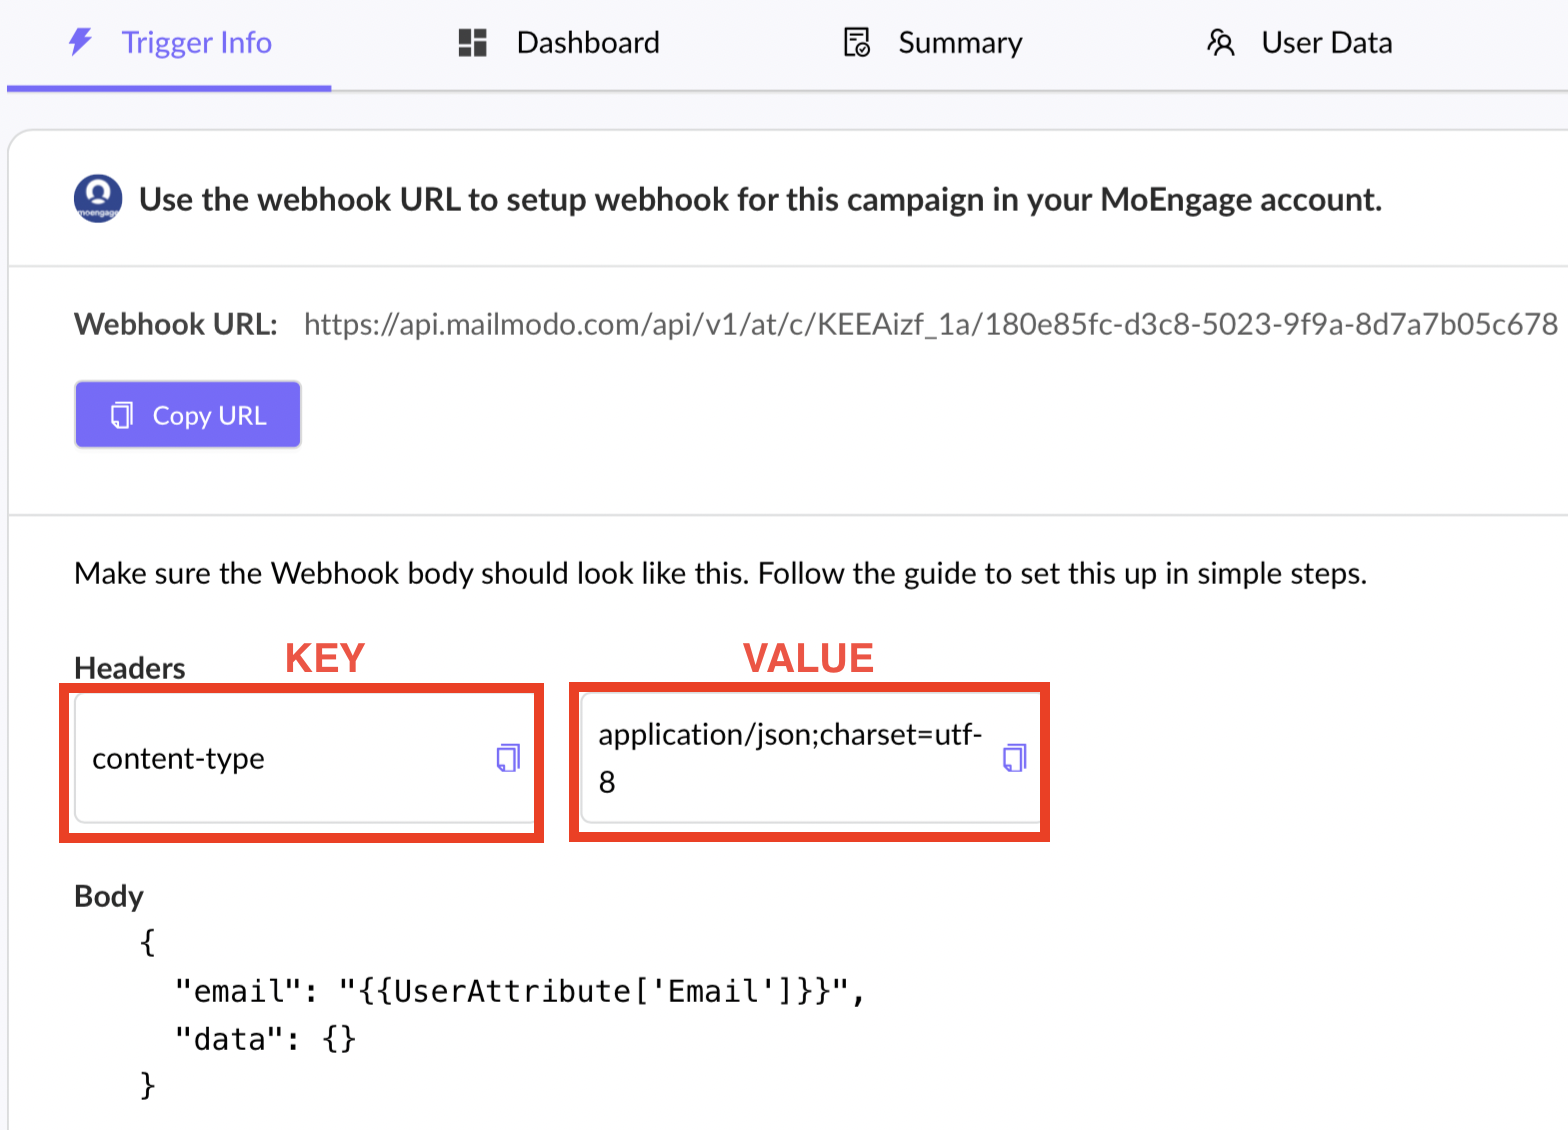
Step 4: In the Body Type, select Raw and Paste the body from the Mailmodo Trigger Info section.
If your Mailmodo template has personalization, then delete <Value for personalization parameter> in the MoEngage body, type @, and select the corresponding personalization attribute in MoEngage in the ensuing Connector Personalisation pop-up
Please choose fallback as per your requirement for when personlisation fails for the selected property in the above pop-up
For example, if your template has first_name then delete <Value for first_name>, type @, and select the First Name attribute in the ensuing pop-up.
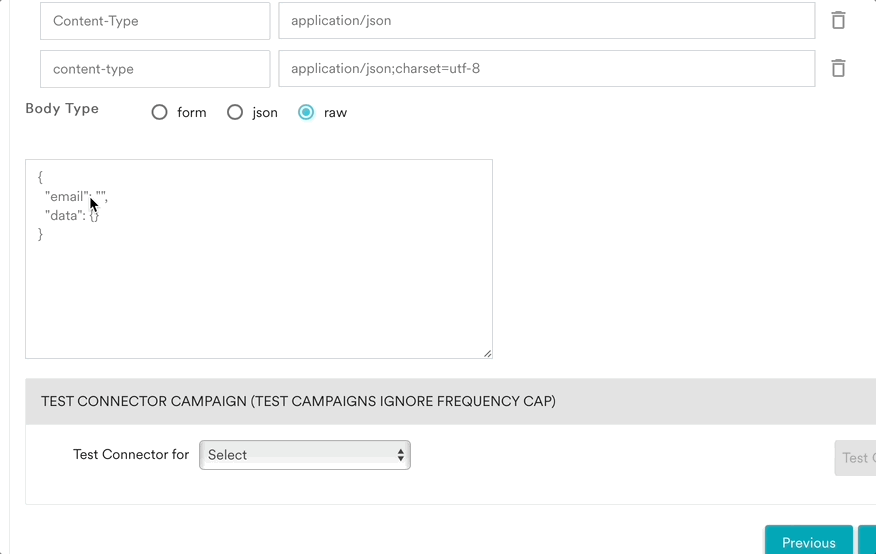
Body from Mailmodo
{ "email": "{{UserAttribute['Email']}}",
  "moengage_id": "{{UserAttribute['ID']}}",
  "data": {
    "first_name": "<Value for first_name>"
  }
}
Body type in MoEngage after personalization mapping
{ "email": "{{UserAttribute['Email']}}",
  "moengage_id": "{{UserAttribute['ID']}}",
  "data": {
    "first_name": "{{UserAttribute['First Name']}}"
  }
}
Both email and moengage_id (customer_id) are mapped by default in the Mailmodo body.
If you're storing email ID in any other attribute, delete the {{UserAttribute['Email']}} value, type @, and map it to that attribute.
In case you are manually mapping (instead of copying the body from Mailmodo campaign dashboard), map the moengage_id to the ID (a.k.a customer_id) attribute in MoEngage.
We need the moengage_id (known as ID or customer_id in MoEngage) of the email recipients mandatorily to push the campaign activity to MoEngage and hence it's configured in the body while setting up the MoEngage Transactional (Trigger) campaign. For more information, please refer to the article
Test the campaign using email ID and click on Next.
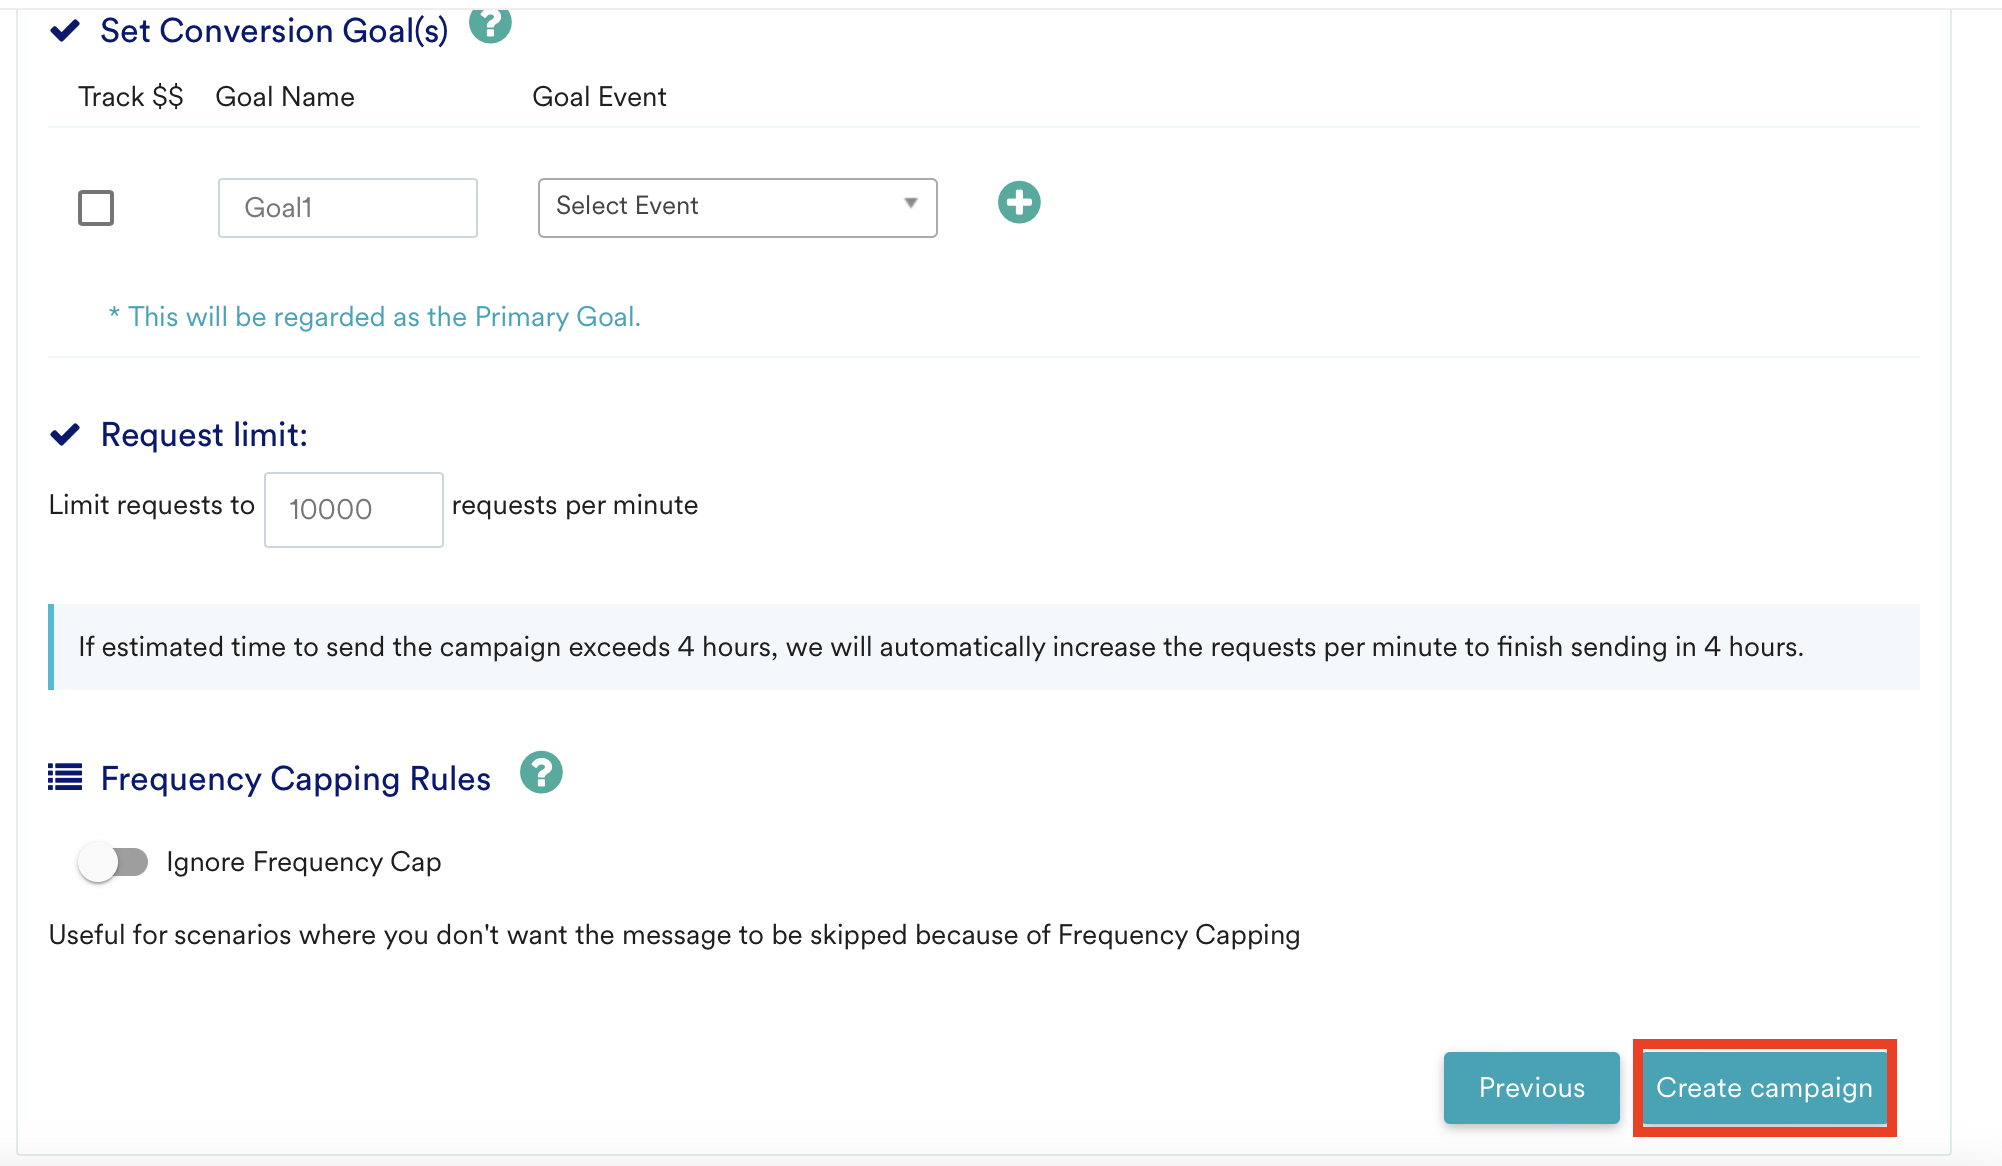
and Publish the campaign after entering requisite details like schedule date and time, conversion goals, delivery controls, etc in the Schedule and Goals step.
That's it! You have successfully created a trigger campaign!