Trigger Campaigns through CleverTap on Mailmodo
Last updated April 3, 2024
In this article we will explain how you can send triggered campaigns in Mailmodo from your CleverTap account.
Step by step guide to connect Clevertap with your Campaign
Step 1: Create the template in the template section.
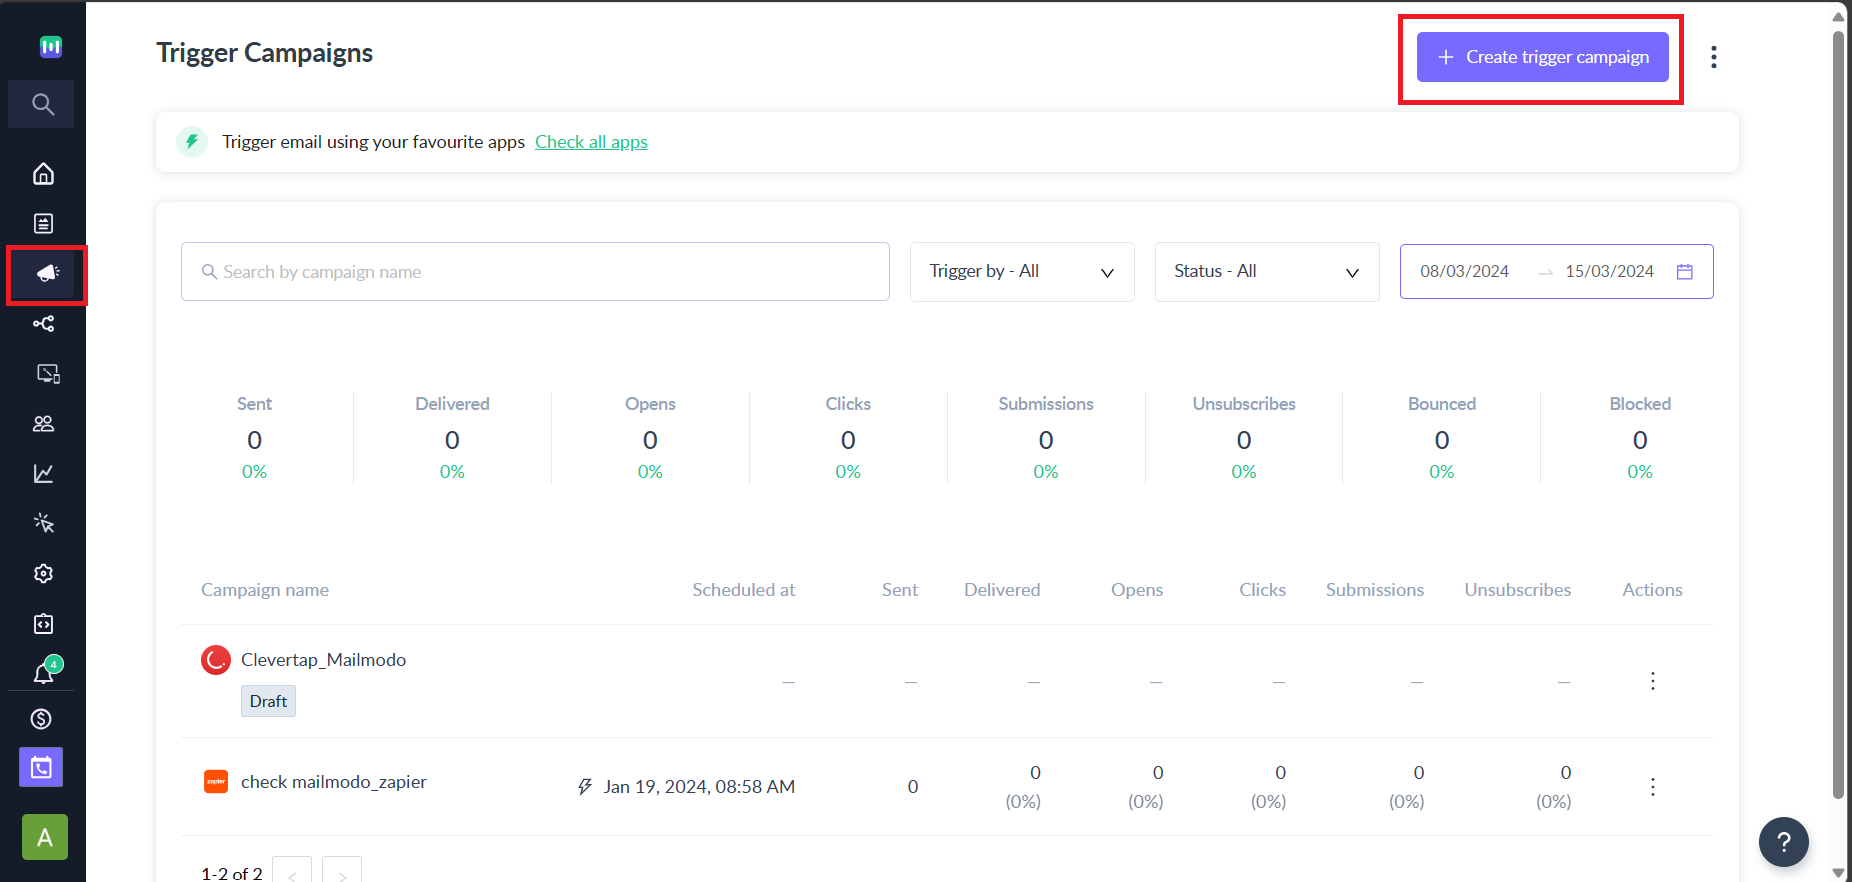
Step 2: Navigate to the Trigger under Campaigns and click on 'Create trigger campaign' to create the campaign.
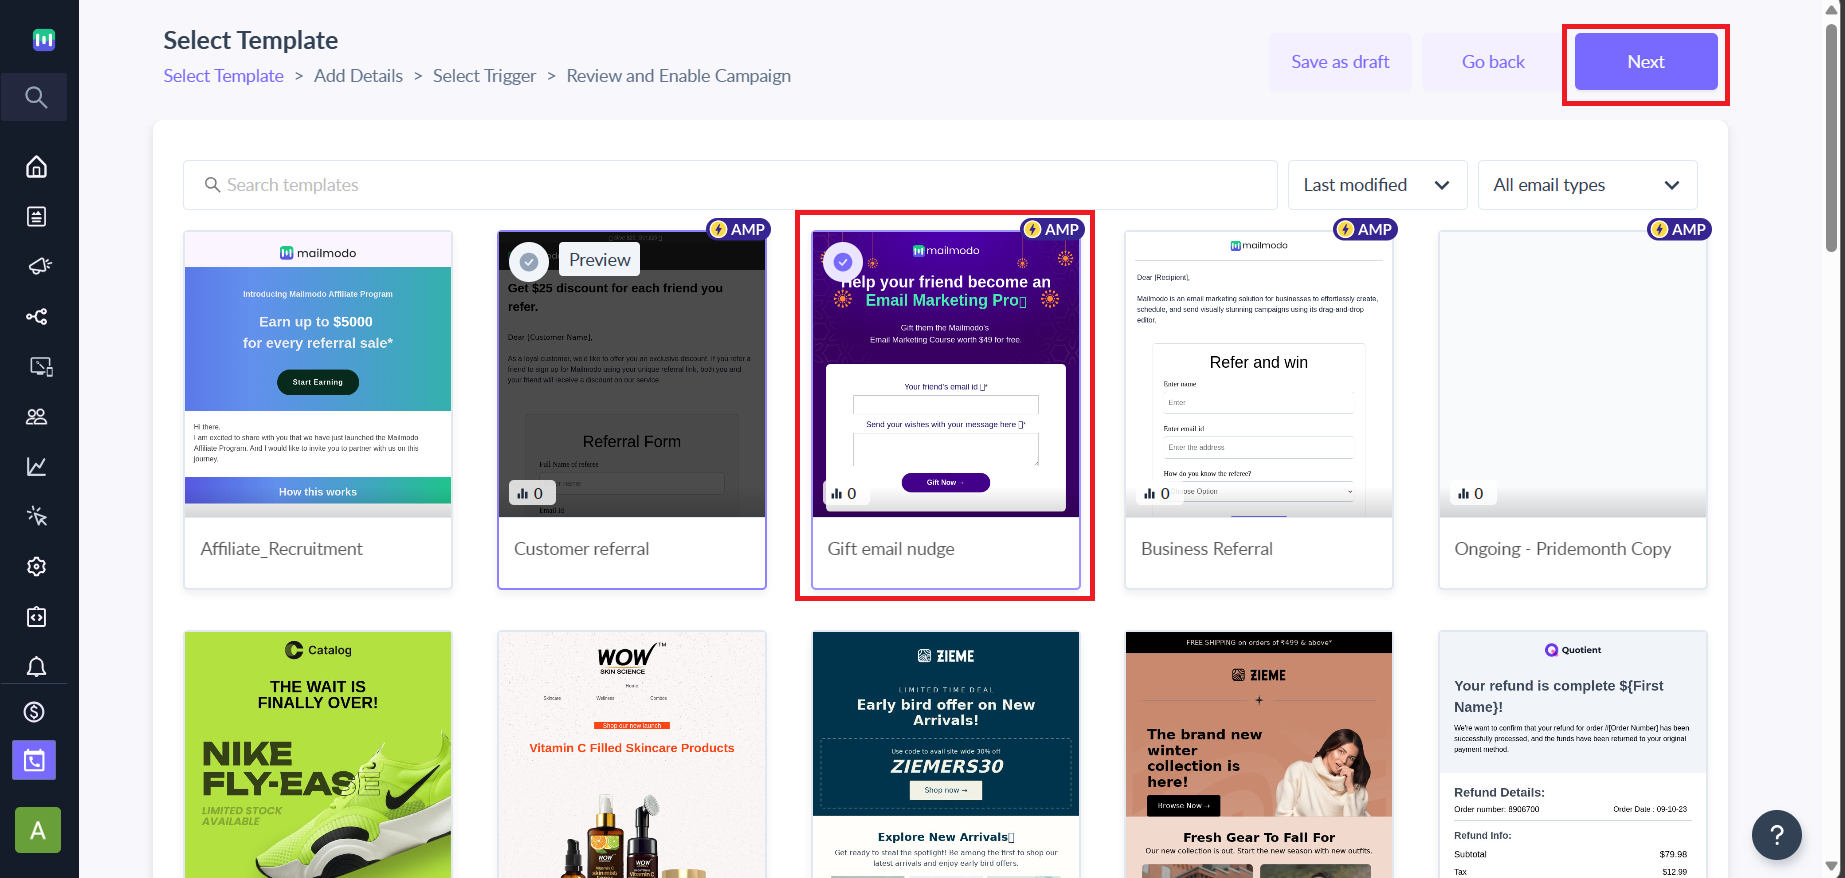
Step 3: Select the created template and click on Next to add the details of the campaign.
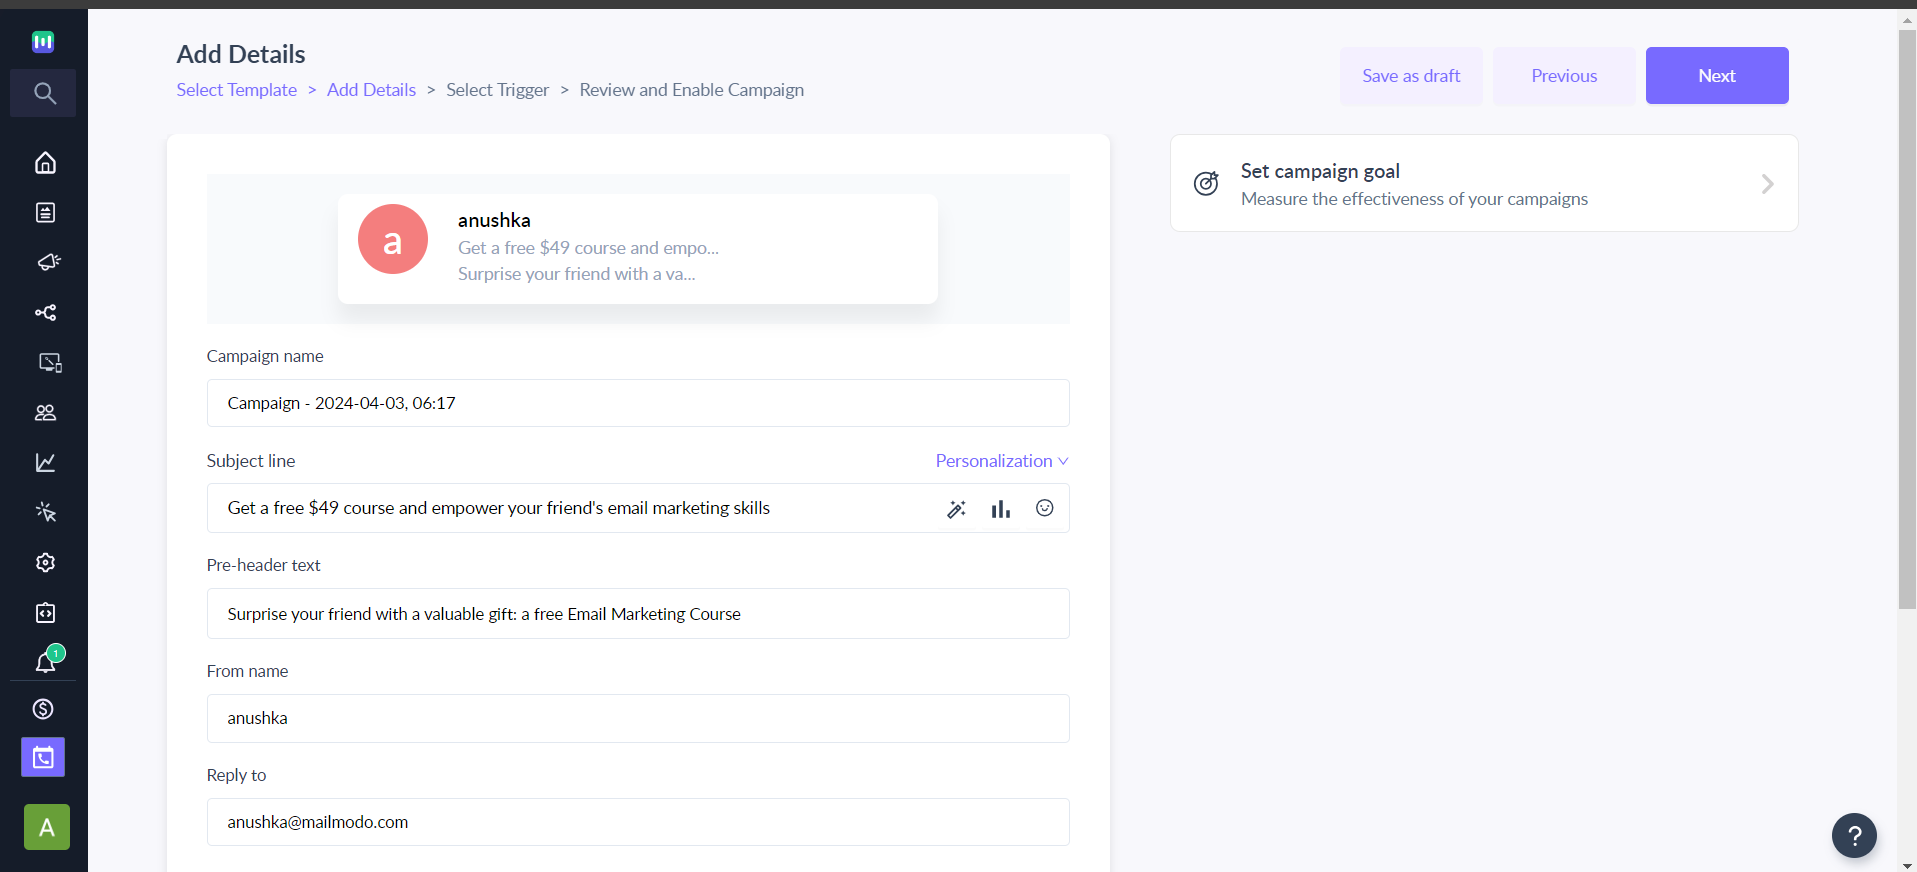
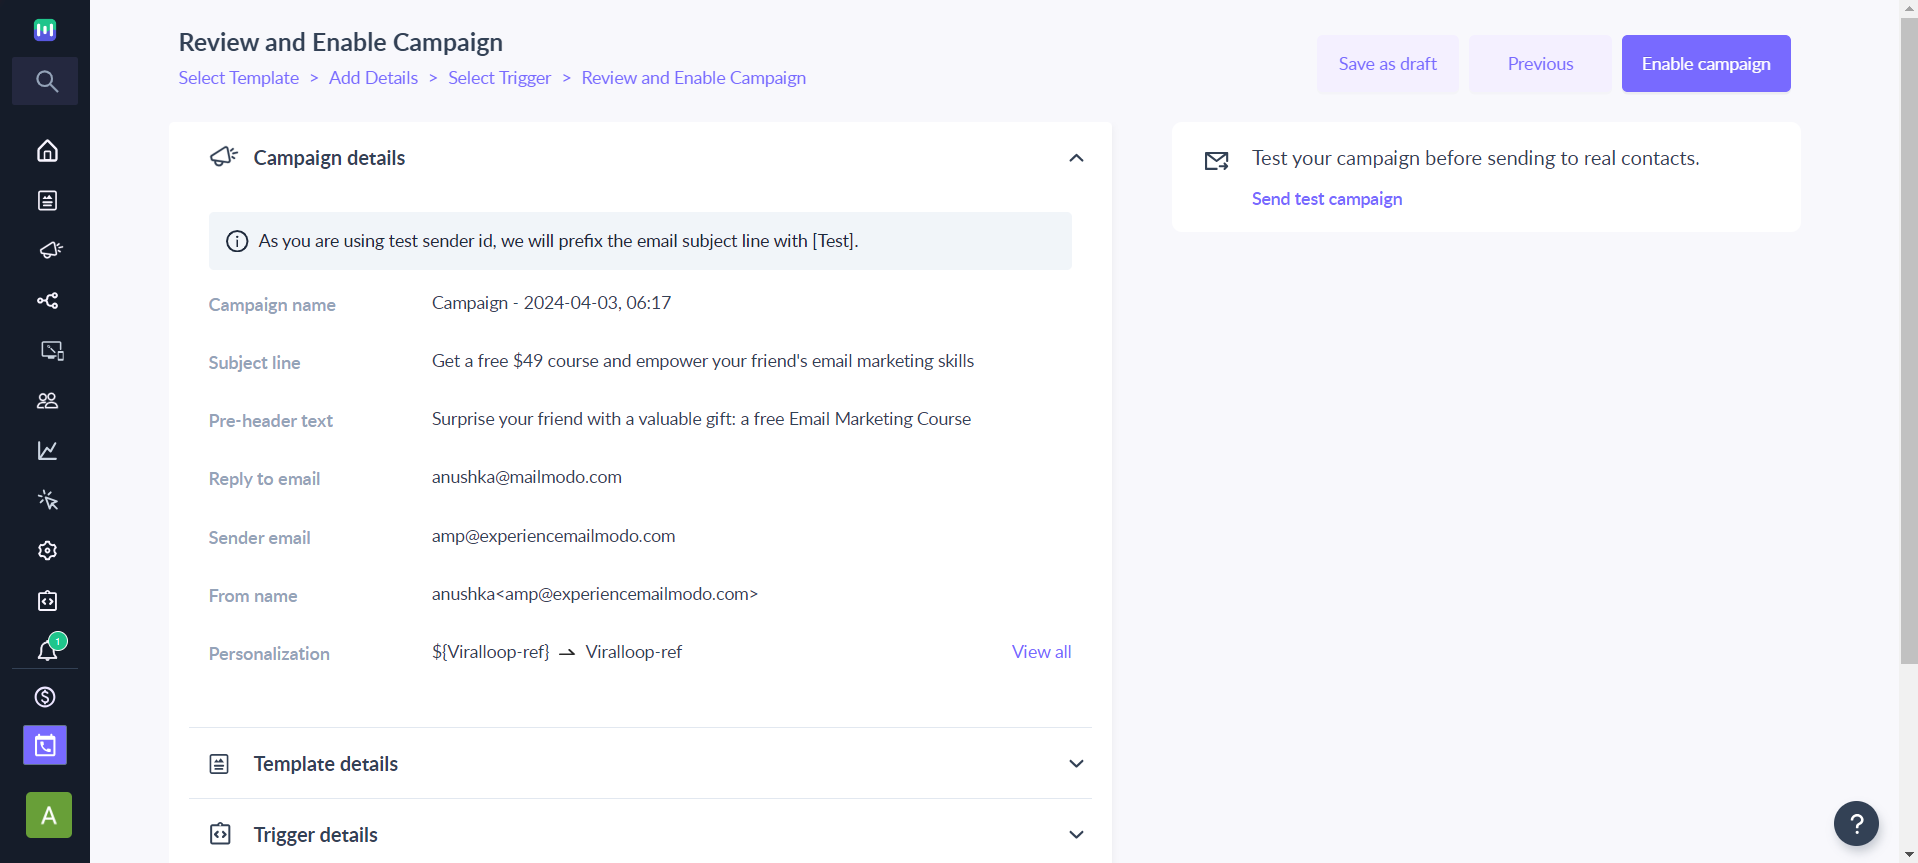
Step 4: Add the relevant 'Subject', 'Pre-Header', 'From Name', 'Reply to Email', and select the 'Sender Email' to complete the details section. Click on Next.
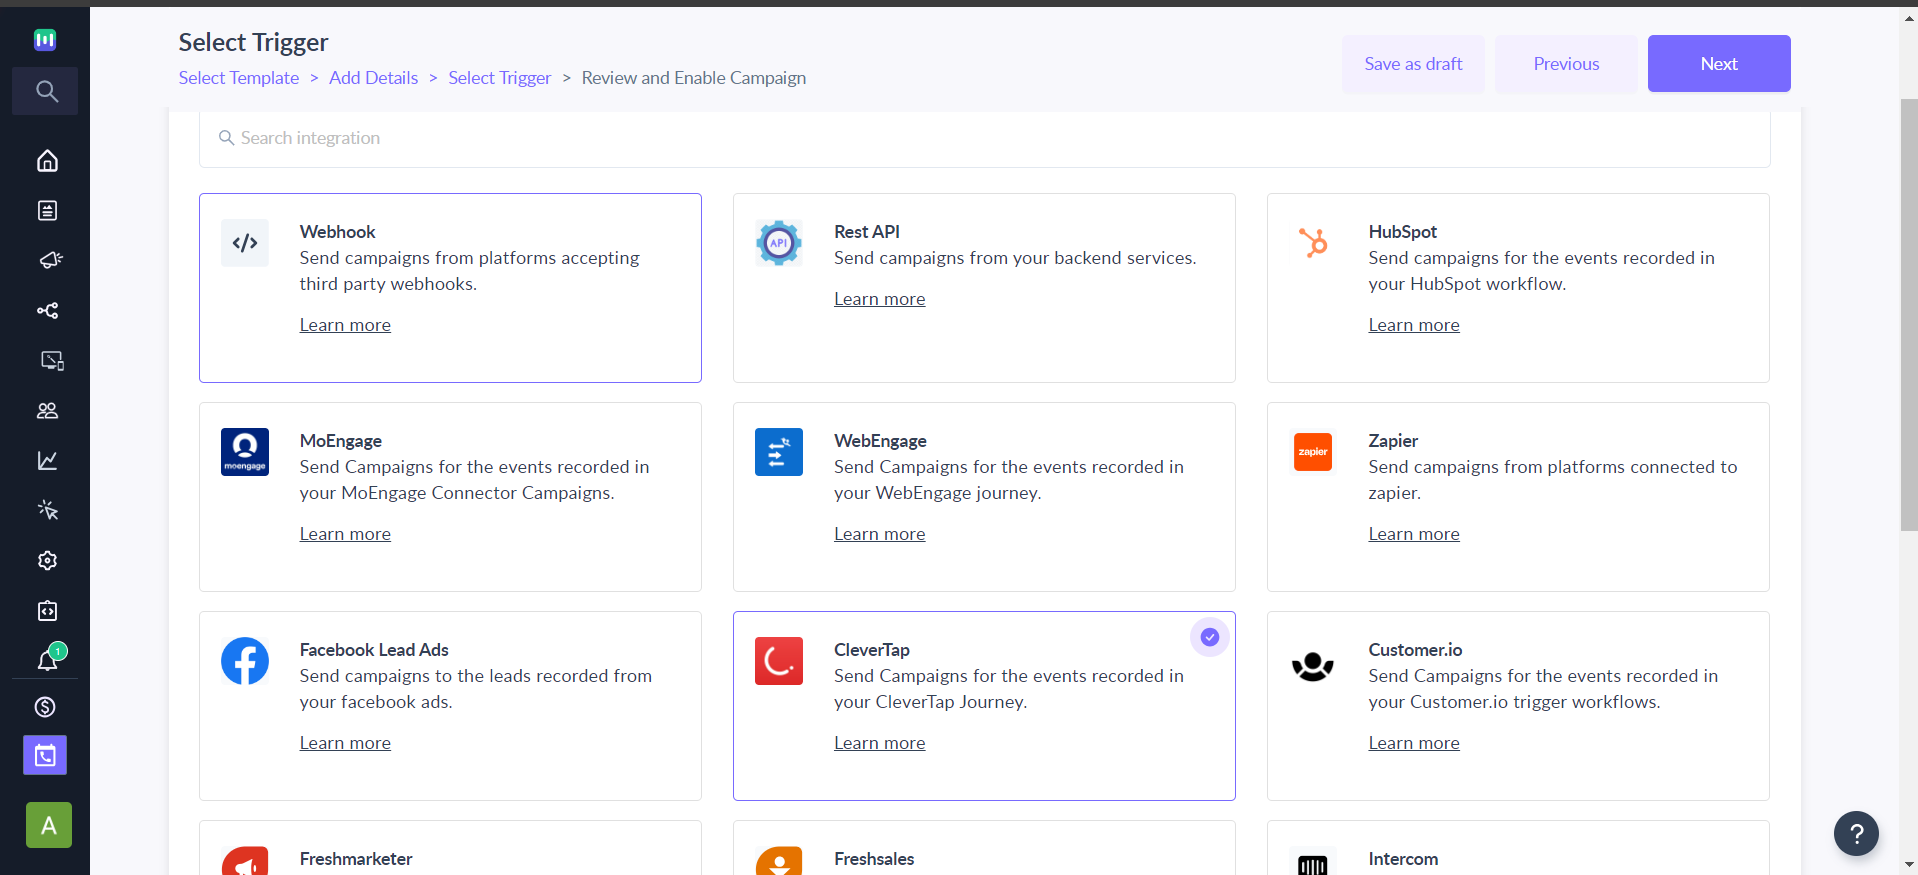
Step 5: In select trigger step, select 'CleverTap' from the list in Trigger on events section and click Next.
Step 6: In the review section, ensure all the details are correctly shown. After reviewing, click on 'Enable Campaign' to create the trigger campaign.
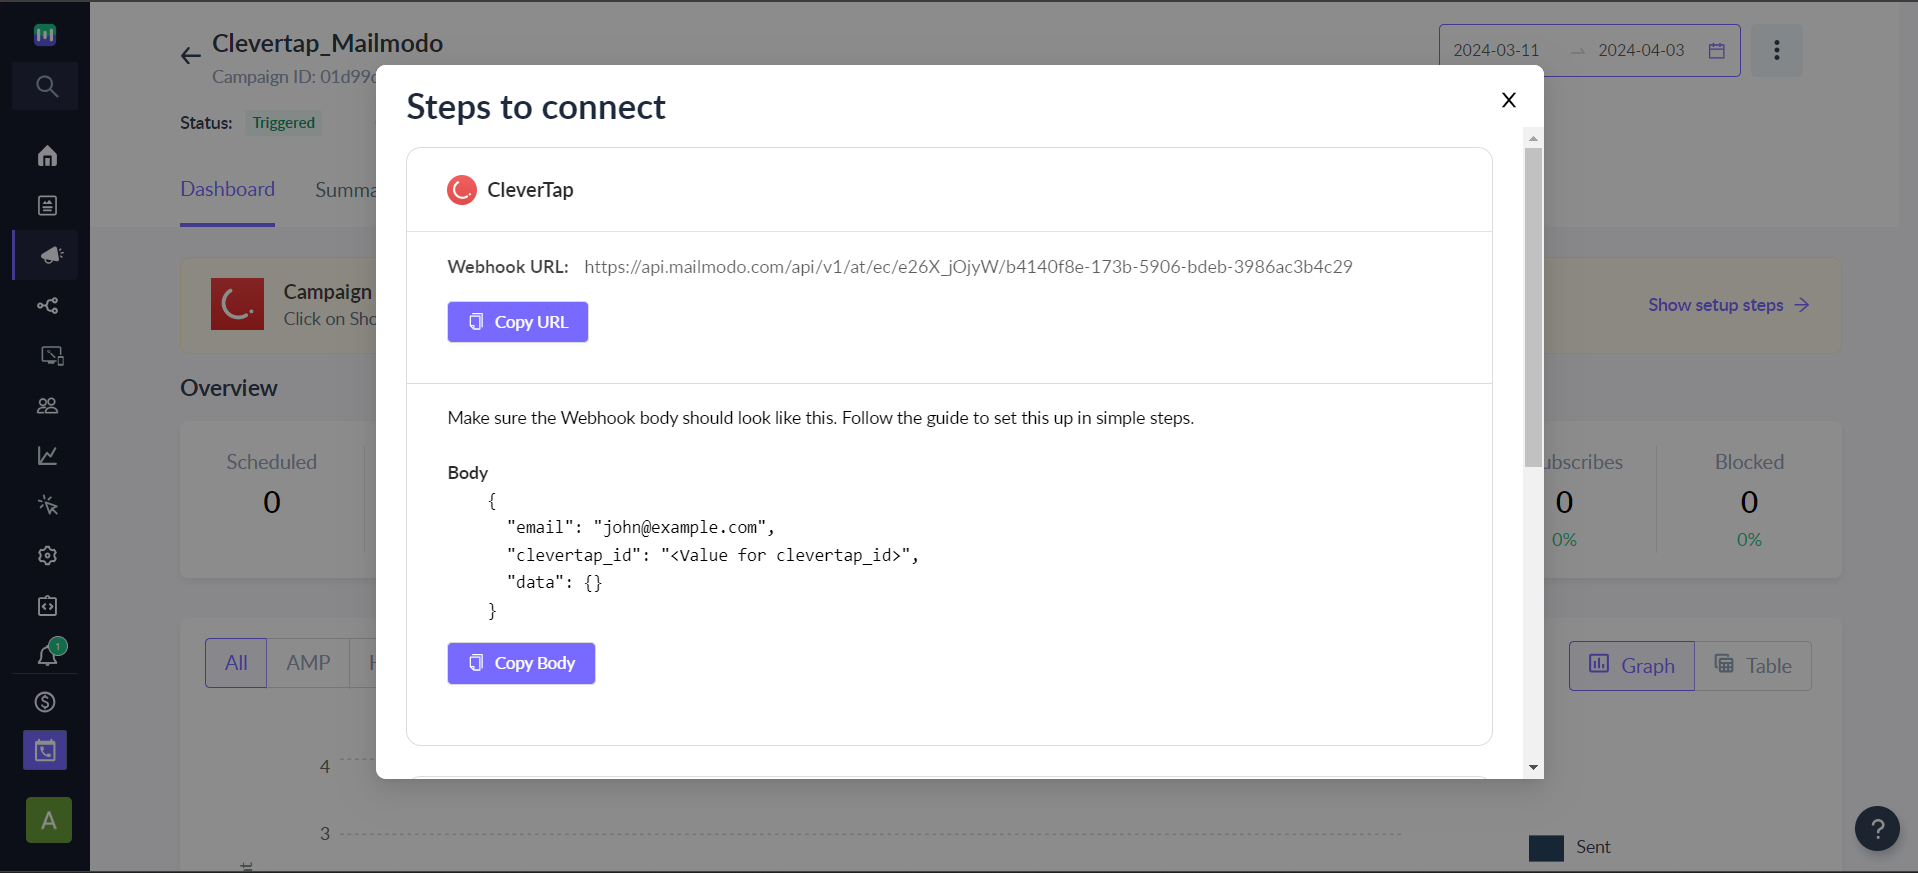
Step 7: A Webhook URL will be generated on the Trigger campaign page under Show setup steps. Use this page to connect your campaign to your platform.
Step 8: Use the copy URL button to copy the Webhook URL.
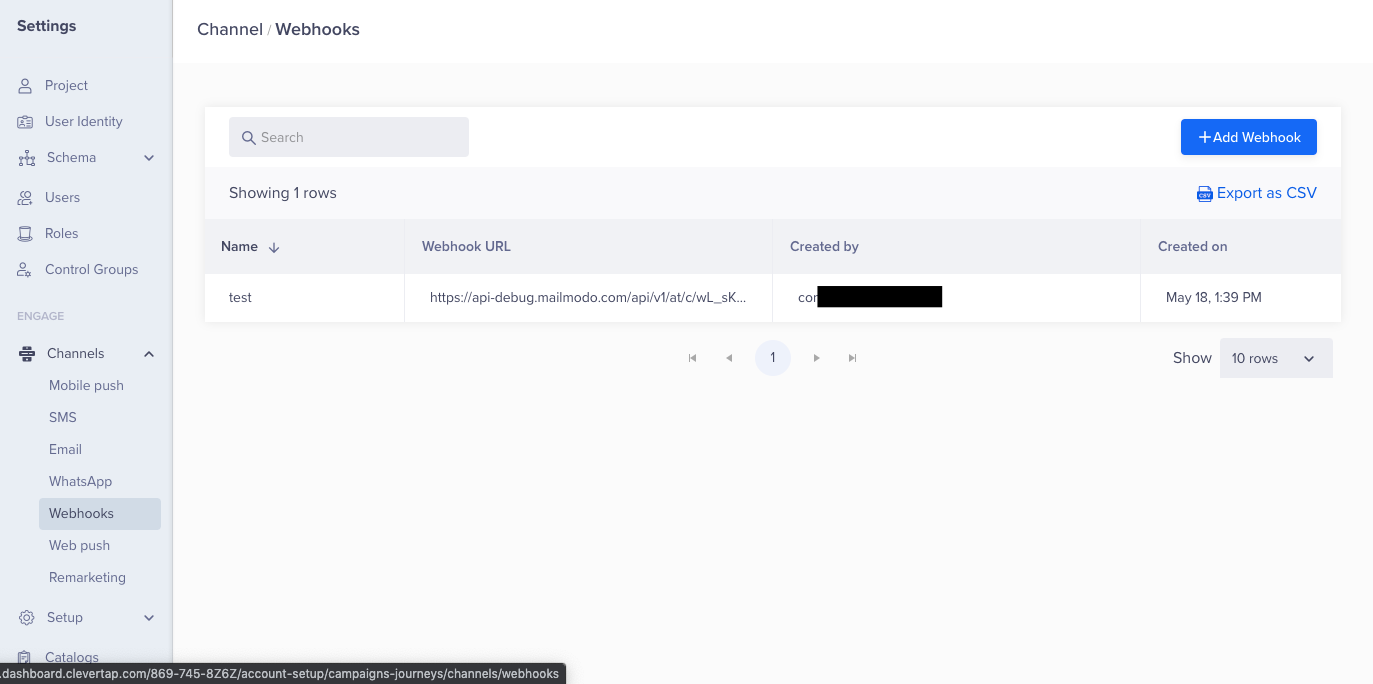
Step 9: Go to Settings in your CleverTap account, under the engage section, select Channel, and click on Webhooks
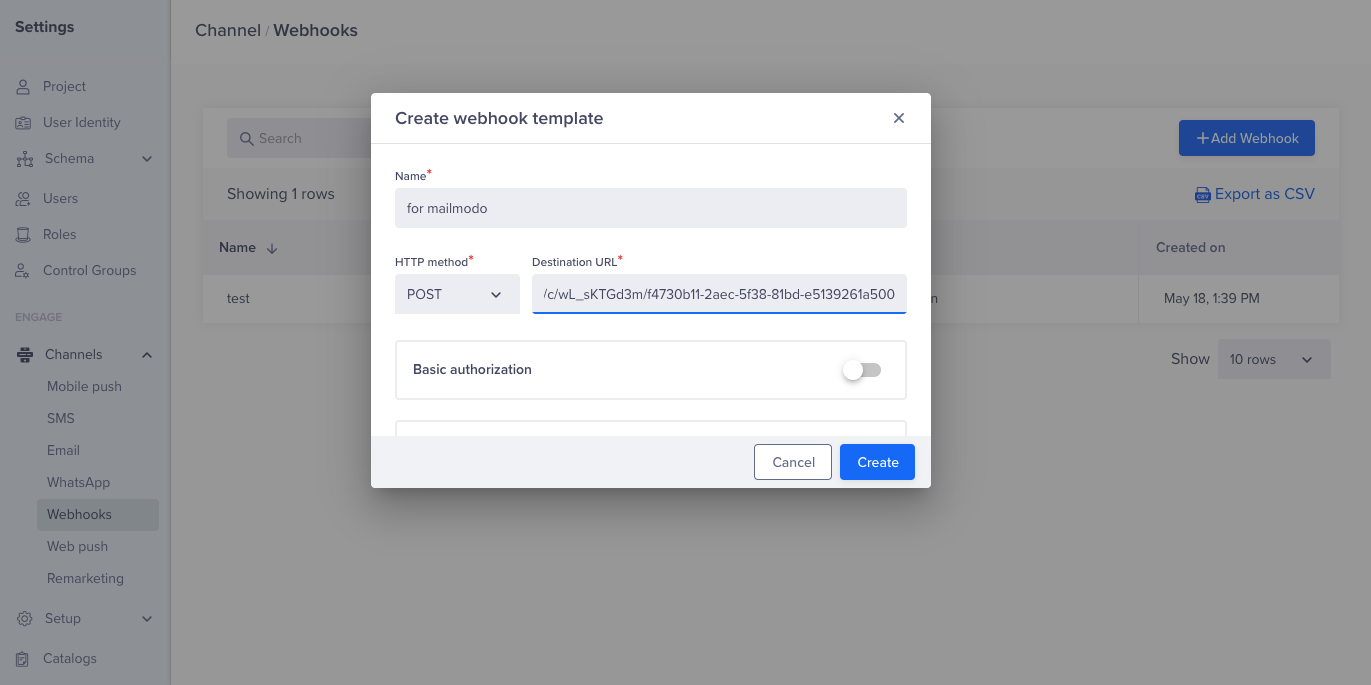
Step 10: Create a new Webhook and enter the ‘Webhook URL’ from your campaign into the ‘Destination URL’. Choose ‘POST’ as the HTTP method & name your Webhook.
Step 11: Now you can use this Webhook to trigger emails to be sent from Mailmodo in your CleverTap account.
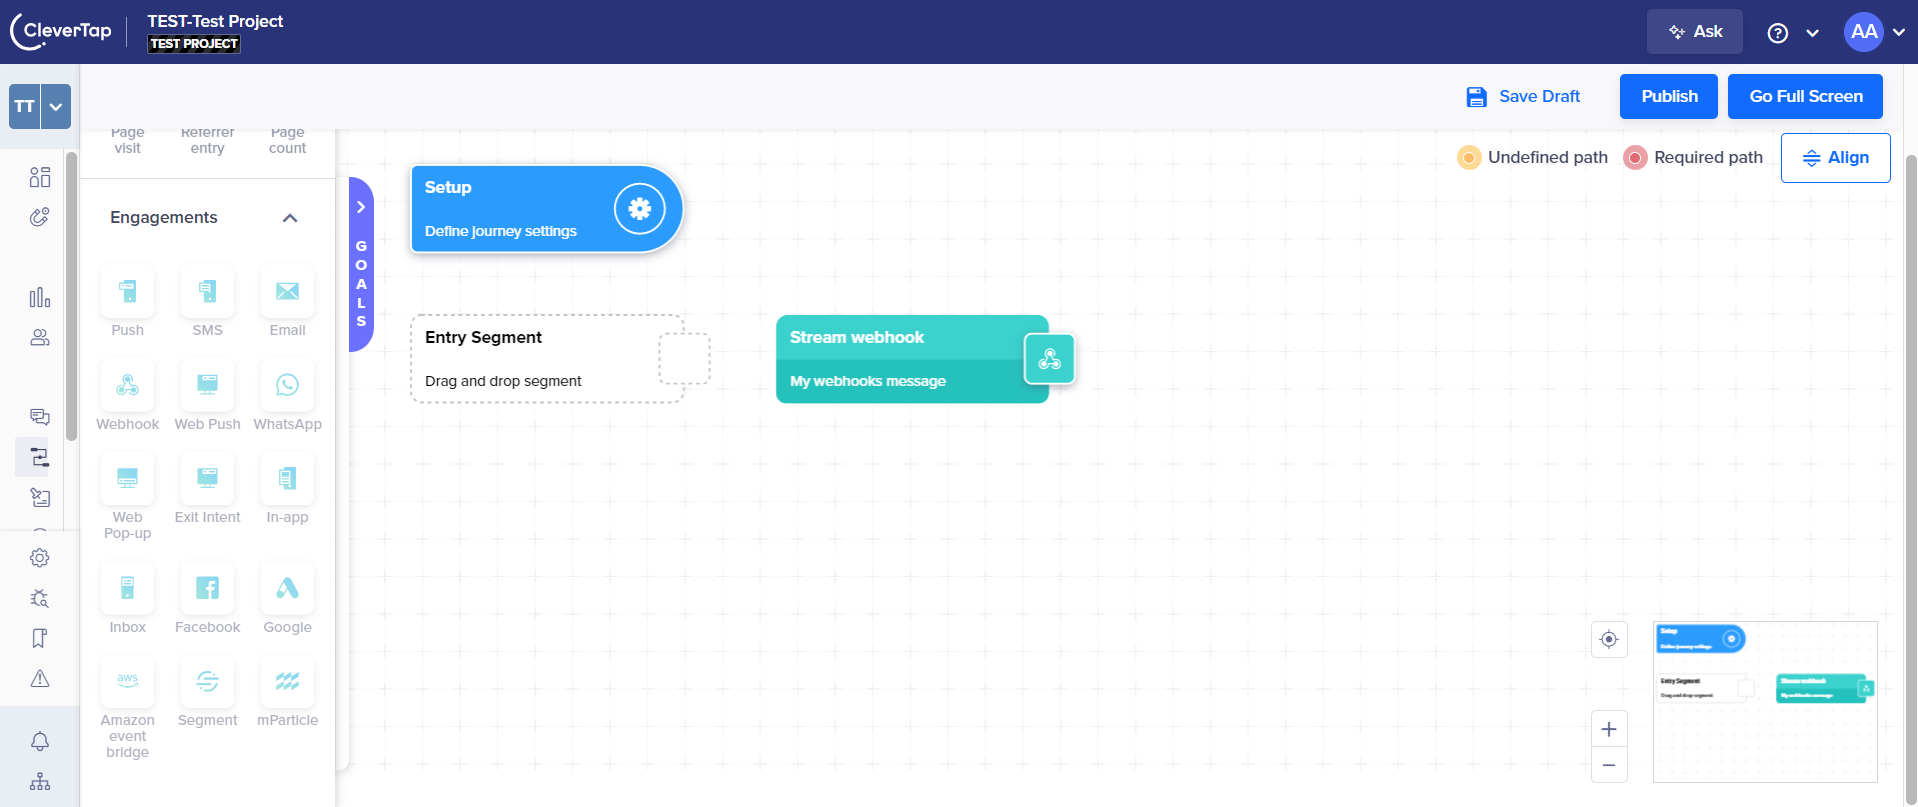
An example on how you can add Webhook to your CleverTap Journeys
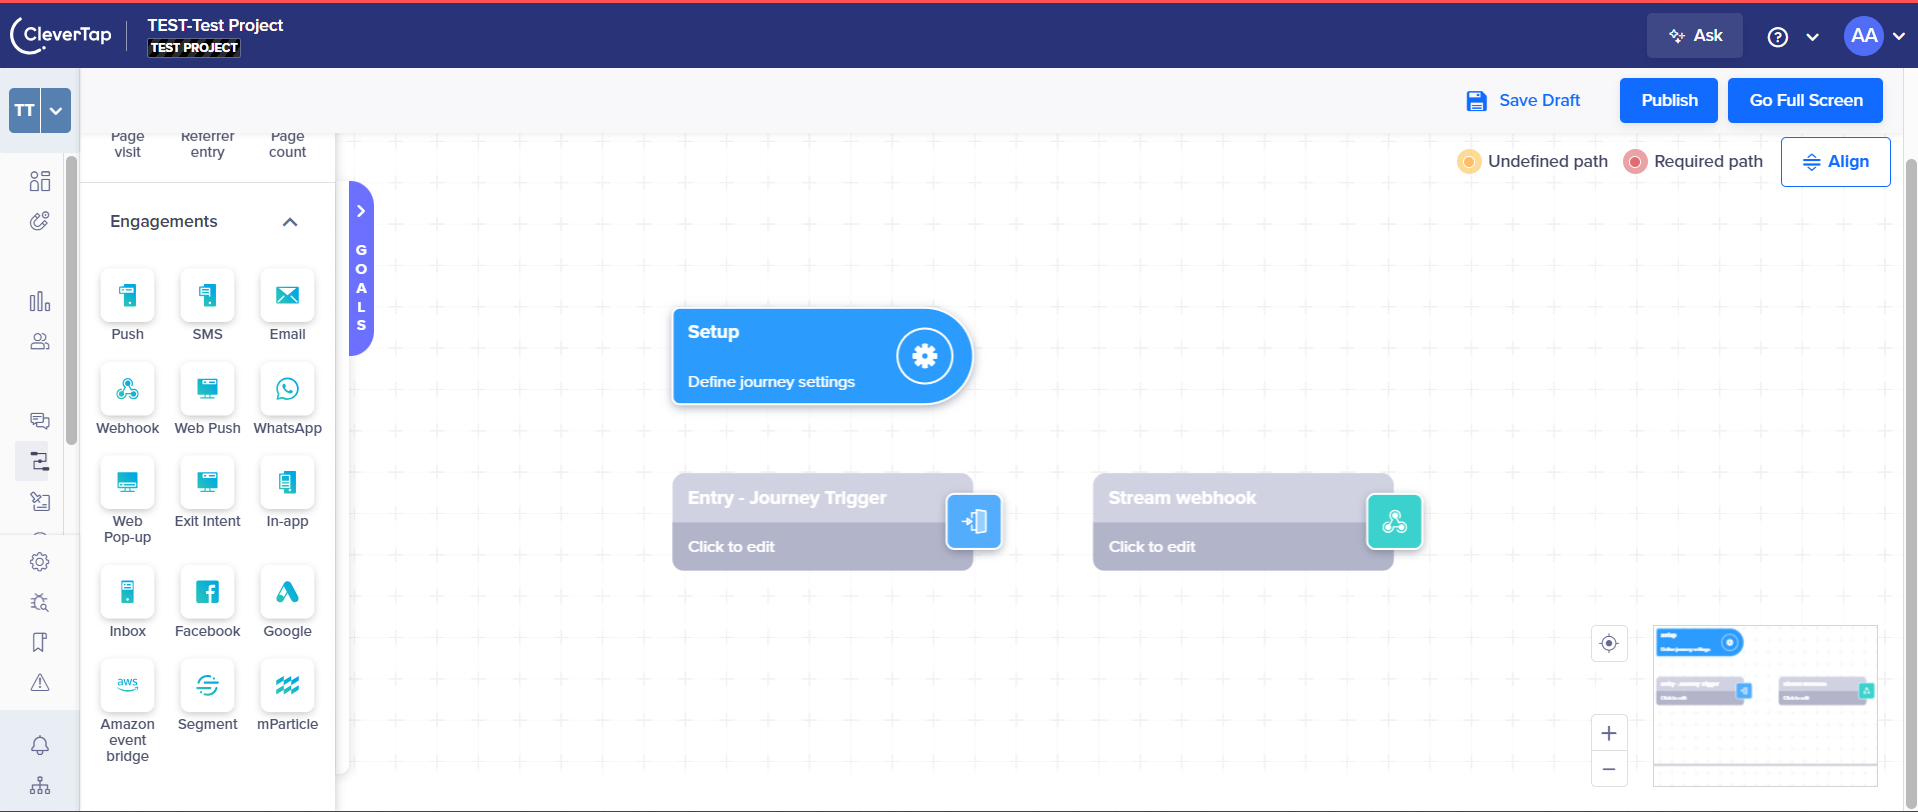
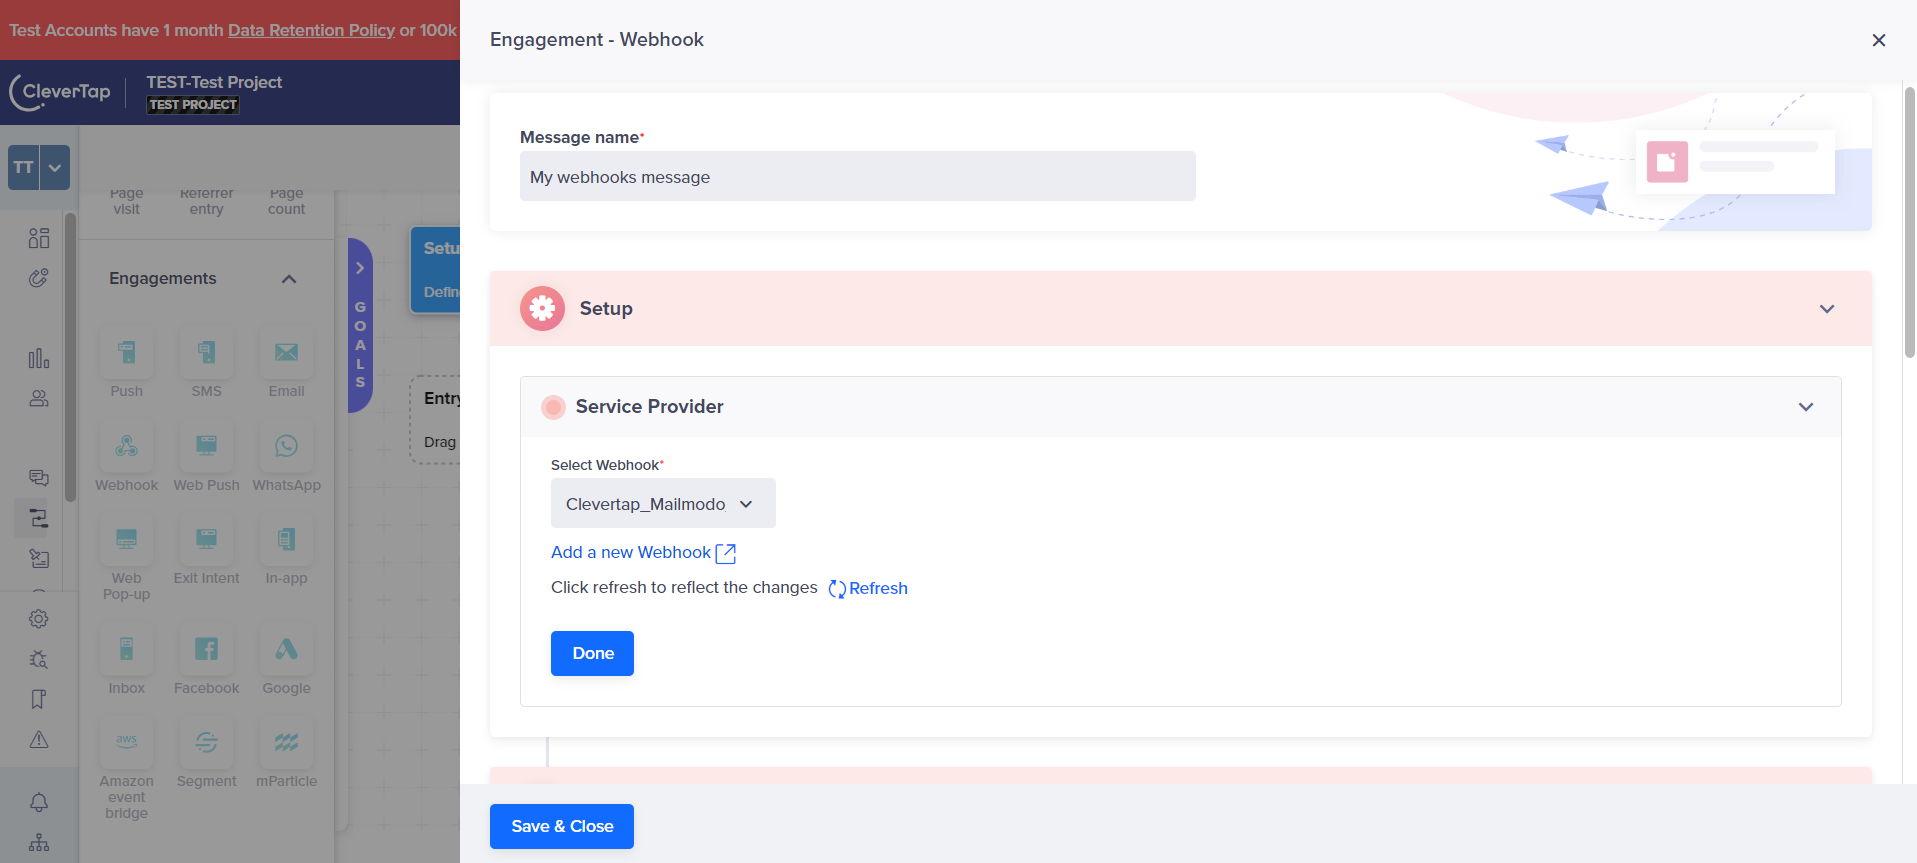
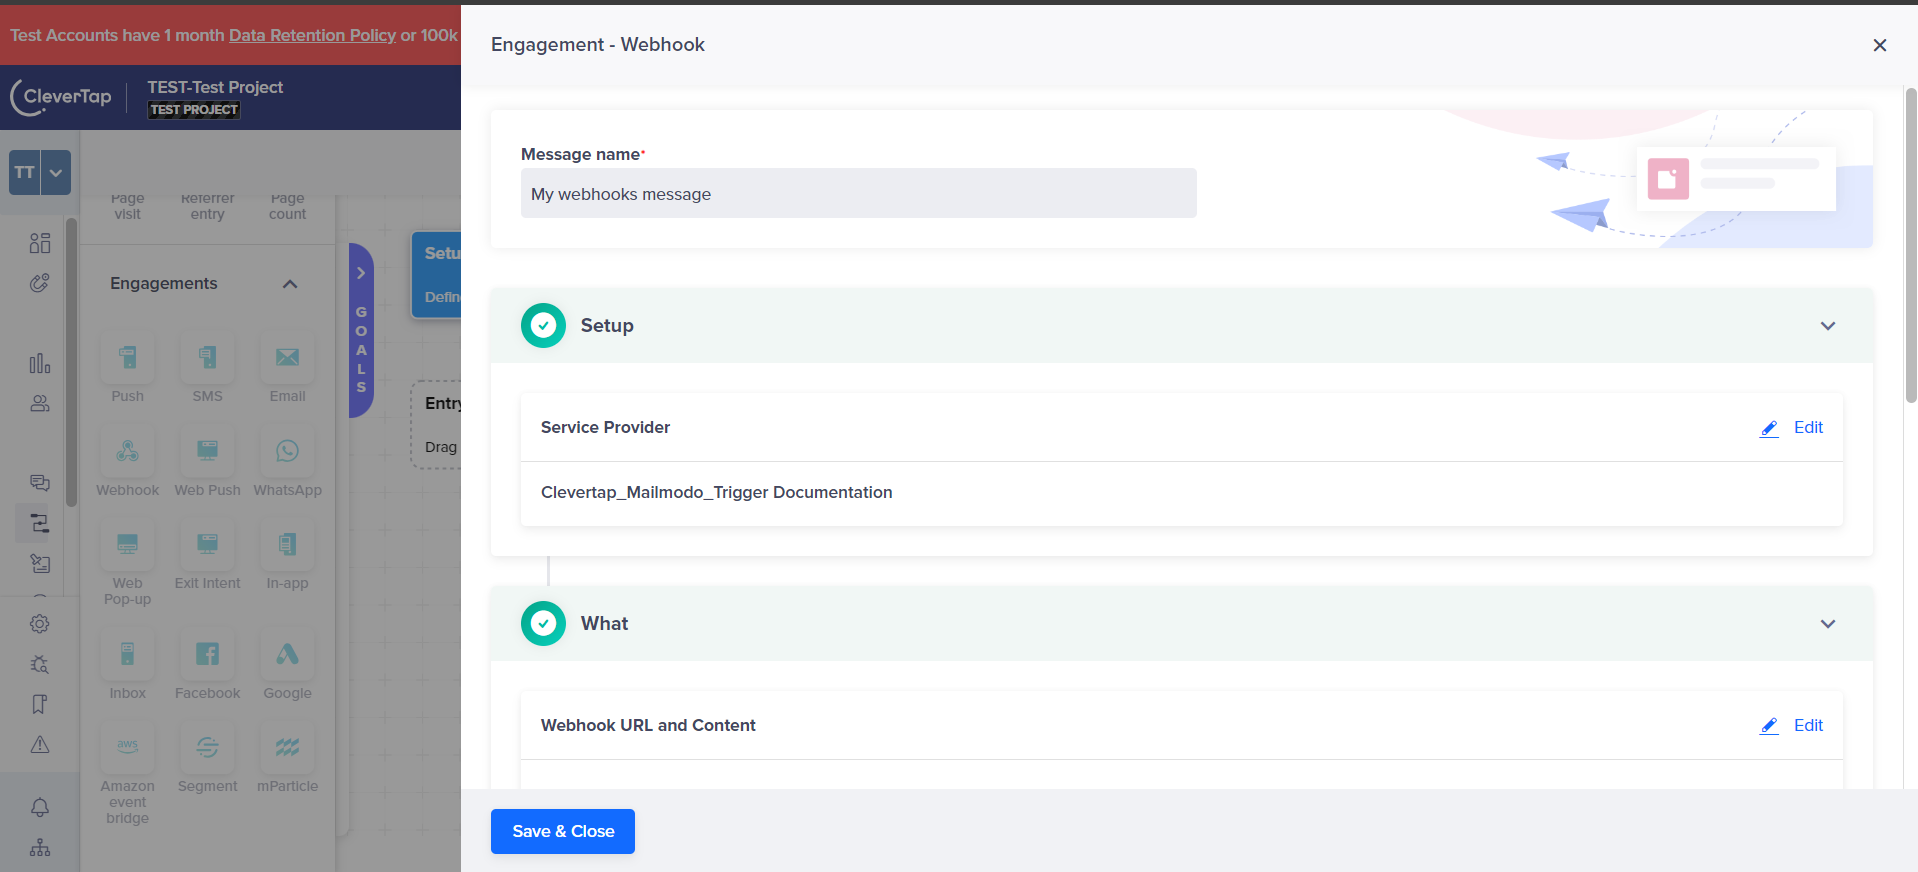
Step 1: Click on the Webhook block to open its settings. Choose the Webhook you just created under the ‘Select Webhook’ dropdown. Click on Done.
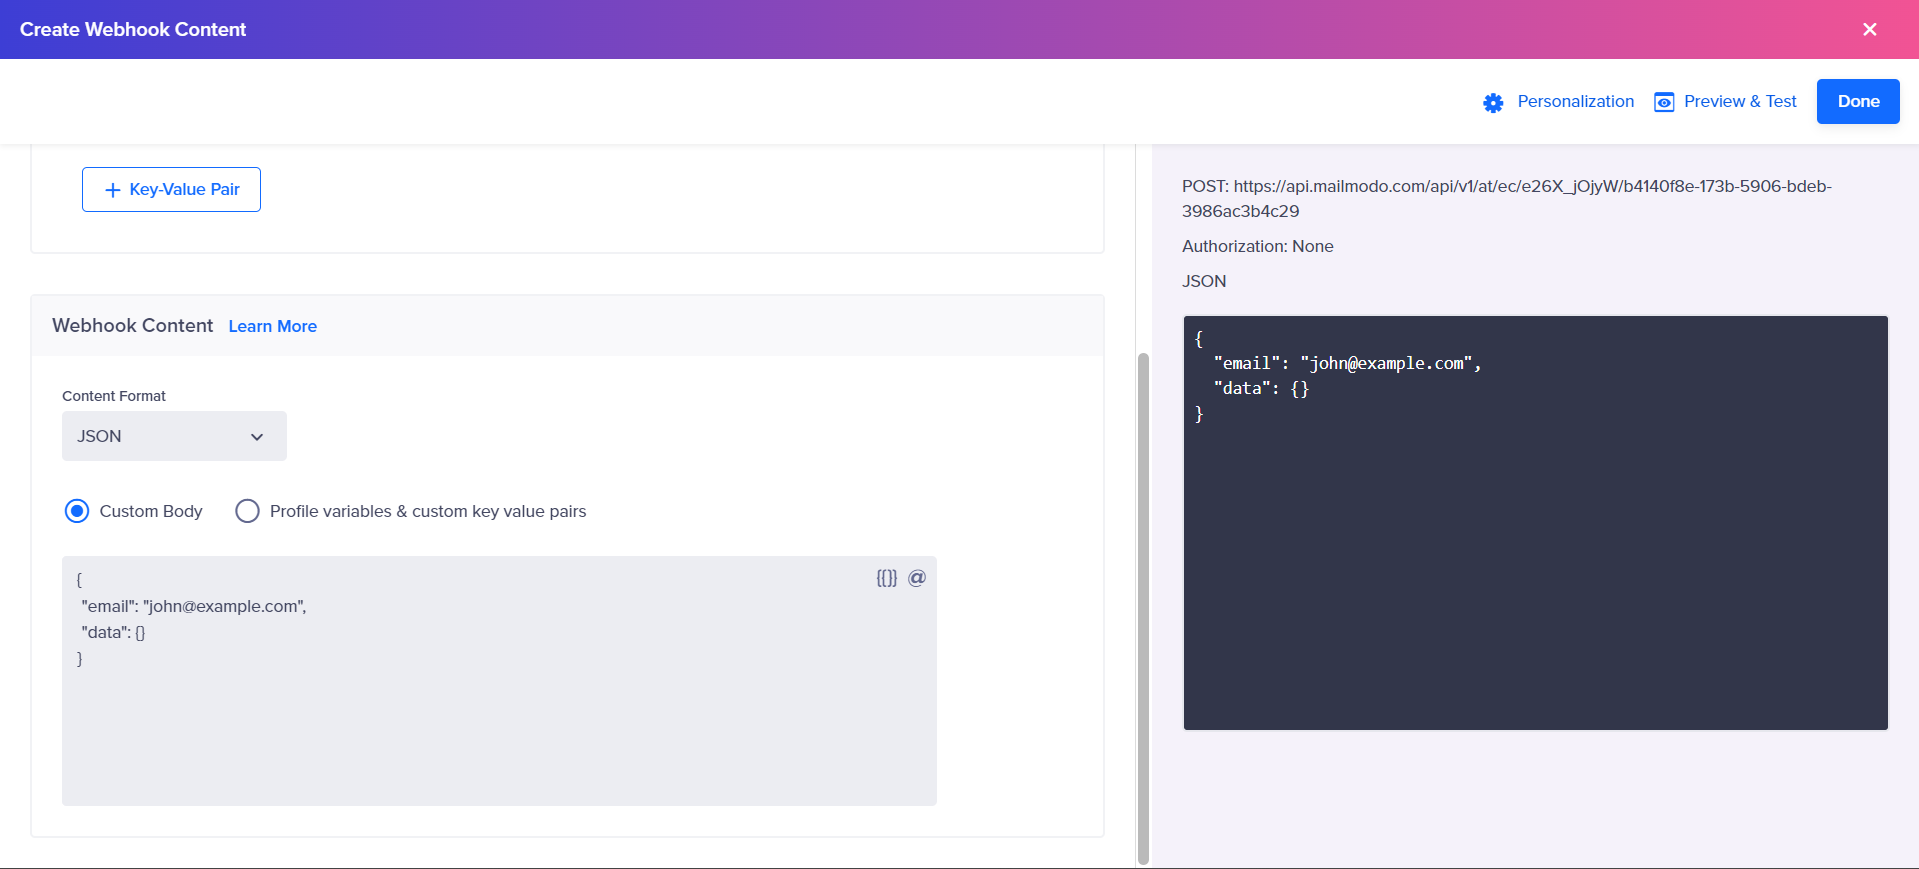
Step 2: Click on Go to Editor Then copy the following code snippet into the Webhook payload and choose the format as JSON:
{ "email":"john@example.com",
  "clevertap_id":"eqODiQ3D0Xldl_YgmdfWcZjAvgJhjI90RJgY",
  "data":{ "firstName":"John" }
}Note: A user on CleverTap is identified by his identity. This identity can be an email, phone number or any other unique string. A help doc on the same can be found here . You can pass any identity of your choice(email, phone number, etc.,) in the clevertap_id tag. When you create a profile using an identity and an email, the identity parameter gets saved under the CleverTap identity in your profile dashboard. If no identity is provided in a profile, the email becomes the default identity.
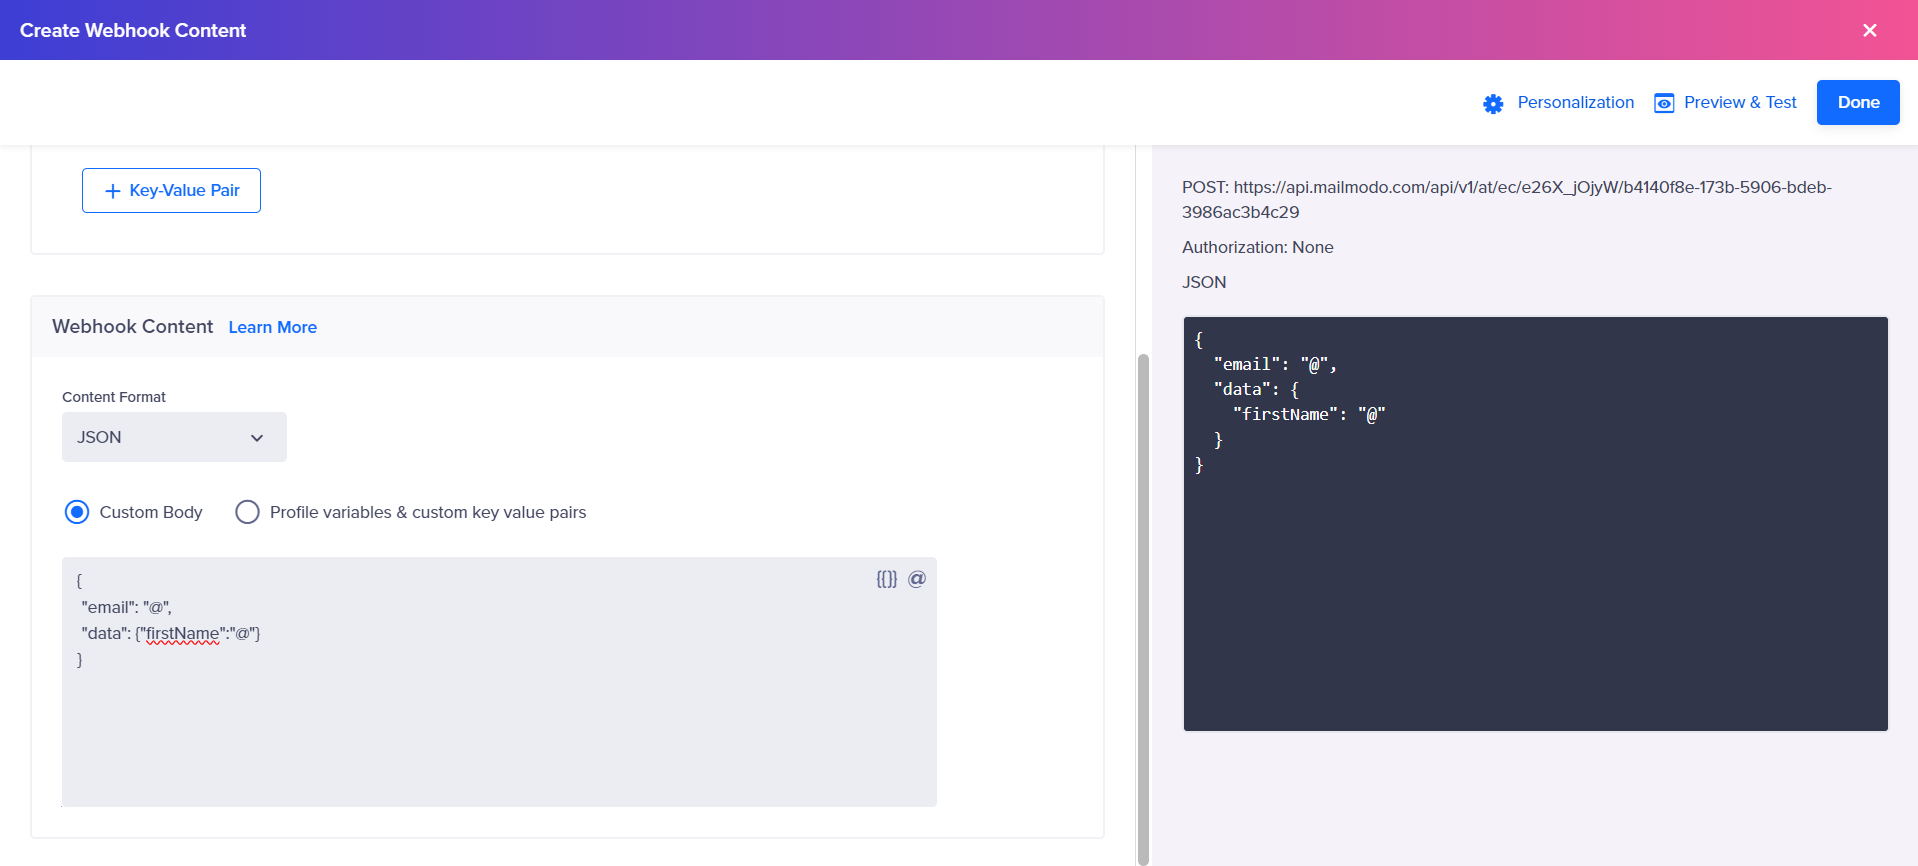
Step 3: The argument to “email” points to recipient emails and “data” points to the personalization parameters. Replace the email argument ‘john@example.com’ with ‘@’ and select the email field from your contact list.
Step 4: Also replace the parameter ‘John’ with ‘@’ and select the appropriate field matching the parameter ‘firstName’.
Step 5: You can add more parameters depending on the campaign, by adding a few extra lines of code in the “data” section. Click on Done.
Make sure that the key of the parameter is exactly the same as the key written in the email campaign.
Step 6: Save and Close the Webhook. Now this Webhook trigger is part of your journey and can trigger emails from Mailmodo.
If you have any query then reach out to us at Mailmodo Support or share your thoughts at Mailmodo Product Feedback .


