

How to create and integrate custom WordPress forms to effortlessly submit Mailmodo data?
Last updated June 27, 2025
WordPress contact forms are a great way to collect leads and generate email subscribers. However, manually submitting this data to Mailmodo can be time-consuming and error-prone. By integrating your WordPress contact forms with Mailmodo, you can automate this process and ensure that all of your data is submitted accurately and efficiently.
Pre-requisites: Requires an editor with the capability to include HTML code blocks. (WordPress's default editor provides this option)
Step-by-step guide on creating an HTML form in WordPress for seamless data submission to Mailmodo:
Step 1: Go to the Page editor in WordPress. Click on Add Block(+) and choose Custom HTML.

Custom HTML forms enable you to create forms with specific fields, ensuring you collect only the desired and required user responses.
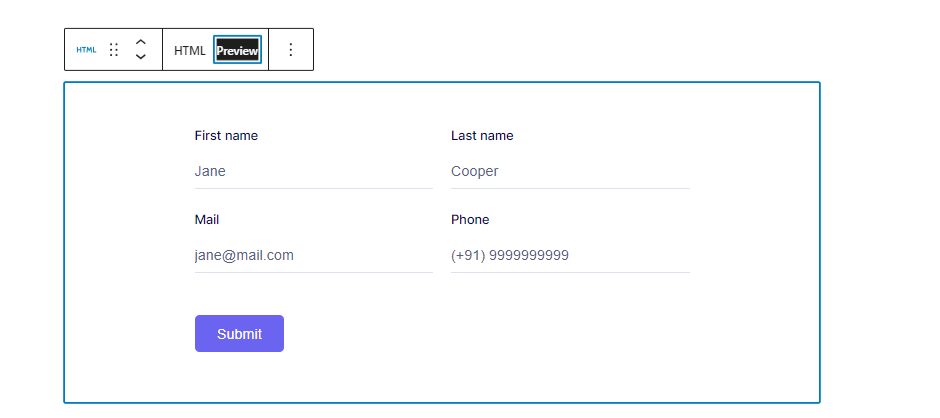
Step 2: You can input your custom HTML form code in the editor below, and then preview the form directly within the editor itself. Paste the HTML code for your form, and see how it looks by using the preview feature provided.
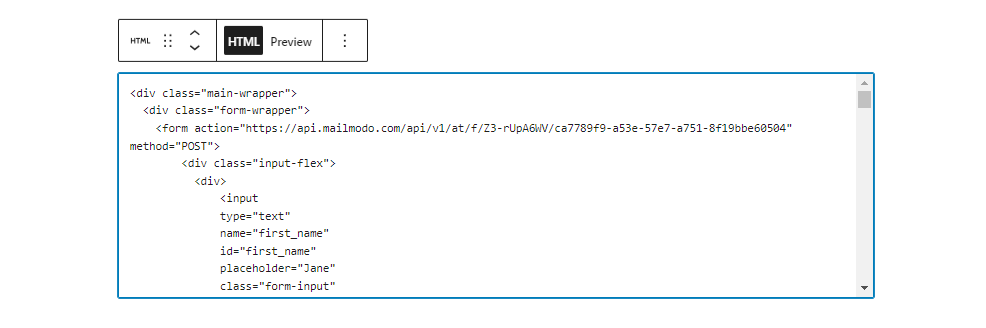
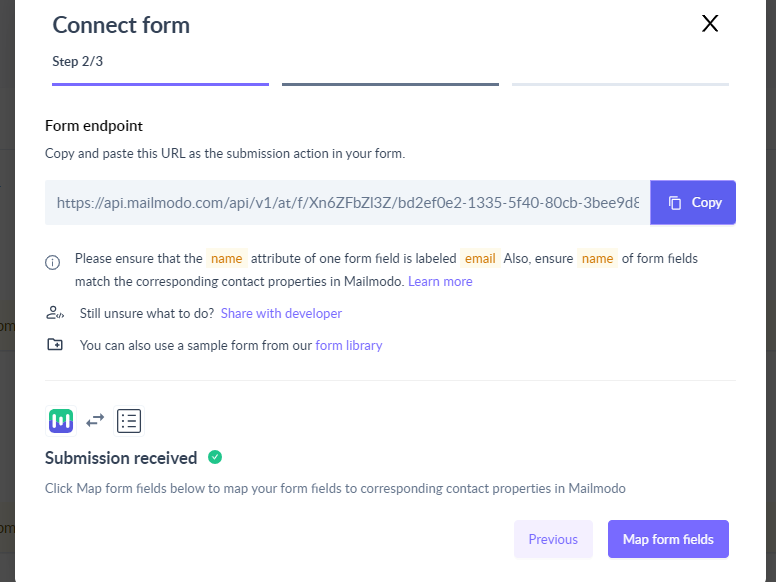
Learn more about the Form Action URL and how to generate it.
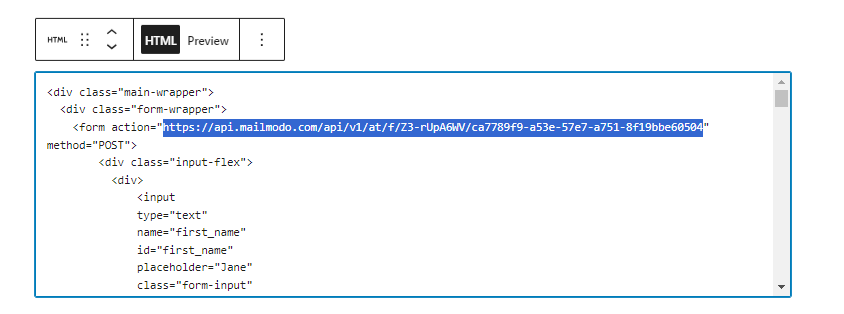
Step 3: Change the URL present in the “action” attribute with the URL generated on Mailmodo Contact Form
Step 4: Publish/Update the page.

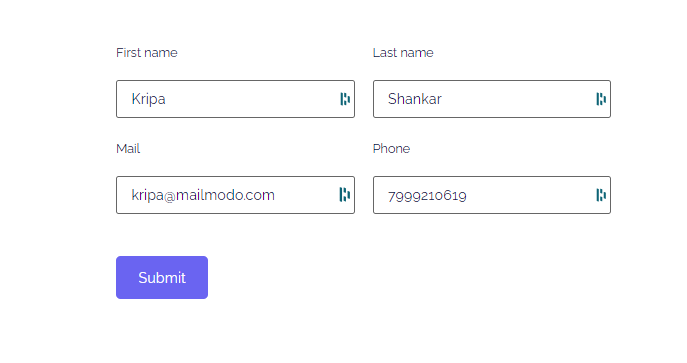
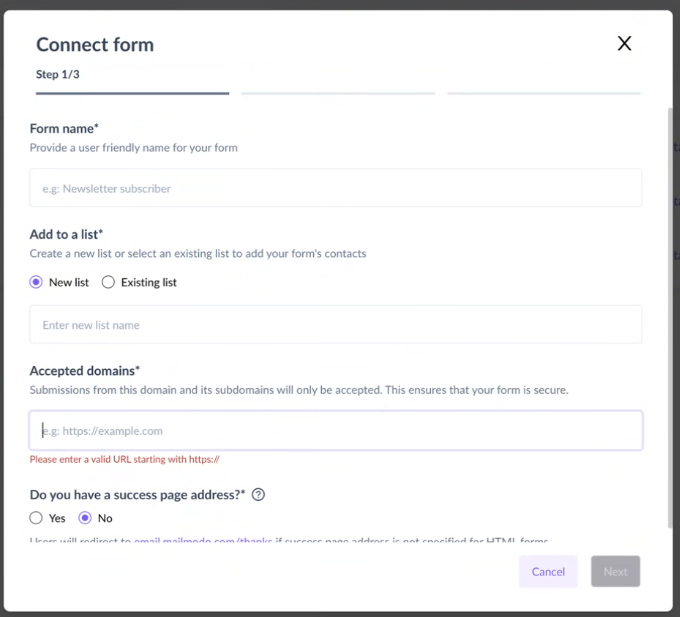
Step 5: Open the page in browser and provide a sample submission. Go to Mailmodo and check if a submission is received. Click ‘Map form Fields’’ .
In the connect form page, add the necessary details and in Accepted Domains enter the domain from where the input would be sent, which in this case is WordPress.
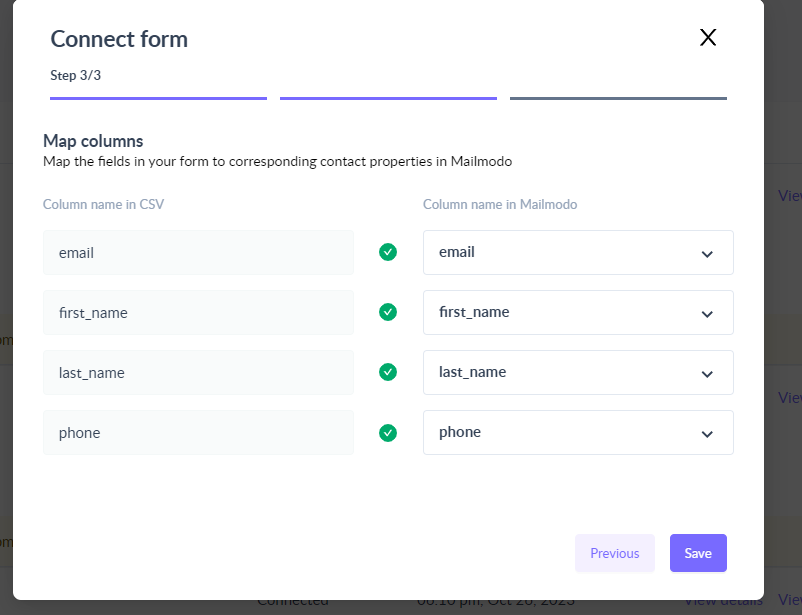
Step 6: Map the properties received from form to Contact properties stored in mailmodo. Save the form.
Note: You can utilize a platform such as Formbold.com to obtain the HTML code
Voila! You will now receive the submitted form data into Mailmodo.
Explore the following form examples along with their code snippets. These examples can serve as templates for creating your custom forms. Feel free to use and modify the provided code snippets to suit your specific form requirements.
Preview form 1:
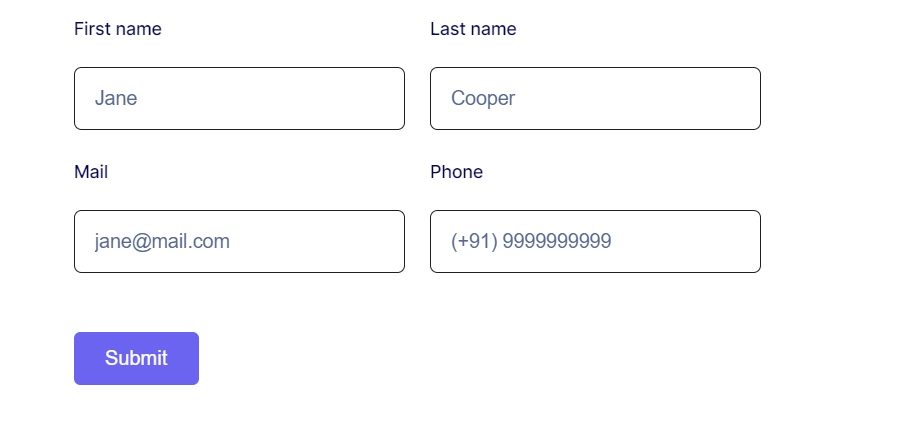
Sample code 1:
<div class="main-wrapper">
  <div class="form-wrapper">
    <form action="https://api.mailmodo.com/api/v1/at/f/Z3-rUpA6WV/ca7789f9-a53e-57e7-a751-8f19bbe60504" method="POST">
        <div class="input-flex">
          <div>
              <input
              type="text"
              name="first_name"
              id="first_name"
              placeholder="Jane"
              class="form-input"
              />
              <label for="first_name" class="form-label"> First name </label>
          </div>
          <div>
              <input
              type="text"
              name="last_name"
              id="last_name"
              placeholder="Cooper"
              class="form-input"
              />
              <label for="last_name" class="form-label"> Last name </label>
          </div>
        </div>
        <div class="input-flex">
          <div>
              <input
              type="email"
              name="email"
              id="email"
              placeholder="jane@mail.com"
              class="form-input"
              />
              <label for="email" class="form-label"> Mail </label>
          </div>
          <div>
              <input
              type="text"
              name="phone"
              id="phone"
              placeholder="(+91) 9999999999"
              class="form-input"
              />
              <label for="phone" class="form-label"> Phone </label>
          </div>
        </div>
        <button class="form-btn">
            Submit
        </button>
    </form>
  </div>
</div>
<style>
  @import url('https://fonts.googleapis.com/css2?family=Inter:wght@400;500;600;700&display=swap');
  * {
    margin: 0;
    padding:0;
    box-sizing: border-box;
  }
  body {
    font-family: "Inter", sans-serif;
  }
  .main-wrapper {
    display: flex;
    align-items: center;
    justify-content: center;
    padding: 48px;
  }
  .form-wrapper {
    margin: 0 auto;
    max-width: 550px;
    width: 100%;
    background: white;
  }
  .input-flex {
    display: flex;
    gap: 20px;
    margin-bottom: 22px;
  }
  .input-flex > div {
    width: 50%;
    display: flex;
    flex-direction: column-reverse;
  }
  .form-input {
    width: 100%;
    padding-bottom: 10px;
    border: none;
    border-bottom: 1px solid #DDE3EC;
    background: #FFFFFF;
    font-weight: 500;
    font-size: 16px;
    color: #07074D;
    outline: none;
    resize: none;
  }
  .form-input::placeholder {
    color: #536387;
  }
  .form-input:focus {
    border-color: #6A64F1;
  }
  .form-label {
    color: #07074D;
    font-weight: 500;
    font-size: 14px;
    line-height: 24px;
    display: block;
    margin-bottom: 18px;
  }
  .form-input:focus + .form-label {
    color: #6A64F1;
  }
  .form-btn {
    font-size: 16px;
    border-radius: 5px;
    padding: 12px 25px;
    border: none;
    font-weight: 500;
    background-color: #6A64F1;
    color: white;
    cursor: pointer;
    margin-top: 25px;
  }
  .form-btn:hover {
    box-shadow: 0px 3px 8px rgba(0, 0, 0, 0.05);
  }
</style>
Preview Form 2 (Subscription):

Sample Code 2:
<div class="main-wrapper">
  <div class="form-wrapper">
    <form action="https://api.mailmodo.com/api/v1/at/f/Z3-rUpA6WV/ca7789f9-a53e-57e7-a751-8f19bbe60504" method="POST">
      <div class="email-subscription-form">
        <input
          type="email"
          name="email"
          id="email"
          placeholder="Enter your email"
          class="form-input"
        />
        <button class="form-btn">
        Subscribe
        <svg width="16" height="16" viewBox="0 0 16 16" fill="none" xmlns="http://www.w3.org/2000/svg">
        <g clip-path="url(#clip0_1661_1158)">
        <path d="M2.494 0.937761L14.802 7.70709C14.8543 7.73587 14.8978 7.77814 14.9282 7.8295C14.9586 7.88087 14.9746 7.93943 14.9746 7.99909C14.9746 8.05875 14.9586 8.11732 14.9282 8.16868C14.8978 8.22005 14.8543 8.26232 14.802 8.29109L2.494 15.0604C2.44325 15.0883 2.3861 15.1026 2.32818 15.1017C2.27027 15.1008 2.21358 15.0848 2.16372 15.0553C2.11385 15.0258 2.07253 14.9839 2.04382 14.9336C2.01511 14.8833 2.00001 14.8264 2 14.7684V1.22976C2.00001 1.17184 2.01511 1.11492 2.04382 1.06461C2.07253 1.0143 2.11385 0.97234 2.16372 0.942865C2.21358 0.913391 2.27027 0.897419 2.32818 0.896524C2.3861 0.895629 2.44325 0.909842 2.494 0.937761ZM3.33333 8.66576V13.0771L12.5667 7.99909L3.33333 2.92109V7.33243H6.66667V8.66576H3.33333Z" fill="white"/>
        </g>
        <defs>
        <clipPath id="clip0_1661_1158">
        <rect width="16" height="16" fill="white"/>
        </clipPath>
        </defs>
        </svg>
        </button>
      </div>
    </form>
  </div>
</div>
<style>
  @import url('https://fonts.googleapis.com/css2?family=Inter:wght@400;500;600;700&display=swap');
  * {
    margin: 0;
    padding: 0;
    box-sizing: border-box;
  }
  body {
    font-family: "Inter", sans-serif;
  }
  .main-wrapper {
    display: flex;
    align-items: center;
    justify-content: center;
    padding: 48px;
  }
  .form-wrapper {
    margin: 0 auto;
    max-width: 550px;
    width: 100%;
    background: white;
  }
  .form-input {
    width: 100%;
    padding: 13px 22px;
    border-radius: 6px;
    border: 1px solid #DDE3EC;
    background: white;
    font-weight: 500;
    font-size: 16px;
    color: #536387;
    outline: none;
    resize: none;
  }
  .form-input:focus {
    border-color: #6a64f1;
    box-shadow: 0px 3px 8px rgba(0, 0, 0, 0.05);
  }
  .email-subscription-form {
    display: flex;
    gap: 15px;
  }
  .form-btn {
    display: inline-flex;
    align-items: center;
    gap: 8px;
    font-size: 16px;
    border-radius: 5px;
    padding: 13px 25px;
    border: none;
    font-weight: 500;
    background-color: #6A64F1;
    color: white;
    cursor: pointer;
  }
  .form-btn:hover {
    box-shadow: 0px 3px 8px rgba(0, 0, 0, 0.05);
  }
</style>
Preview Form 3 (Captcha):

Steps to Get reCAPTCHA API Keys - Go to the Google reCAPTCHA website . - Create a new site for reCAPTCHA v2 with the "I'm not a robot Checkbox" option. - Enter your domain and accept the reCAPTCHA Terms of Service. - Complete the setup to get your Site Key and Secret Key. If you don't get a the API Keys then an error similar to above image will occur.
Sample Code 3:
<head>
  <script src="https://www.google.com/recaptcha/api.js" async defer></script>
</head>
<body>

  <form id="myForm" action="<--paste your webhook URL here-->" method="post">
    <!-- Your form fields go here -->
    <label for="fname">First name:</label><br>
    <input type="text" id="fname" name="fname" value="John" required><br>
    <label for="email">Email:</label><br>
    <input type="text" id="email" name="email" value="test@test.com" required><br><br>
    <div class="g-recaptcha" data-sitekey="<--paste teh Site Key here-->" data-callback="recaptchaCallback"></div>
    <input type="submit" value="Submit">
  </form>

  <script>
    function recaptchaCallback() {
      // This function will be called when reCAPTCHA is successfully completed
      document.getElementById("myForm").submit(); // Submit the form
    }

    document.getElementById("myForm").addEventListener("submit", function(event) {
      var response = grecaptcha.getResponse();

      if (response.length === 0) {
        // If reCAPTCHA is not completed, prevent form submission
        alert("Please complete the reCAPTCHA.");
        event.preventDefault();
      }
    });
  </script>

</body>
Use the search bar in our Help Center to find quick guides and walkthroughs. If you face any problem then reach out to us at Mailmodo Support or share your thoughts at Mailmodo Product Feedback .