How to add reCAPTCHA
Last updated July 31, 2024
ReCAPTCHA is required to distinguish between real users and automated bots. It helps prevent bots from abusing online services, such as creating fake accounts, sending spam, or launching attacks. By solving simple challenges, users prove they are human, enhancing security and ensuring the proper functioning of websites.
Guide for adding Captcha to your website
Get reCAPTCHA API Keys
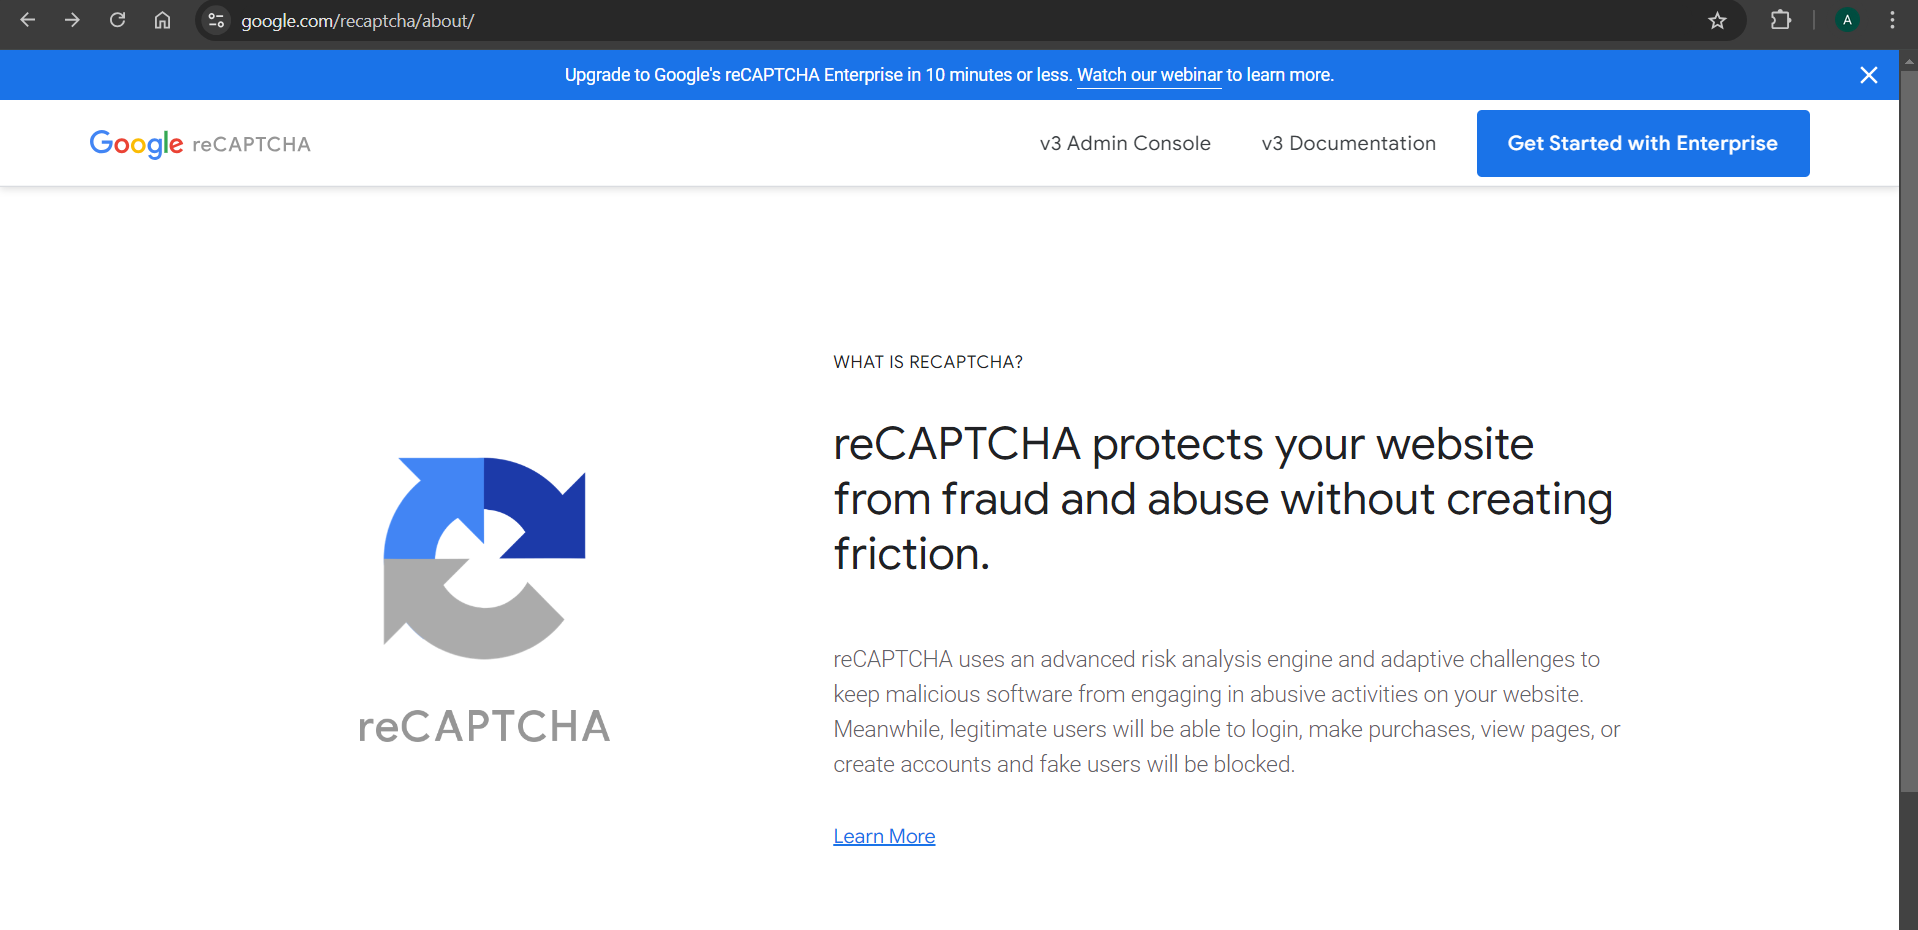
Step 1: Go to the Google reCAPTCHA website .
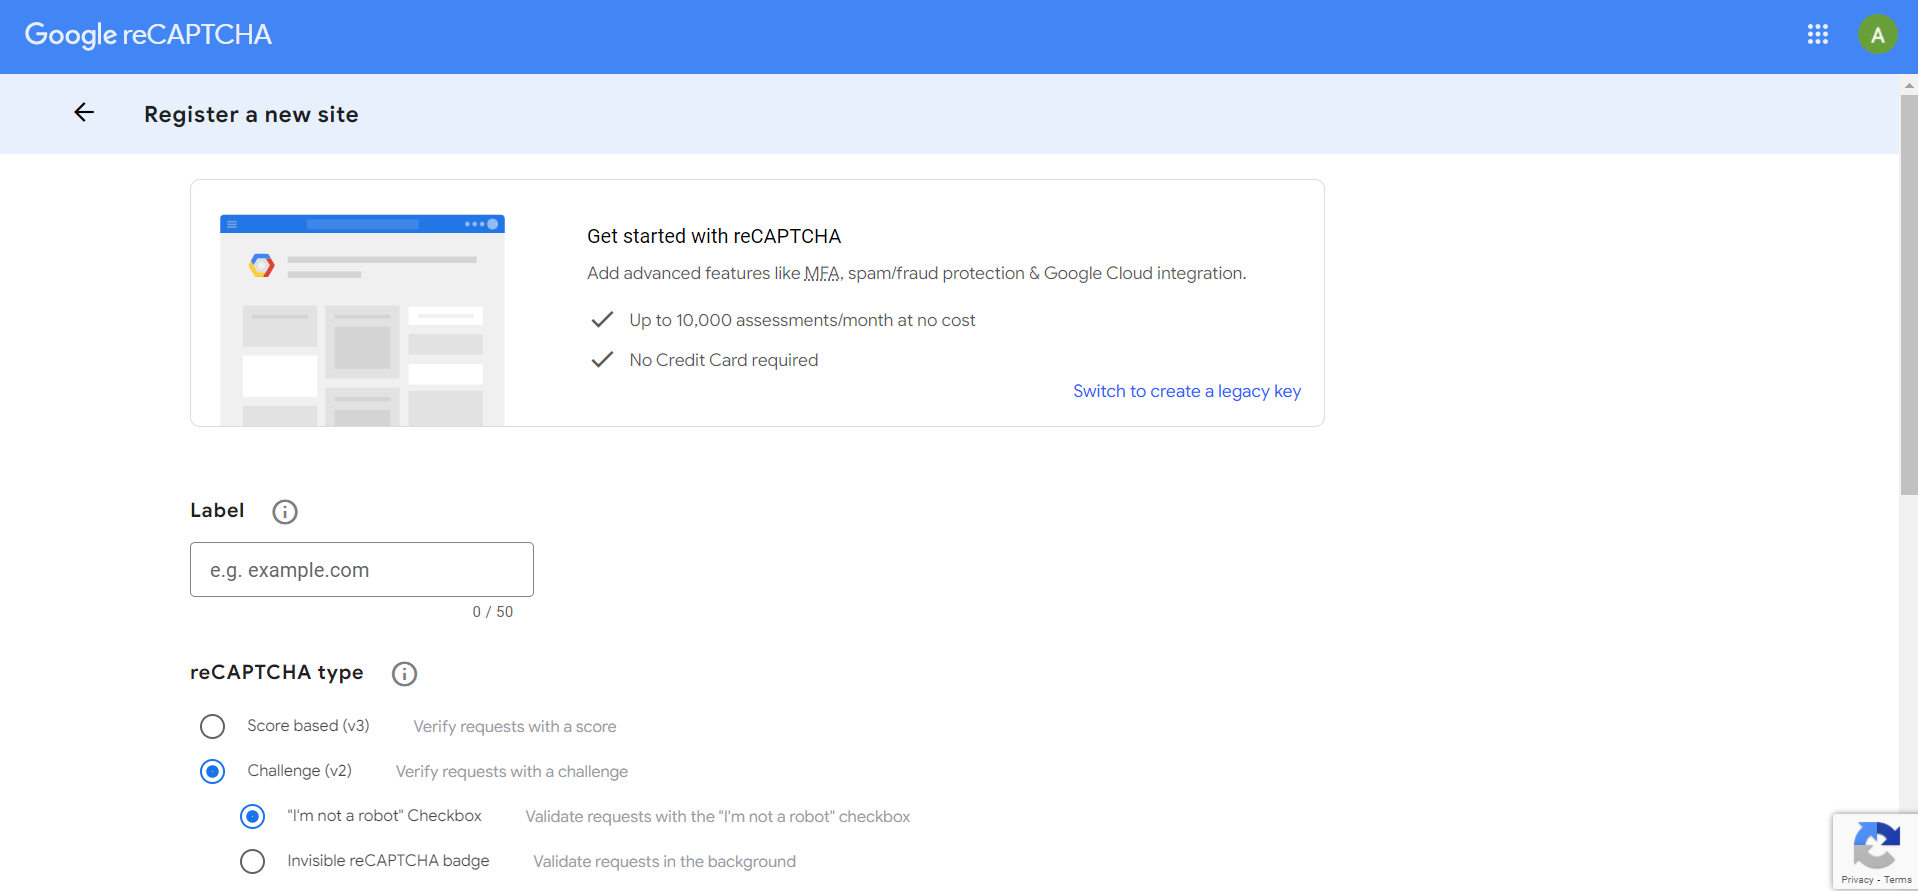
Step 2: Create a new site for reCAPTCHA v2 with the "I'm not a robot Checkbox" option.
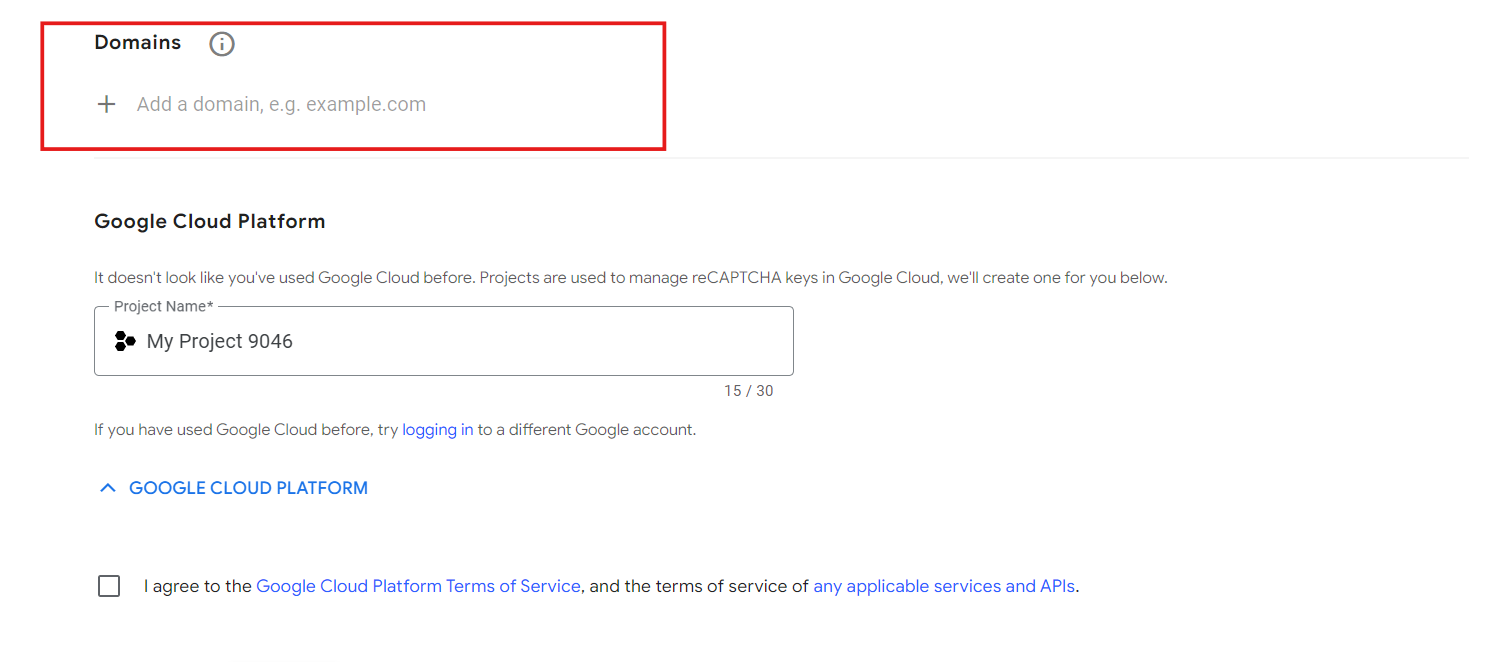
Step 3: Enter your domain and accept the reCAPTCHA Terms of Service.
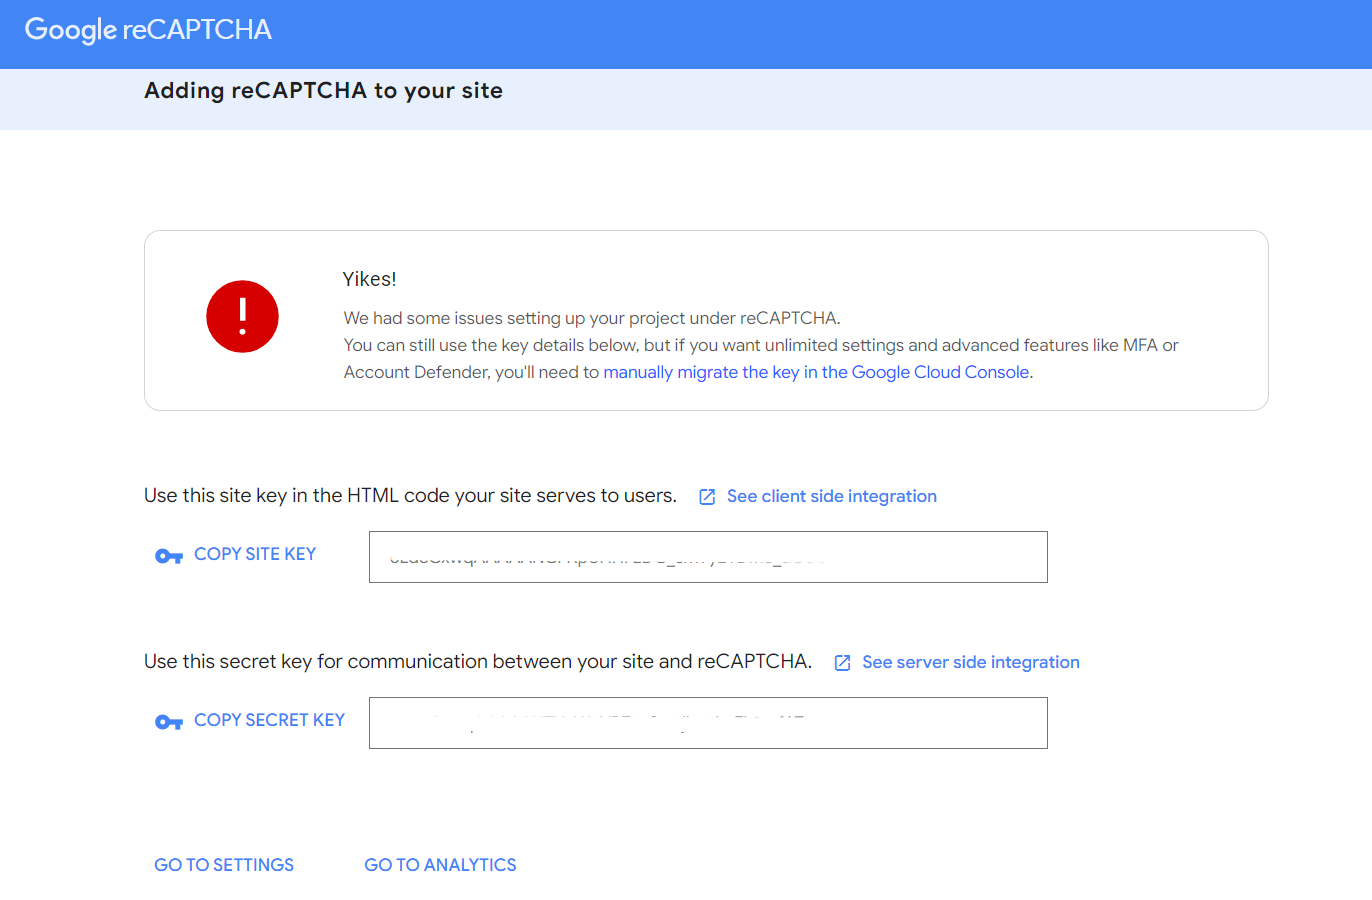
Step 4: Complete the setup to get your Site Key and Secret Key.
Adding form in Mailmodo
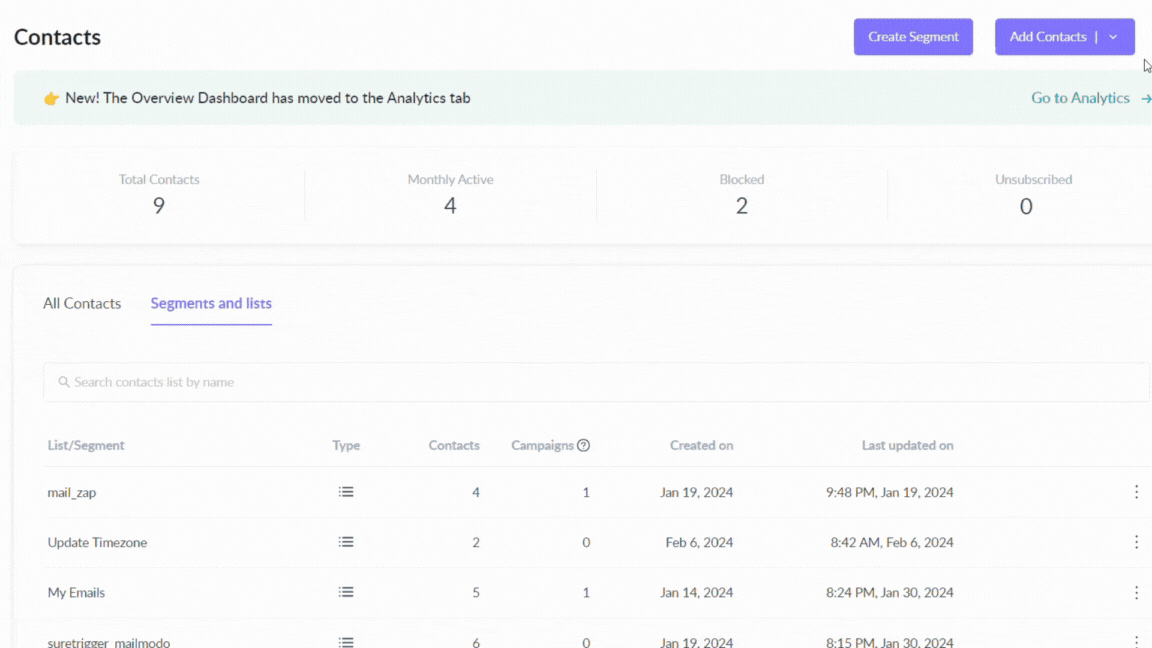
Step 1: Go to Contacts Click on Add Contacts and select Add through forms.
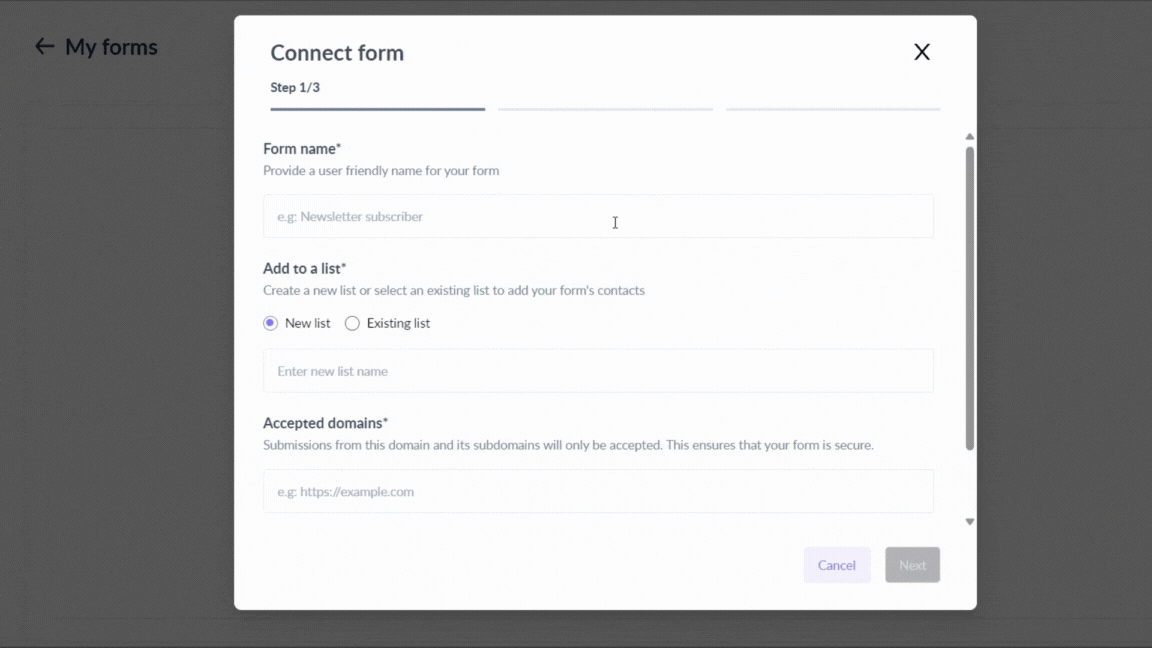
Step 2: Click Connect Form and choose Custom forms. Click on Continue.
Step 3: Provide Form Name, choose New List/Existing List. If New List, then give name for the list, otherwise if Existing List then choose from drop down menu.
Step 4: Enter the domain from which the submissions need to be accepted. Submissions from this domain and its subdomains are accepted.
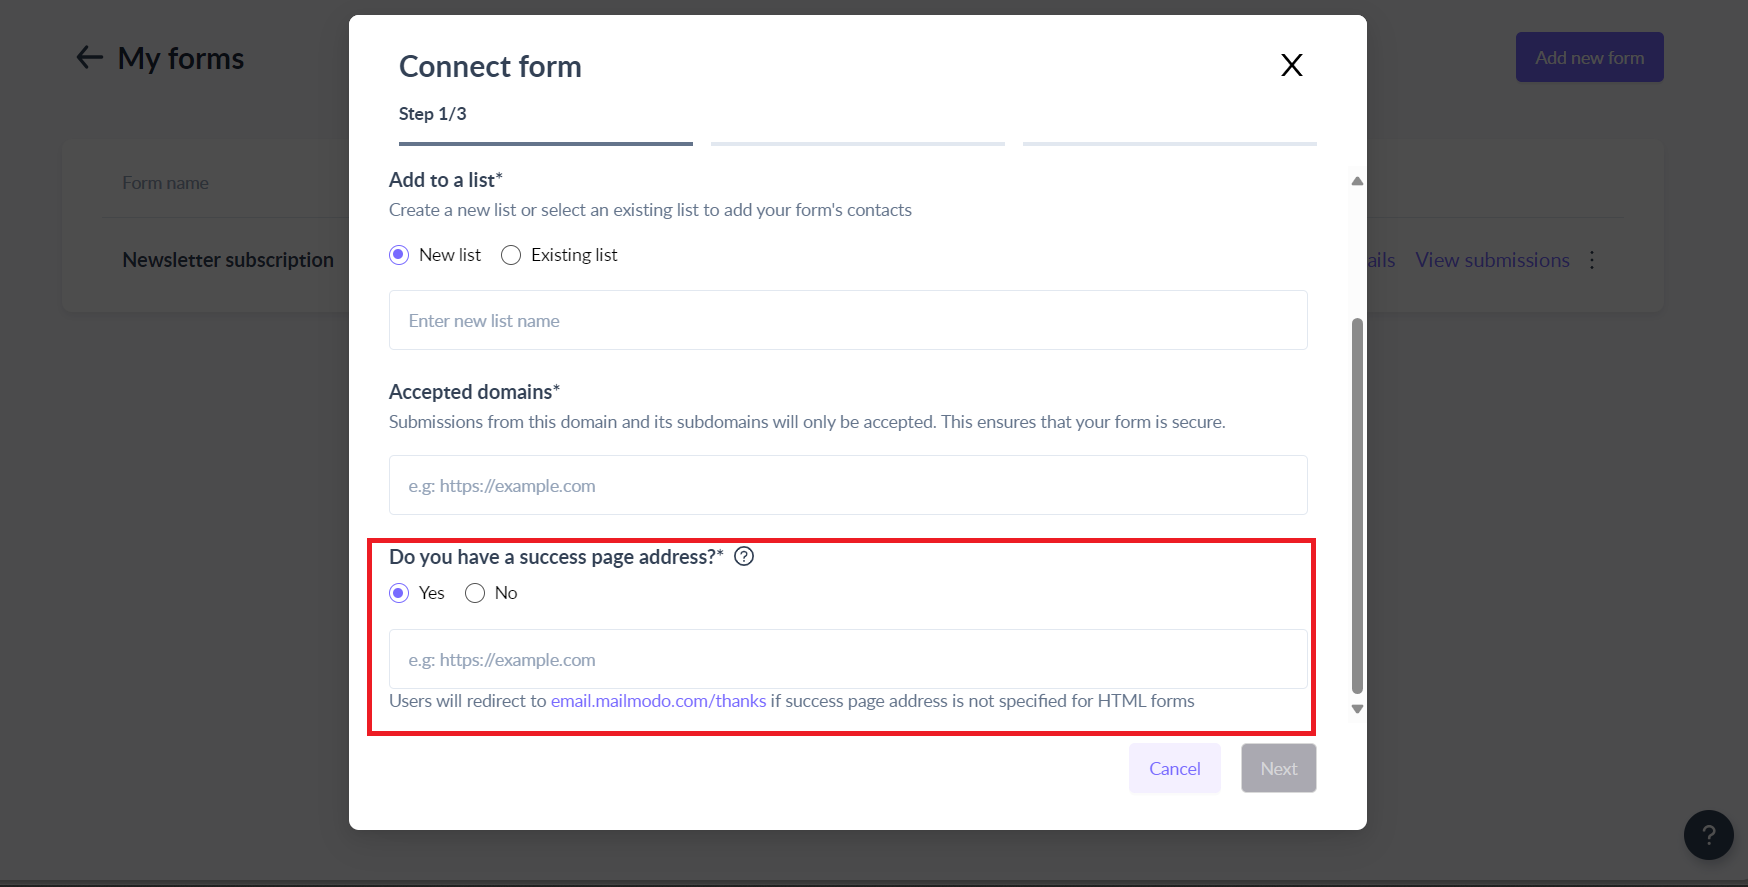
Step 5: If you have a success page address, select 'Yes' and enter the success page address.
If 'No', then users will be redirected to email.mailmodo.com/thanks by default.
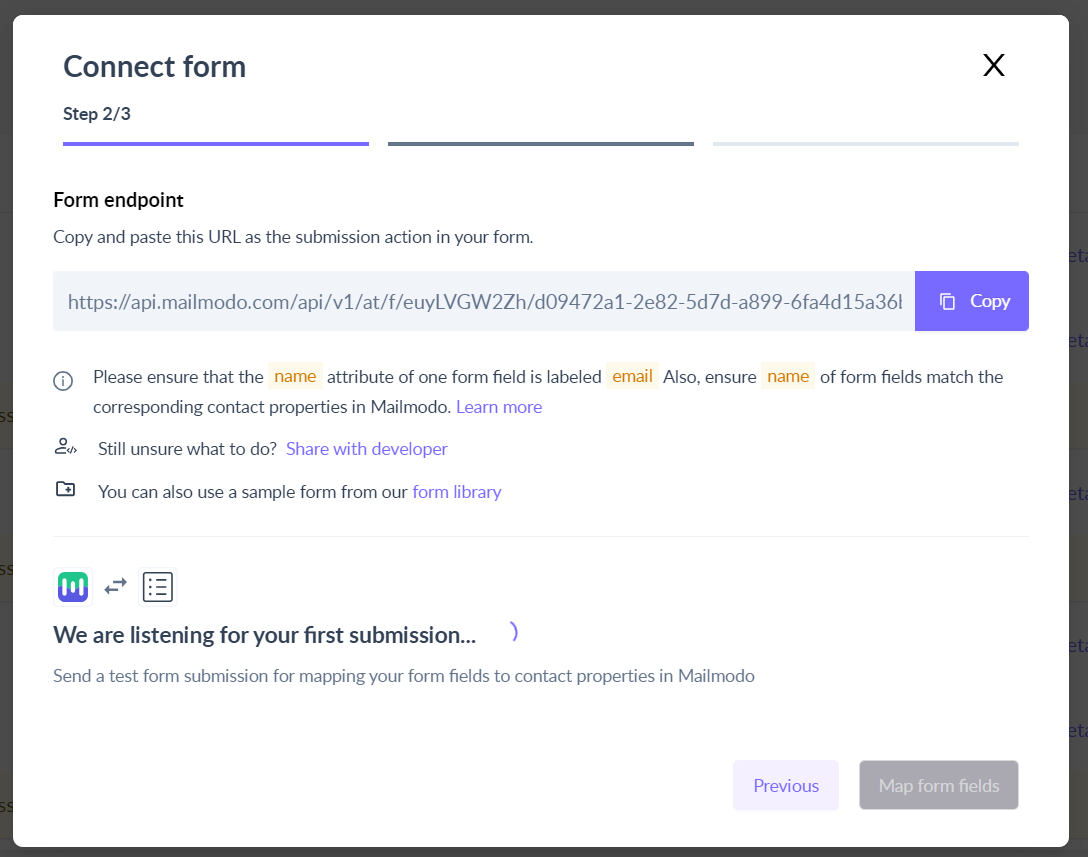
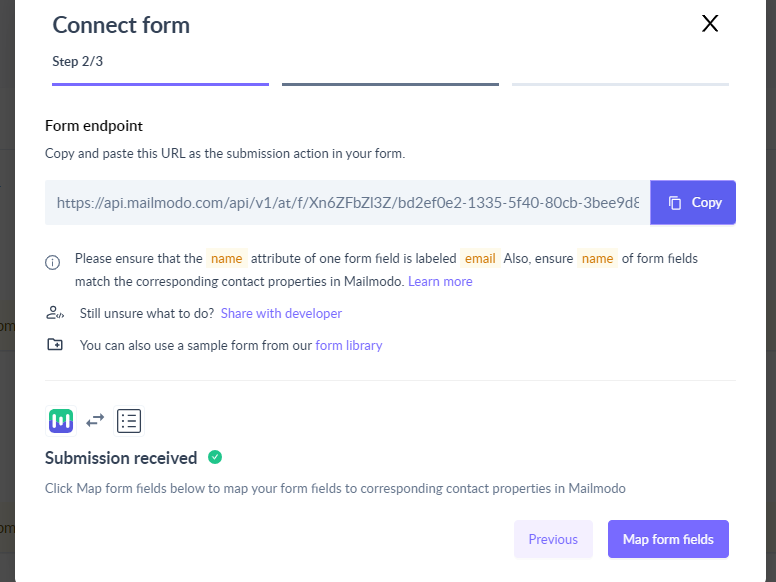
Step 6: Copy the URL provided by Mailmodo and integrate it with your form. Alternatively, you can share the URL and the steps with the developer using 'Share with developer' option.
Please ensure that the name attribute of one form field is labeled email. Also, ensure that the name of form fields match the corresponding contact properties in Mailmodo.
Adding Captcha to website
We are taking WordPress website as an example. You can follow the same steps for your website with some minor changes.
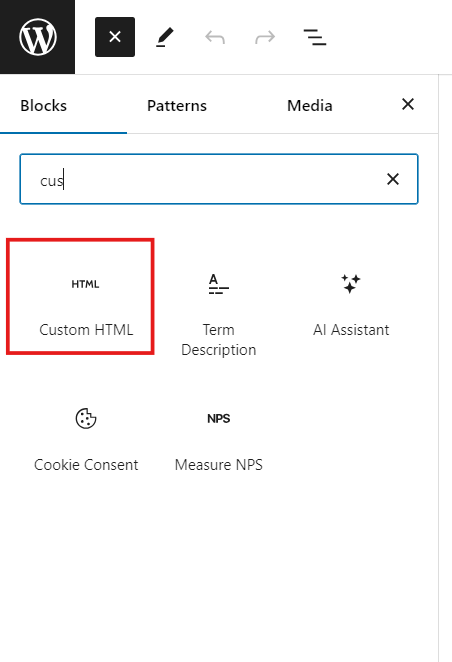
Step 1: Go to the Page editor in WordPress. Click on Add Block(+) and choose Custom HTML.
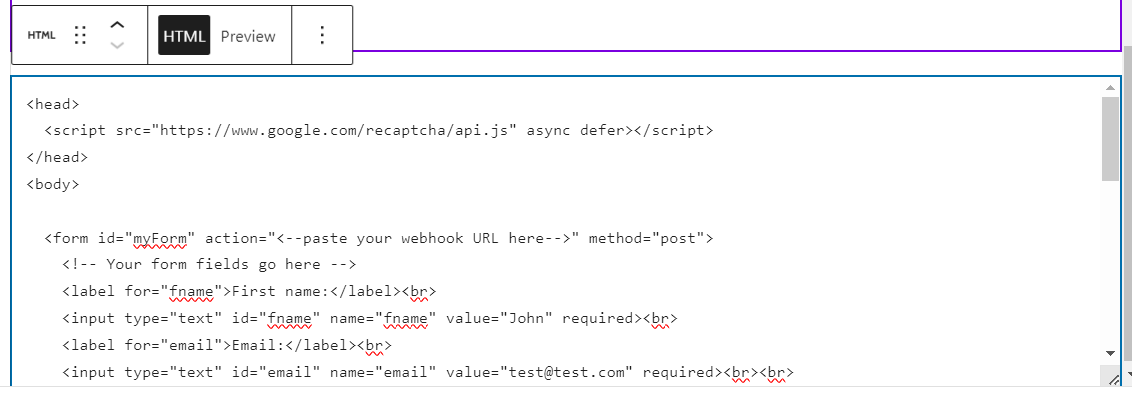
Step 2: Input your custom HTML form code in the editor, and then preview the form directly within the editor itself.
<head>
  <script src="https://www.google.com/recaptcha/api.js" async defer></script>
</head>
<body>

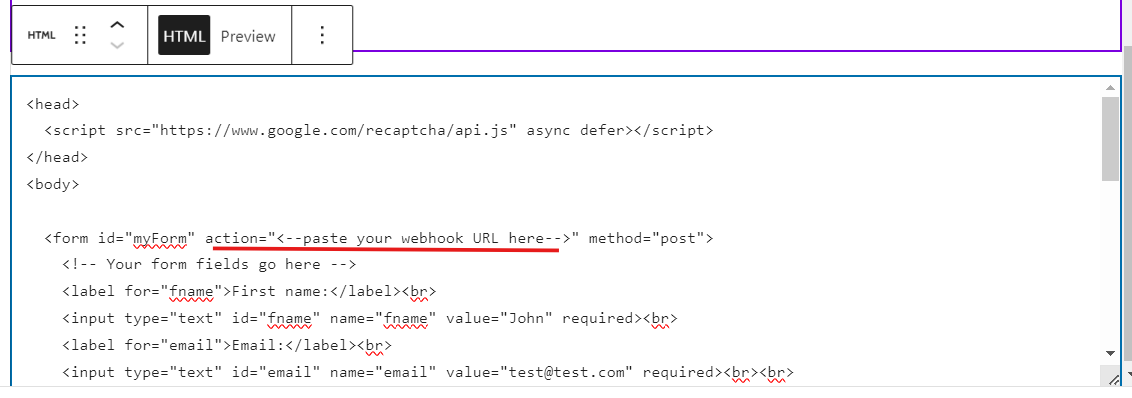
  <form id="myForm" action="<--paste your webhook URL here-->" method="post">
    <!-- Your form fields go here -->
    <label for="fname">First name:</label><br>
    <input type="text" id="fname" name="fname" value="John" required><br>
    <label for="email">Email:</label><br>
    <input type="text" id="email" name="email" value="test@test.com" required><br><br>
    <div class="g-recaptcha" data-sitekey="<--paste teh Site Key here-->" data-callback="recaptchaCallback"></div>
    <input type="submit" value="Submit">
  </form>

  <script>
    function recaptchaCallback() {
      // This function will be called when reCAPTCHA is successfully completed
      document.getElementById("myForm").submit(); // Submit the form
    }

    document.getElementById("myForm").addEventListener("submit", function(event) {
      var response = grecaptcha.getResponse();

      if (response.length === 0) {
        // If reCAPTCHA is not completed, prevent form submission
        alert("Please complete the reCAPTCHA.");
        event.preventDefault();
      }
    });
  </script>

</body>
Step 3: Change the URL present in the “action” attribute with the URL generated in Mailmodo Form.
And add the site key.
Step 4: Publish/Update the page.
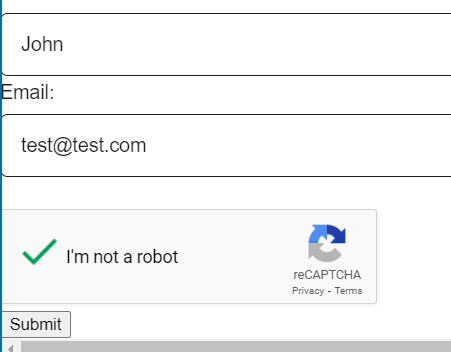
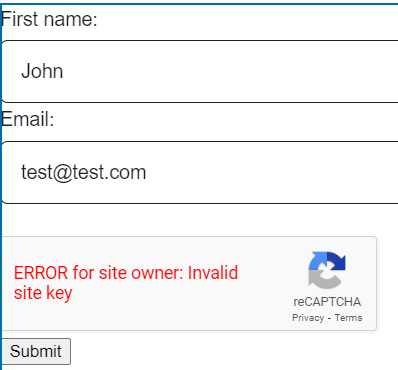
Step 5: Open the page in browser and provide a sample submission.
If you don't get a the API Keys then an error will occur.
Checking with Mailmodo
Step 1: Once, the test submission is done, the status will change to Submission Received. This will map your form fields to contact properties in Mailmodo.
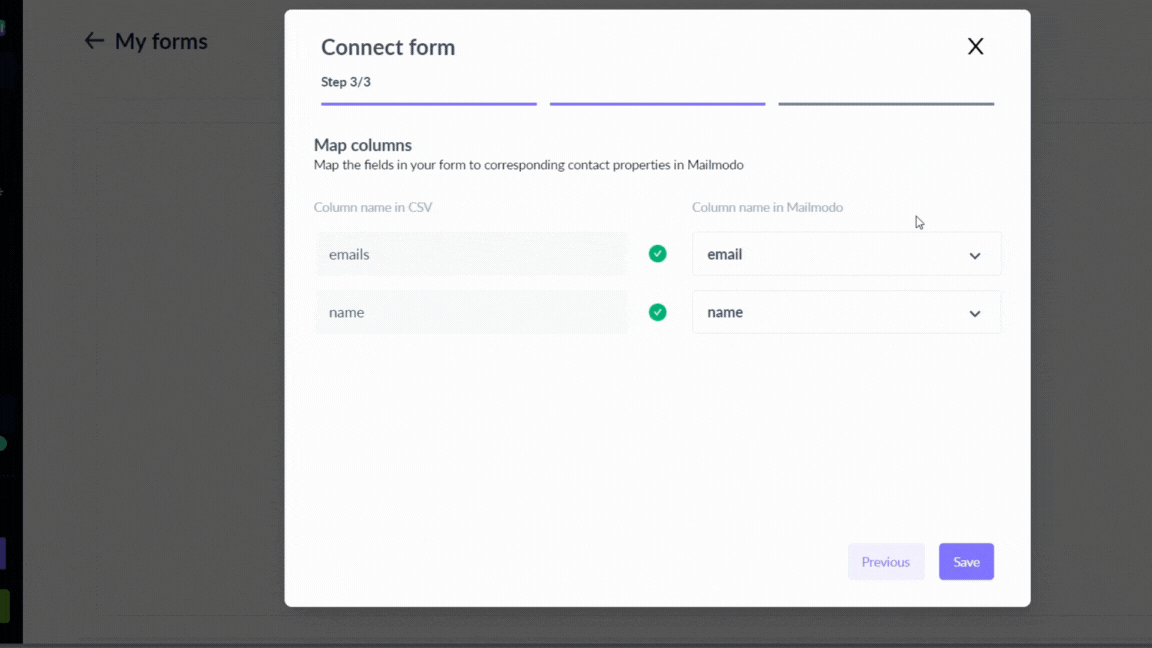
Step 2: Click on Map form fields, and check whether the mappings are correct or not. If not, then map the fields in your form to corresponding contact properties in Mailmodo and click Save.
Voila! You will now receive the submitted form data into Mailmodo.
Use the search bar in our Help Center to find quick guides and walkthroughs. If you face any problem then reach out to us at Mailmodo Support or share your thoughts at Mailmodo Product Feedback .


