

Embed Google font in landing page
Last updated May 27, 2024
Custom CSS
After importing CSS code from Google Font customize it. To learn about importing the CSS code check Additional resource below.
To create your custom CSS:
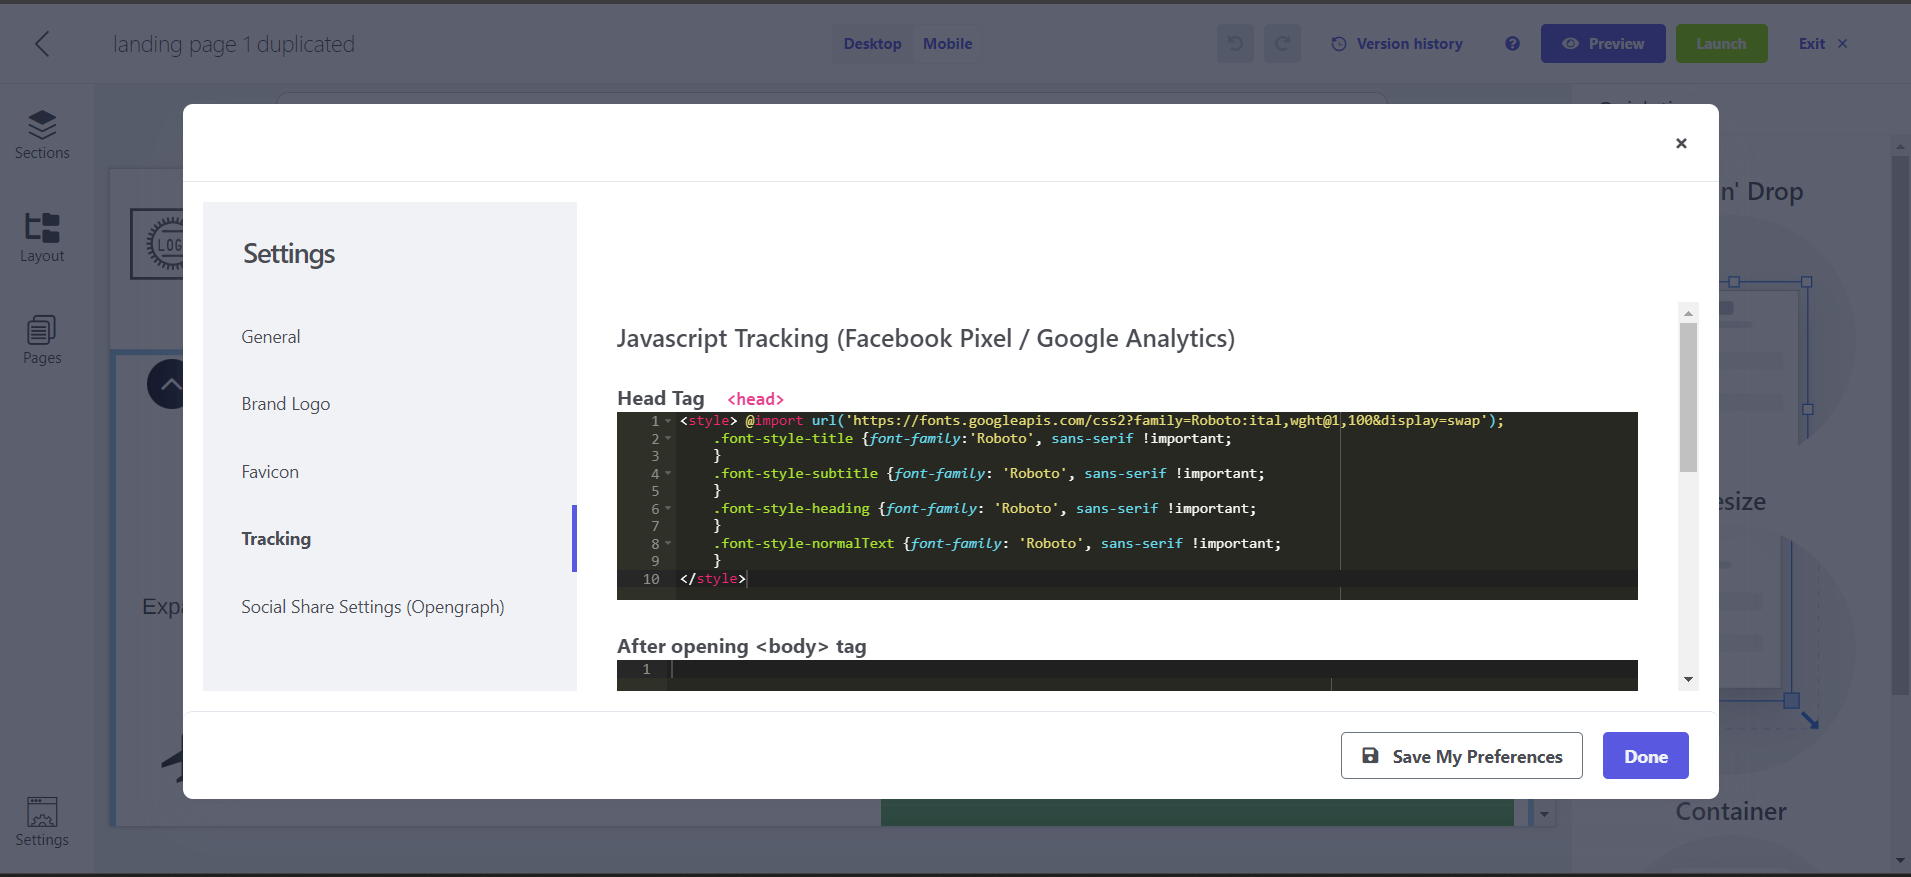
1. Copy the CSS code for the Google font URL.
2. Apply the font-style-title, font-style-subtitle, font-style-head, and font-style-normalText classes to define the Title, Subtitle, Head, and Normal body font styles in your landing page, specifying their respective font families.
3. Include the !important rule at the end of each code line to ensure the proper override of previous styling rules, ensuring that the custom font displayed on the published landing page is the correct one.
<style> @import url('https://fonts.googleapis.com/css2?family=Roboto:ital,wght@1,100&display=swap');
    .font-style-title {font-family:'Roboto', sans-serif !important;
    }
    .font-style-subtitle {font-family: 'Roboto', sans-serif !important;
    }
    .font-style-heading {font-family: 'Roboto', sans-serif !important;
    }
    .font-style-normalText {font-family: 'Roboto', sans-serif !important;
    }
</style>
Integrating custom CSS to landing page
Follow the below steps:
- Navigate to Landing pages.
- Choose the specific landing page where you wish to apply the Google font.
- Within the landing page editor, click on Settings located in the bottom left corner.
- Open the Tracking tab.
- In the Head Tag section, insert your custom CSS.
- Click Done.
- If your landing page was previously published, click Launch and re-publish it to ensure your changes are reflected.
Additional resources
https://www.w3docs.com/snippets/css/how-to-import-google-fonts-in-css-file.html
If you face any problem then reach out to us at Mailmodo Support or share your thoughts at Mailmodo Product Feedback .