

Send campaign as an action in the journey
Last updated February 17, 2024
Use the send campaign as an action to send emails to contacts in the journey.
For example - Use this as an action in the signup event journey to send welcome kits to new customers on your platform.
Key steps -
Step 1: Drag and drop the ‘Send campaign’ card from the left panel.
Step 2: Connect it to the relevant card in the journey.
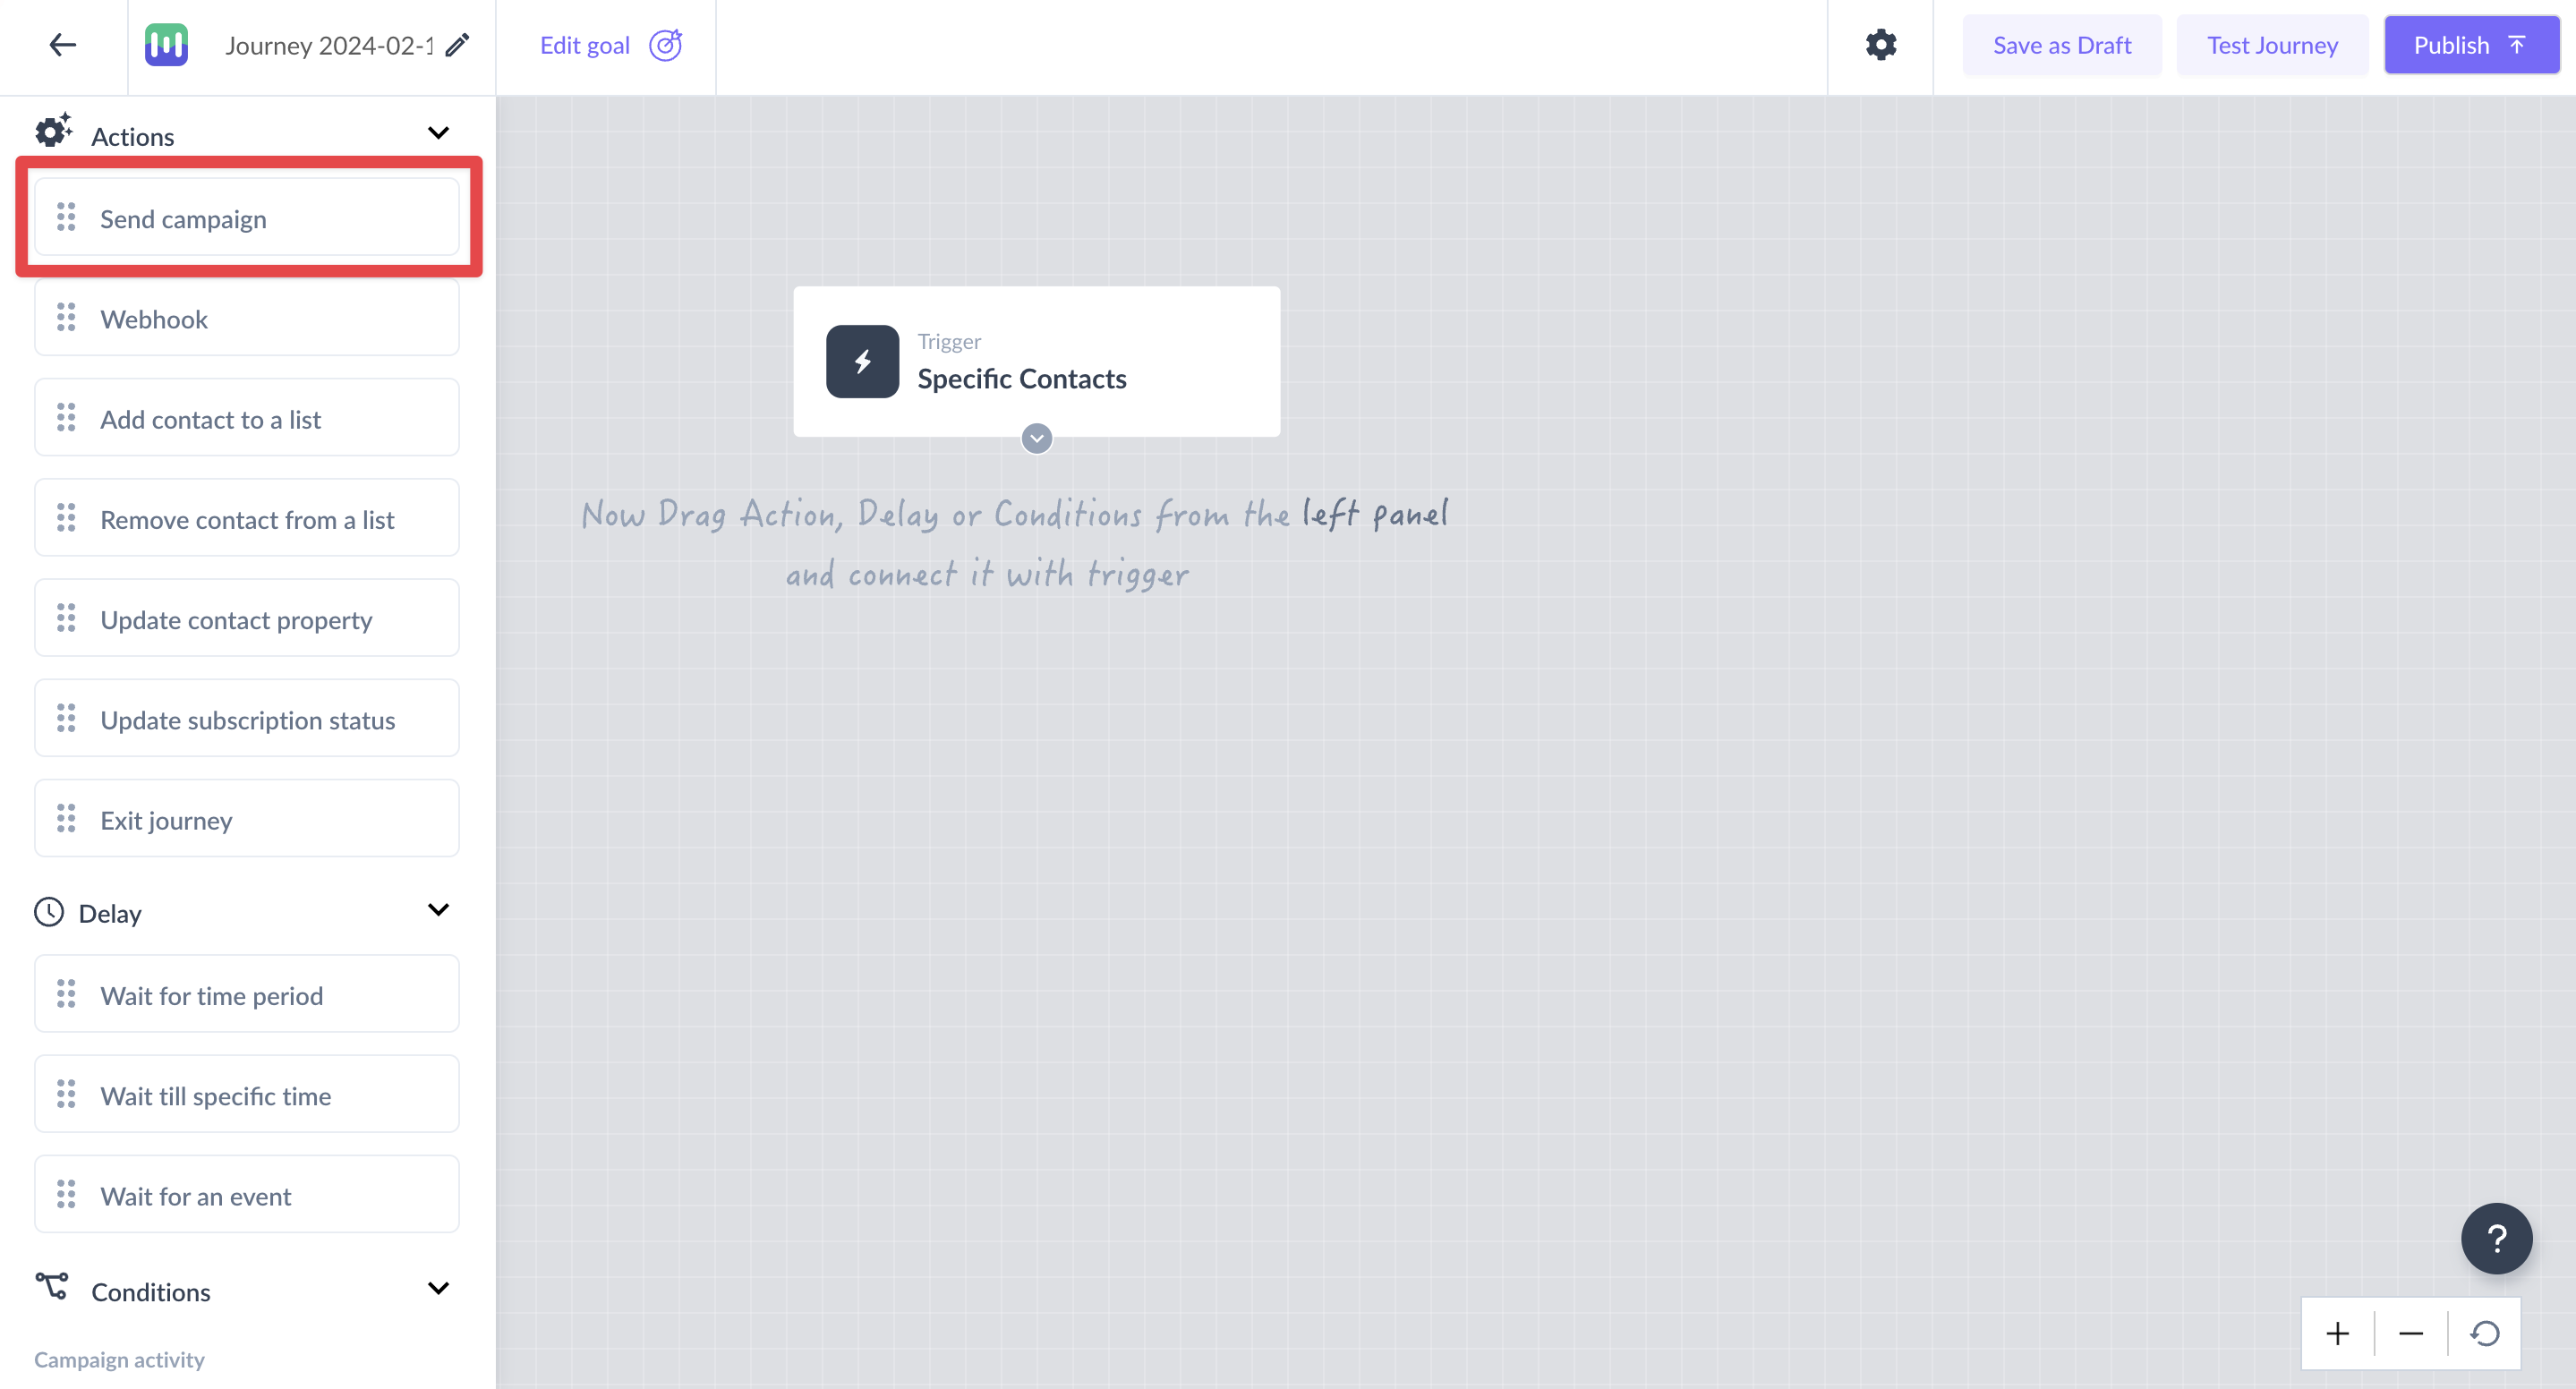
Step 3: Click on the ‘Send campaign’ card to open the right panel.
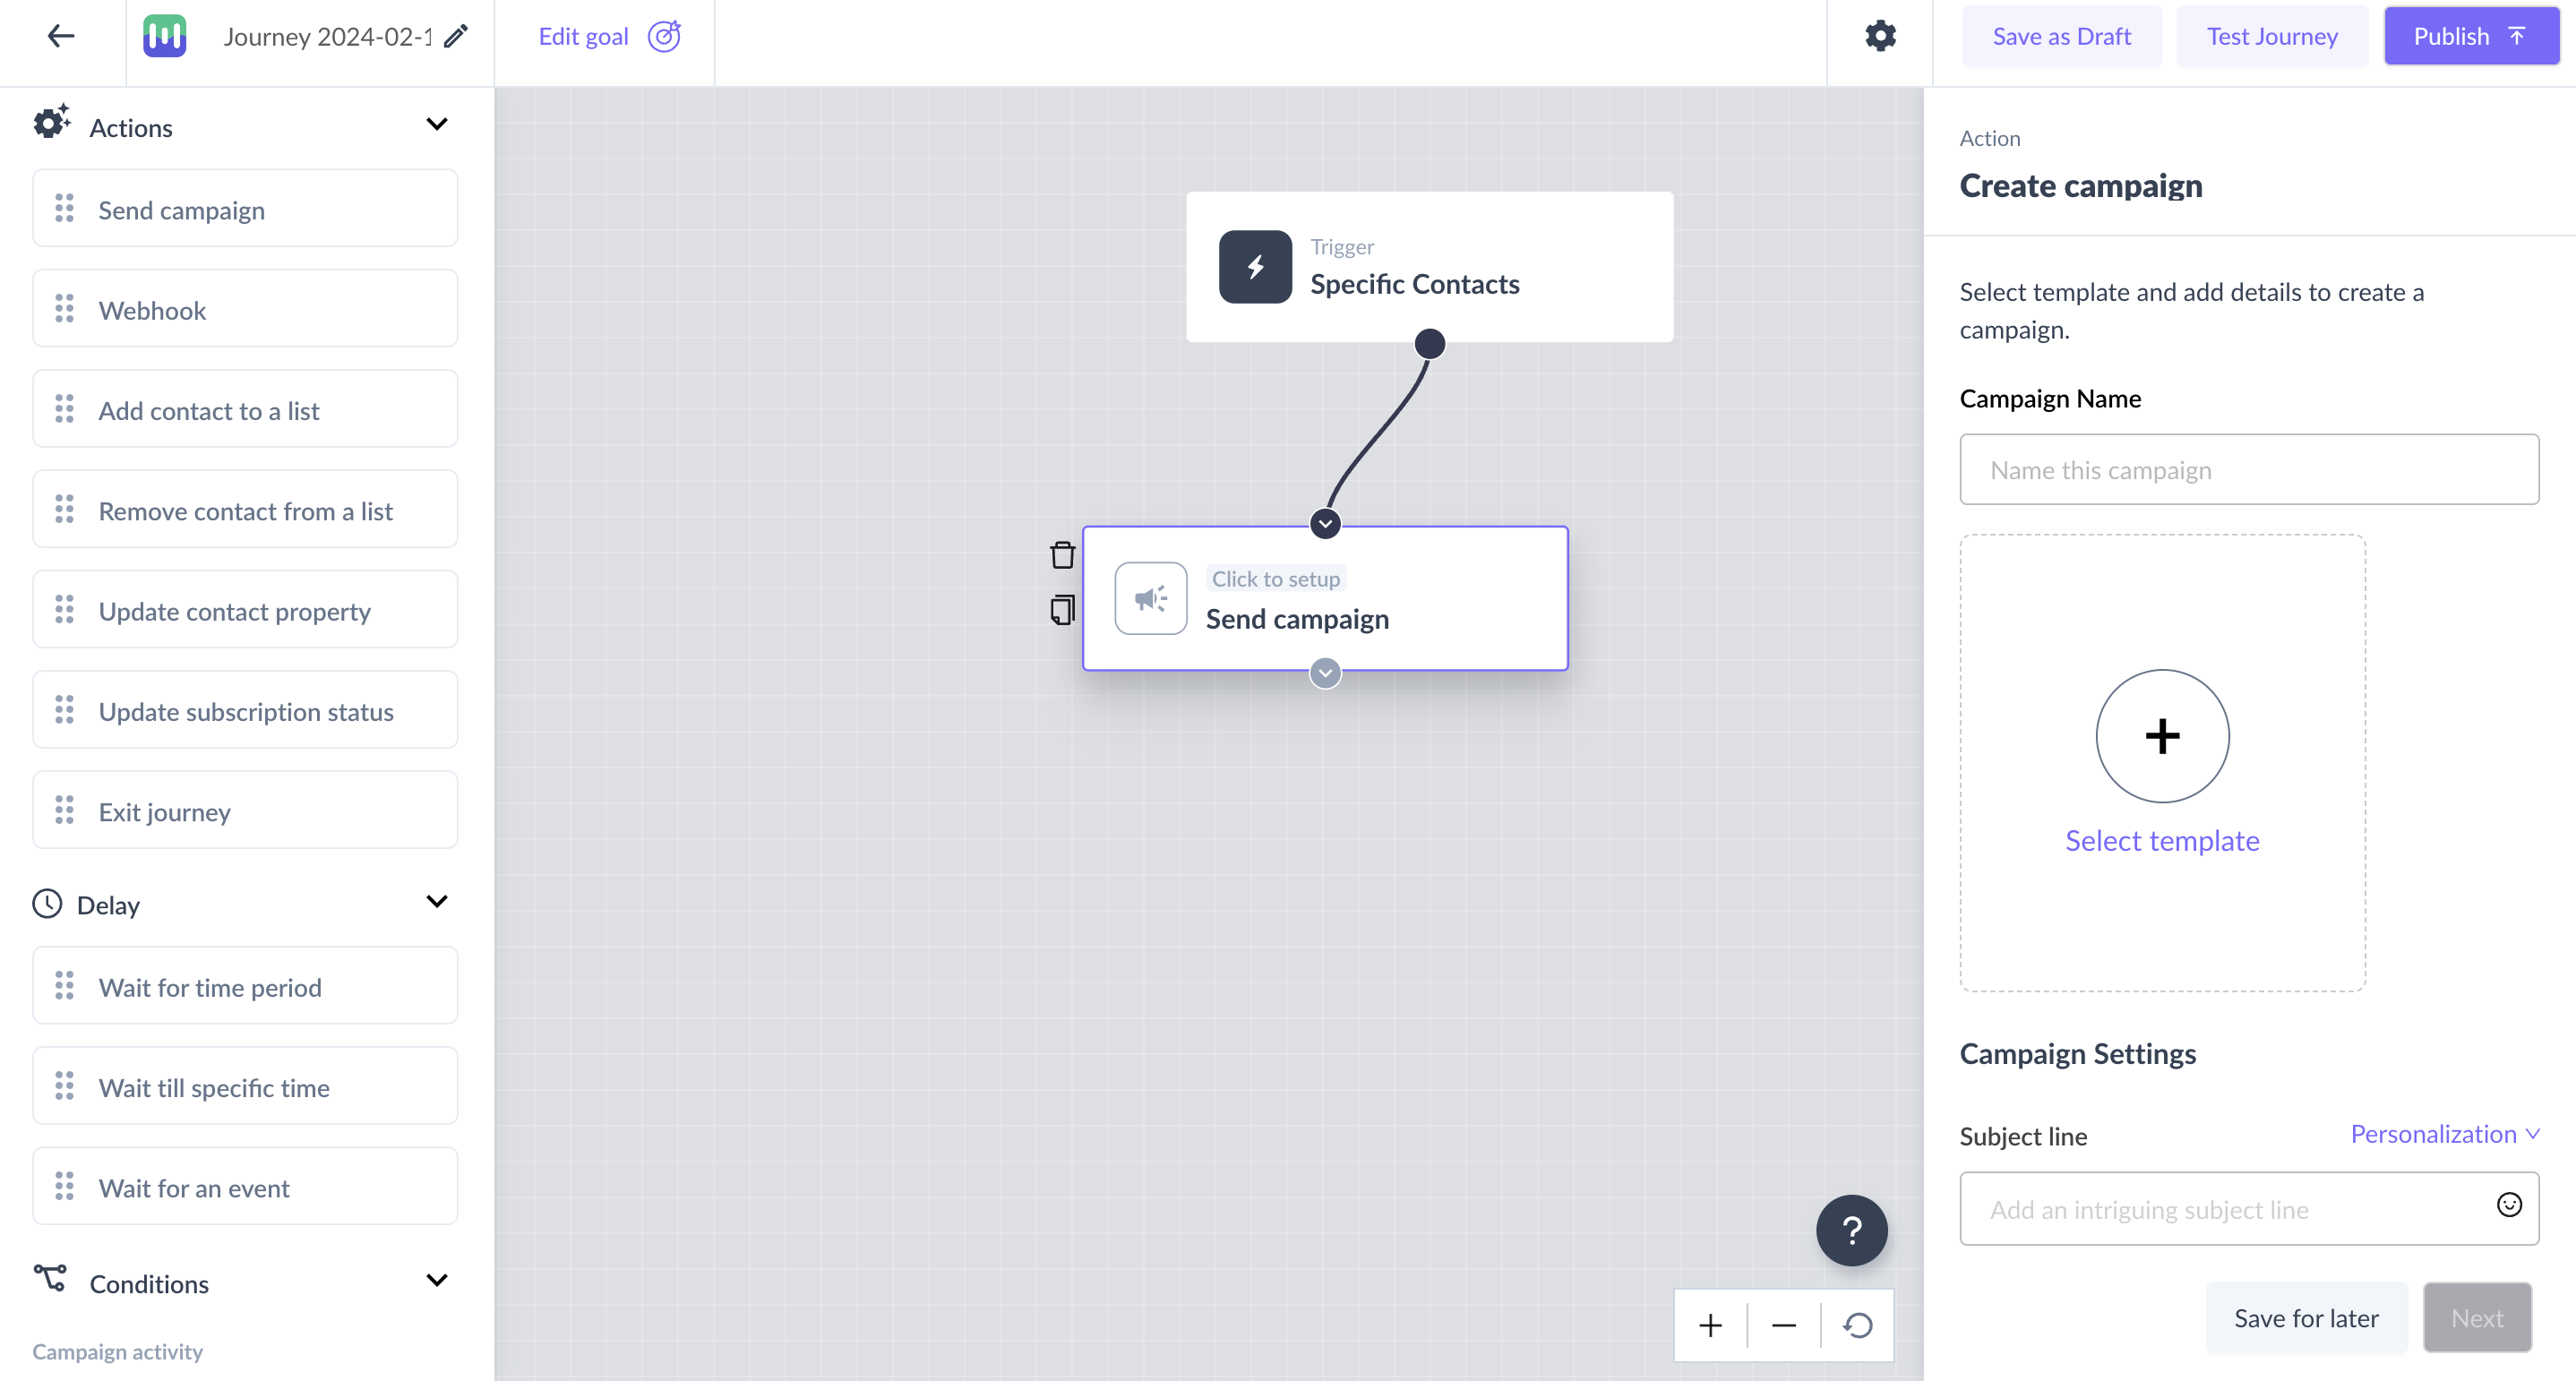
Step 4: Add the campaign name, subject line, and pre-header text, from the name, reply to email, and select template and sender email to set up the campaign.
| Setting | What to add in it? |
| Campaign Name | Give a unique name to your campaign for easy identification. |
| Select template | Click on the "Select template" button and choose your desired email template. |
| Subject line | Write an engaging and compelling subject line for your email. Alternatively, select subject lines from successful previous campaigns. |
| Pre-header text | Add a brief, descriptive text that complements the subject line and entices recipients to open the email. |
| From Name | Enter the name you want to appear as the sender of the email. |
| "Reply to" email | Provide an email address where recipients can reply to your campaign. |
| Sender email | Input the email address that recipients will see as the sender. |
In cases when the template or subject has personalisation parameters, you need to map it in the personalisation popup.
If the trigger is an occurrence of an event and the personalizations are for event properties, use the same personalisation pop-up to select the exact event and map the parameters with the event properties.
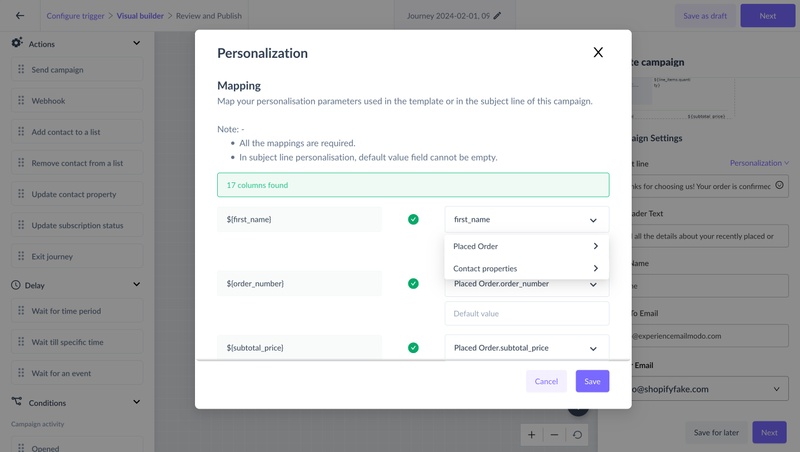
Step 5: Click ‘Next’ to map the personalisation in the pop-up and review the added campaign details.
Step 6: Once satisfied with the review page, click the ‘Save’ button in the campaign flow to complete the configuration.
This would mean, that whenever a contact reaches the ‘send campaign’ step in the journey, an email with the selected template and added details will get triggered.