

Trigger journeys on occurrence of an event
Last updated July 25, 2025
The occurrence of an event trigger will allow a contact to enter a journey based on their activity recorded on your website, app, or other platforms. To send events in Mailmodo, use our event API or integration with the Segment App.
Example Use Case:
When contacts engage with specific content, such as downloading an ebook or viewing a video, this trigger can start content engagement journeys with related resources, follow-ups, and calls to action.
Requirements:
Ensure you capture events related to your customer's activities on your website/store. To learn more about custom events on mailmodo, click here.
Key steps:
Step 1: Go to the Journey section in Mailmodo app and click Create Journey button.

Click on Start from Scratch.

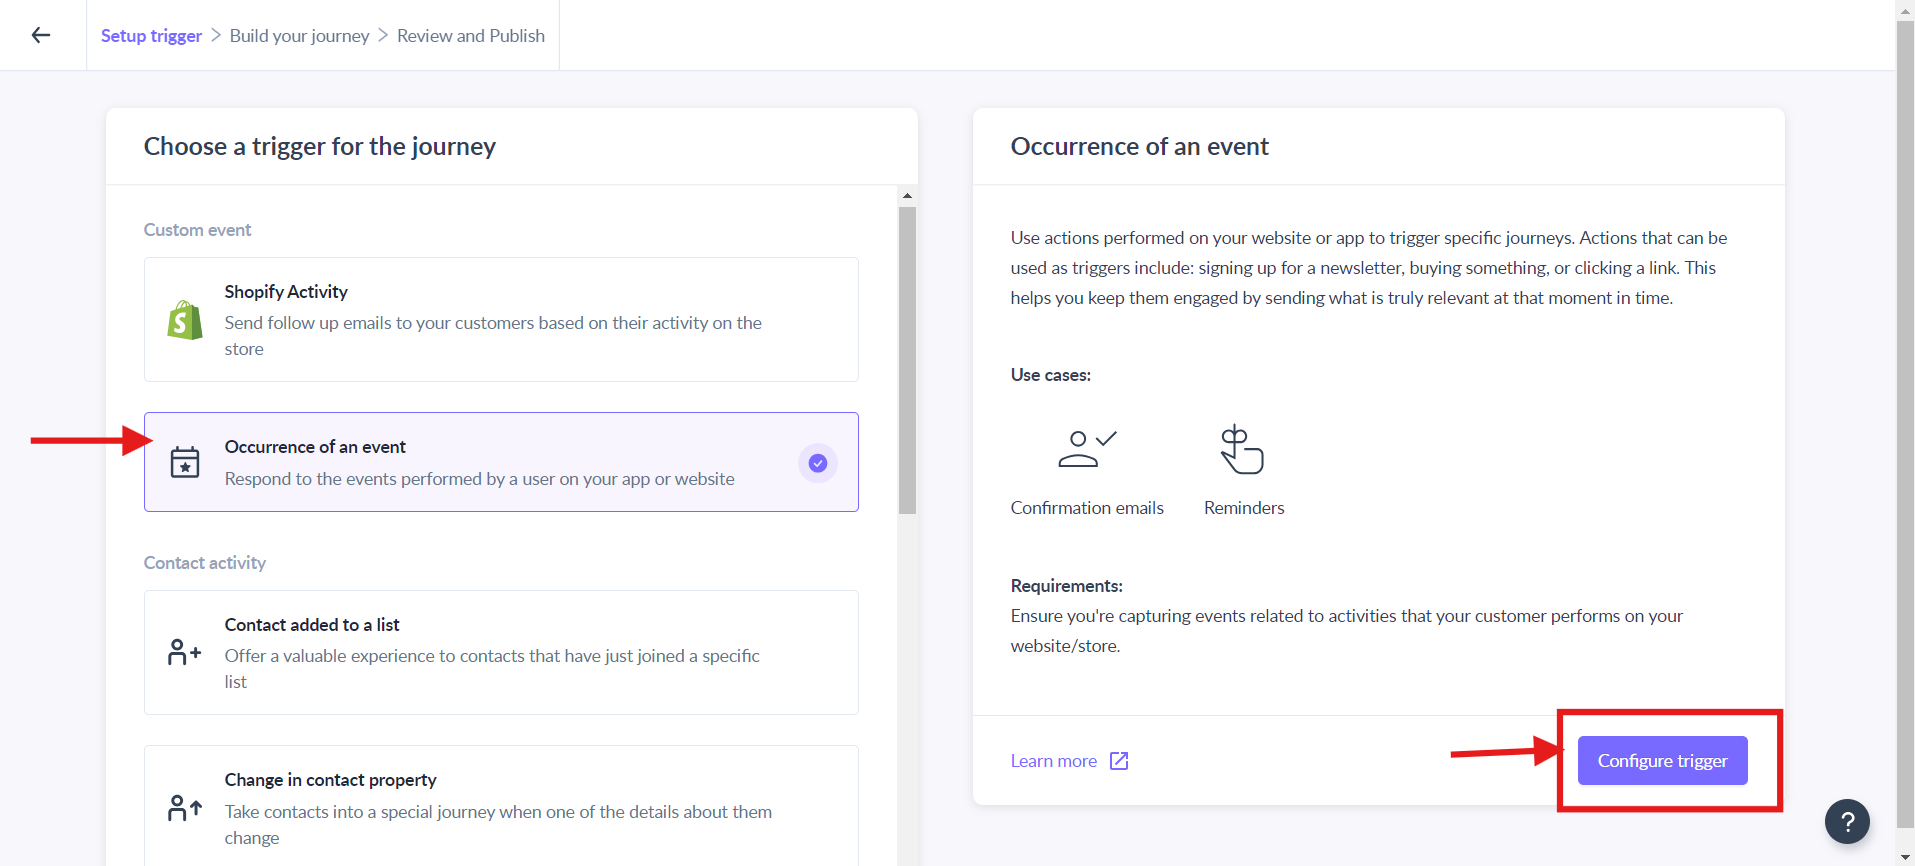
Step 2: Select ‘Occurrence of an event’ as the trigger.
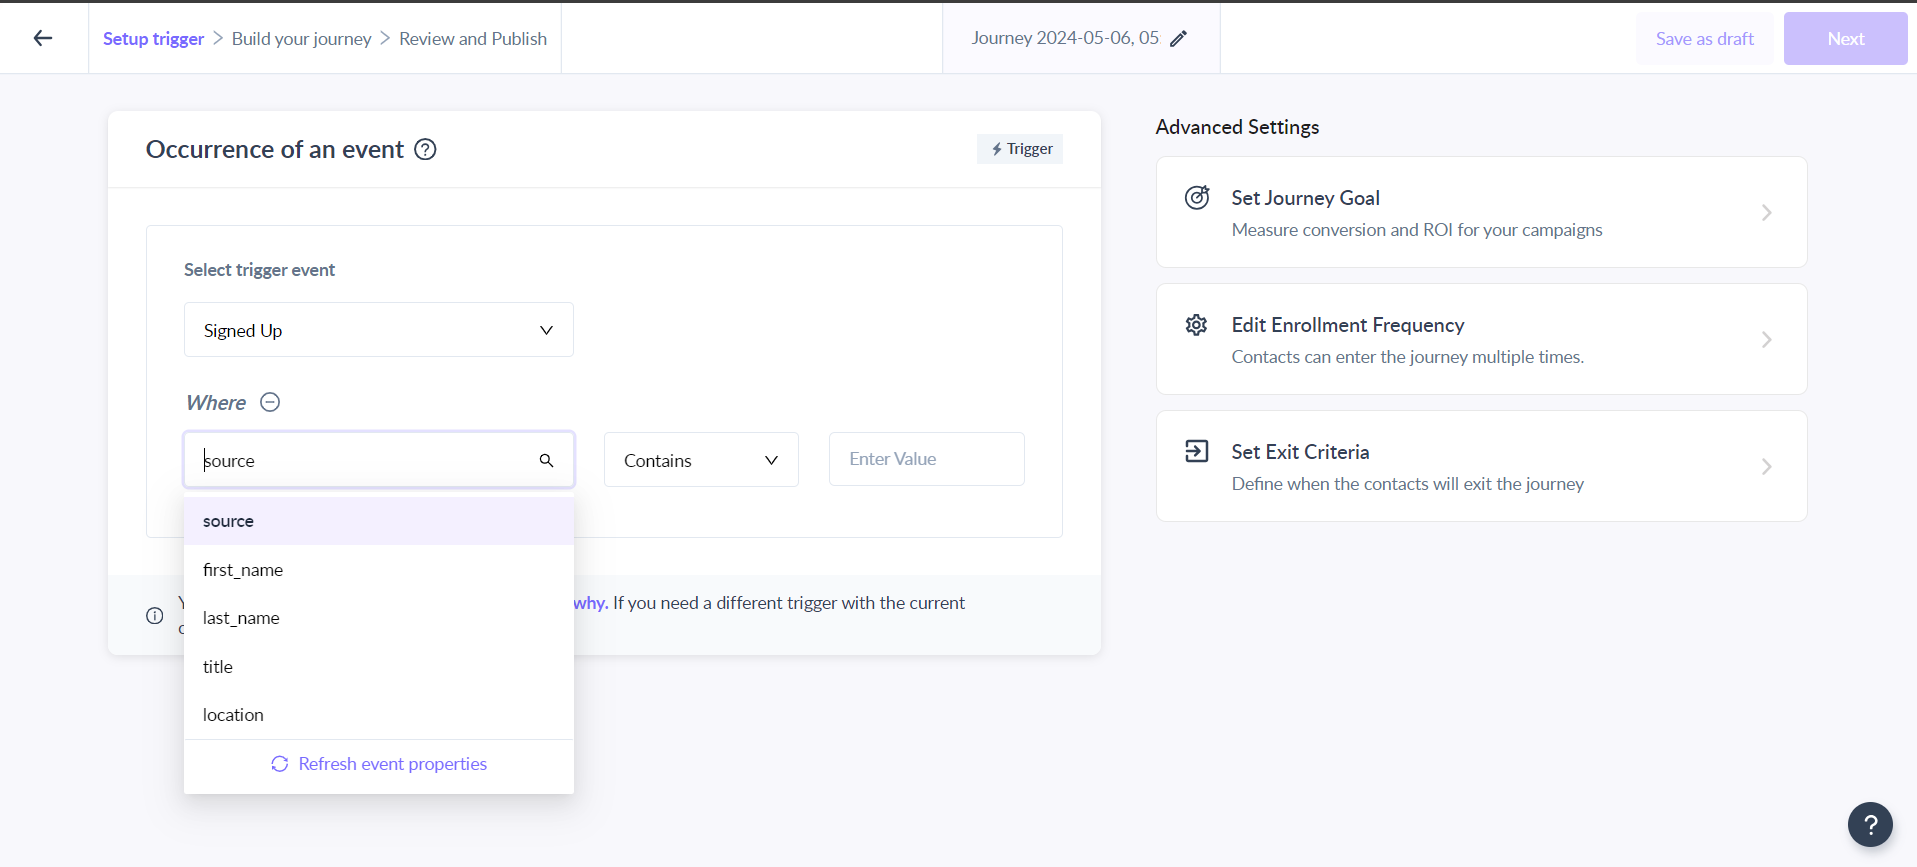
Step 3: Search and select the relevant event from the dropdown.

Step 4:. You can add a filter to set up a trigger for a specific event property.
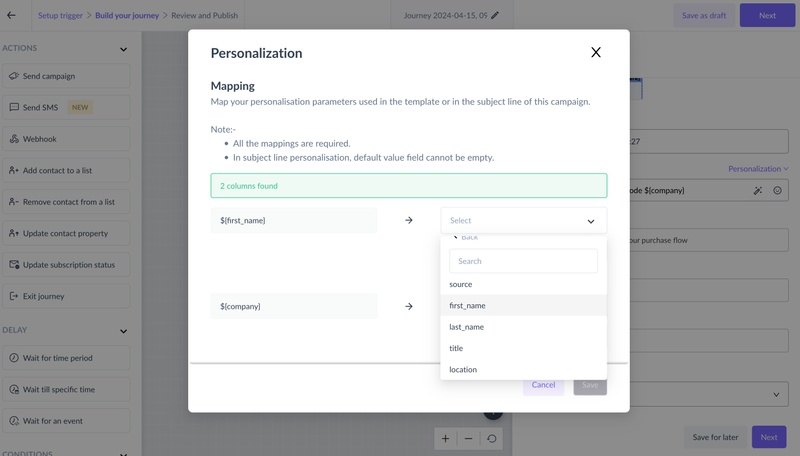
Step 5: You will be prompted to map the personalization parameters added in the template or subject line in the send campaign block to contact properties or attributes of the custom event selected in the trigger block.
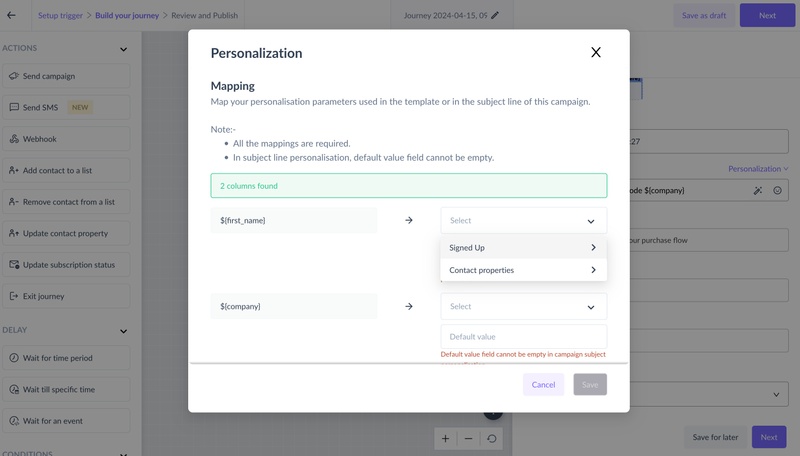
You can also map these parameters to properties that have additional details in them. These are called "Nested Objects". In the example below, the "user_details" property is a nested object under the event "Onboarding Completed".
"event": "Onboarding Completed"
{
  "email": "dummyemail@gmail.com",
  "event_name": "Onboarding Completed",
  "user_details": {
    "source": "organic",
    "signup_date": "YYYY:MM:DD",
    "plan_type": "Premium"
  }
}
You can also capture an event that has a property containing a list of recipients or products in it. These are called "Nested Arrays". You can map the parameters to the individual items in the list.
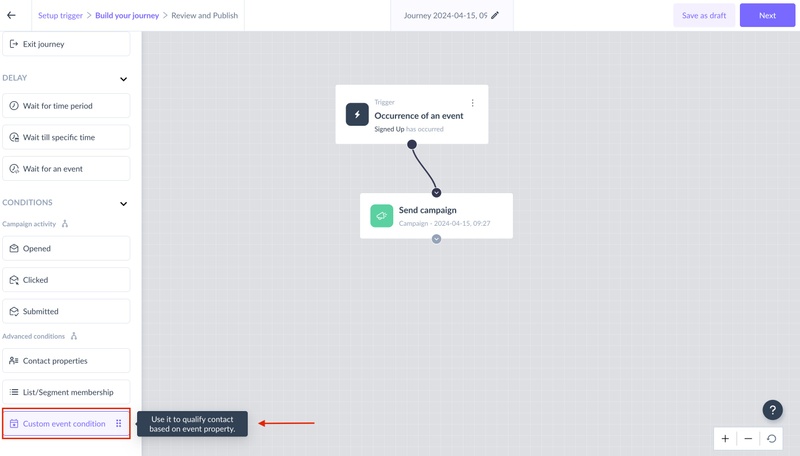
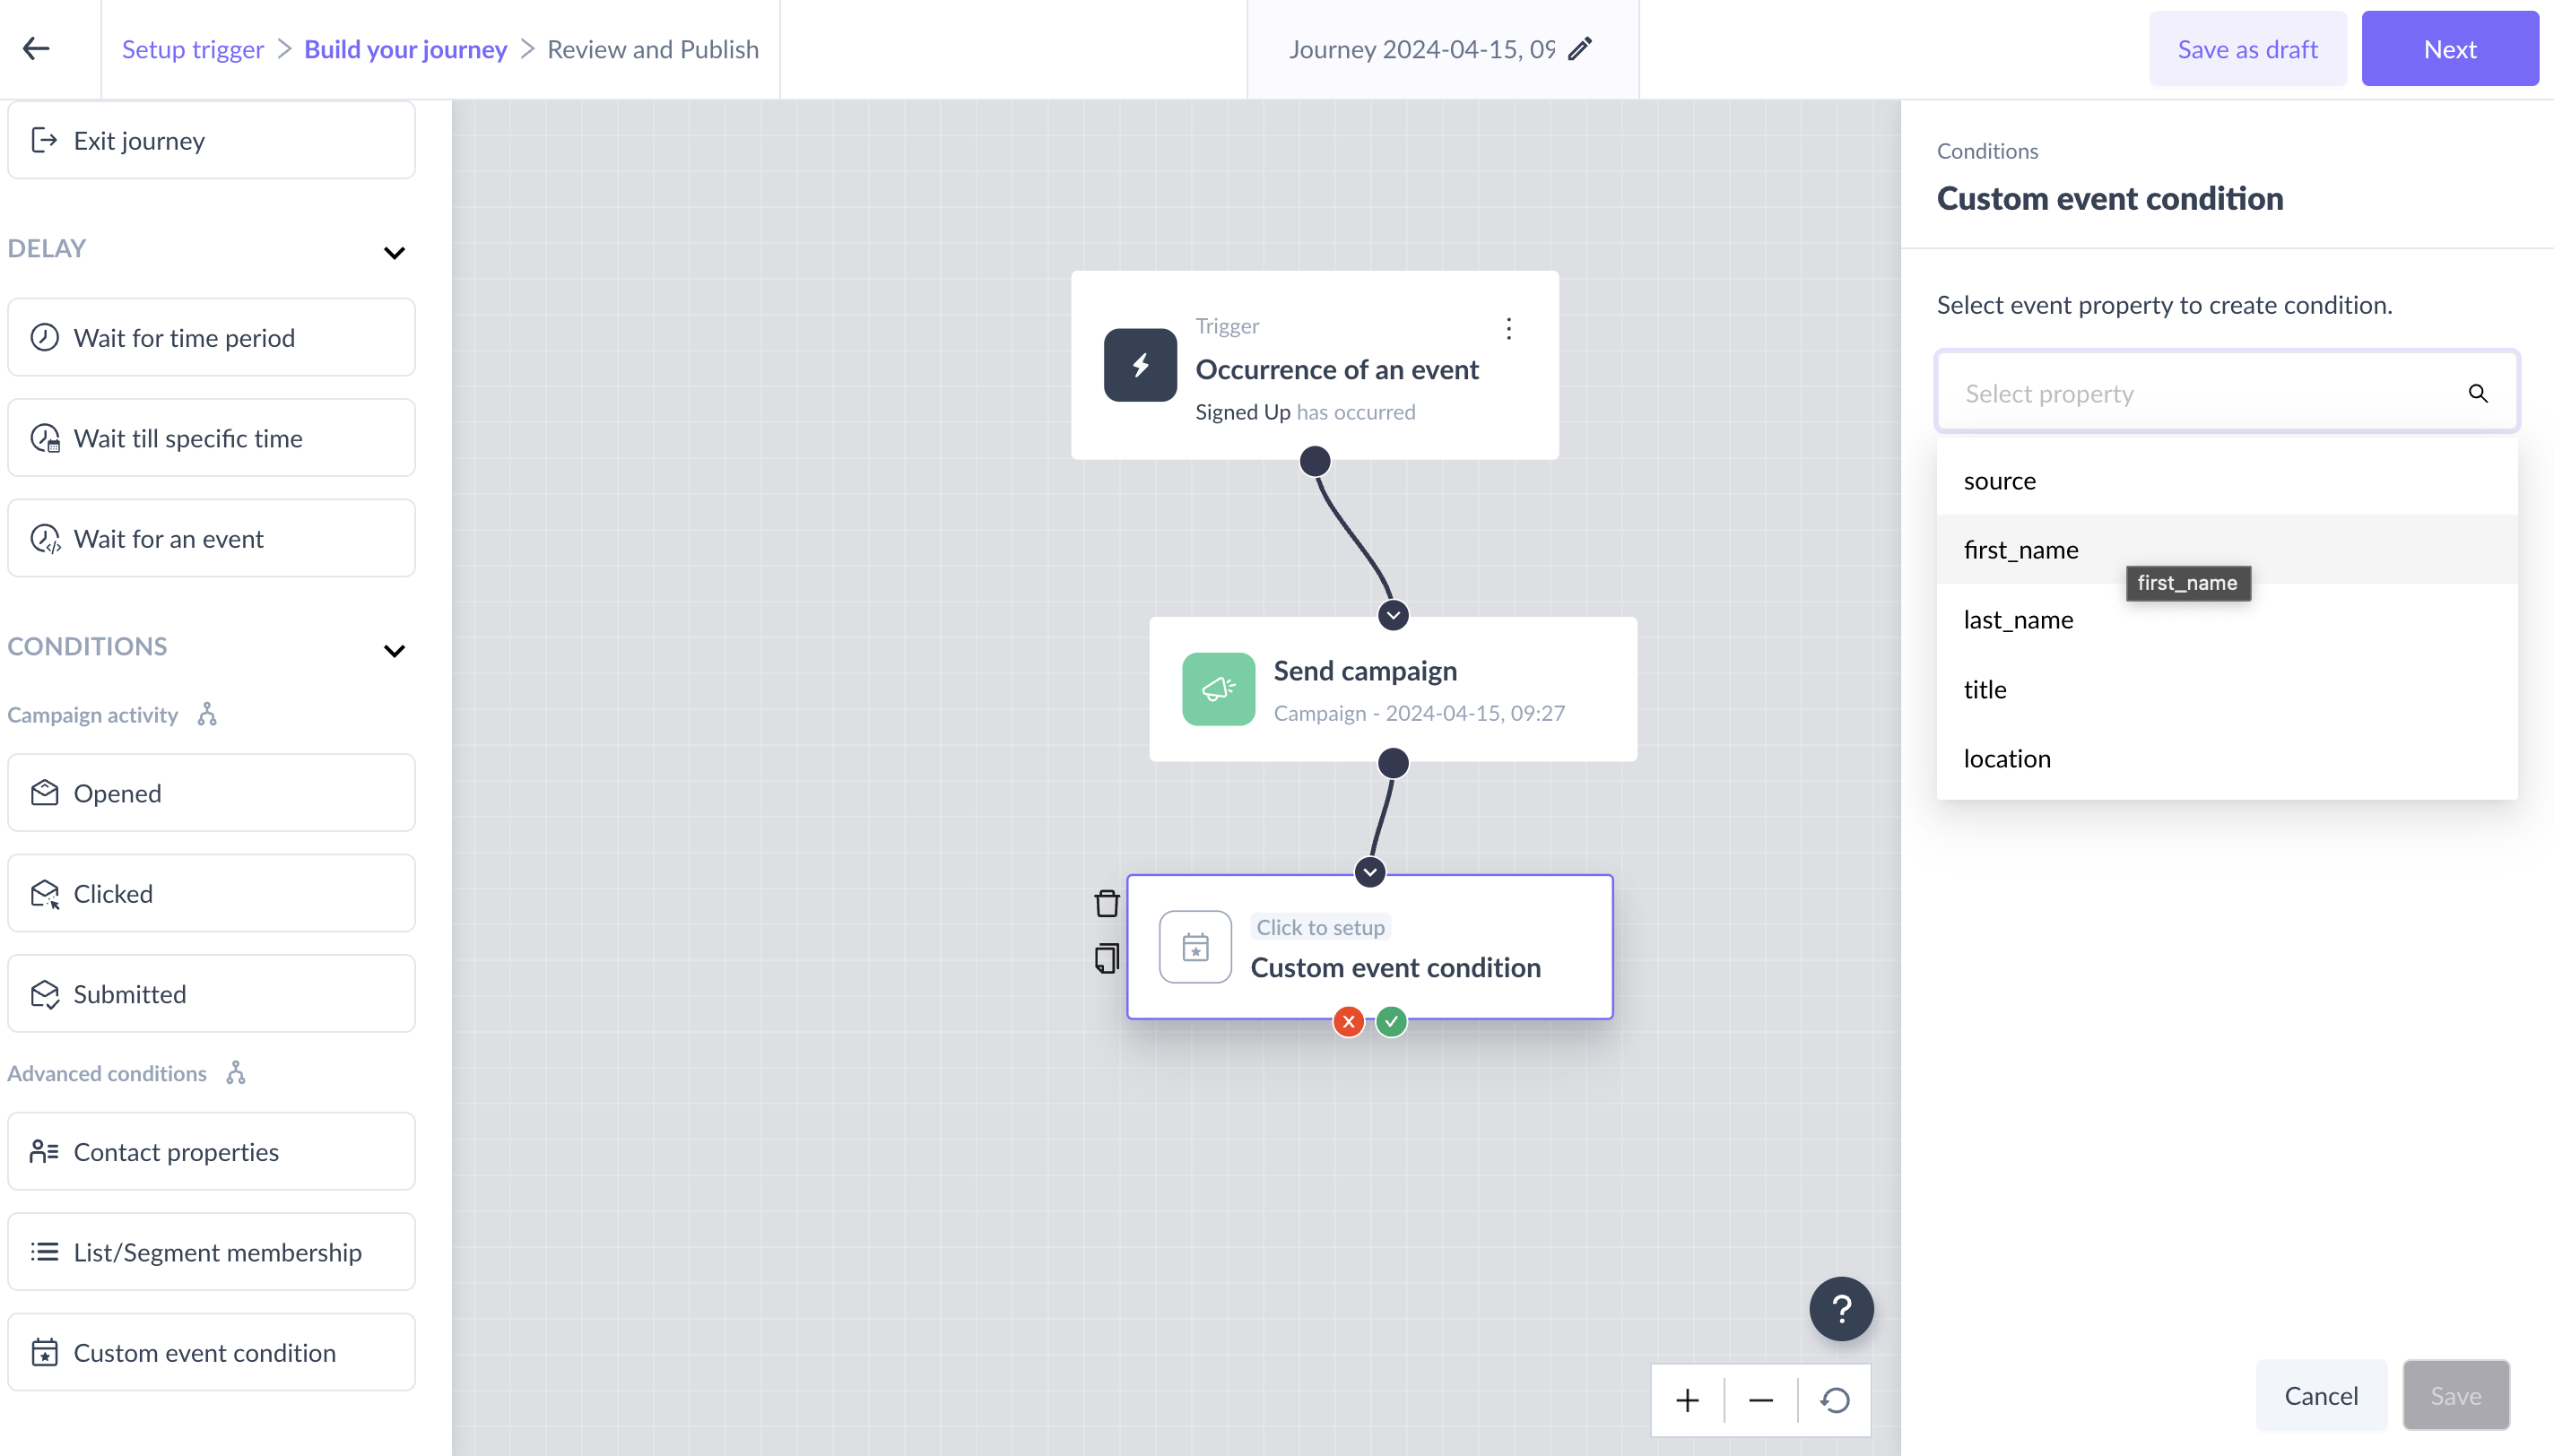
Step 6: To split the journey further, you can add the "Custom event condition" block and direct the contacts to different paths in the journey based on the properties of the event that they correspond to.
You can learn more about the custom event condition block here .
Step 7: Design the complete journey and click on the "Next" button
Step 8: Test the journey before publishing it
When you click on the "test journey" button on the Review and Publish page, you will see the test data in JSON format. You can tweak the values in this test data according to your requirements. Please make sure to enter the correct values for which you want the journey to be triggered.
Step 9: Click on the Publish button once the journey is ready. The journey being published would mean that the journey is running and is waiting for the event to occur and run the journey for that contact.

If you have any queries, then reach out to us at Mailmodo Support or share your thoughts at Mailmodo Product Feedback.