

How to Create Abandoned Checkout Flow in Mailmodo
Last updated July 25, 2025
Overview
This guide will walk you through the essentials of creating and implementing an effective abandoned checkout flow using our platform. Abandoned checkout emails are a powerful tool for re-engaging potential customers who have shown interest in your products but didn't complete their purchase. If you haven’t yet integrated your Shopify account with Mailmodo and set up email flow, learn how to integrate Shopify with Mailmodo here .
What is an Abandoned Checkout Flow?
An abandoned checkout flow is designed to recover potentially lost sales by re-engaging customers who have added items to their shopping carts but did not complete the purchase. It typically involves a series of well-timed email reminders and incentives to encourage customers to return to their carts and finalize their transactions.
Create this flow from scratch
Step 1: Choosing the appropriate trigger
The trigger that you can choose for a contact to enter this flow: “Abandoned checkout” event in the Shopify Activity trigger
If you have integrated your Shopify store with Mailmodo, you can add the Shopify Activity option from the “triggers’ section in the journey builder and directly use the “Abandoned checkout” event to trigger this flow.
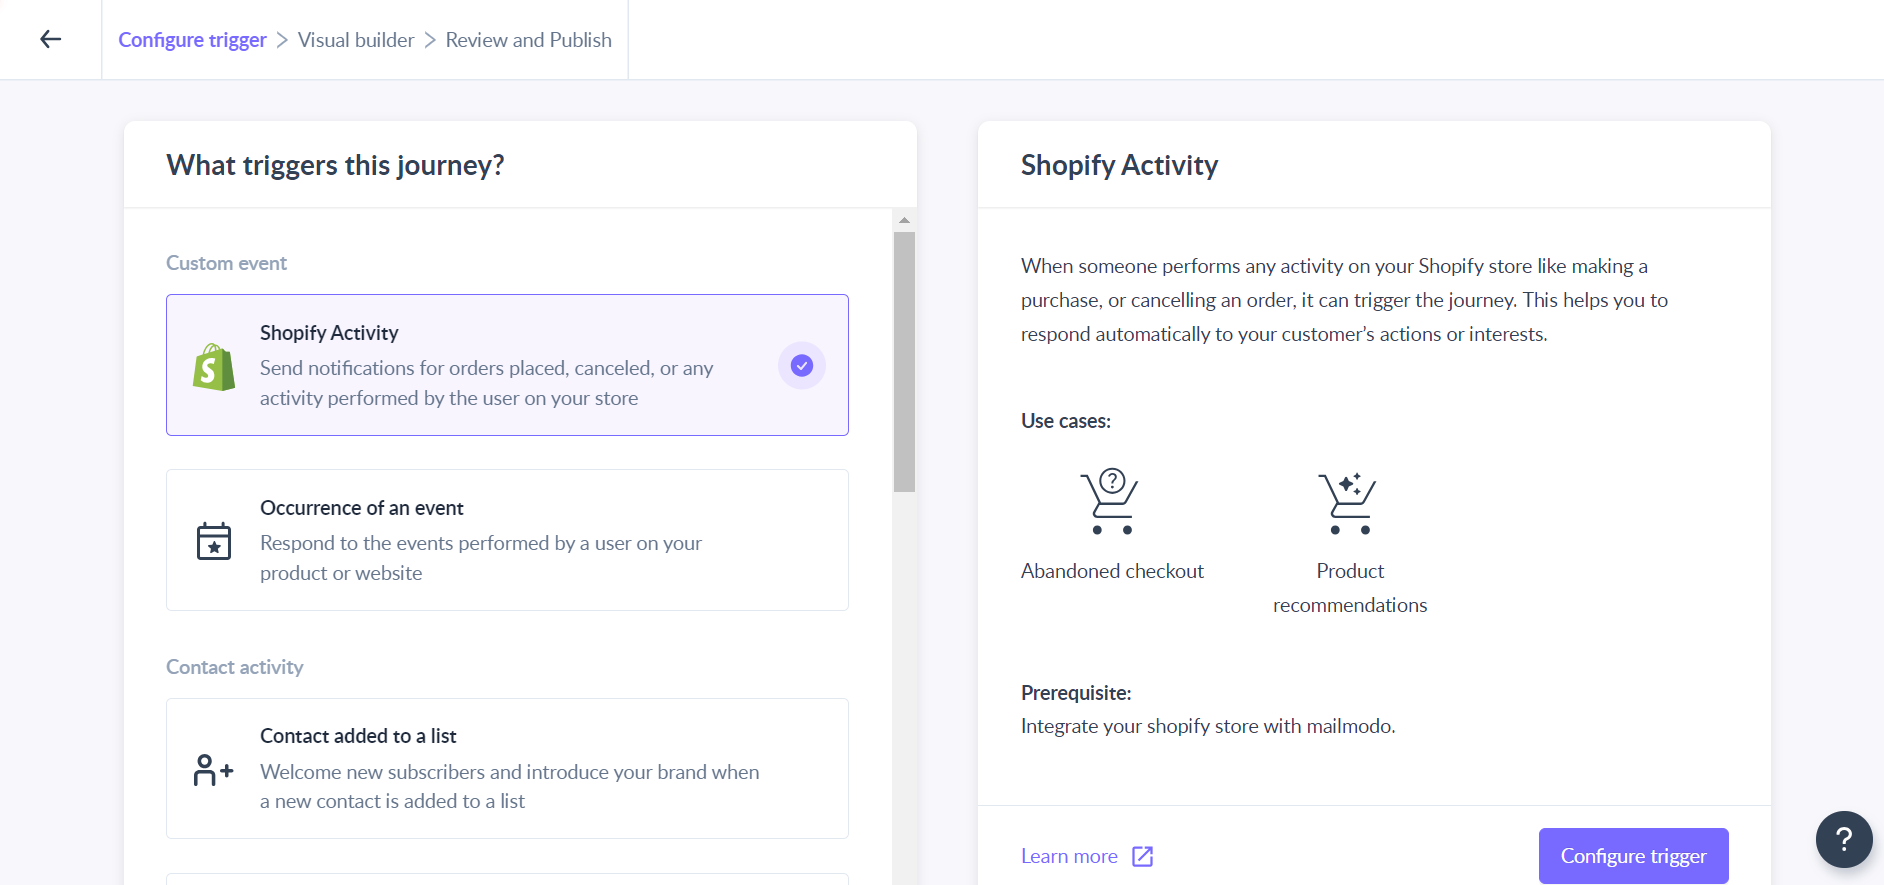

Please note that the abandoned checkout event of Shopify is triggered when a customer starts the checkout of certain products but does not purchase them for more than 20 minutes.
Step 2: Configure Time delays
Decide on the timing of your email reminders. Consider sending the first email shortly after the checkout abandonment and follow up with strategically timed messages. You can do so by adding delay nodes after the trigger and before sending emails.
Timing for sending abandoned cart messages isn't one-size-fits-all. The right timing depends on your product type. For high-end items like custom furniture, a longer delay may work better, as these purchases require more consideration compared to everyday items like sunglasses. Rushing messages might seem too eager and hinder conversions.

If you are using the “Abandoned Checkout” event from the Shopify activity trigger, you can send an email immediately to whoever enters the flow. But if you choose any other triggers, make sure you add a time delay block post the trigger.
Step 3: Create emails with templates and subject lines
Design compelling email templates that align with your brand's style and tone. Craft engaging subject lines and persuasive content.
Remember to include personalization parameters that will help you to make these emails more personal and relevant.
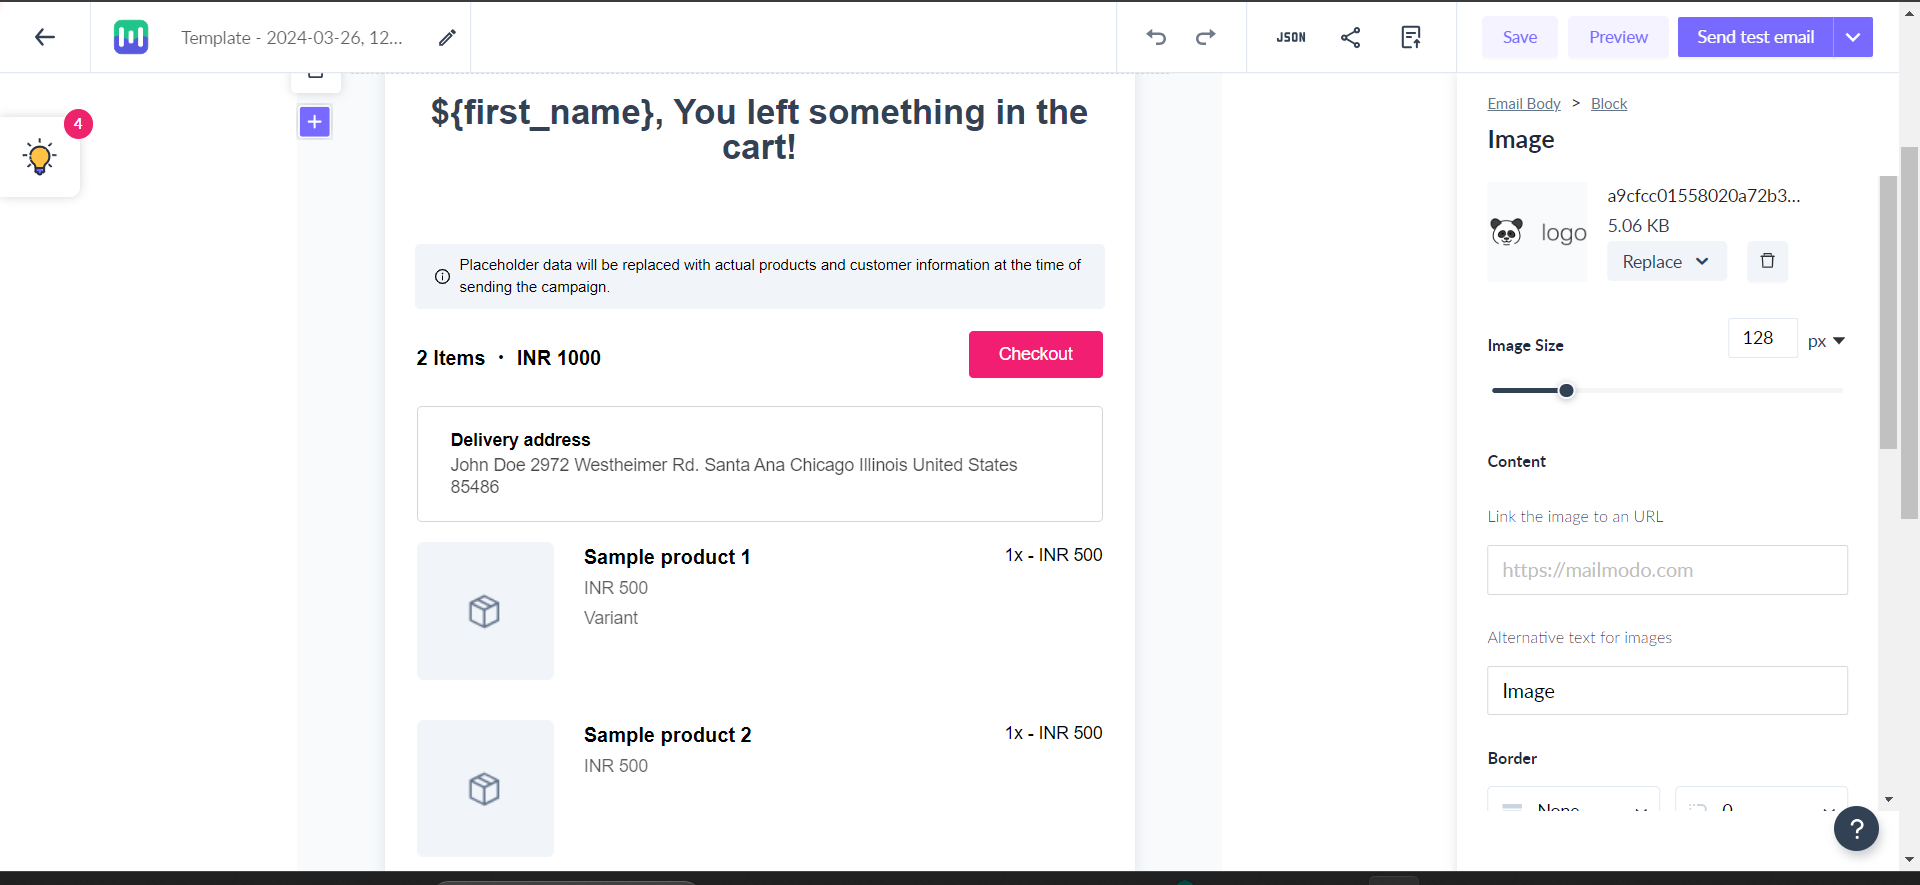
You can add additional Checkout buttons in your email. Just make sure to use https://<your Shopify store URL>/cart or https://<your Shopify store URL>/checkout as button URL.
At Mailmodo, we've simplified the process of reminding your customers about the items they've left in their cart, making it easy for them to complete their purchases. All you need to do is add the 'Abandoned Checkout' widget to your email template. This widget will automatically display the products your individual customers added to their cart but didn't bought yet.
You can add up to 3 emails in this flow that will remind your customers about the products that they didn't purchase after a delay of certain hours based on your industry.
Step 4: Set goals
Add a check before sending any email whether the customer has placed an order or not by using the “Wait for an event” block. You need to select “Placed order” as an event and remove him from the flow when he meets this condition.
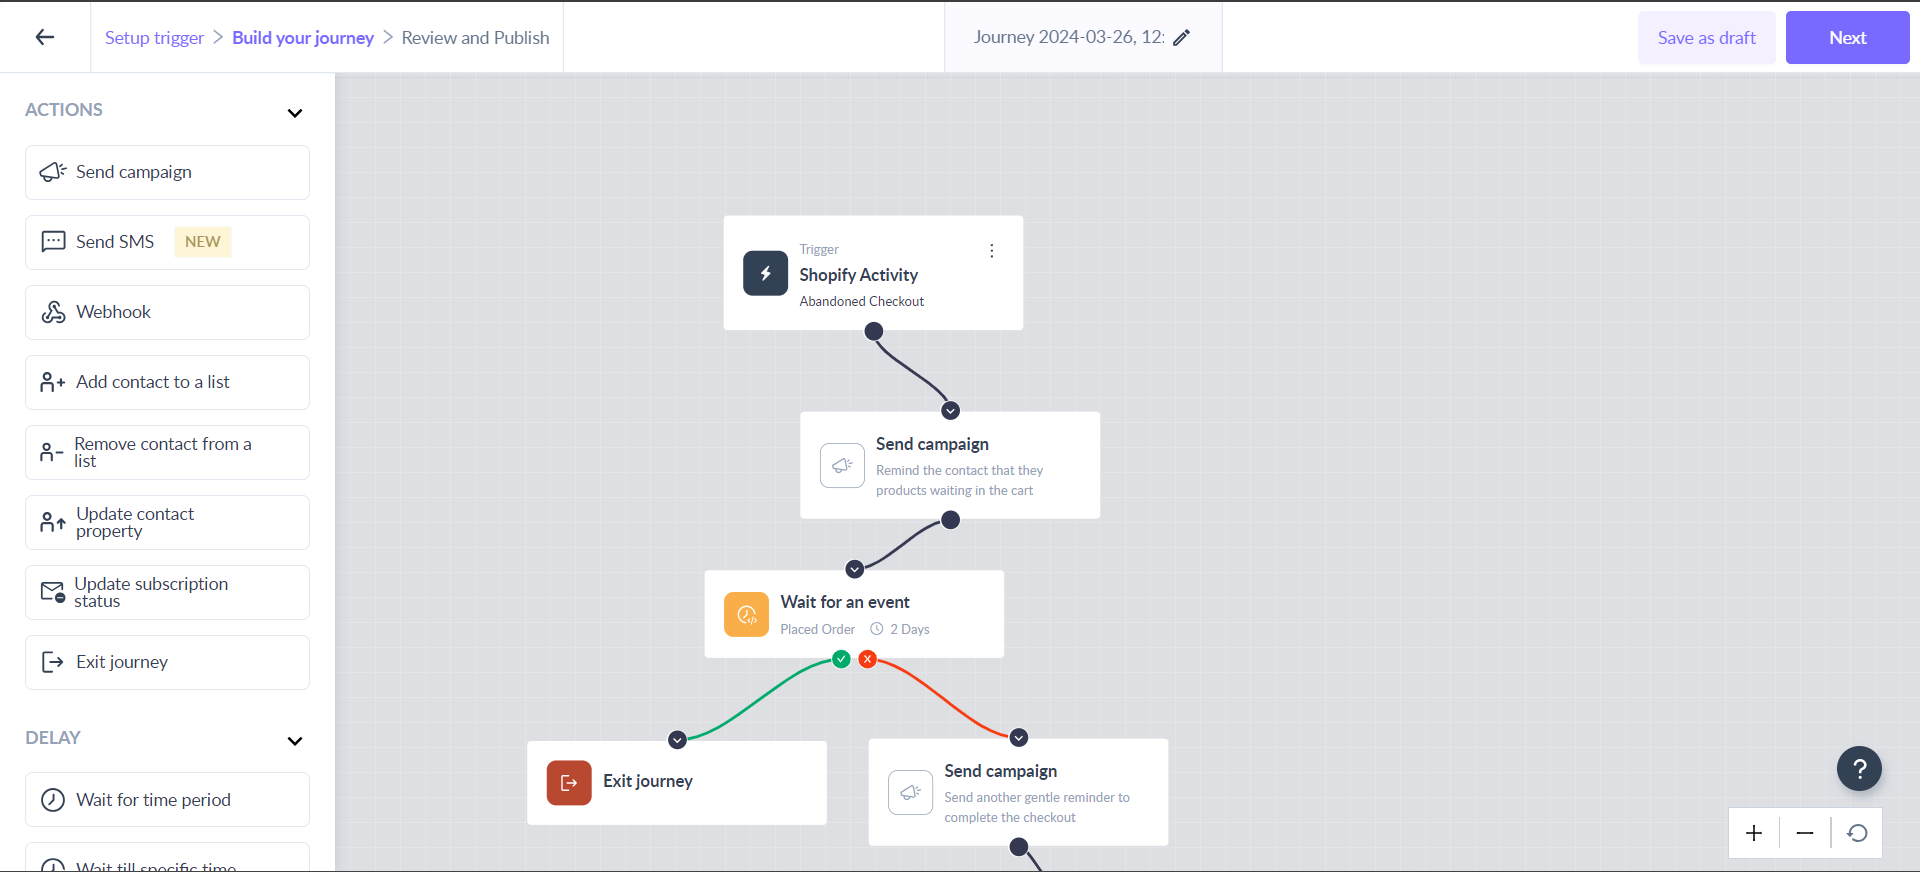
You can also add the journey goal as “Placed order” and choose to terminate the journey for the customers who have achieved this goal.
Step 5: Once you configure all the blocks, click on the “Publish” button.
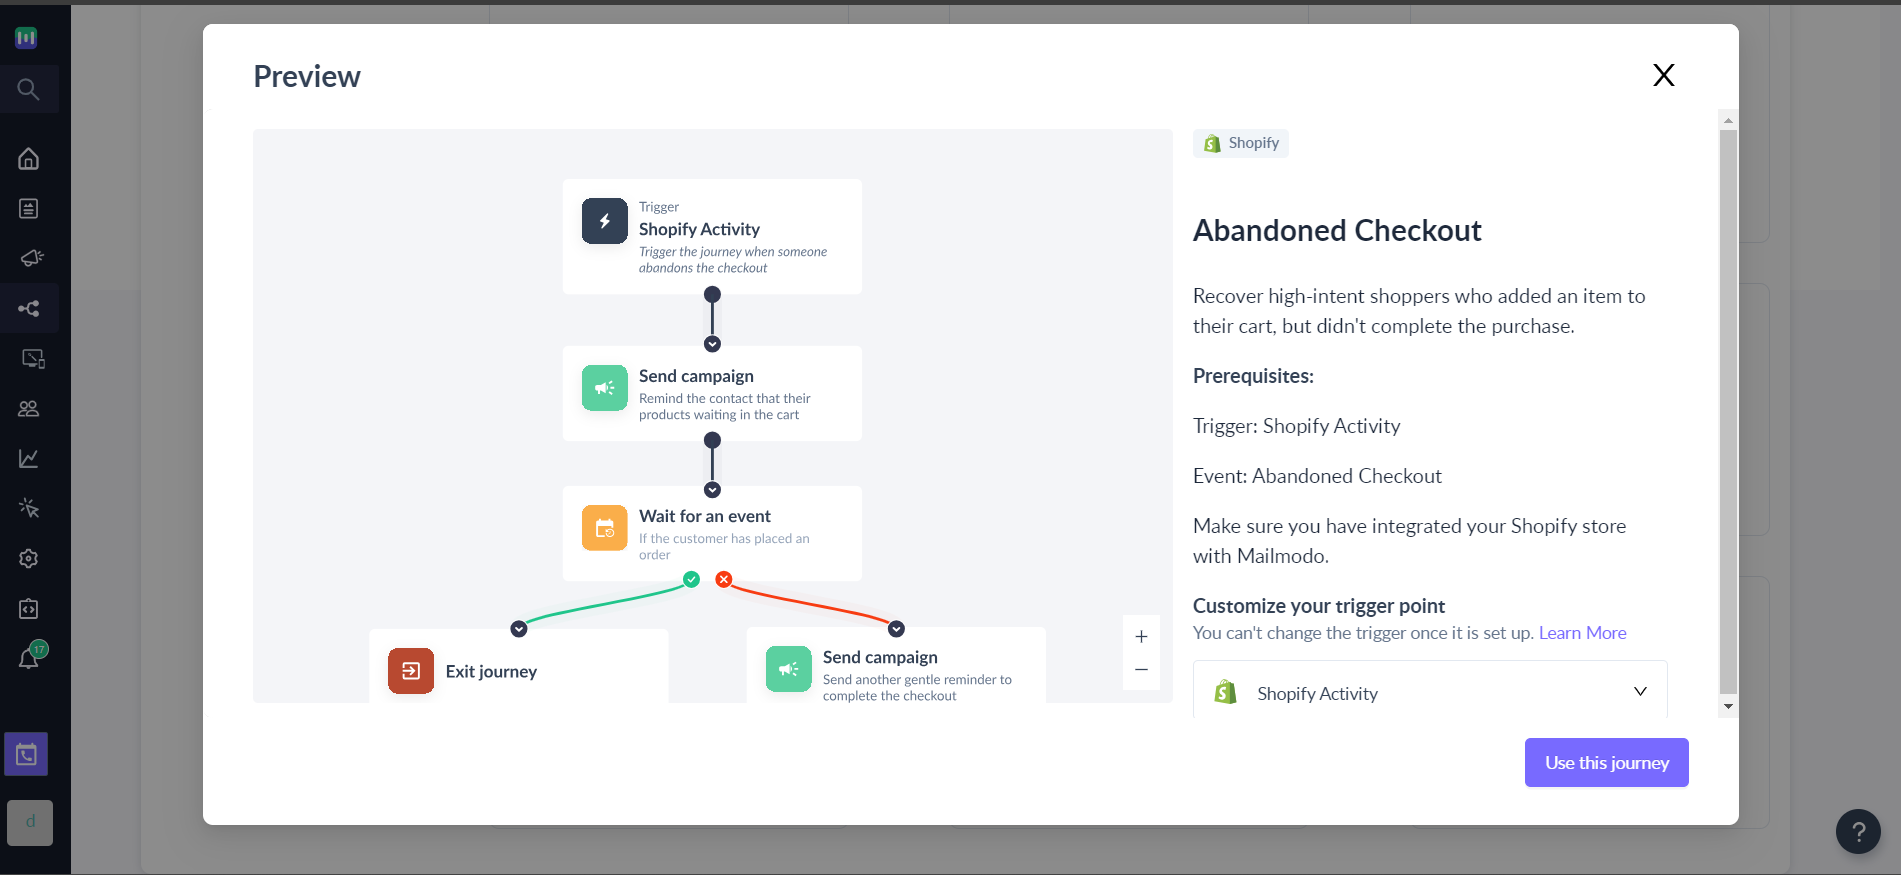
Use Mailmodo’s pre-built abandoned cart flow
We, at Mailmodo, have a pre-built abandoned cart flow that is readily available as a part of standard features. You can access this flow in the “Journeys” section of your account.
If you face any problem then reach out to us at Mailmodo Support or share your thoughts at Mailmodo Product Feedback .