How to export template submissions and create leads in HubSpot from Mailmodo
Last updated June 25, 2025
This article tells you how to export template submissions and create leads in HubSpot.
Prerequisites
To do the aforementioned functions, you need to first integrate HubSpot with Mailmodo. Follow the steps mentioned in this guide for the same.
Here is the step-by-step process to export Mailmodo template submissions to HubSpot:
Step 1:
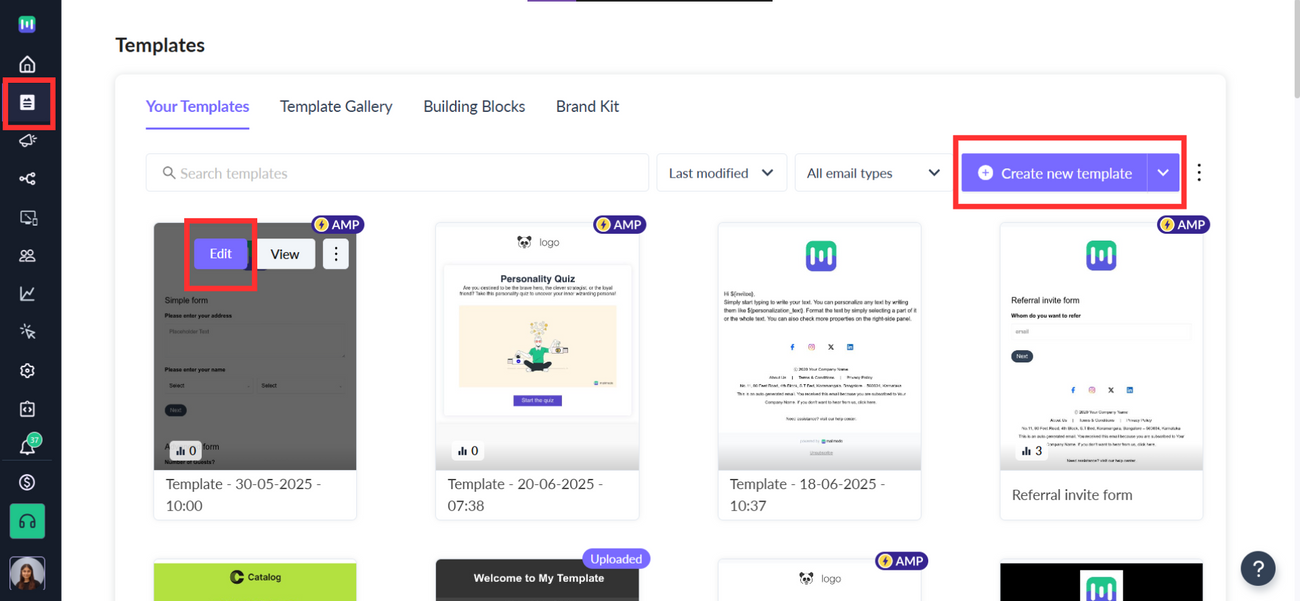
Go to Templates from the vertical menu on the left and select the template for which the form submissions are to be exported.
(You can also create a new template and add a form for which the submissions will be exported)
For the purpose of this tutorial, we will select a pre-made template. Click on Edit.
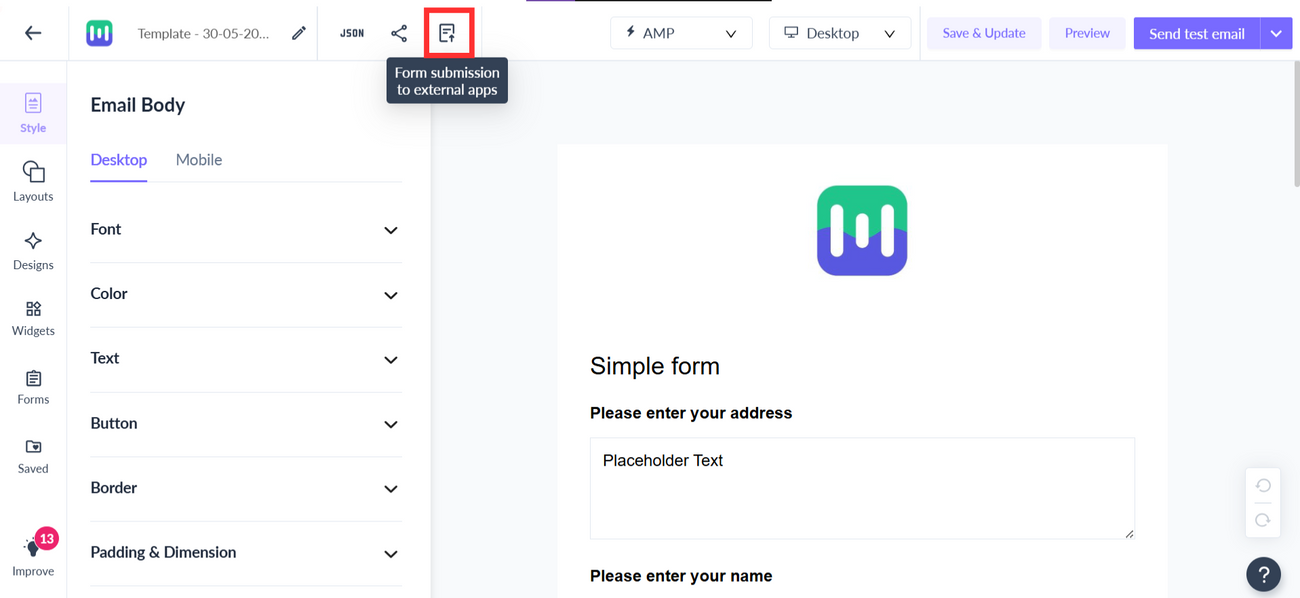
Step 2: In the template editor page, click on Form submission to external apps button in the top-right corner. This option is only available if your template has a form in it.
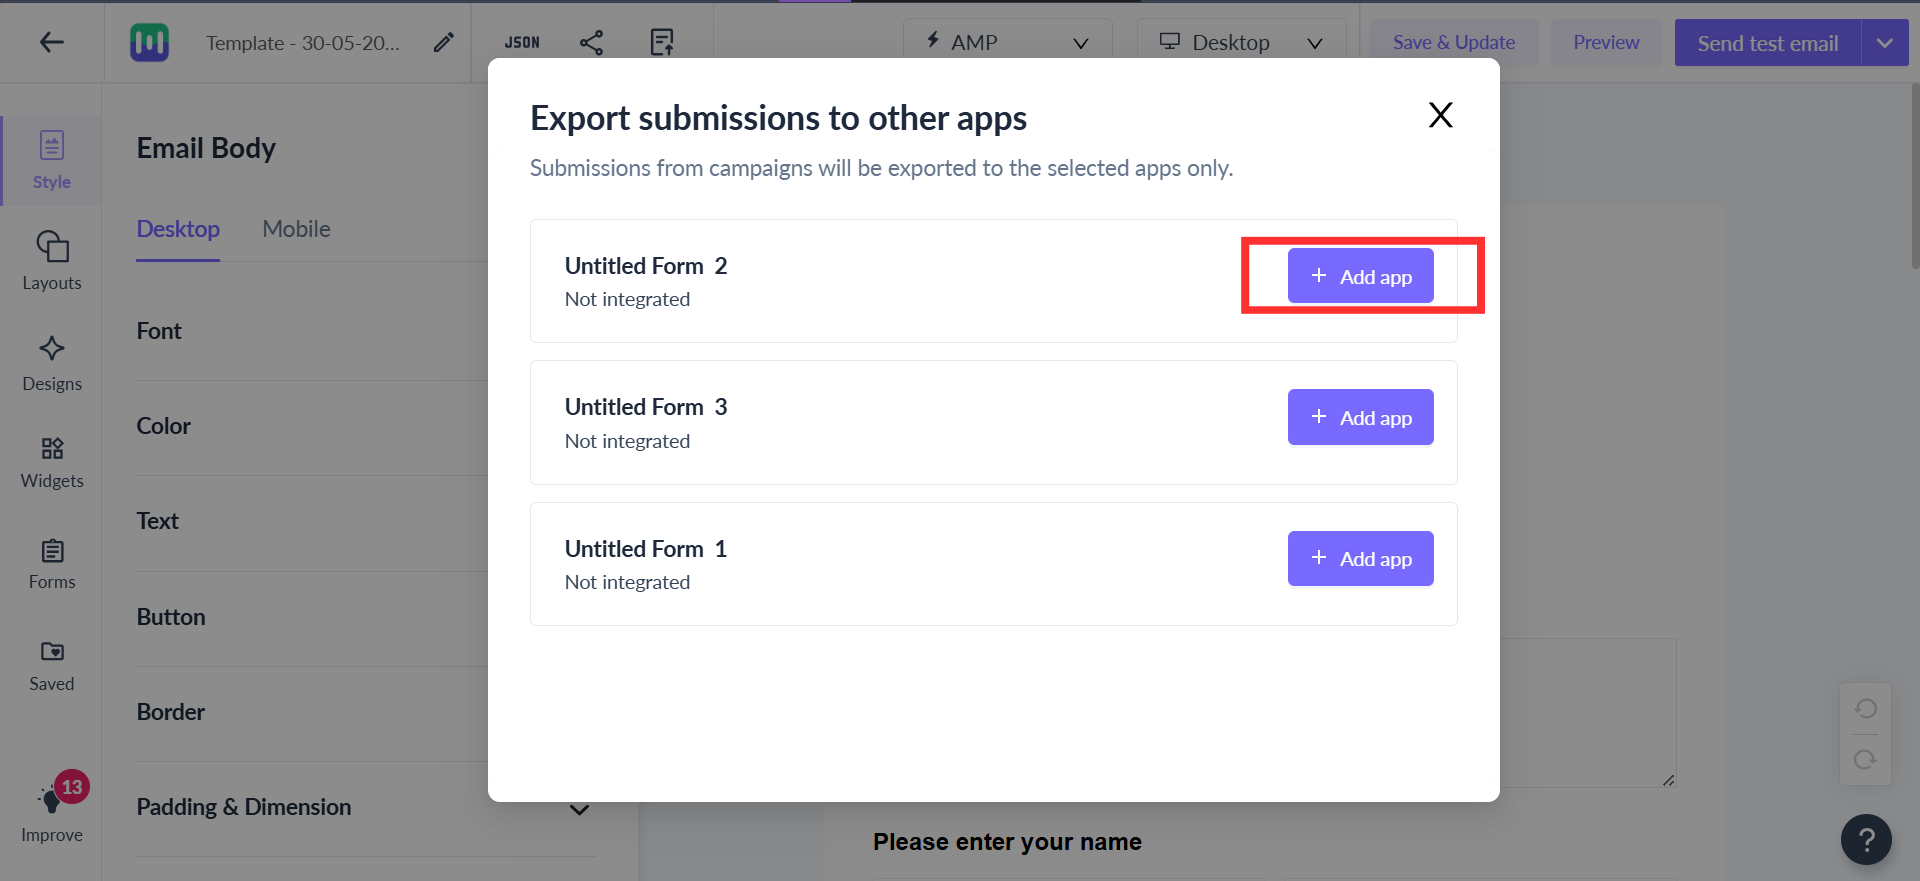
Step 3: A dialogue box will open. Click on Setup under the Action column.
Step 4: Click on the pen icon on the top to change the name of the form. The form name will be used to create an equivalent form in HubSpot.
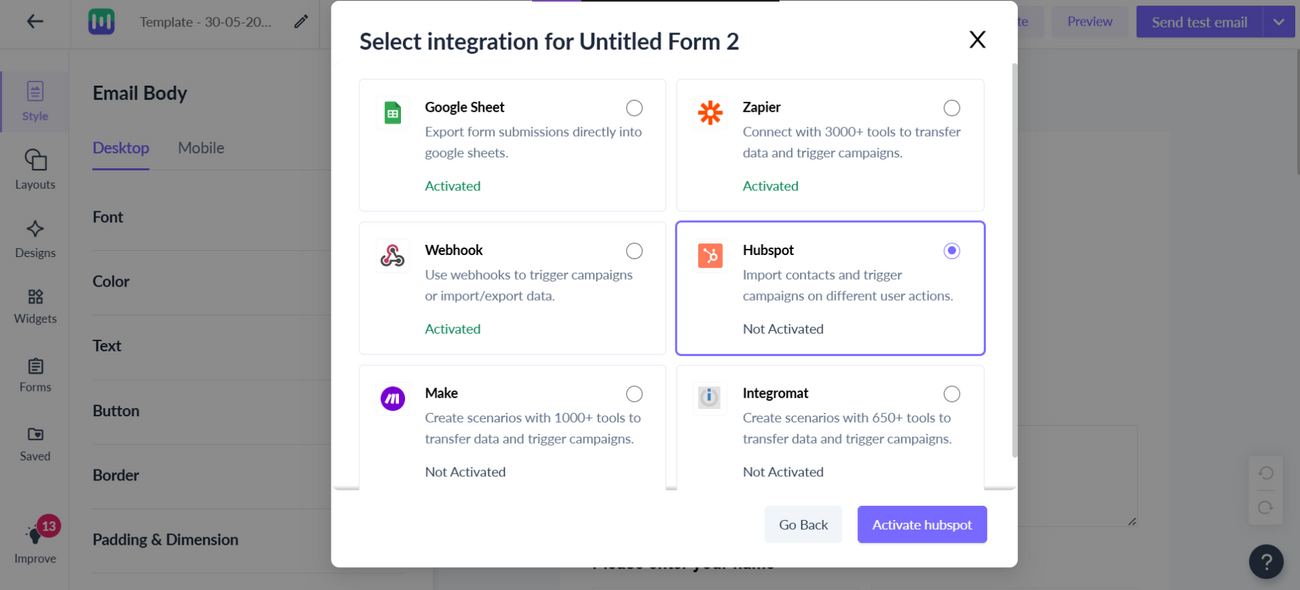
HubSpot would be visible under Integration Platforms. Select it and click on Activate.
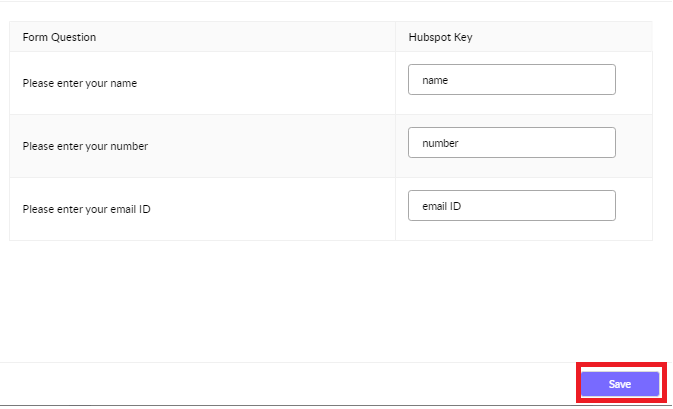
Step 5: After clicking on 'Next' a new pop-up will open where the form questions will have to be mapped to the respective HubSpot Key. For example, the question, "Please enter your name" can be mapped to the "Name" and "Please enter your email ID " can be mapped to the "email ID" keys . Once the mapping is done, click on Save
For the mapping, Mailmodo only displays those HubSpot keys which belongs to the contact properties group .
Upon successful integration, you will see the integrated app below the form. In case you want to stop, click on the three dots to stop exporting submissions for that form.
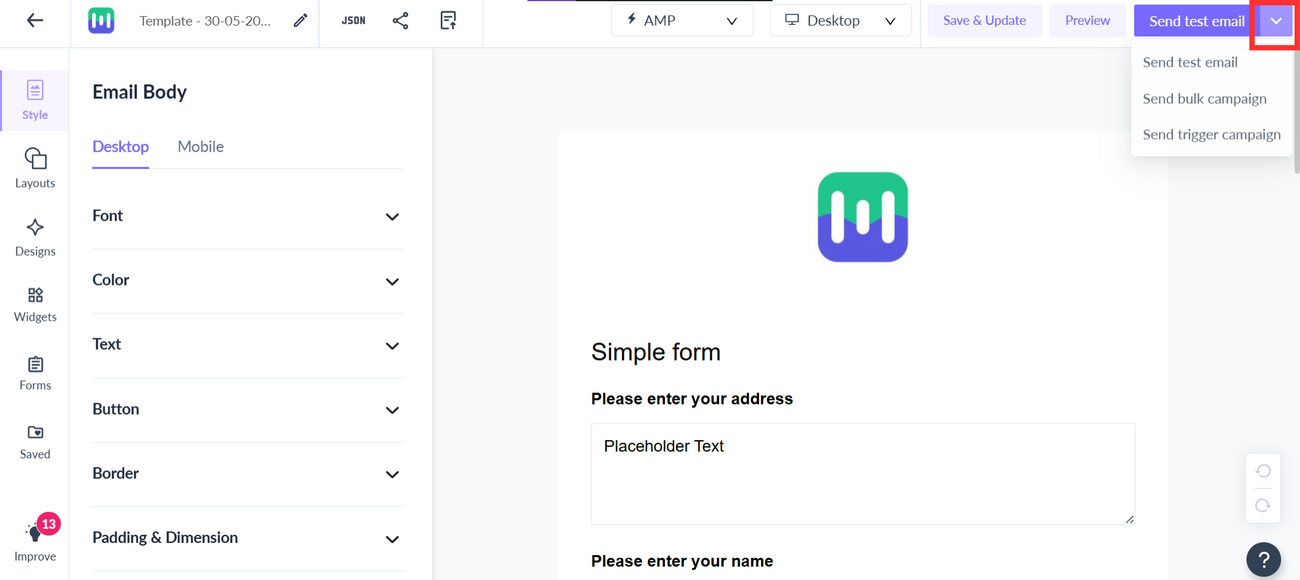
Step 6: After clicking on the 'Save' button, HubSpot will get successfully integrated. Next click on 'Send Bulk Campaign' or 'Send Trigger Campaign' to send the campaign to our target audience.
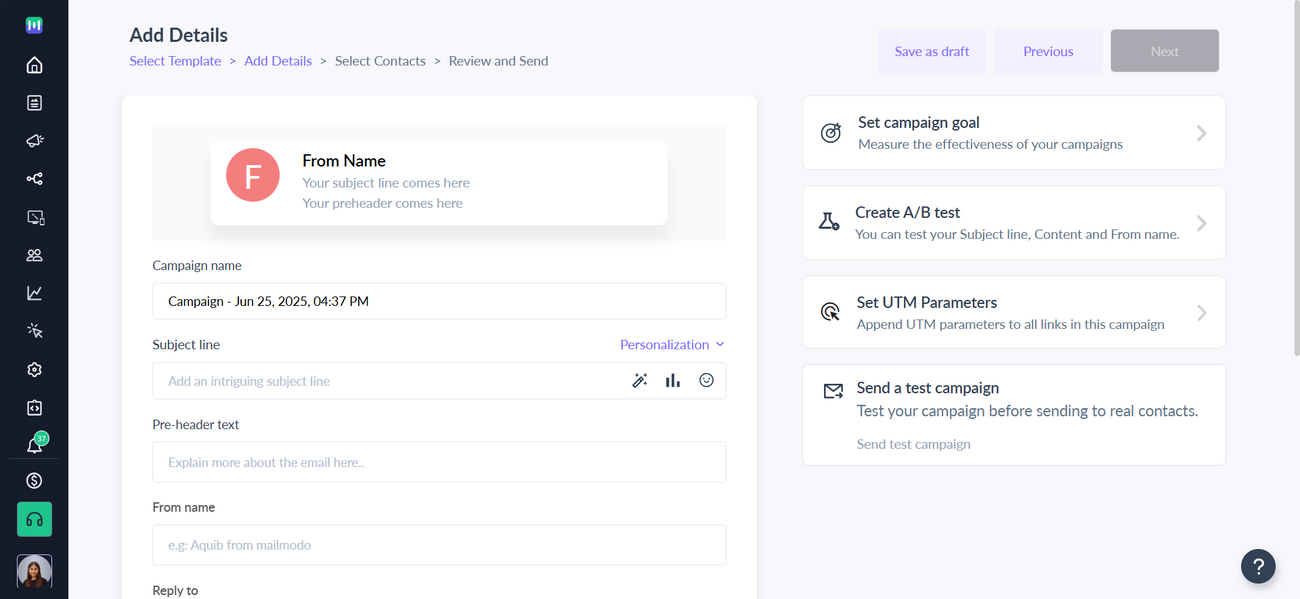
Step 7: Add the required campaign details and then click on 'Next'
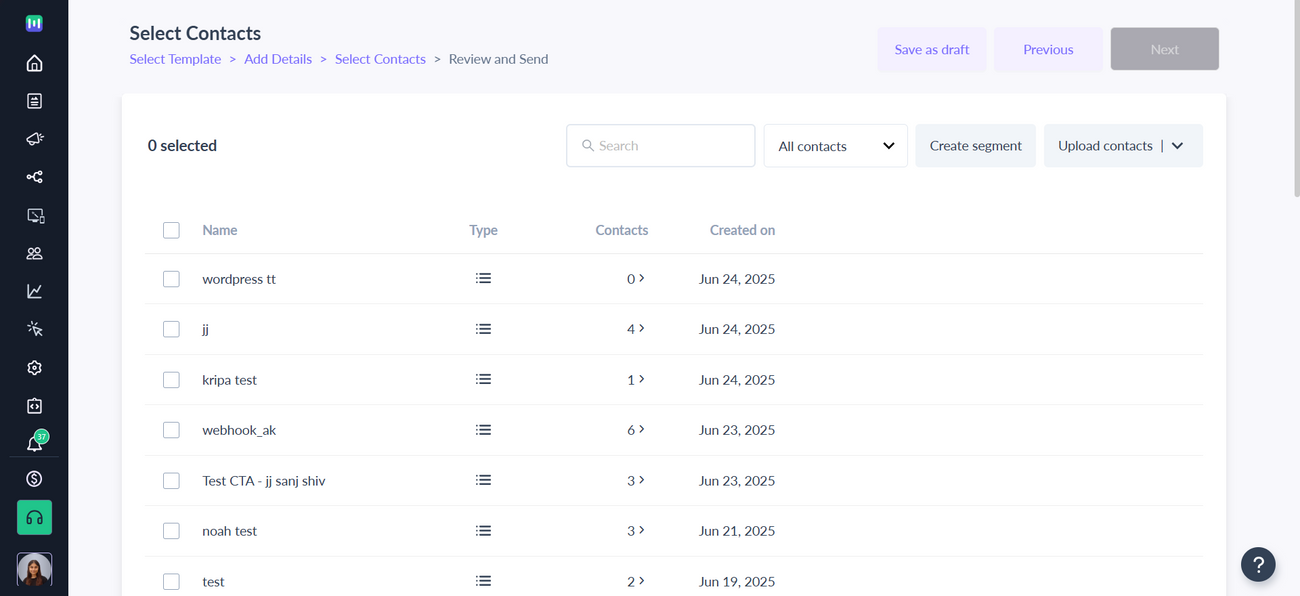
Step 8: Select the saved contact list or you can also add new contact list in CSV format using Upload Contacts button to add new contacts to which the mails need to be sent. Then click on 'Next'
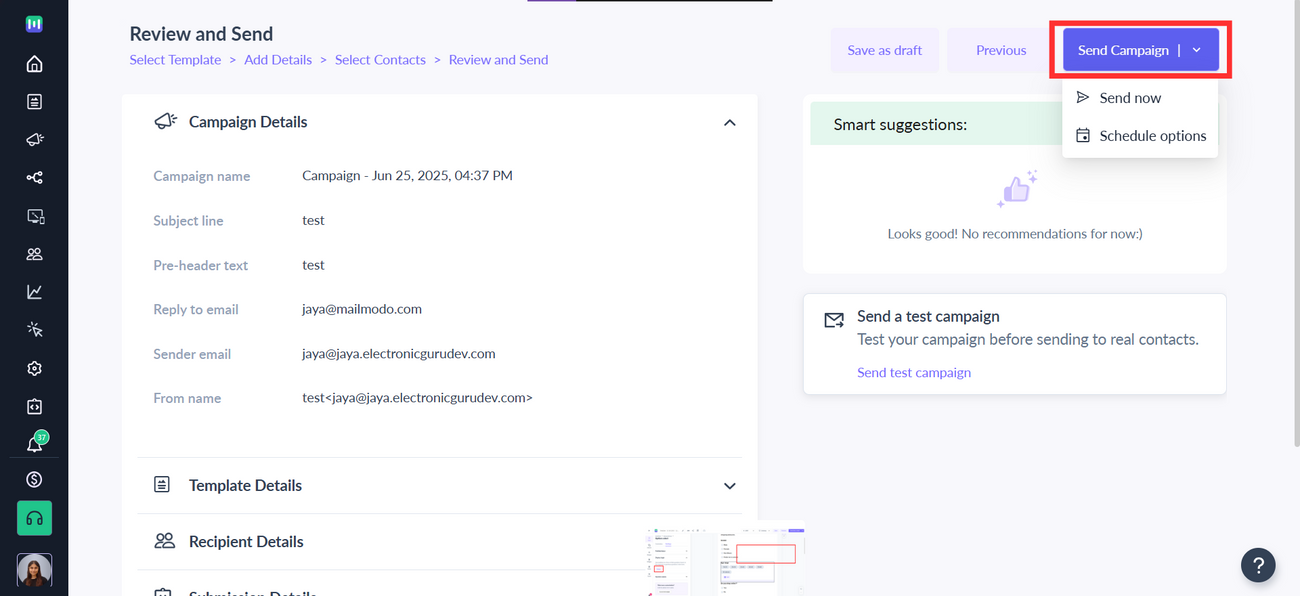
Step 9: After this you can review the content and choose to send the campaign instantly or schedule it for later. After clicking on 'Send Campaign', the campaign will be successfully sent to your contacts. Based on your requirement you can either schedule the campaign now, it'll be sent immediately or schedule a campaign for a custom time.
Step 10: Once submissions have been made the same will reflect in your HubSpot account. To check this you need to first login to your HubSpot account then go to the tab 'Marketing', under this tab you need to select 'Forms'
Step 11: After clicking on 'Forms' you will be able to view your form submissions. Select the form for which you need to check the submissions and you will be able to view all the submissions made
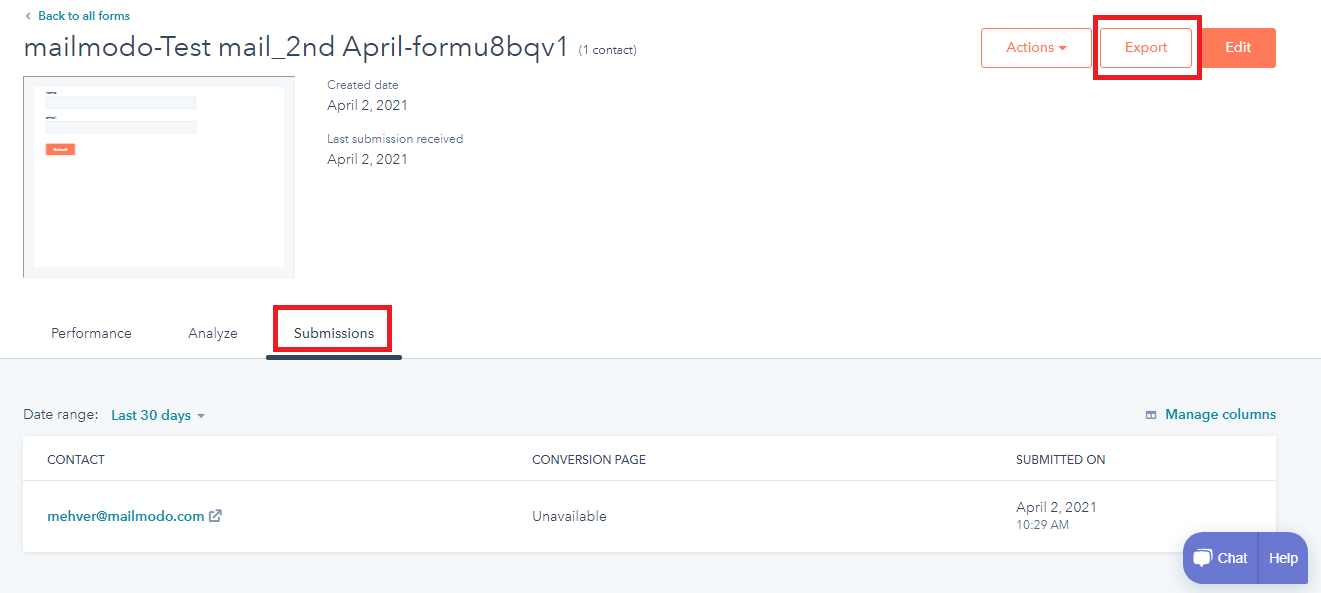
Step 12: After clicking on the form, click on the 'Submissions' header, here you will be able to view submissions made with the contact details, conversion page and the date and time of the submissions made. This data can be also be exported to your mail.
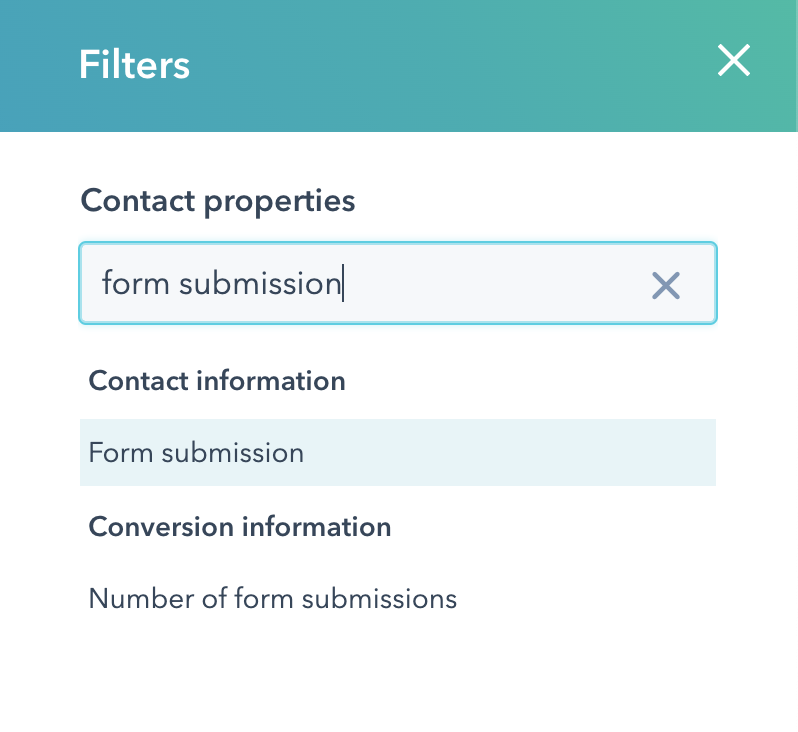
Step 13: To check the leads added via template submissions, go to Contacts->More Filters.
Under contact properties, search for Form Submissions.
Select the form for which you want to view the leads. Click on Apply filter.
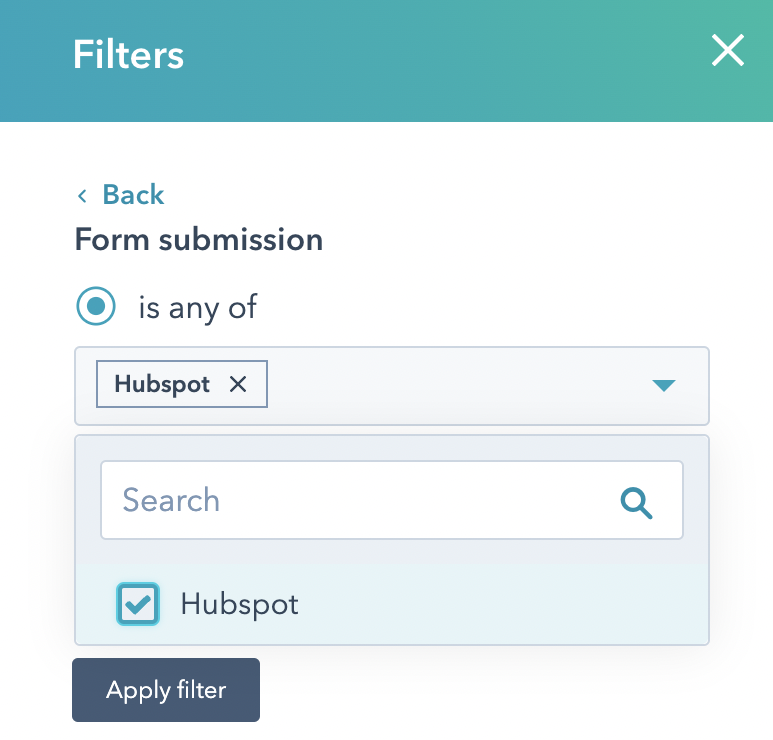
You would be able to see the leads added in the Contact list.
Henceforth, any submissions and leads generated will reflect in your HubSpot dashboard.
Form submissions are tracked at a template level. If multiple campaigns are sent using the same template, then submissions (and leads) will be attributed to the same form in HubSpot.


