

Setting up Mailmodo with AWS SES SMTP
Last updated March 10, 2024
You can either use Mailmodo SMTP or AWS SES SMTP for sending emails to your contacts. In this article, we will provide detailed steps on how to configure a new Sender ID using AWS SES SMTP.
Before you begin, please ensure the following prerequisites:
Pre-Requisites
- Make sure you have already configured a sender email address for your AWS SES account. For steps on how to add sender email address in AWS SES, click here .
- Make sure you have admin access for your AWS account. If you don't have the right permissions, then please work with your AWS account administrator to get the required access or work with them to configure the account.
Detailed Steps
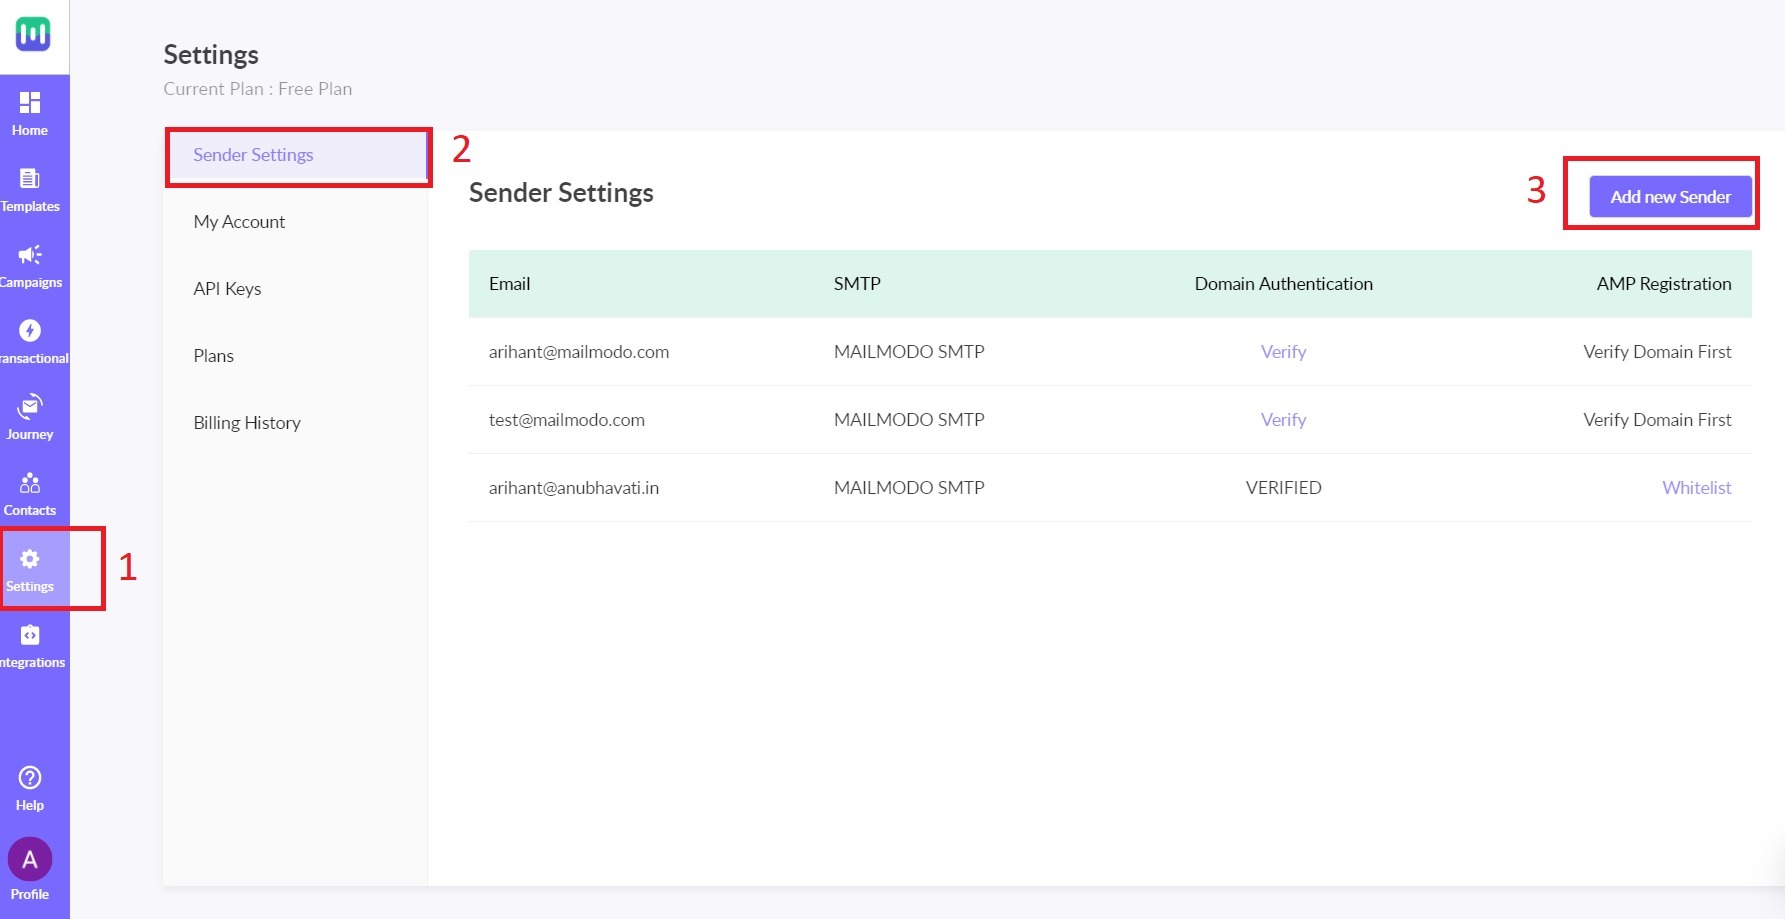
Step 1: Login to your Mailmodo account. Go to the Settings page. Select Sender Settings and click Add New Sender.
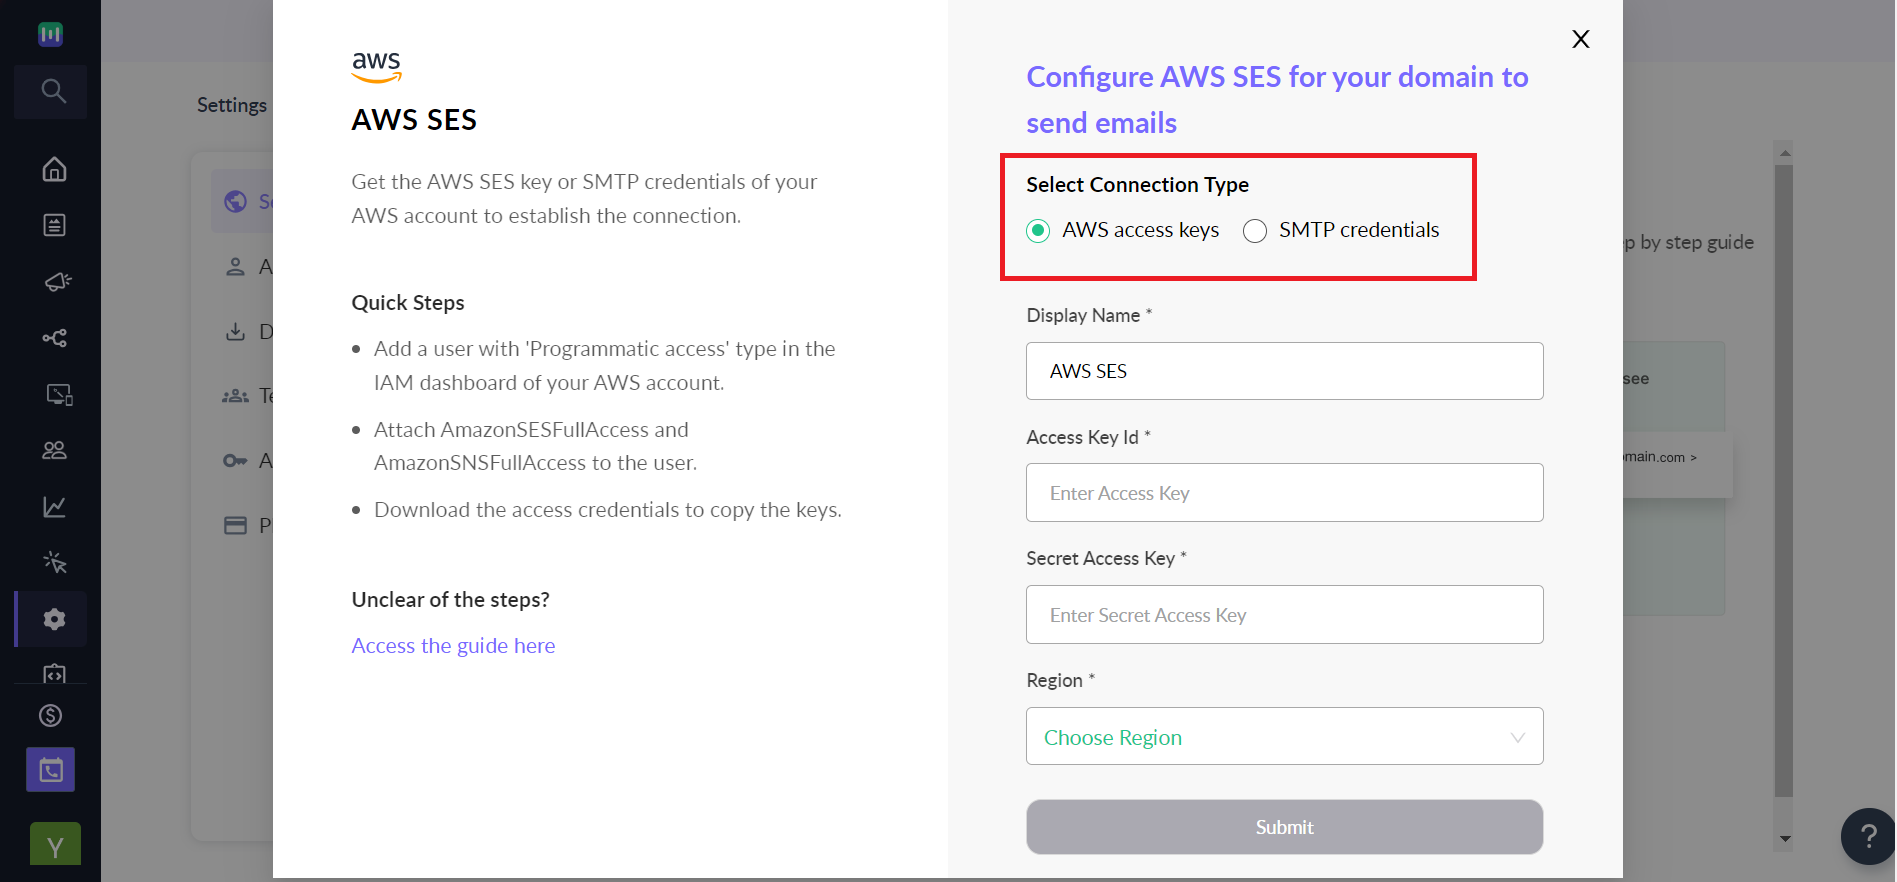
Step 2: Add your sender id and select AWS as SMTP.

Step 3: There are two ways to add a sender id that uses AWS SMTP-
- Using access key
- SMTP credentials
Using access key
Step 1: Search for IAM in the AWS search bar.

Step 2: Go to users from the left panel in the IAM dashboard.
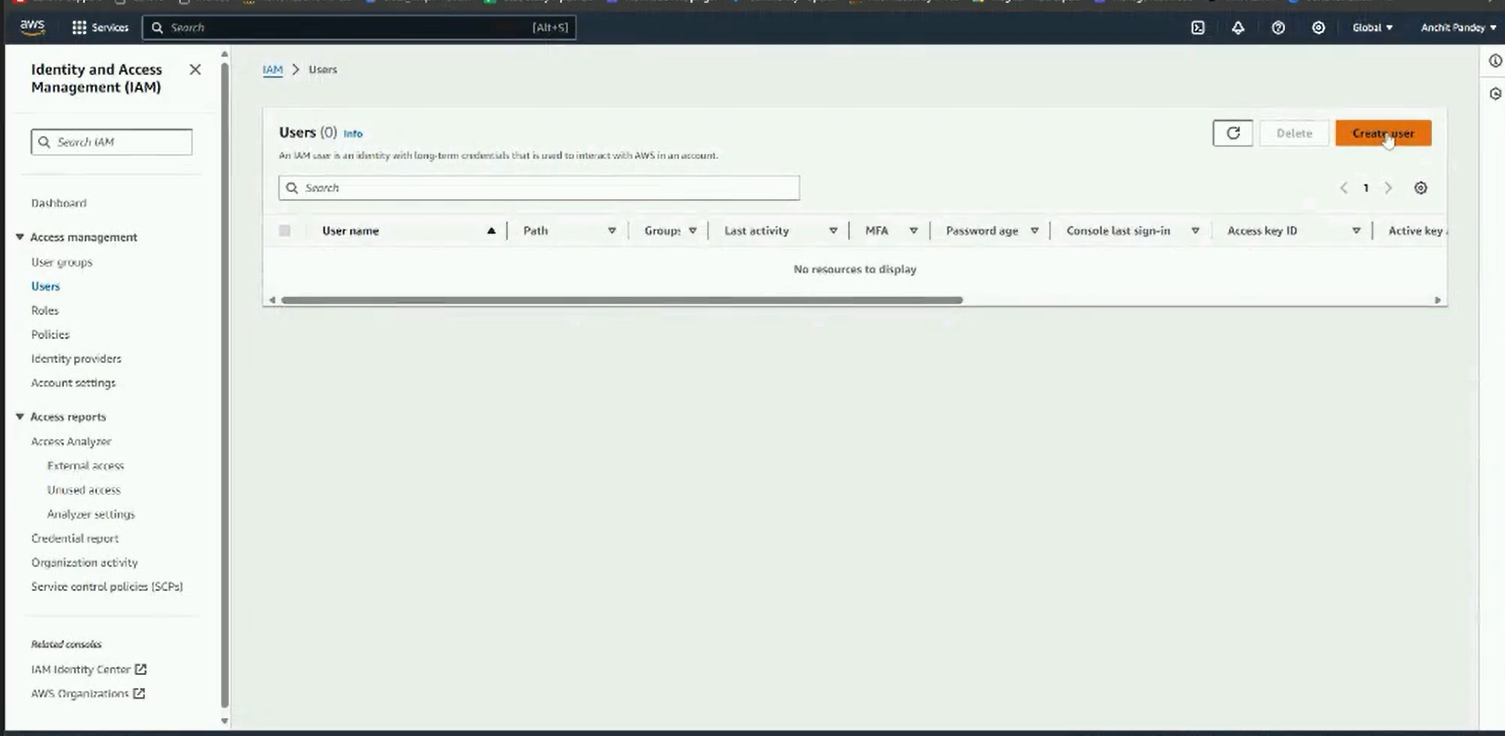
Click on add users.
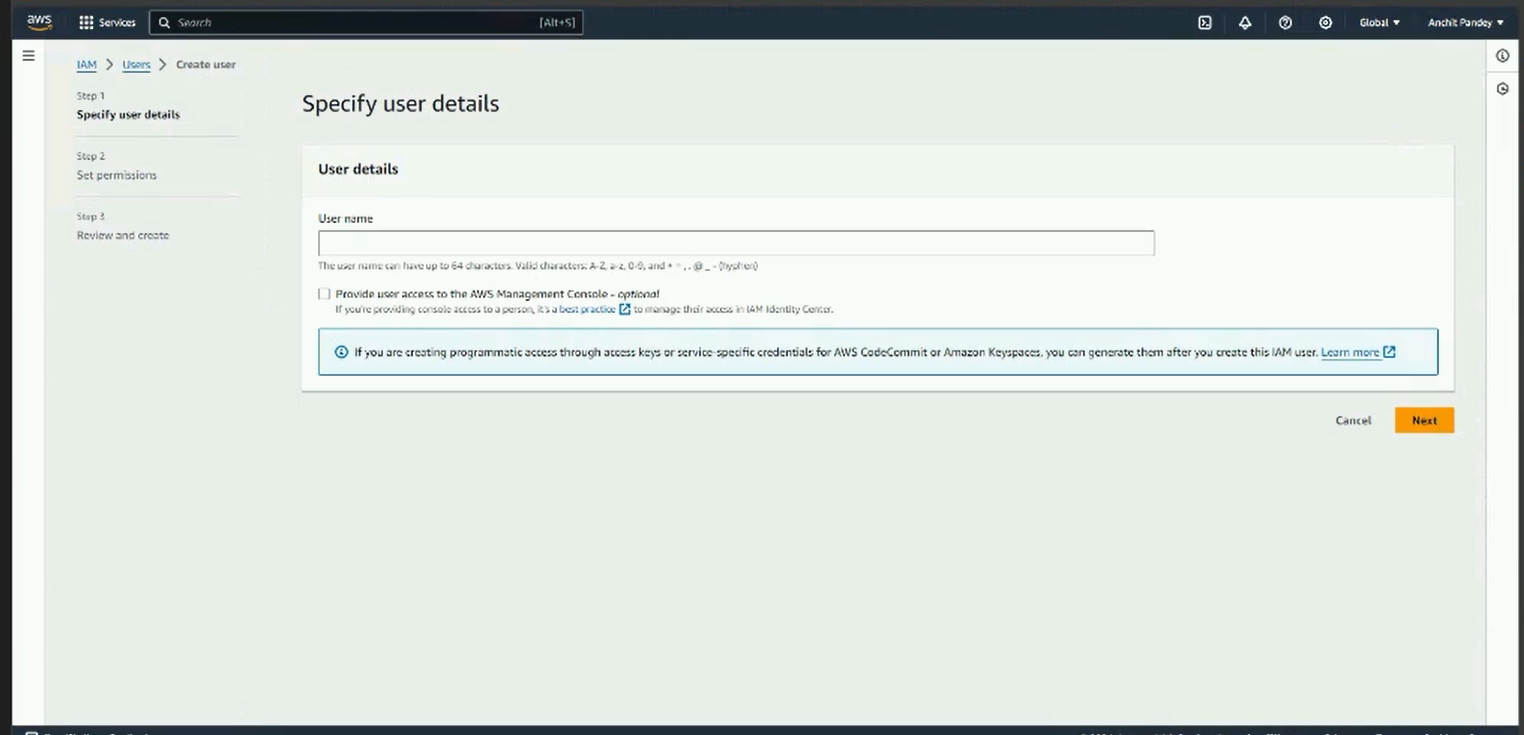
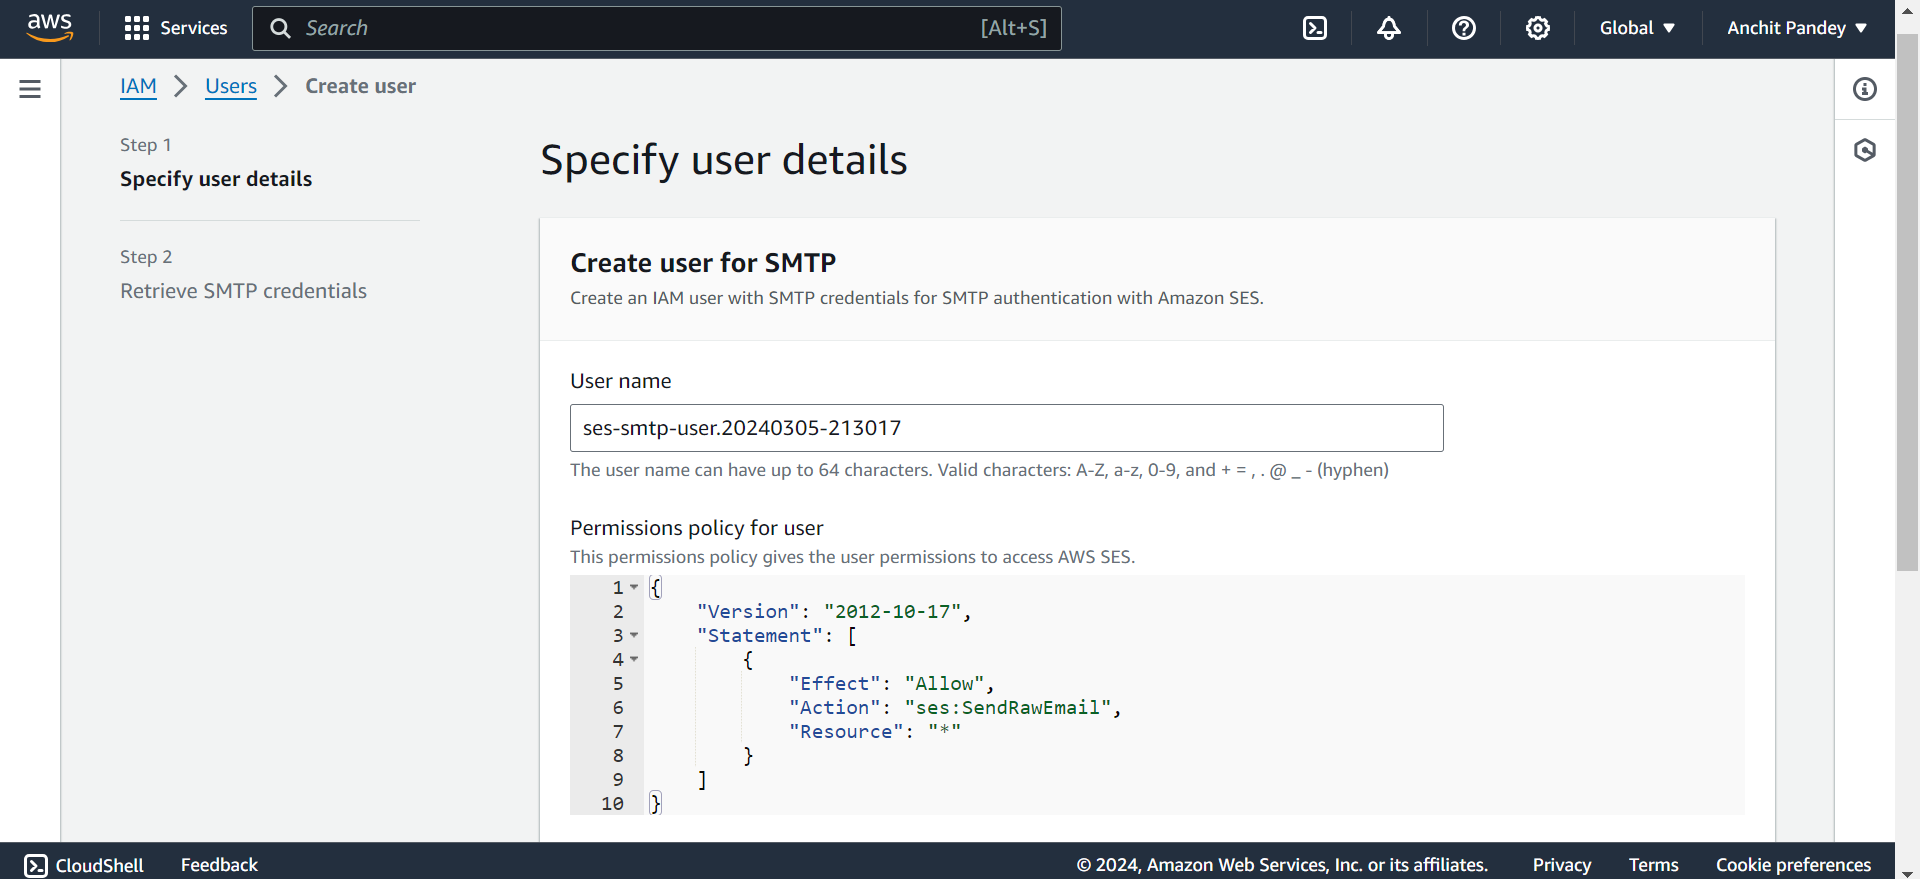
Step 3: Add a user name and set access type as “Access key - Programmatic access”. Click on “Next: Permissions”

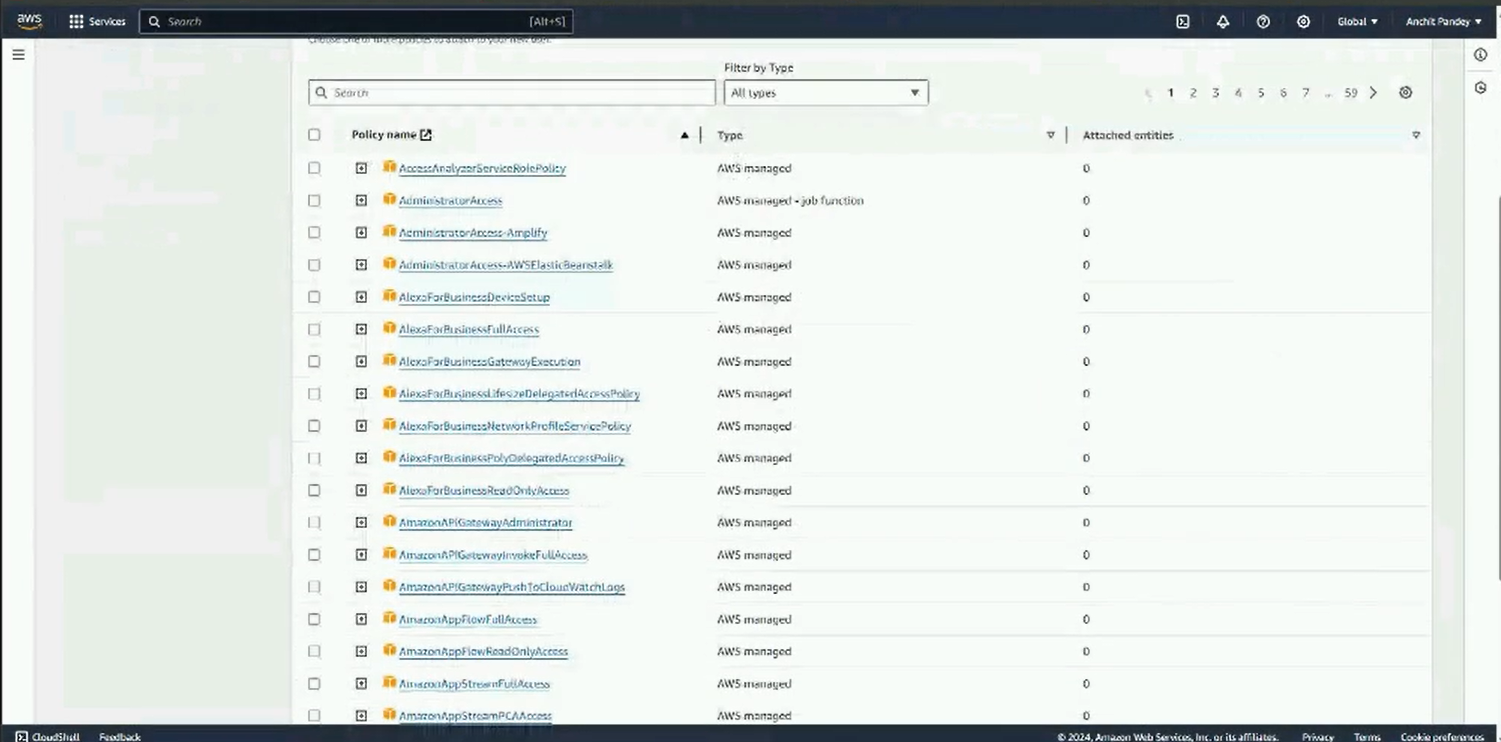
Step 4: Set permission as “Attach existing policies directly”. Search for AmazonSESFullAccess and AmazonSNSFullAccess in policies. Attach them by selecting the checkbox against their name. Click on “Next: Tags”.
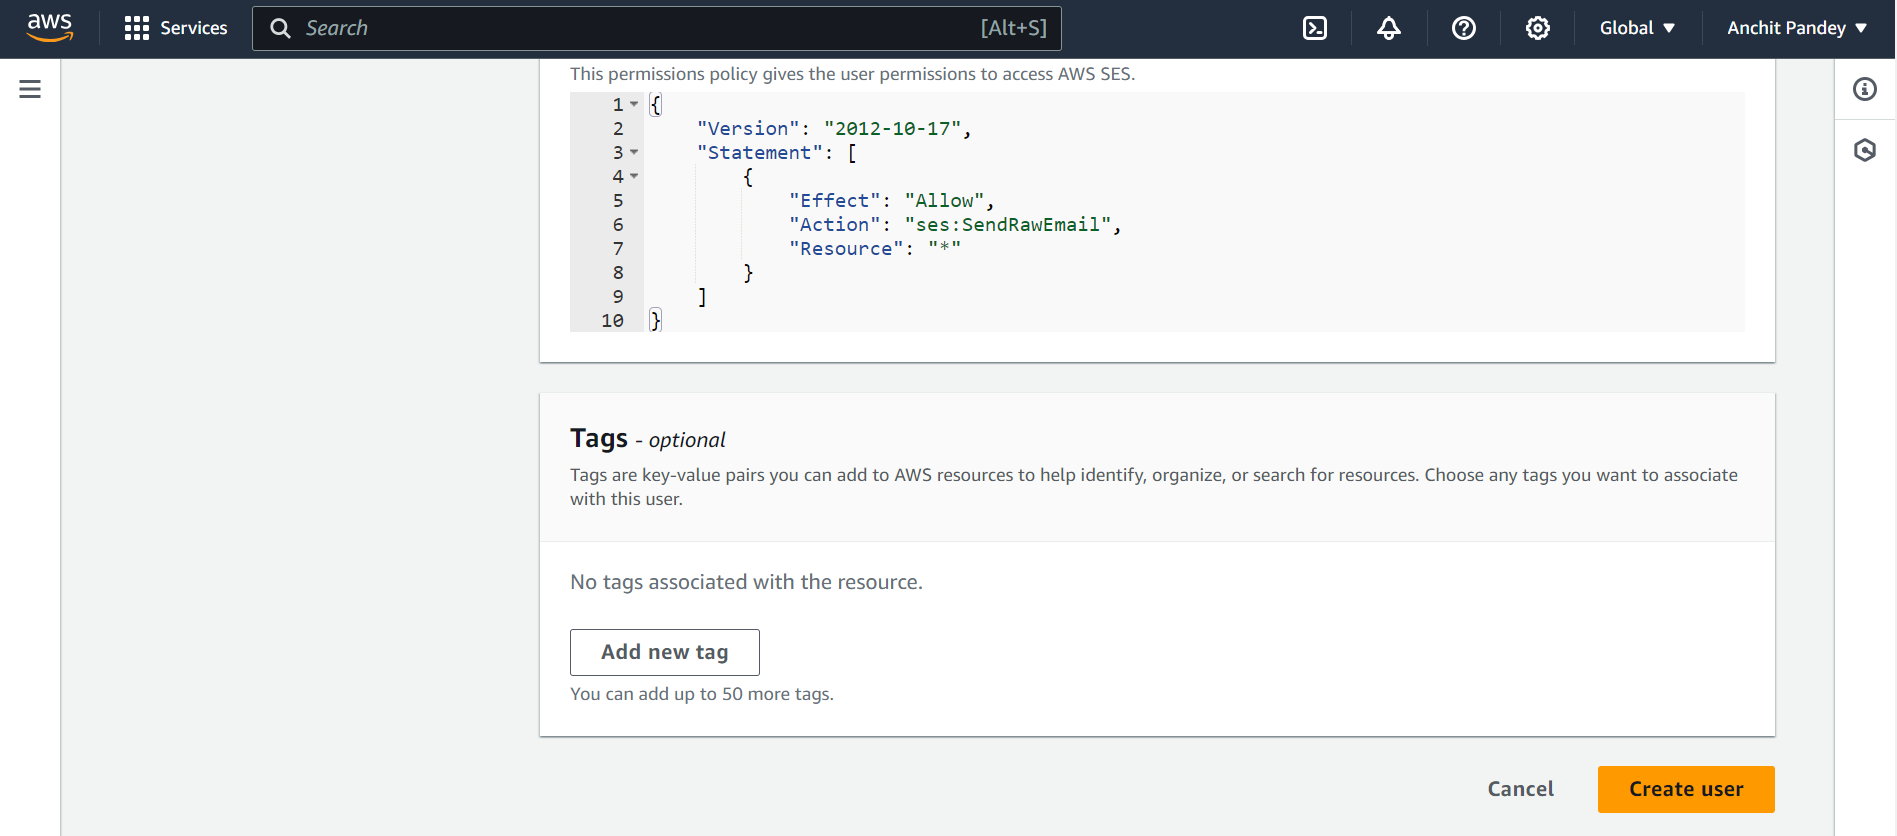
Step 5: You can skip the Add tags step. Click on “Next: Review”.

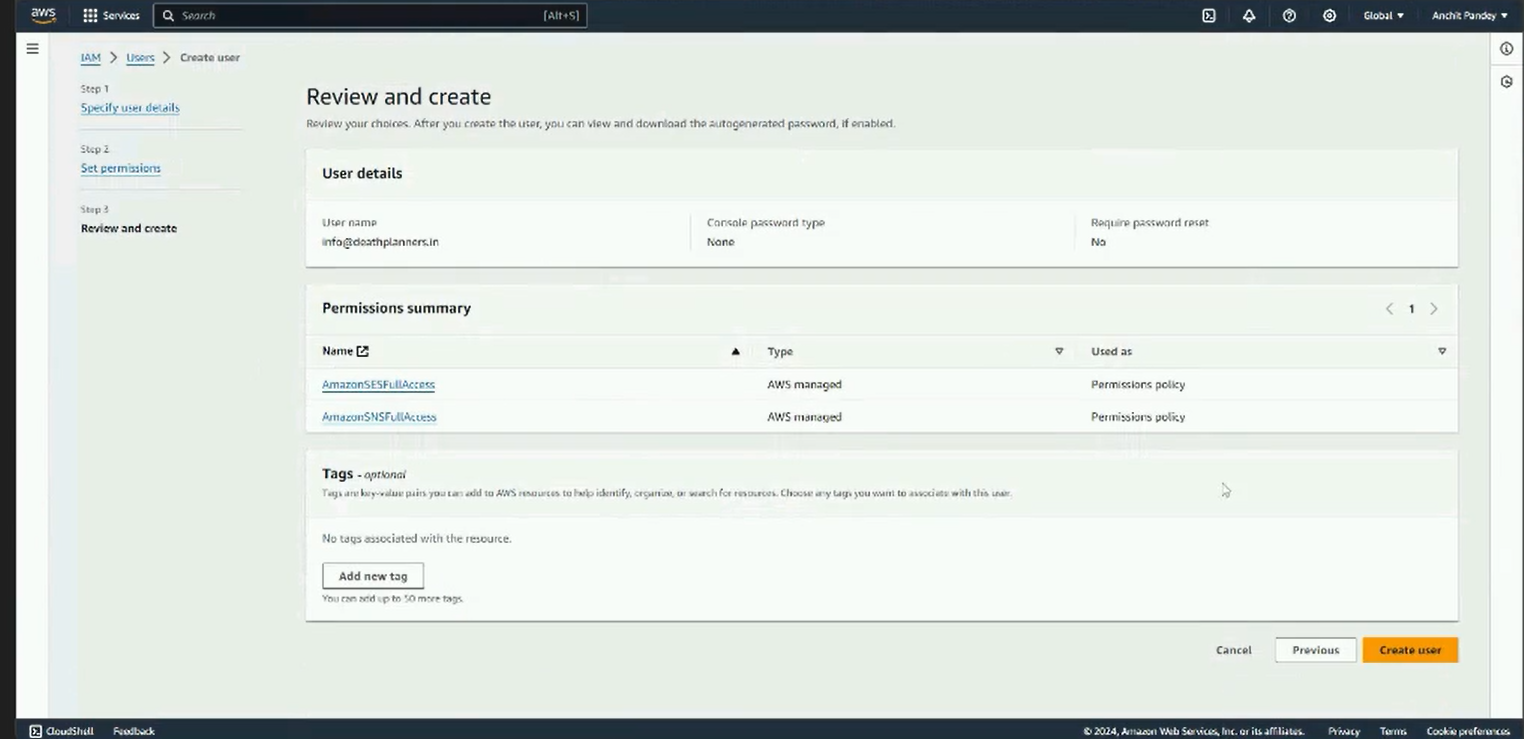
Step 6: Review the details. Once satisfied, click on Create user.
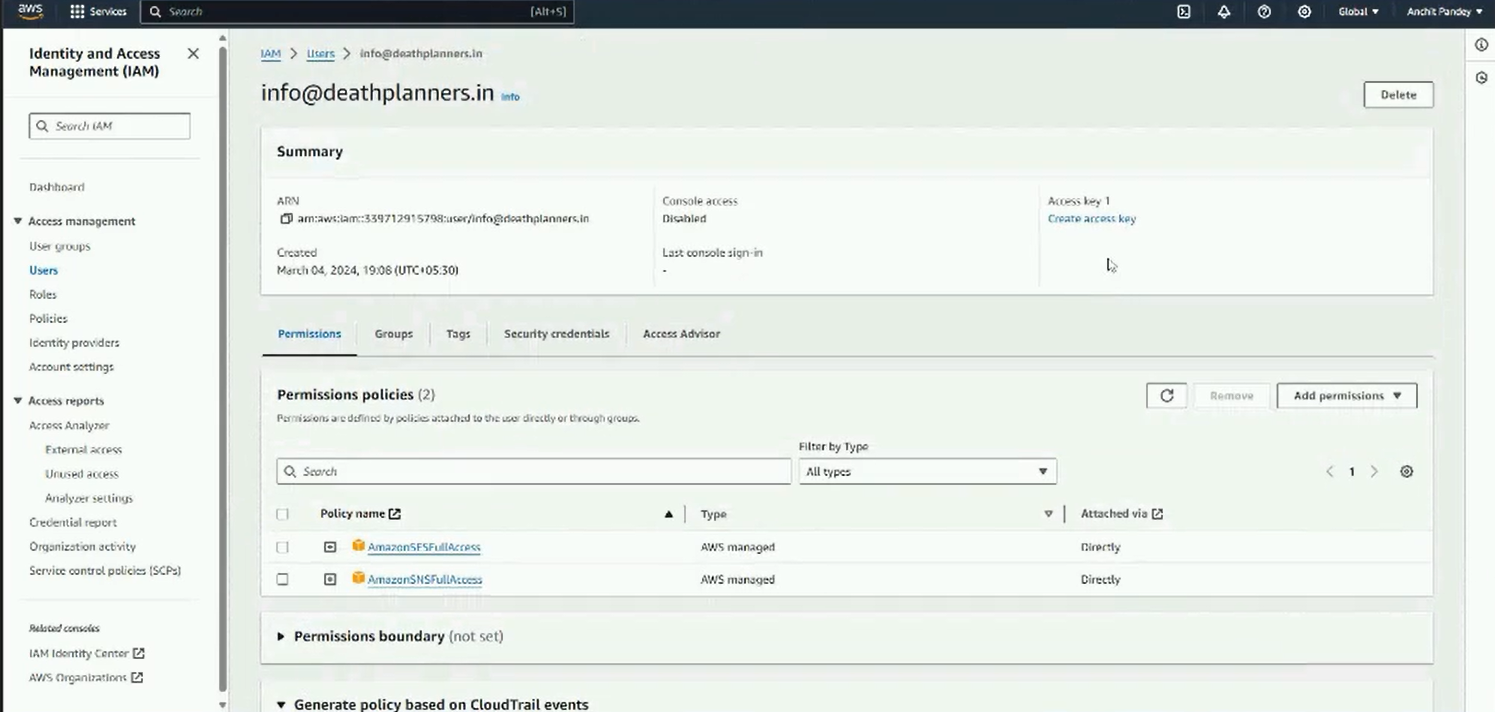
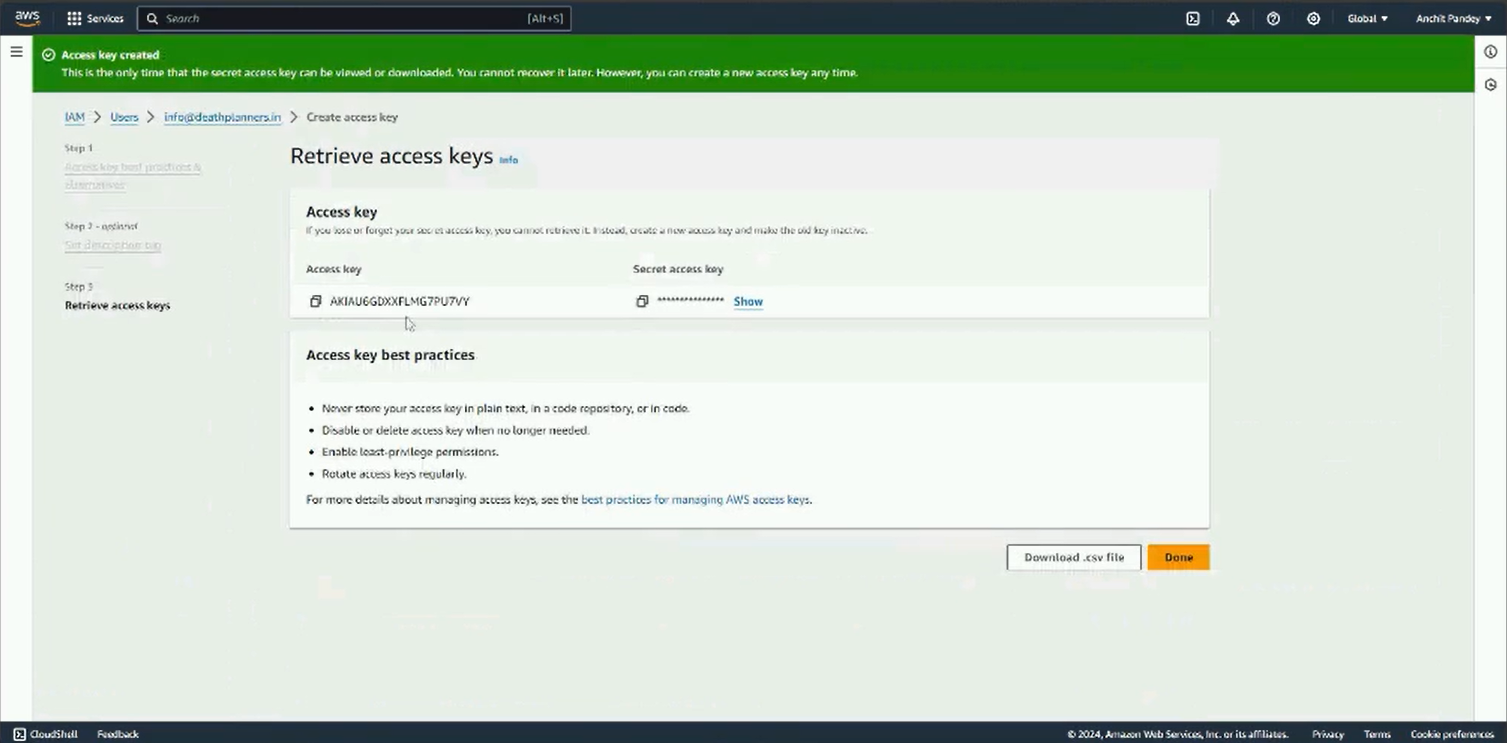
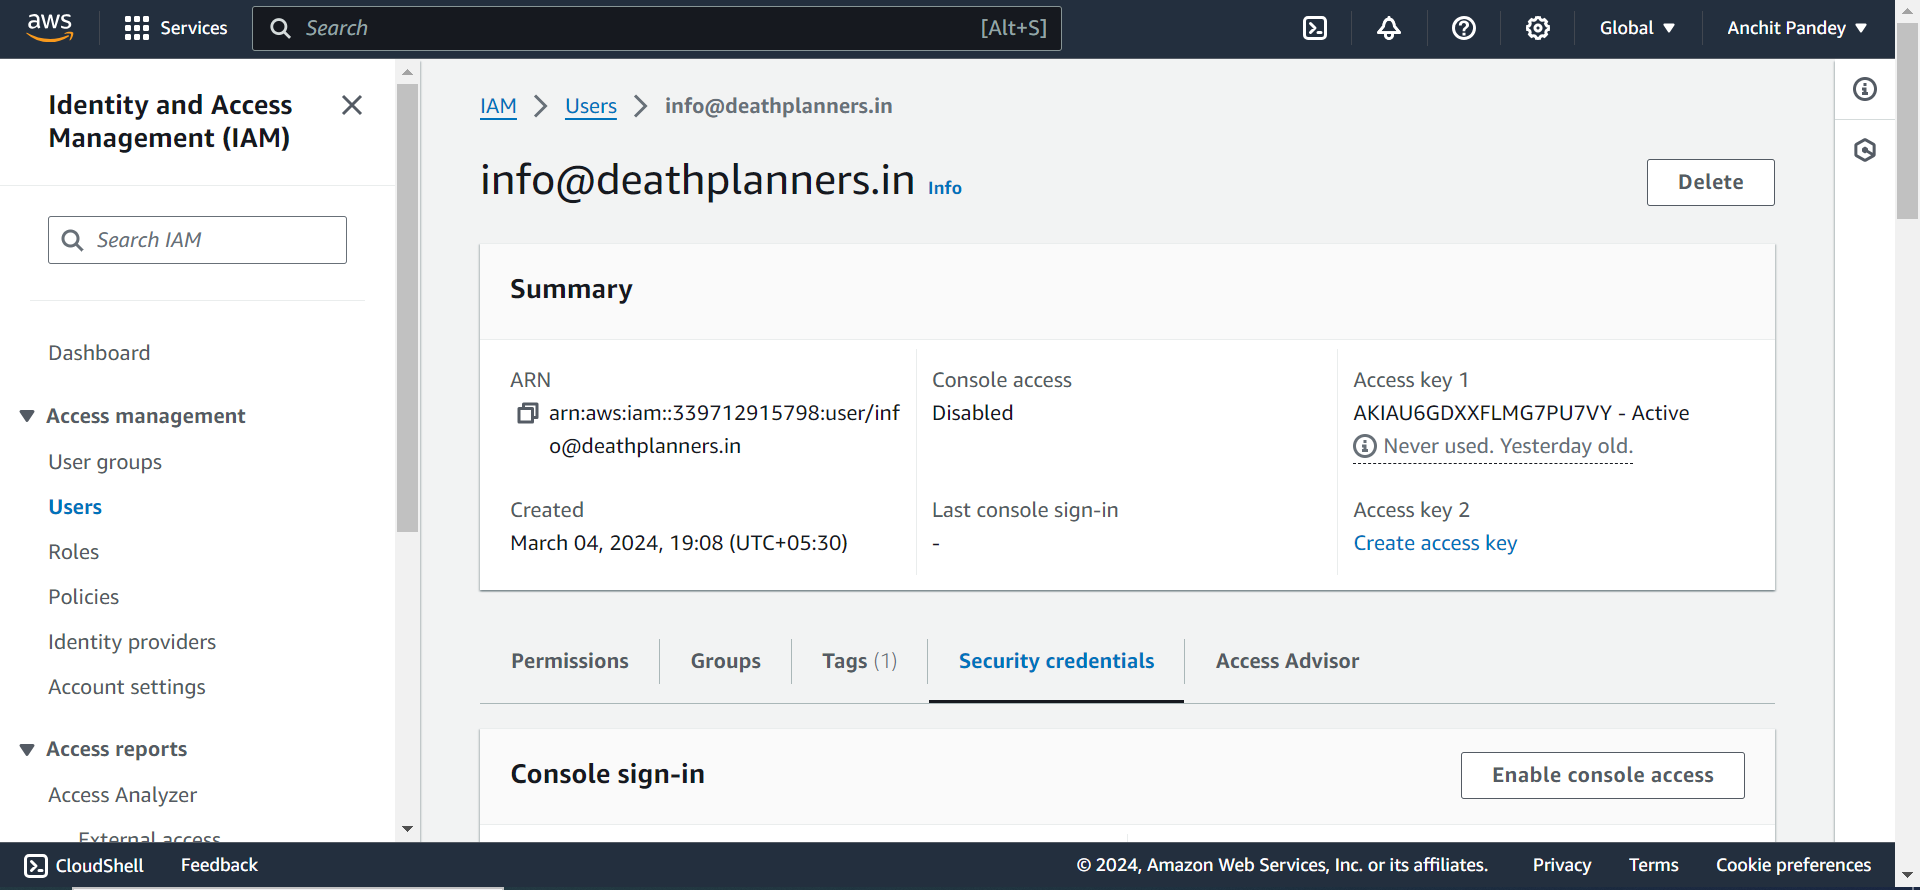
Step 7: Download the access credentials CSV or copy paste the credentials somewhere safe.
Step 8: Go back to Mailmodo and paste these credentials in Mailmodo.
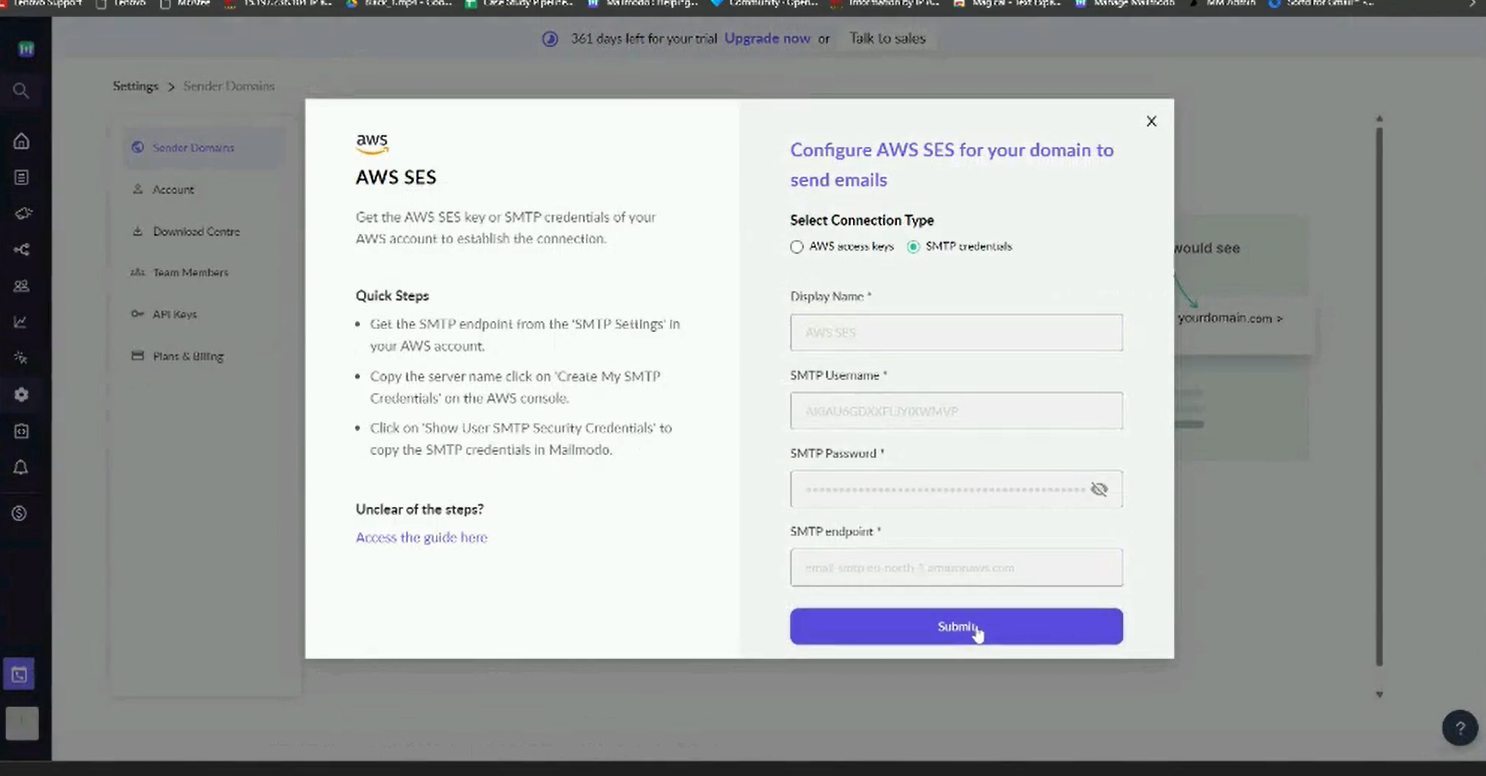
Using SMTP credentials
Note: Before sending emails via AWS SMTP, please make sure that the account is in the production state, and not the sandbox state.Step 1: Go to SES and select SMTP settings in the left panel.
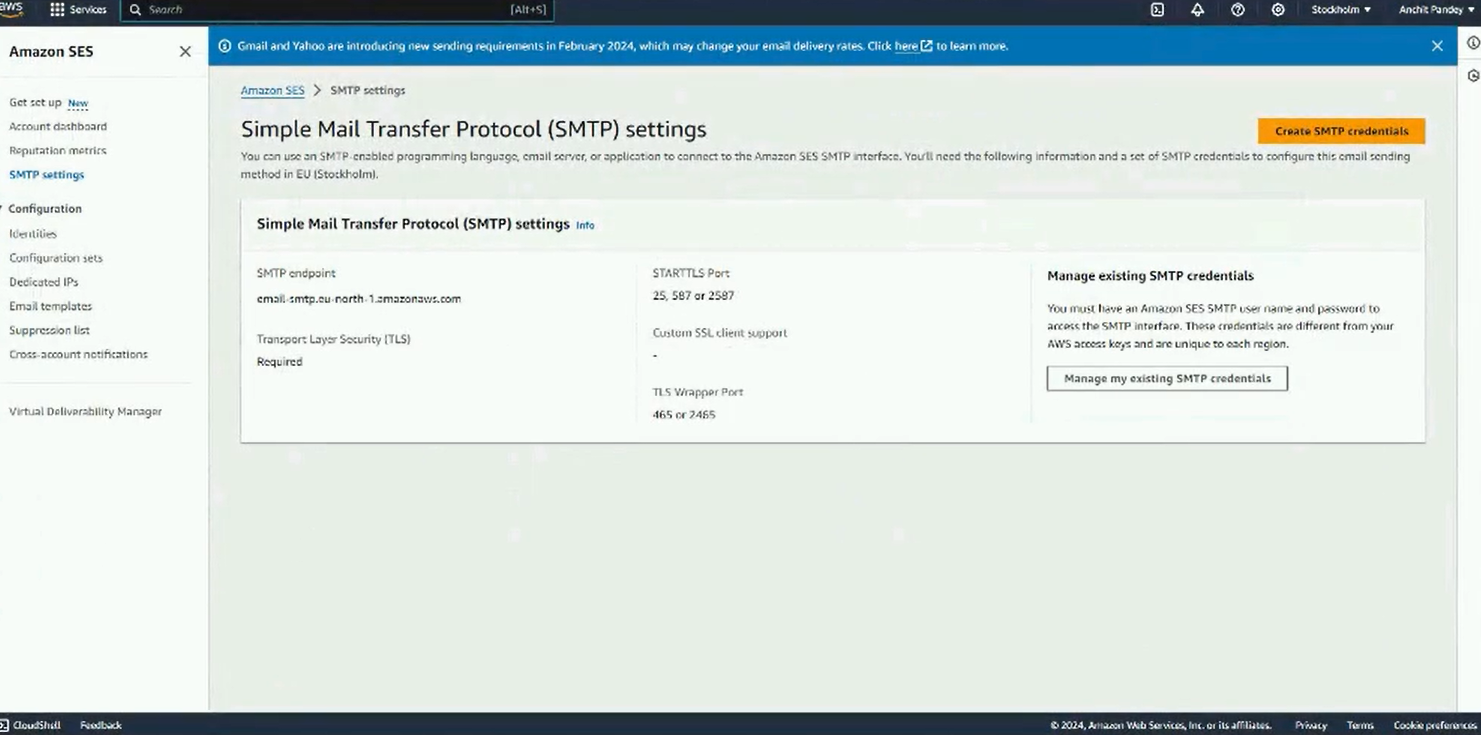
Step 2: Copy the SMTP endpoint and paste it in Mailmodo.

Step 3: Next click on Create SMTP credentials.
Click on Create.
Step 4: Once created, click on Show User SMTP Security Credentials. Paste that information in Mailmodo.
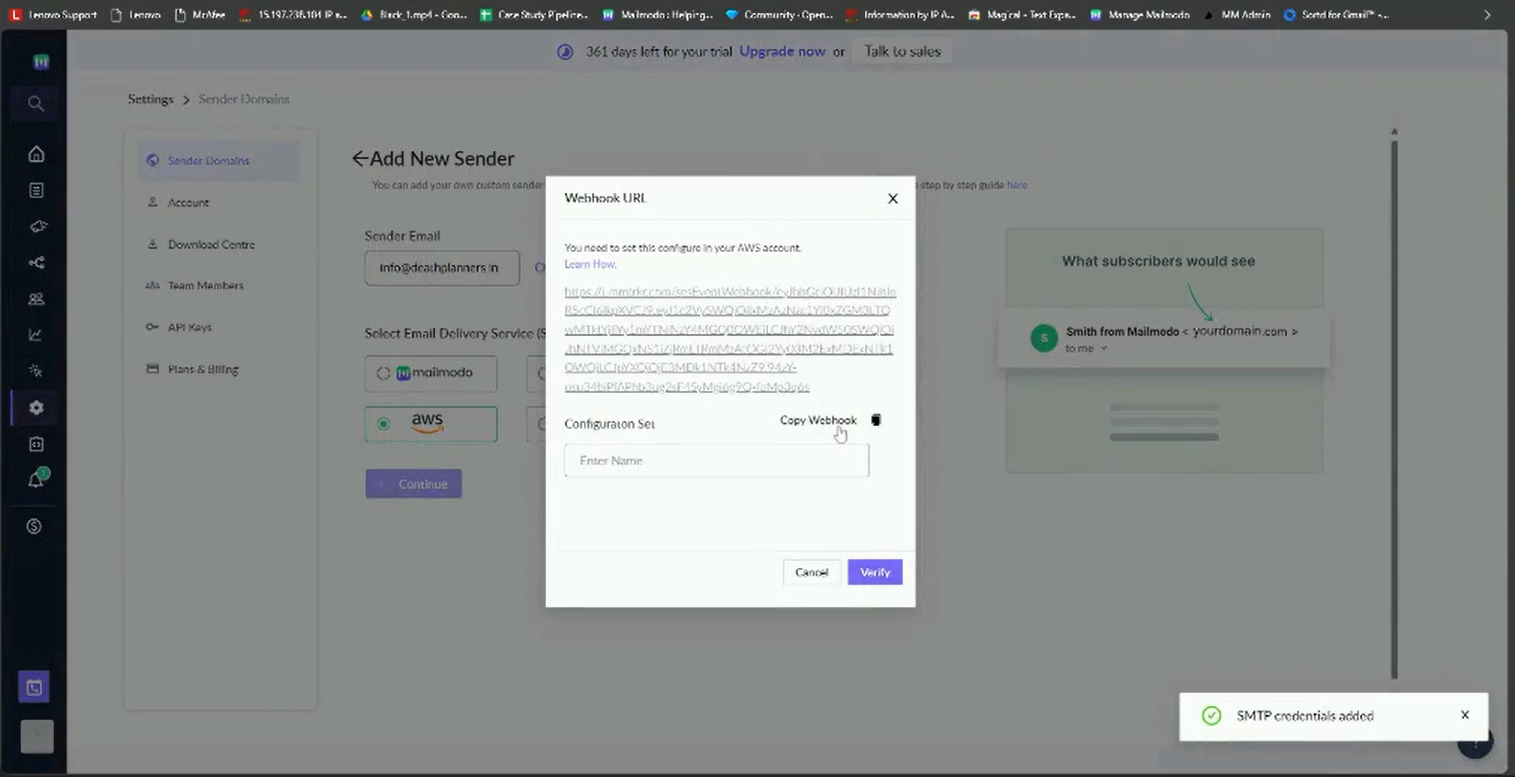
Adding Webhook and Configuration Set
Adding a Webhook helps you keep track of your mail bounces and complaints. This process is optional but we recommend adding the Webhook and Configuration Set so that users have better control over their deliverability management.
After configuring the AWS SES using access keys or SMTP Credentials, a Webhook URL will be displayed, which you need to add to your SES configuration
Step 1: Search for SNS in AWS console and click on Simple Notification Service.
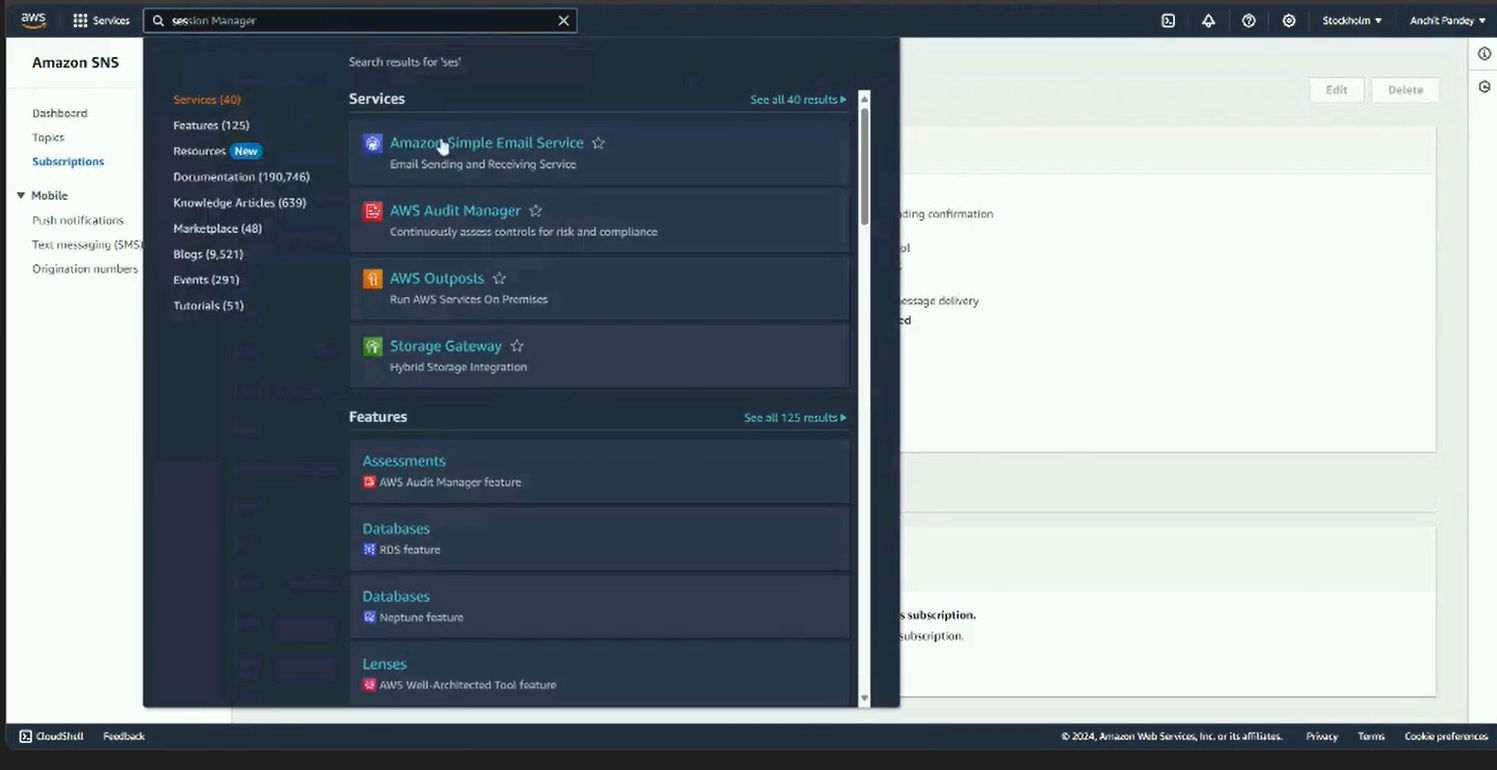
Kindly note that SES and SNS must be setup in the same region.
Step 2: Select Topics from the left panel. Create a new topic.
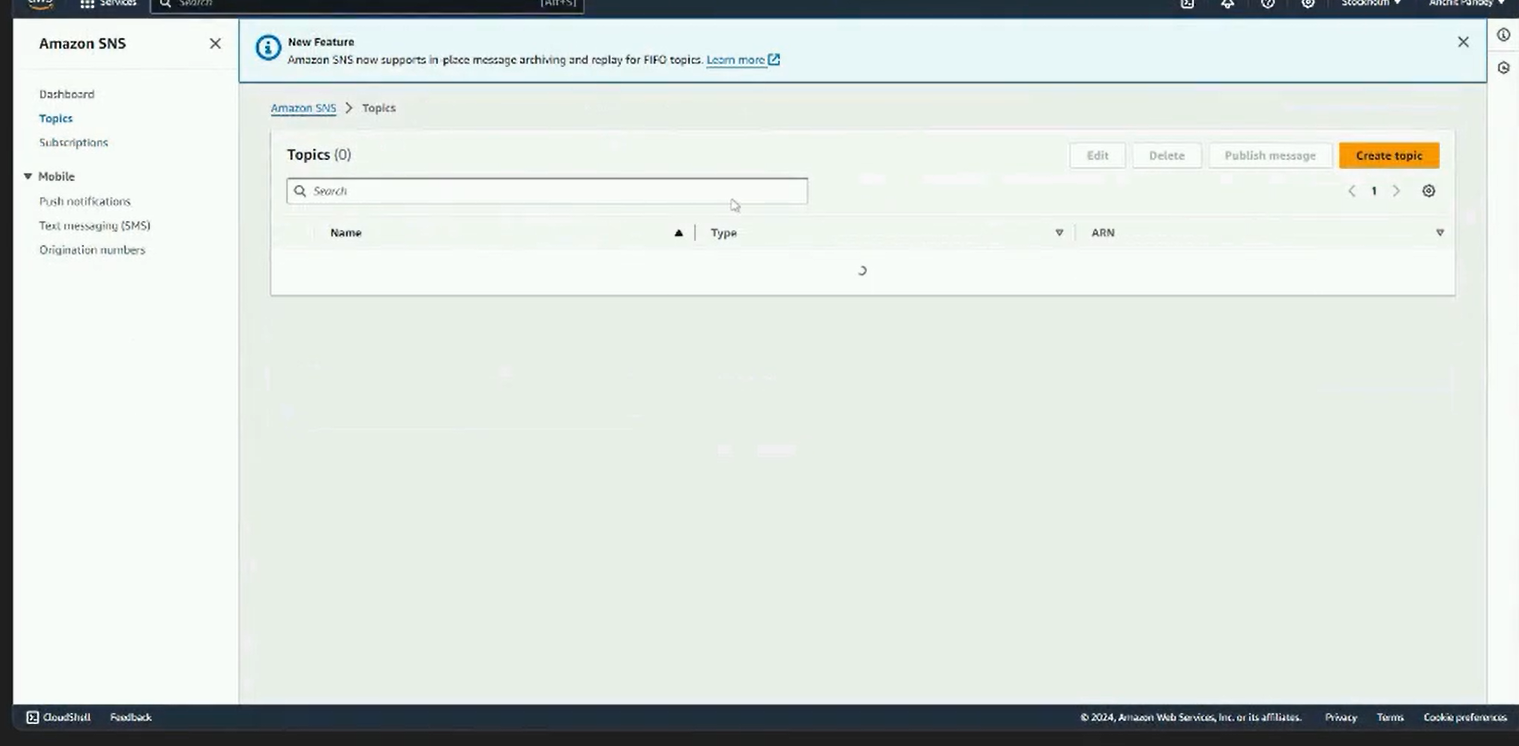
Step 3: Select topic type as Standard. Give a name to the topic.
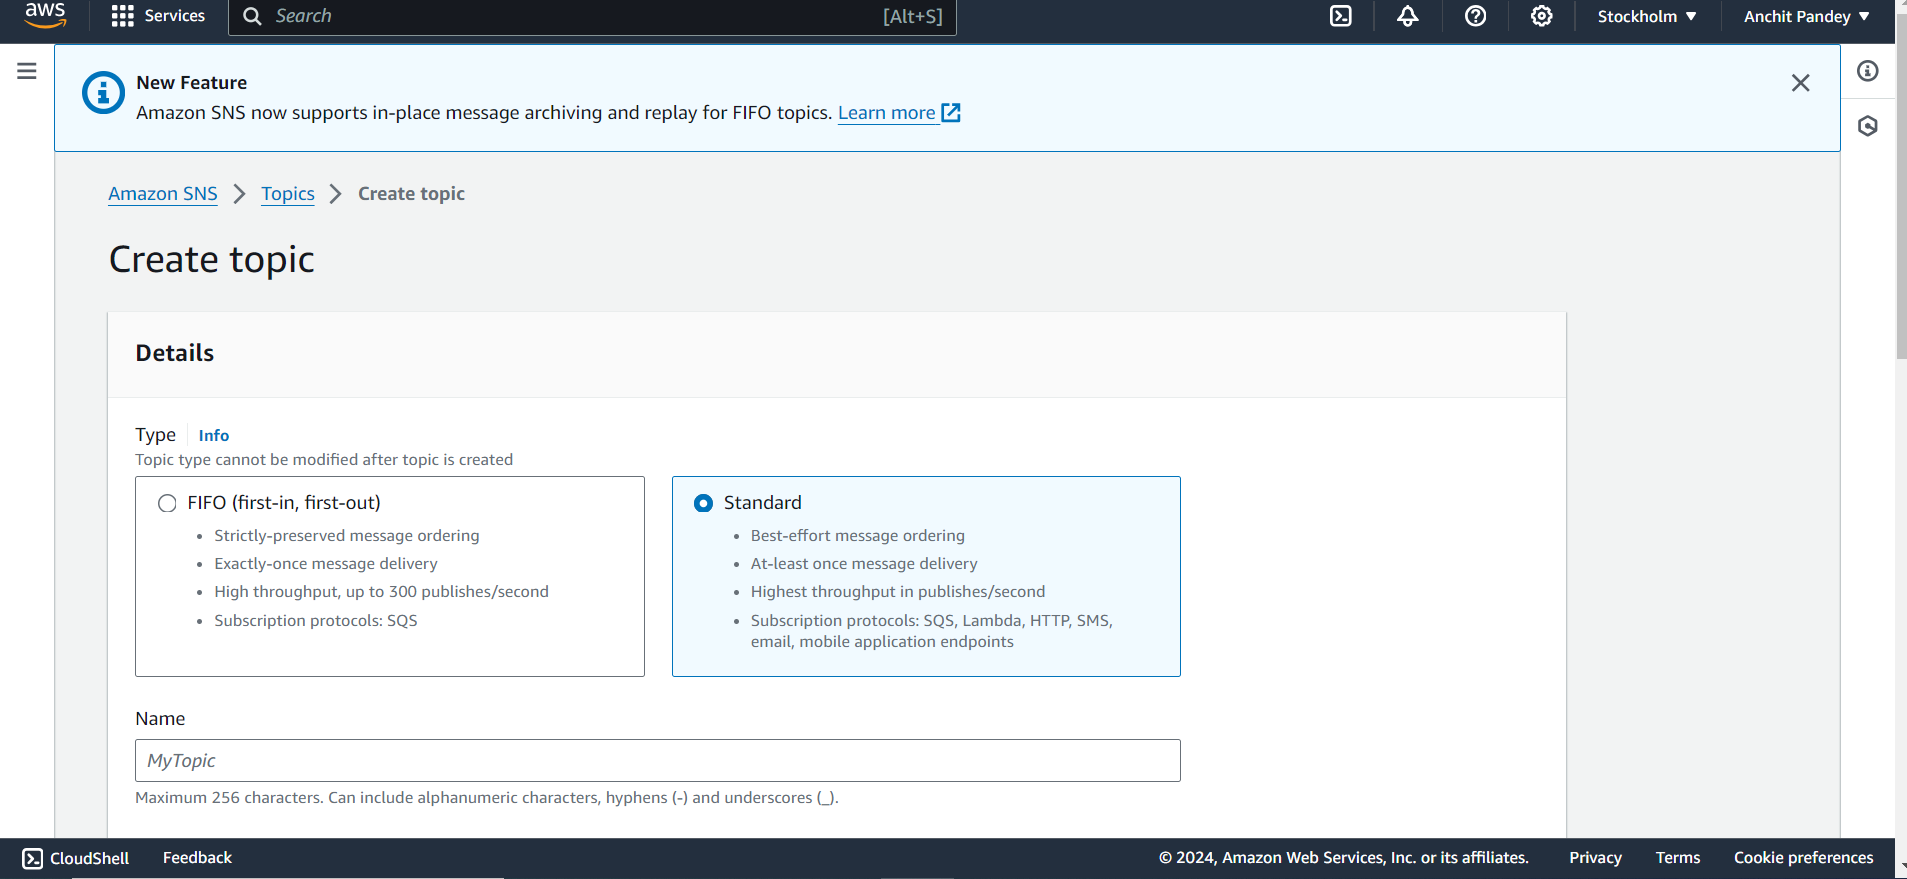
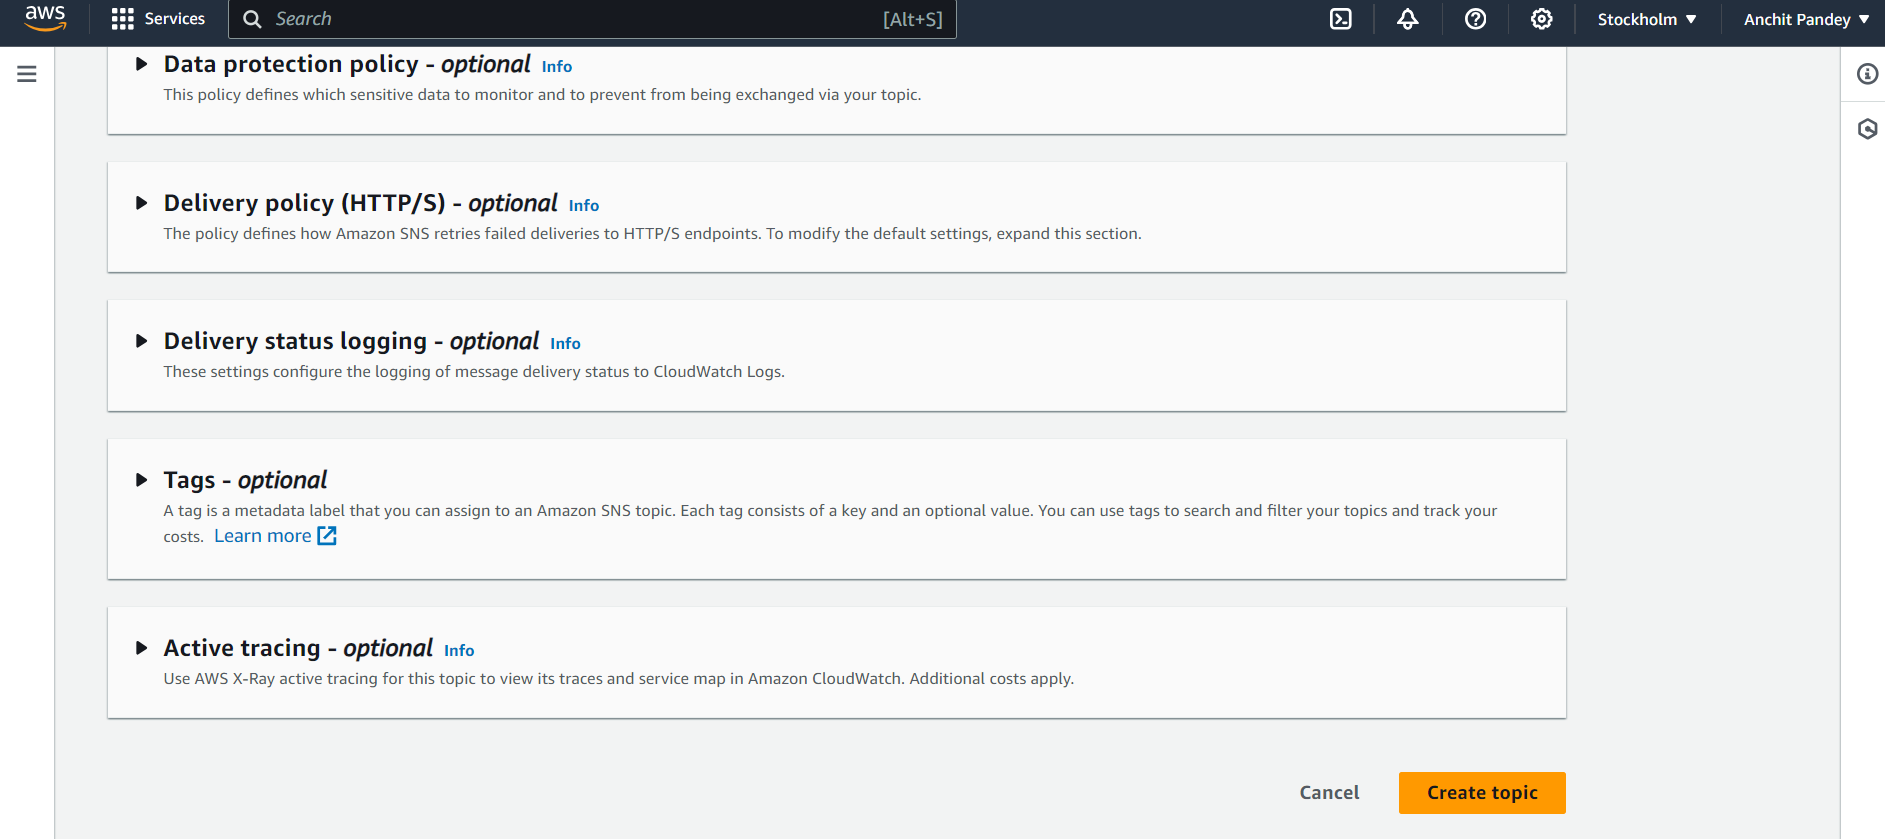
Scroll down and click on Create topic.
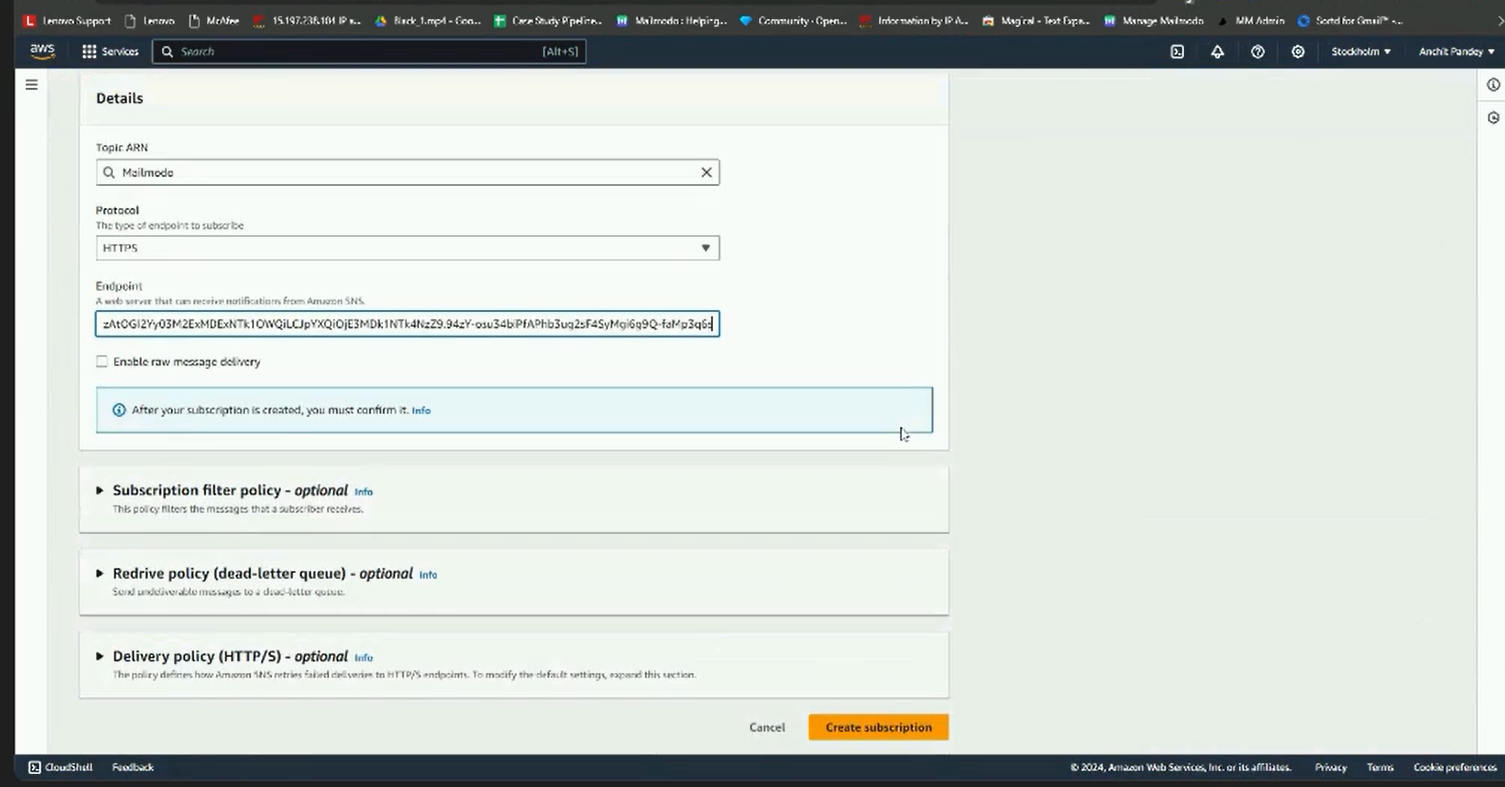
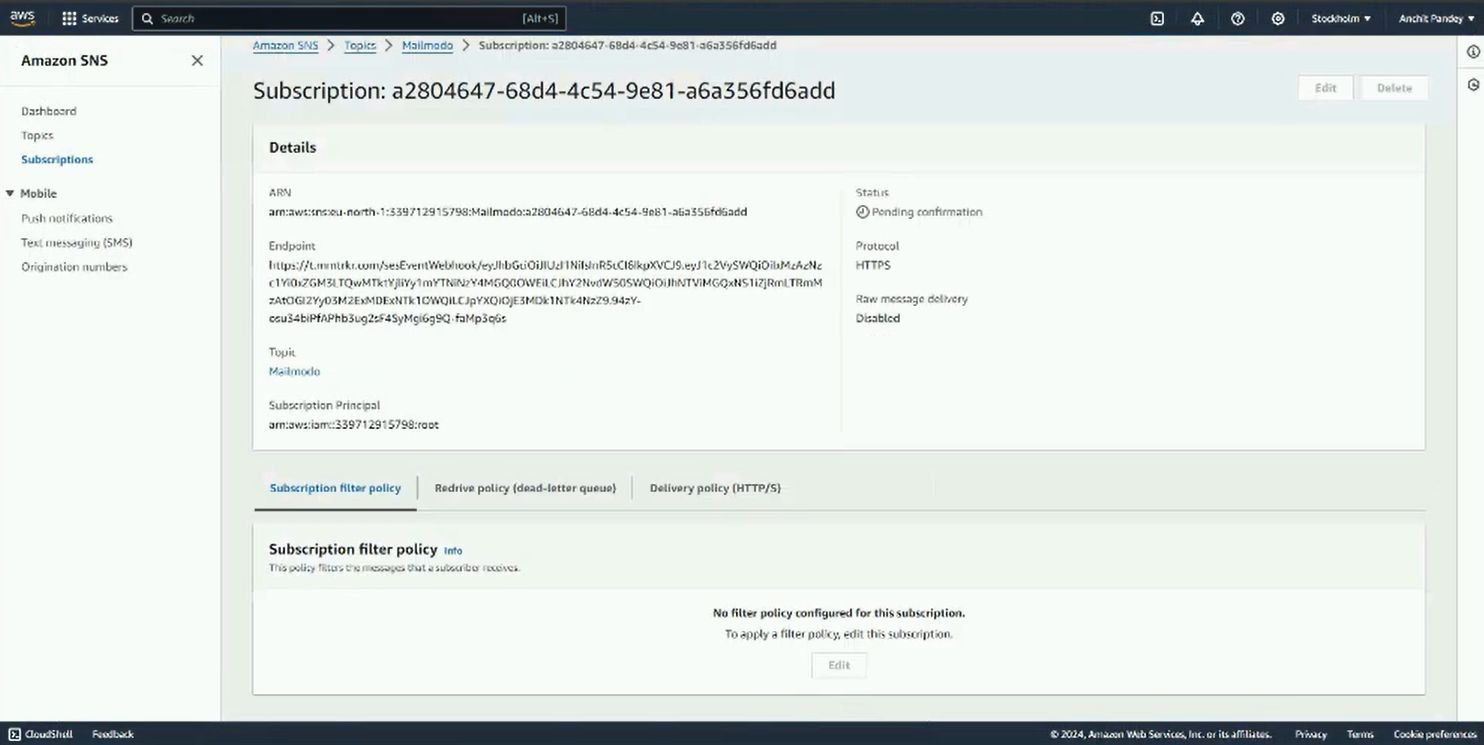
Step 4: Once a topic is created click on create subscription.
Step 5: Topic ARN would be pre filled. Select HTTPS as the protocol. Paste the webhook URL generated in Mailmodo.
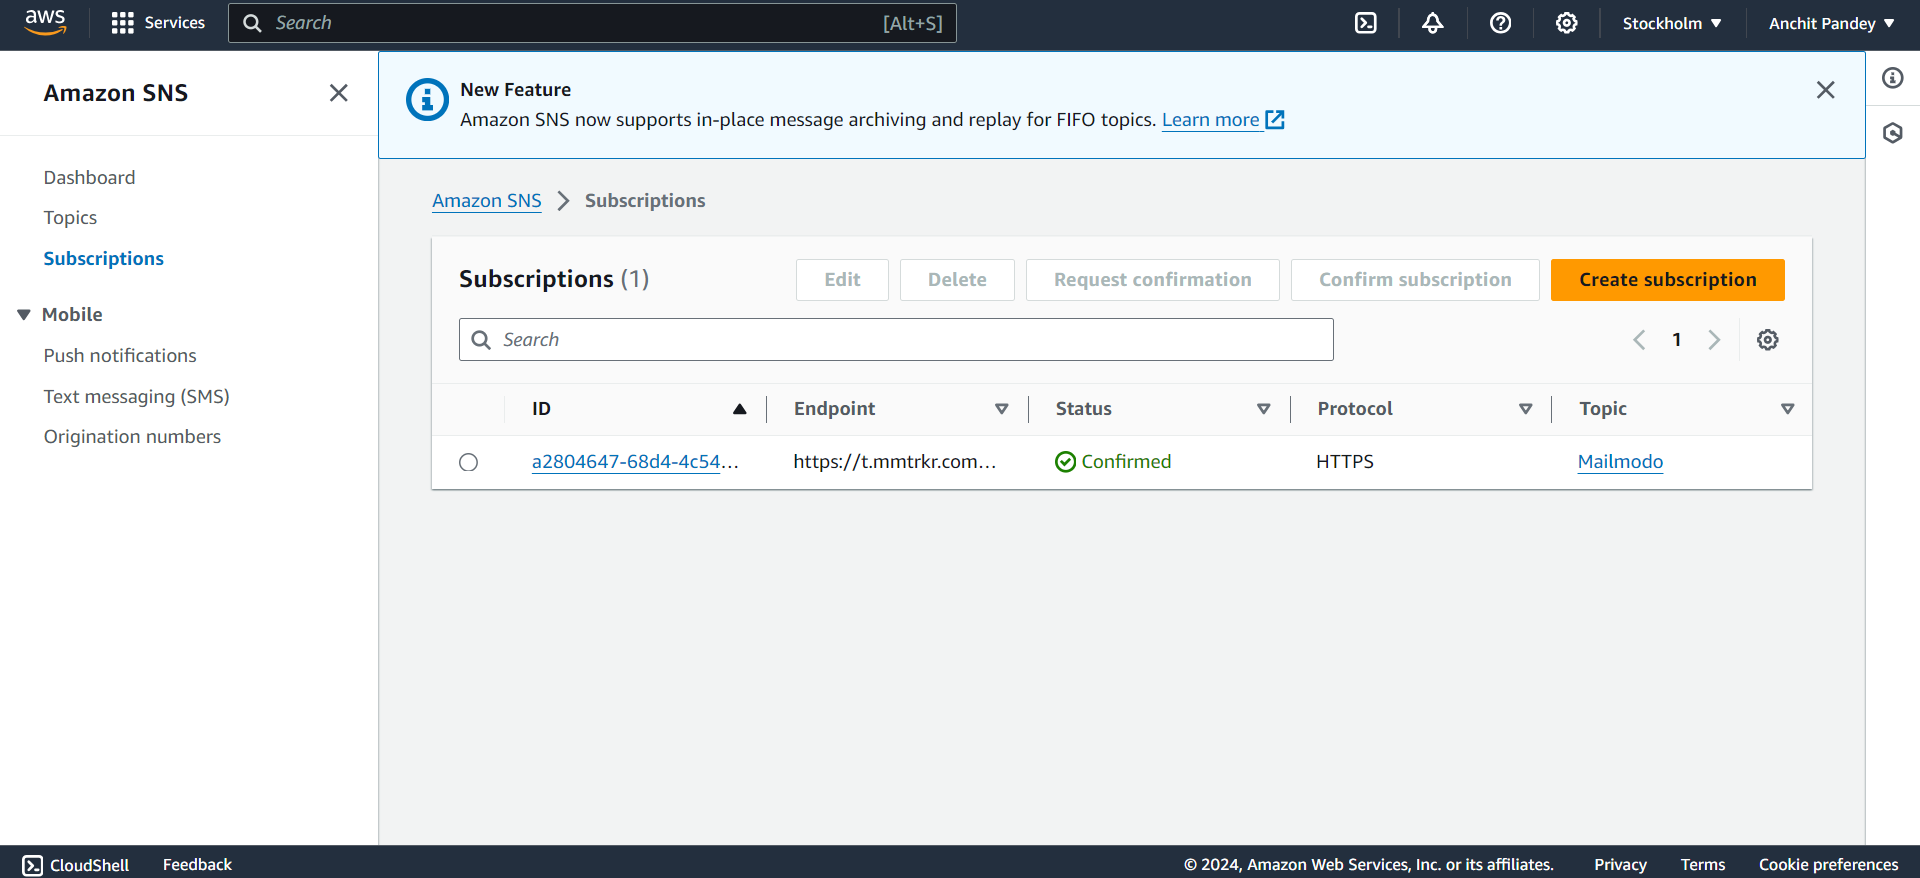
Step 6: Scroll down and click create subscription.
Once a subscription is created, this screen would be visible.
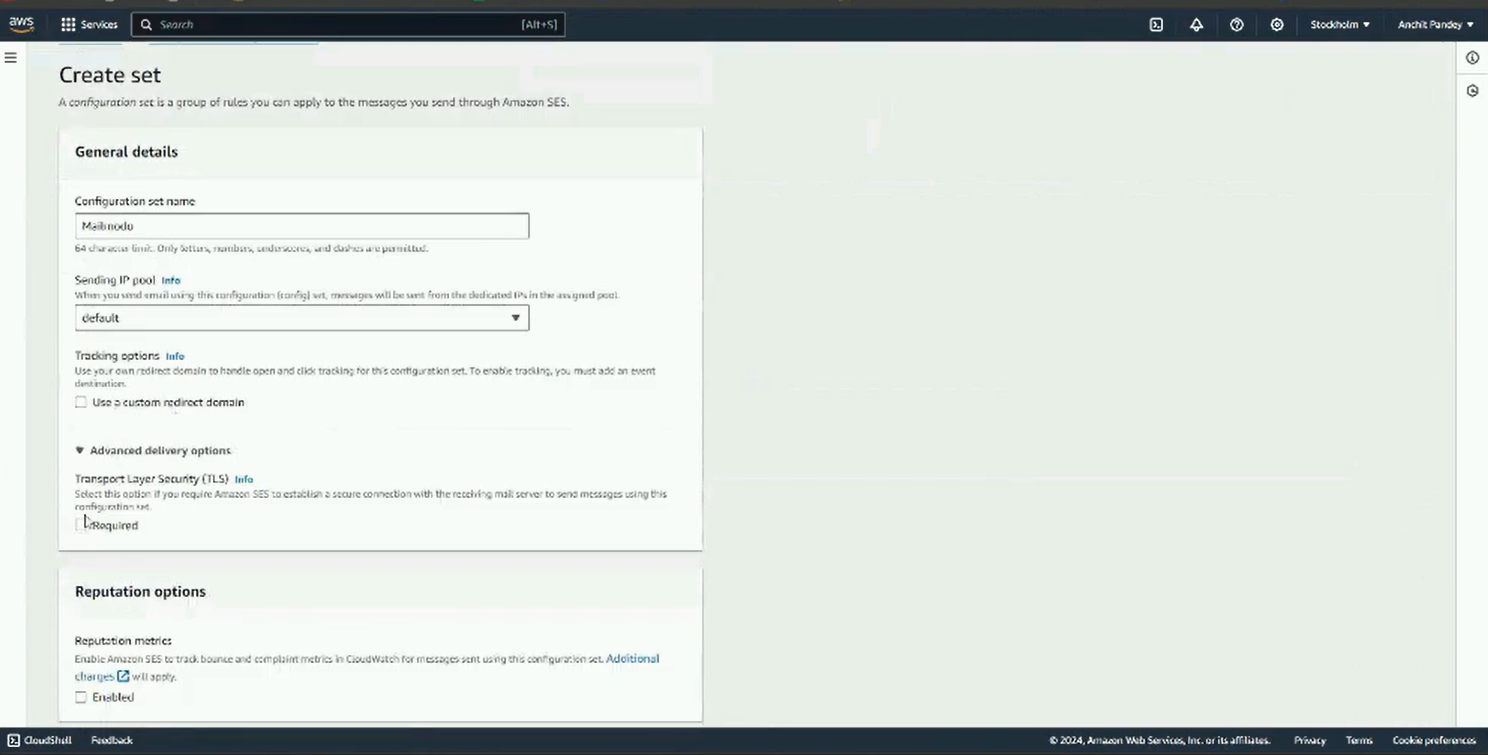
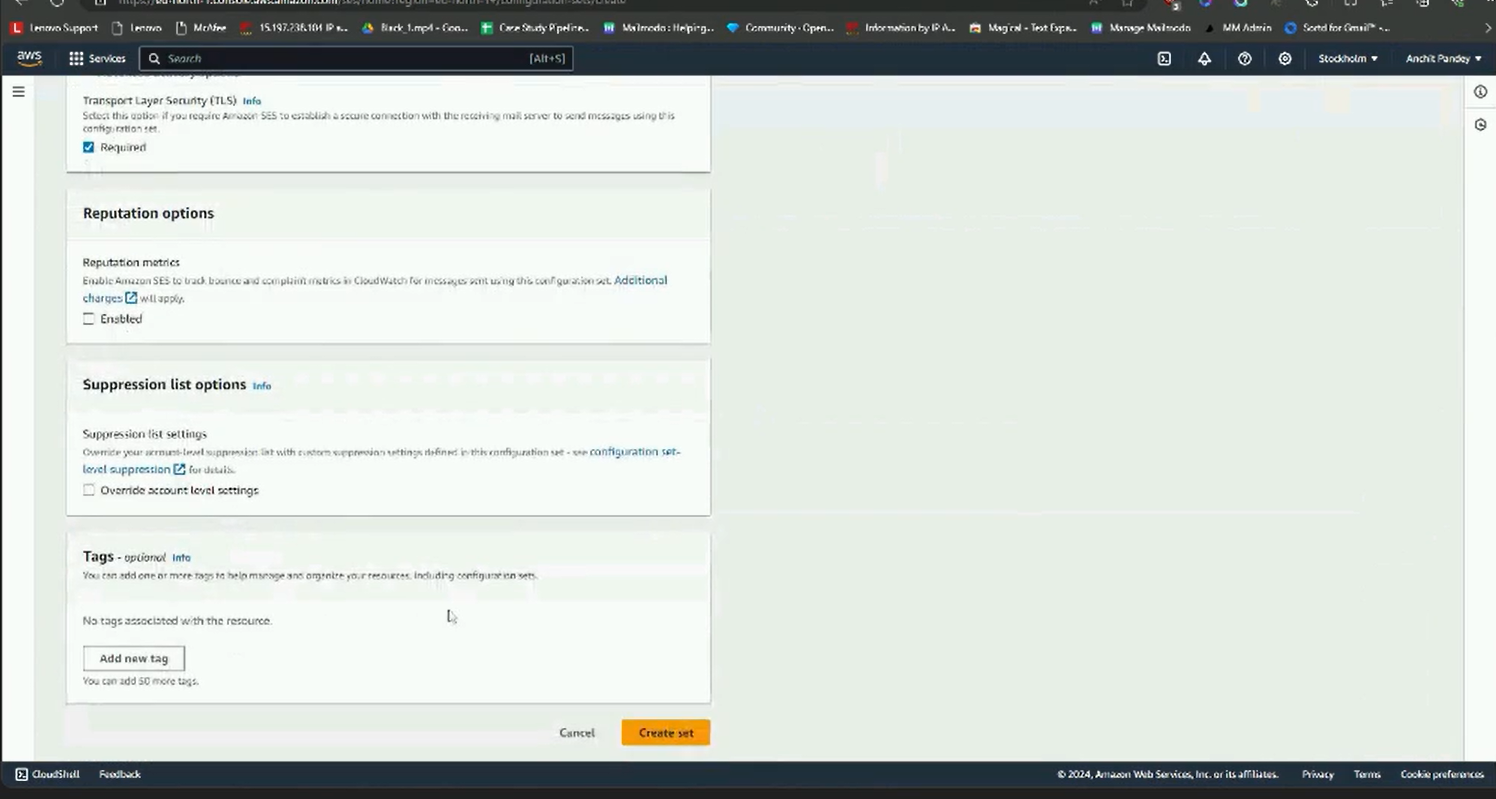
Step 7: Next go to SES. Select Configuration set from the left panel. Click on Create set.

Step 8: Name the configuration set. Scroll down and click on create set.
Step 9: Once the configuration set is created, add the event destination.

Navigate to event destination tab and click on Add destination.
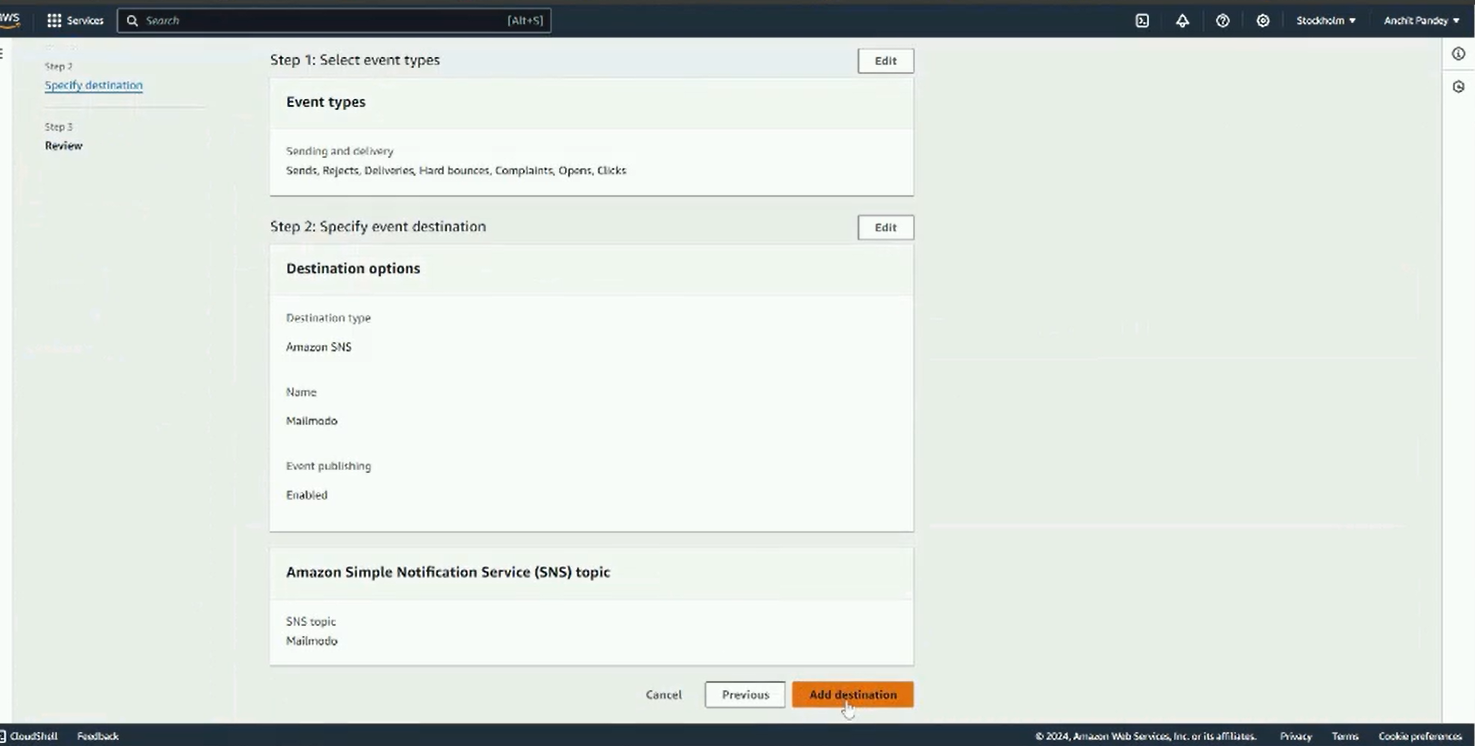
Step 10: Select the following event types: Sends, rejects, delivery, hard bounces, complaints.
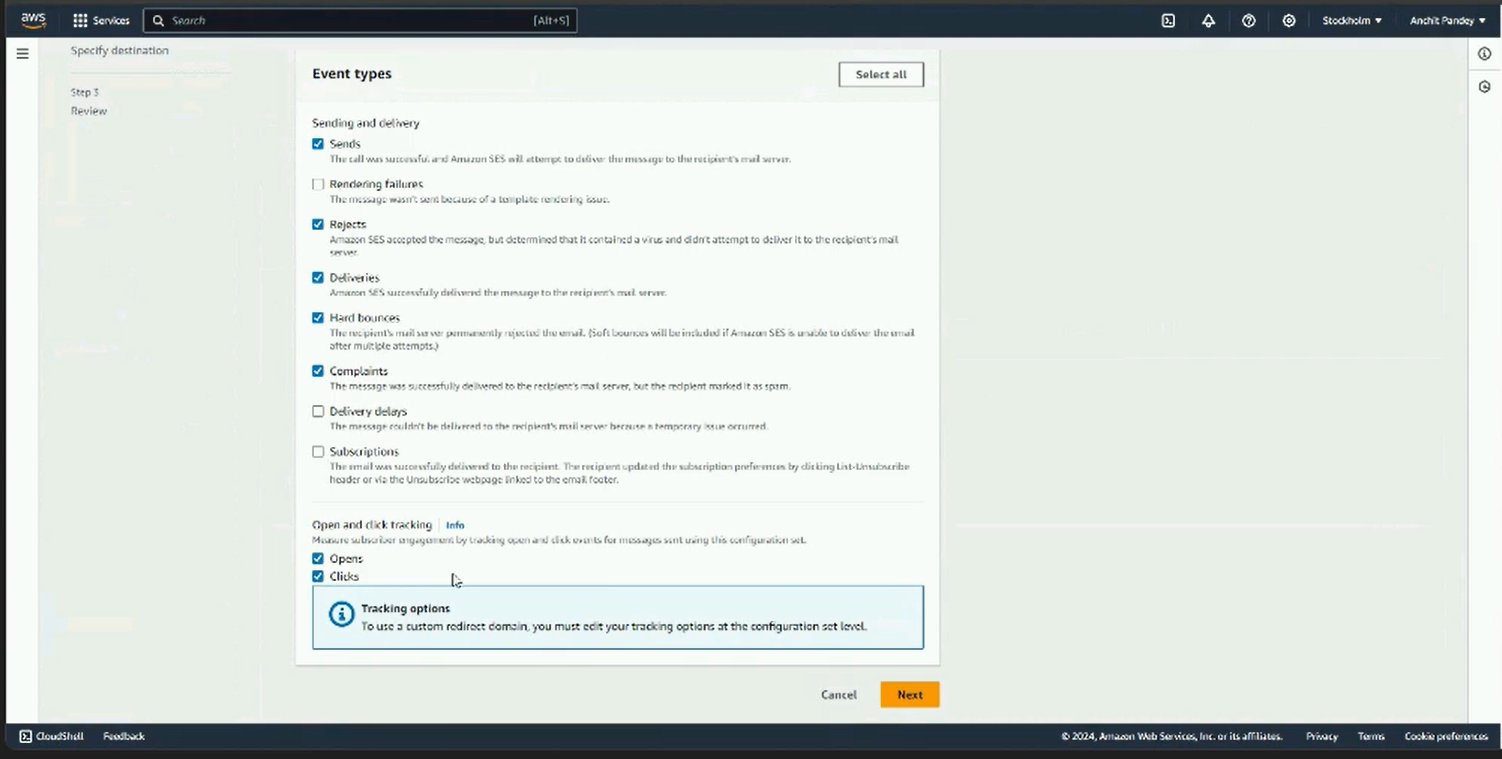
Click on next.
Step 11: Select Amazon SNS as destination type. In SNS topic, select the topic you created earlier. Click on Next.
Step 12: Review the details and click on Add destination.
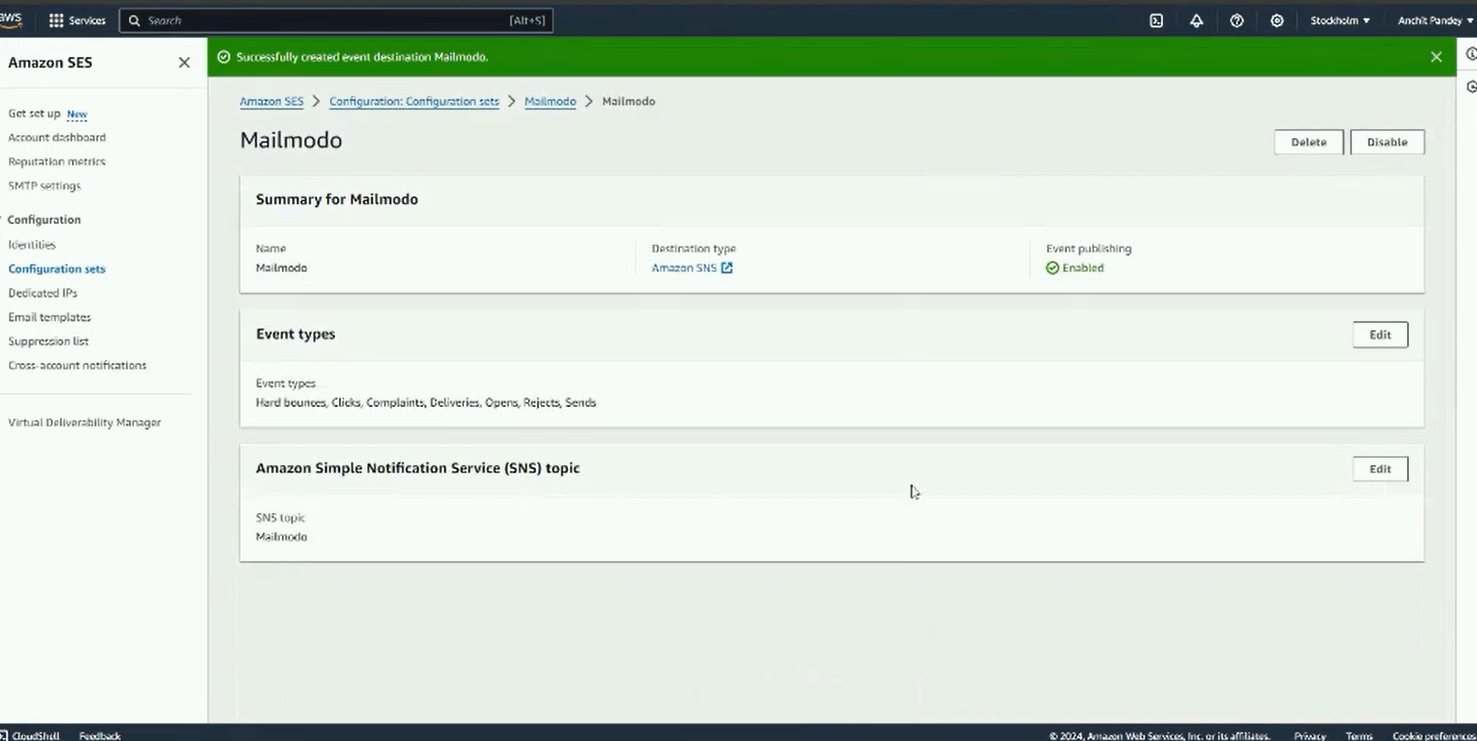
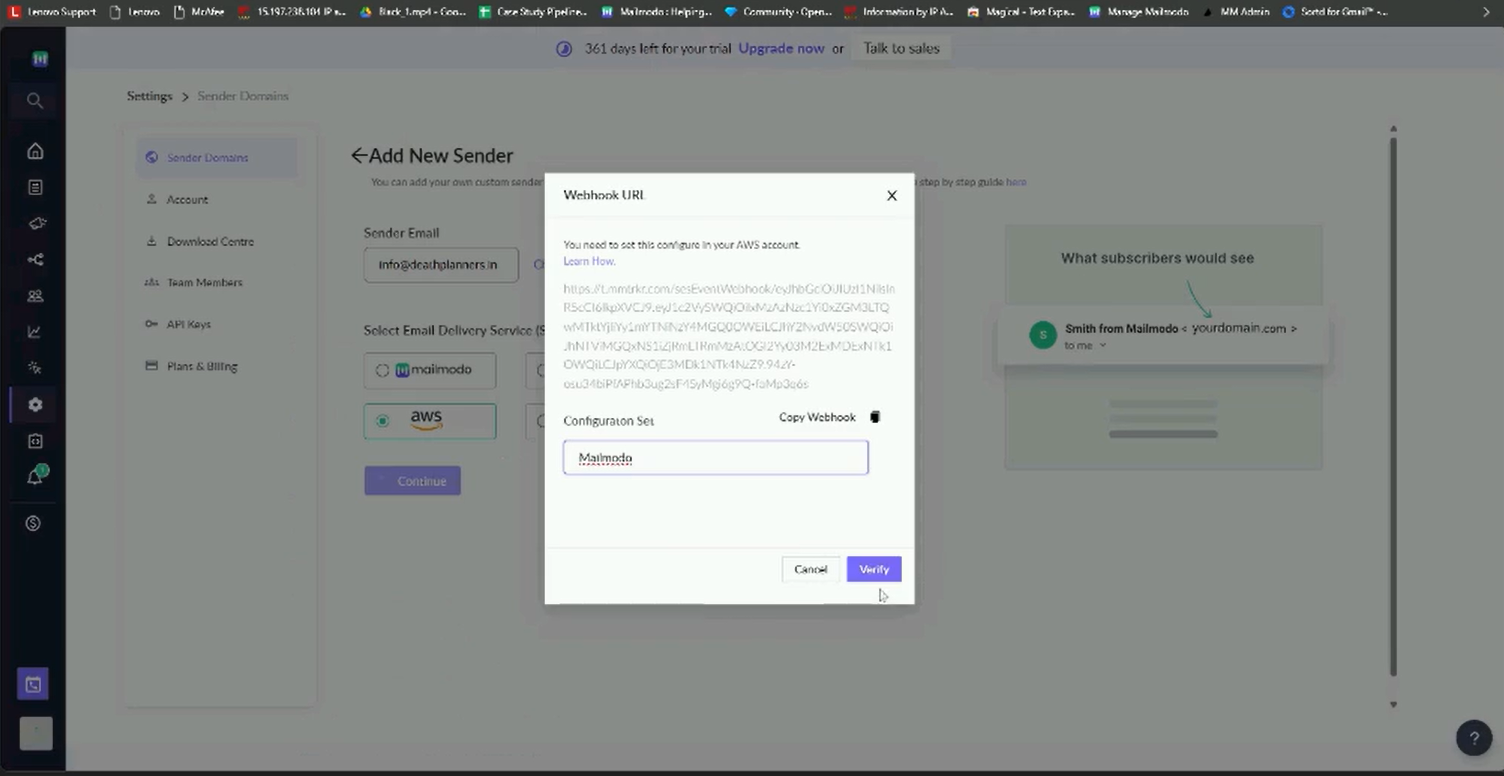
Step 13: Paste the Configuration Set name on the Mailmodo tab containing the Webhook URL. Verify the settings and your SMTP will be configured.
- Then proceed towards AMP Whitelisting for your sender ID, steps for which are mentioned here .
Troubleshooting issues with DNS records addition
There may be a situation where even after adding the requisite DKIM, DMARC and SPF records, the domain verification fails on Mailmodo.
Solving this problem requires inspecting the DMARC and SPF records that have been added, and subsequently changing them if incorrect values have been entered.
To check the DMARC & SPF record that has been added to your domain:
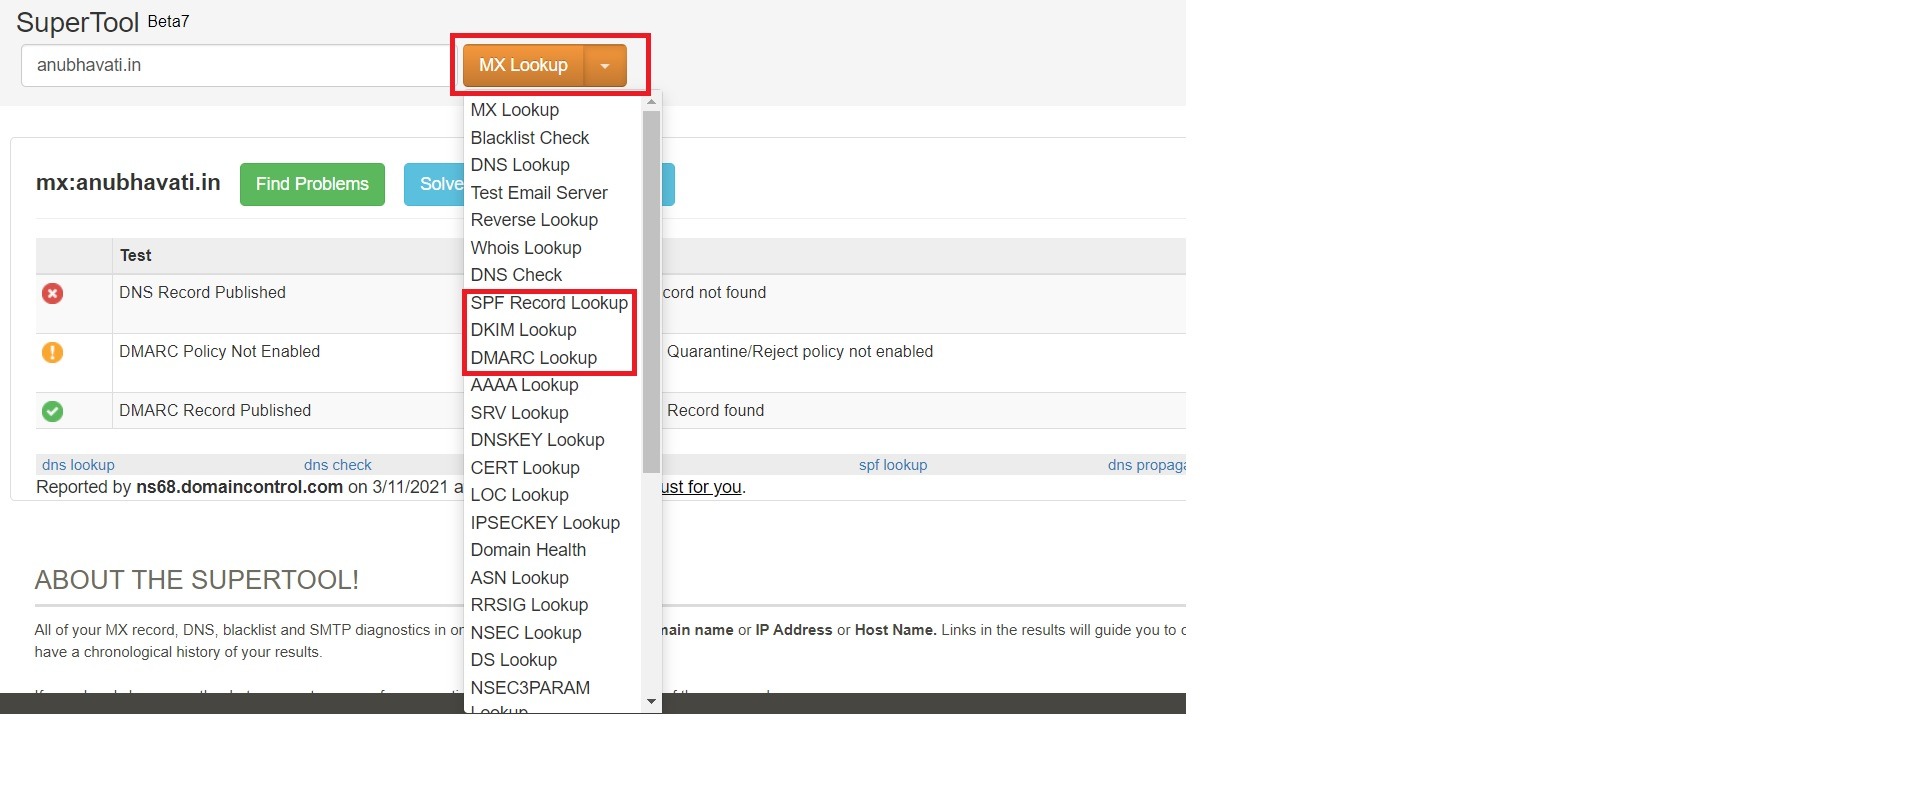
- Go to mxtoolbox.com
- Enter your domain name, and click on MX Lookup

- Next, click on the drop-down next to MX Lookup, and you can check for DKIM, DMARC and SPF records for your domain:
- Now, verify the DMARC & SPF records against their correct values, which are:
DMARC
| Hostname | Type | Value |
| _dmarc | TXT | v=DMARC1; p=quarantine; rua=mailto:admin@yourdomain.com; pct=10; sp=quarantine |
SPF
| Hostname | Type | Value |
| @ | TXT | "v=spf1 include:example.com include:amazonses.com ~all" |
Also, keep in mind that multiple DMARC & SPF records are not allowed as they create issues in mail deliverability.