How to Add Your Sender Domain in Mailmodo?
Last updated December 10, 2024
Adding your sender domain in Mailmodo involves configuring essential DNS records such as SPF, DKIM, and DMARC to ensure email authentication and improve deliverability. This guide will walk you through the steps to set up and verify your sender domain in Mailmodo.
Why Configure Your Sender Domain?
Adding your sender domain ensures that your emails are authenticated and trusted by recipient servers. It helps to:
- Prevent your emails from being marked as spam.
- Enhance email deliverability.
- Protect your domain reputation.
- Enable advanced features like AMP emails.
Steps to Add and Verify Your Sender Domain in Mailmodo
Step 1: Access the Sender Domains Section
- Log in to your Mailmodo account.
- Navigate to the Settings page.
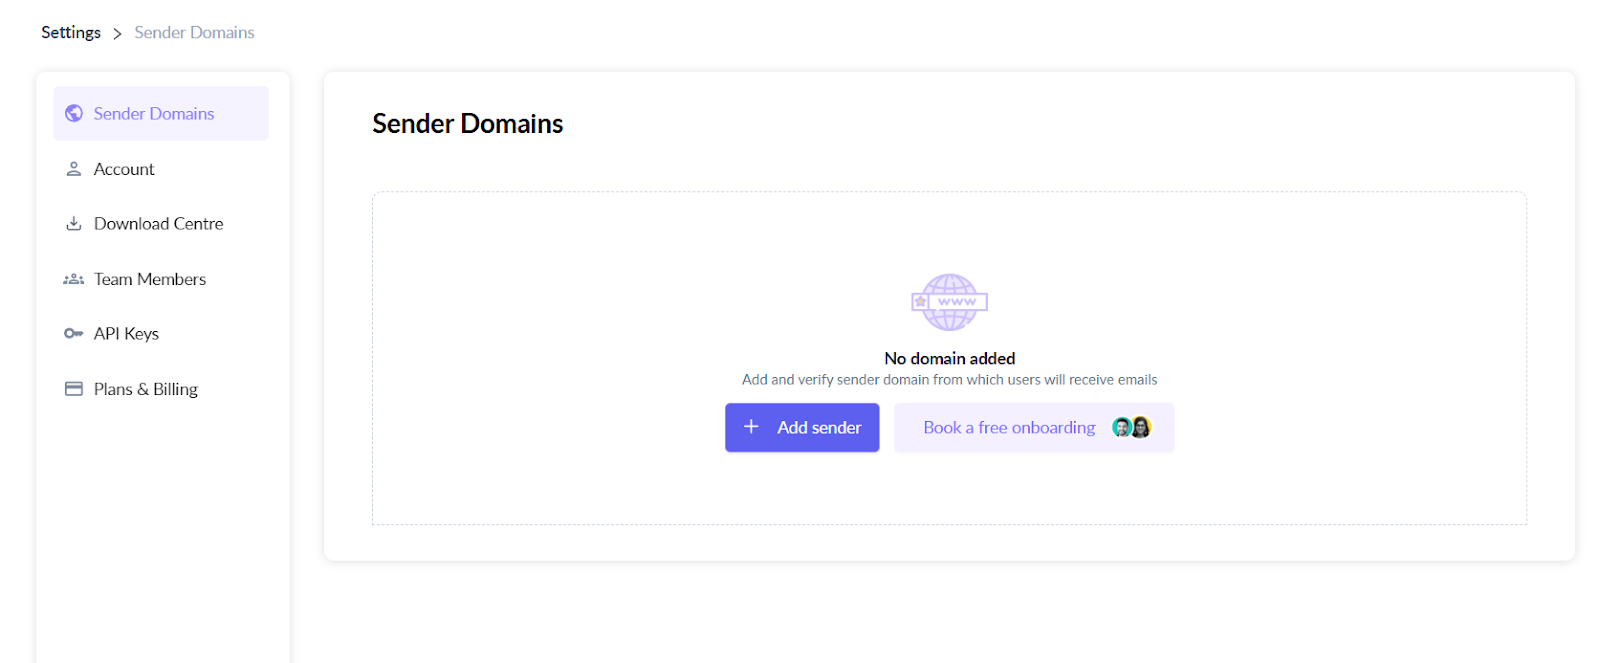
- Under the Sender Domains section, click on + Add Sender.
Step 2: Add Your Sender Email
- In the dialog box that appears, enter the sender email address you want to use for your campaigns.
- Example: yourname@yourdomain.com
- Click on Continue.
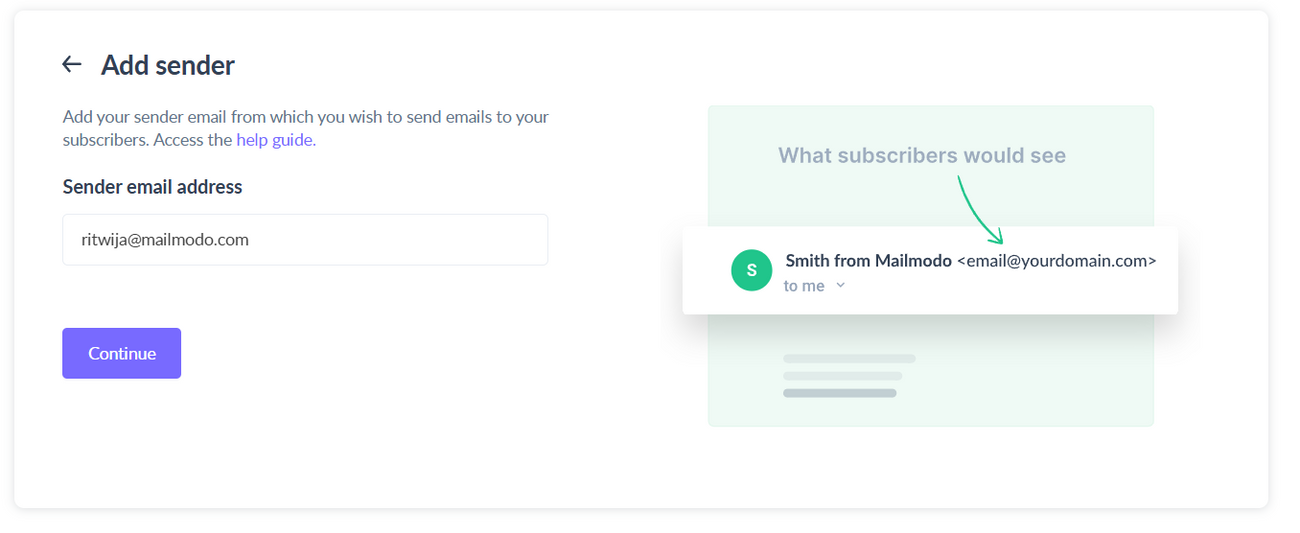
💡 Your contacts will receive emails from this address. Make sure it aligns with your brand identity.
Step 3: Apply for AMP Email Whitelisting
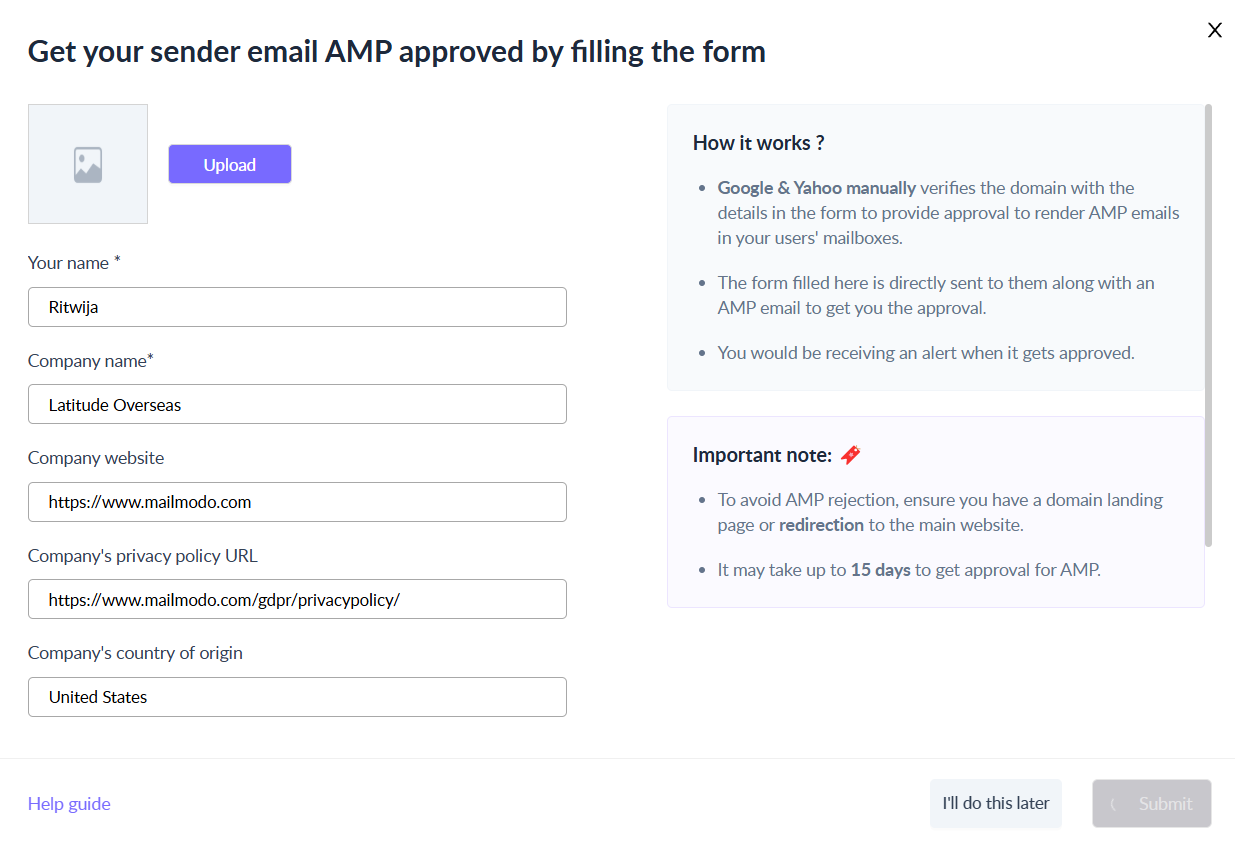
- Complete the AMP application form to whitelist your domain with Google and Yahoo.
- Without this approval, you won’t be able to send AMP emails.
- Follow the steps provided in this AMP approval guide .
Step 4: Add DNS Records to Your Domain Registrar
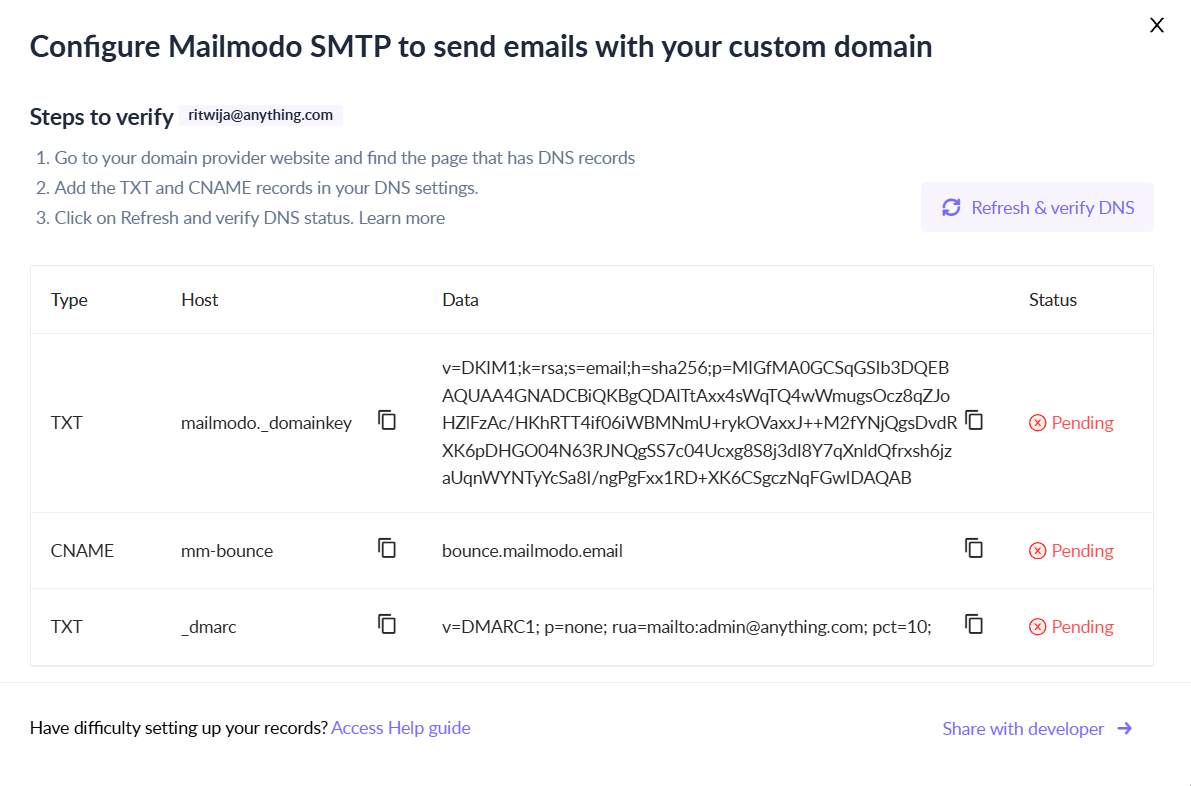
- After completing the AMP form, Mailmodo will provide the necessary DNS records (as shown in the screenshot below).
- TXT Record for DKIM authentication.
- CNAME Record for bounce handling.
- TXT Record for DMARC policy enforcement.
- Copy each record and add them to your DNS registrar's management portal under the appropriate sections.
- Type: Defines the type of DNS record (e.g., TXT or CNAME).
- Host: Indicates the specific hostname for the record.
- Data: Contains the value to be entered in the DNS settings.
💡 Pro Tip: If you're using a popular domain registrar like GoDaddy or Namecheap, refer to their guides for DNS record management.
Step 5: Verify the DNS Records
- Once the DNS records are added, return to Mailmodo and click on Refresh and Verify.
- The status will update to Verified if the records are correct.
💡 Verification may take up to 24-48 hours, depending on your domain registrar.
Next Steps
Once your sender domain is verified:
- You can start sending email campaigns through Mailmodo.
- Verified domains also enable advanced features like tracking and AMP emails.
Troubleshooting Tips
- Ensure there are no typos in the DNS records.
- Check with your registrar if propagation takes longer than 48 hours.
- If verification fails, revisit the DNS records and correct any errors.
If you face any issues, refer to our Help Center or contact Mailmodo Support for assistance.


