

How to add DNS Settings to your Domain Records
Last updated July 7, 2025
In this article we will update the DNS settings to configure Mailmodo SMTP for your domain, with Godaddy's domain service as an example:
Find and verify DNS records in Mailmodo.
Step 1: Go to the Settings page and Click on Senders Settings.

Step 2: Add your sender email.
Your contacts would receive emails from the email address you add here.

Step 3: Select Mailmodo from the SMTP list.
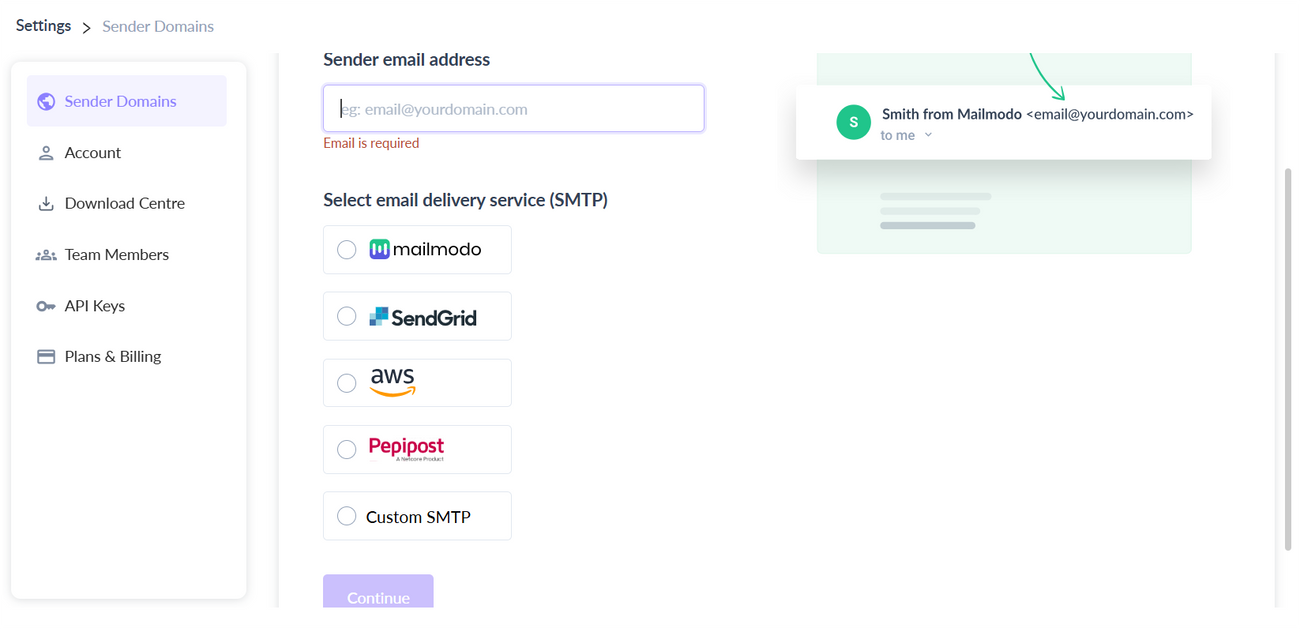
Step 4: Click on Continue.

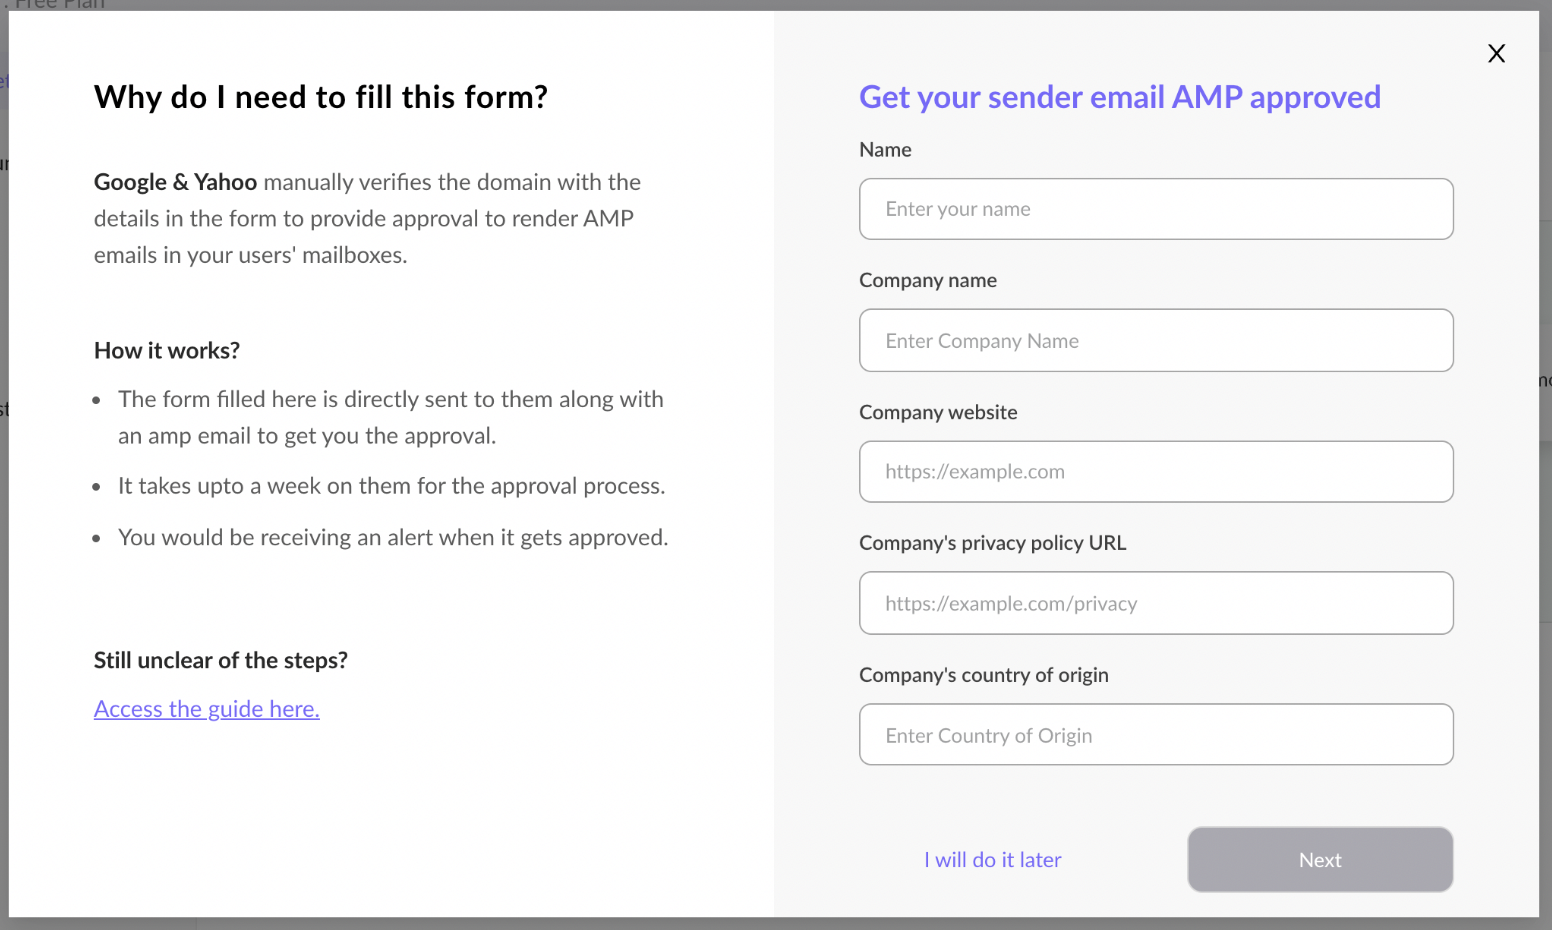
Step 5: Fill out the AMP form to get your domain AMP whitelisted from Google and Yahoo. Without getting this approval, you would not be able to send AMP emails to the contacts. (Here's a quick help doc on how to do this).

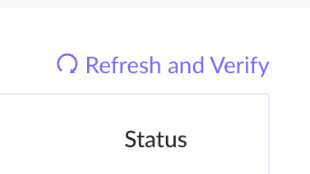
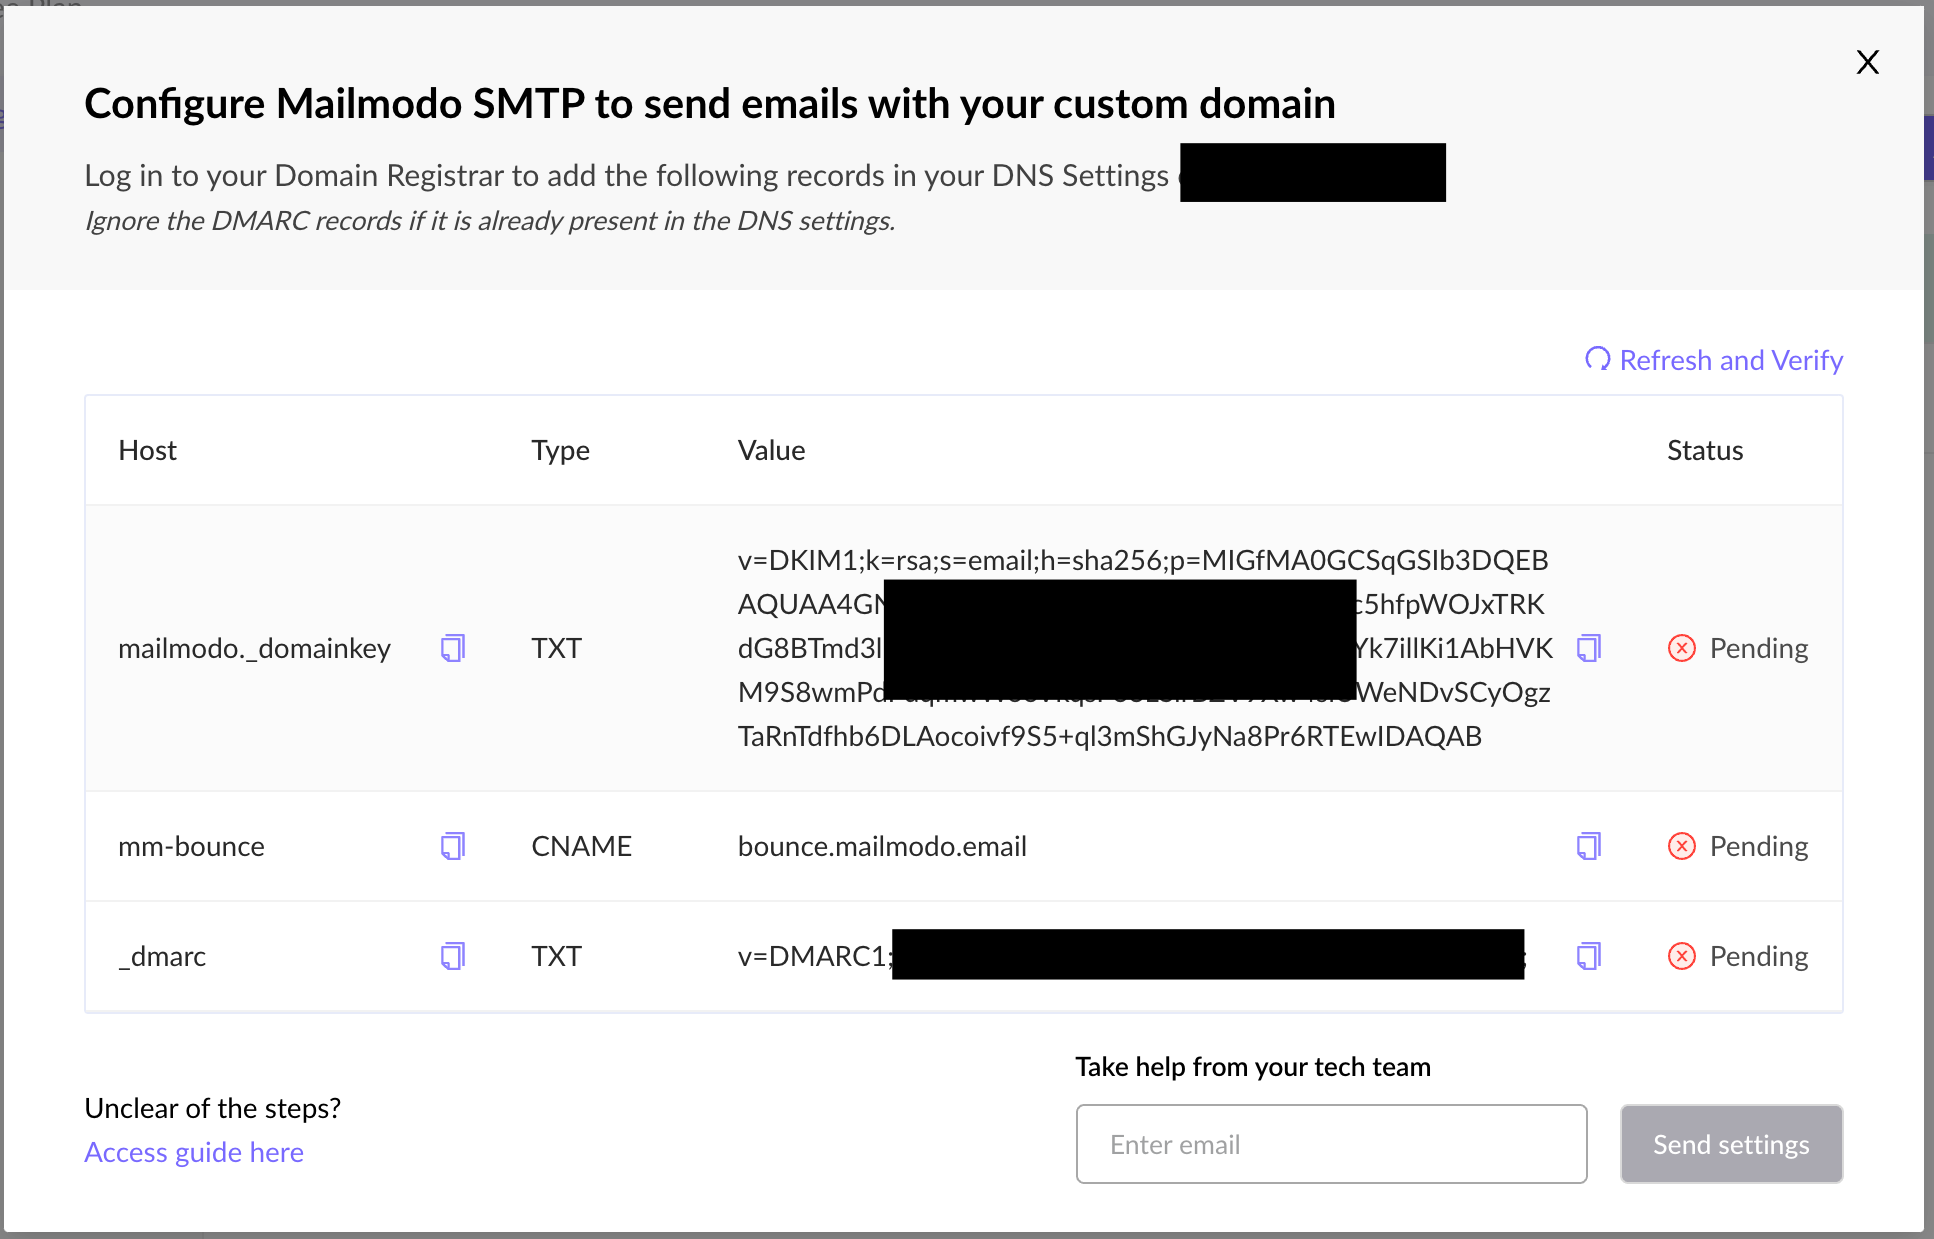
Step 6: After filling the AMP form, you would see a dialog box with the DNS settings. These are your DNS records, copy each of them and add them to the DNS management section of your registrar.
Note- You can check your domain registrar using tools like whois.com
Step 7: Once they are added, click on 'Refresh and Verify' to get the Verified status for the records.

The verified status would mark the ready state of the sender id for sending campaigns.
In case, your AMP whitelisting is pending, you would only be able to send HTML campaigns till the approval happens.
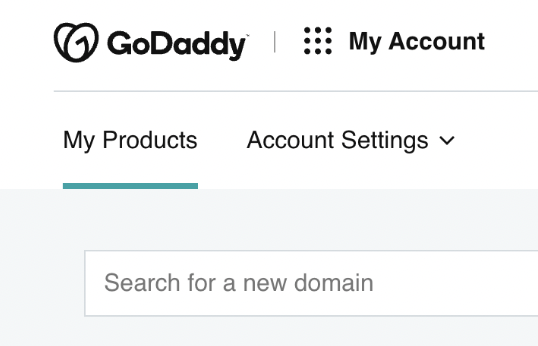
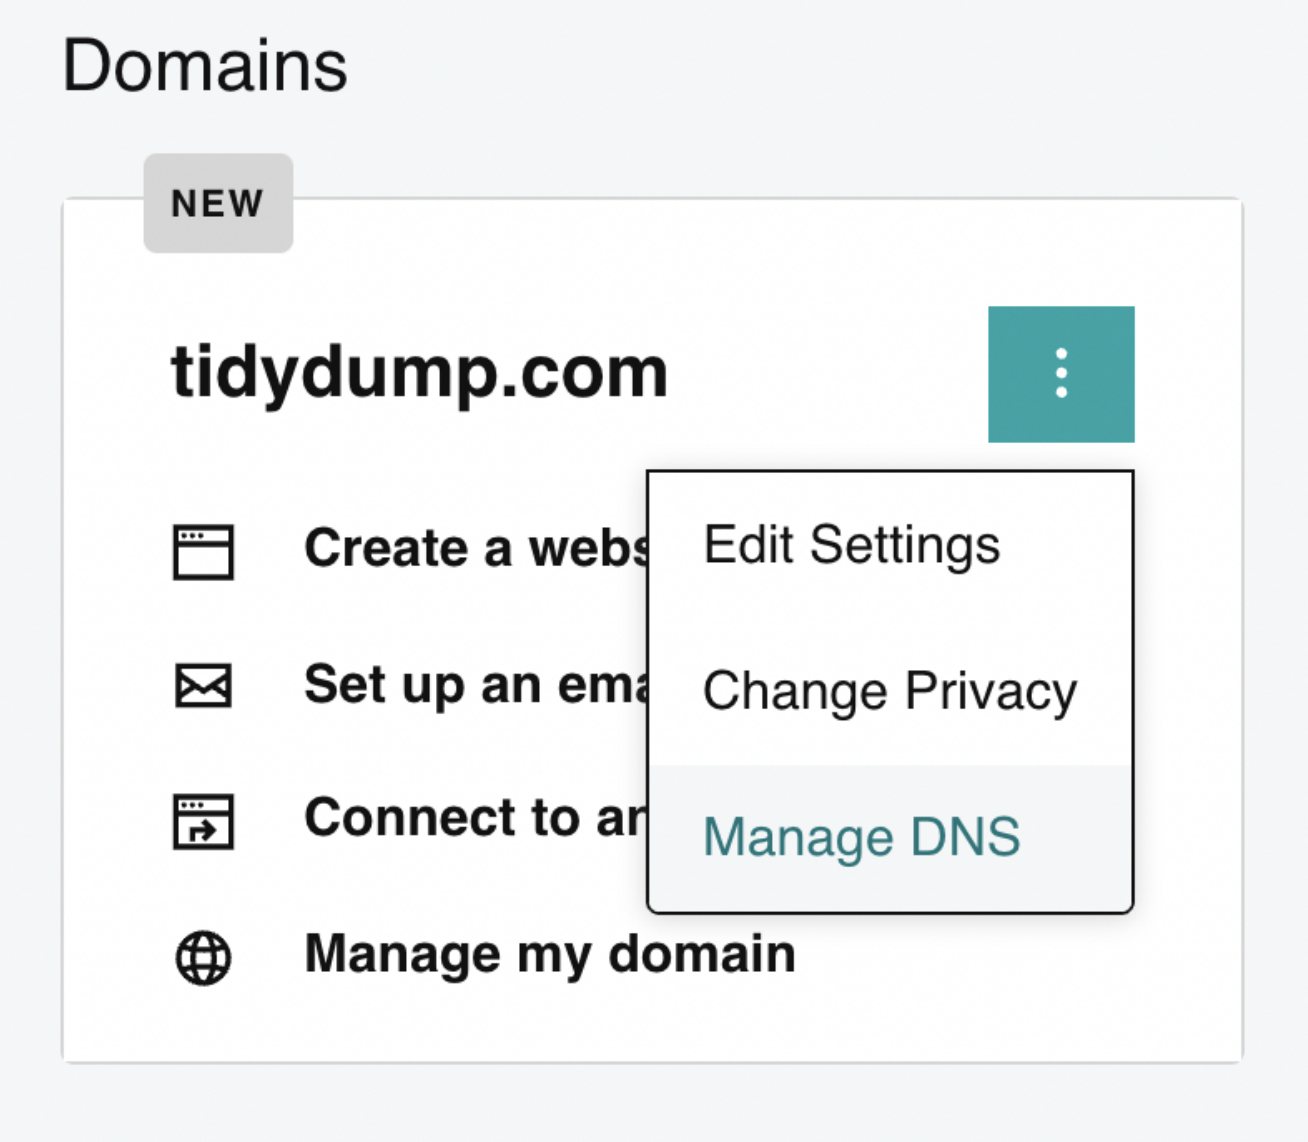
Find DNS management in Godaddy.
Step 1: Go to My Products.
Step 2: Find the desired domain.
Step 3: Click on Manage DNS.
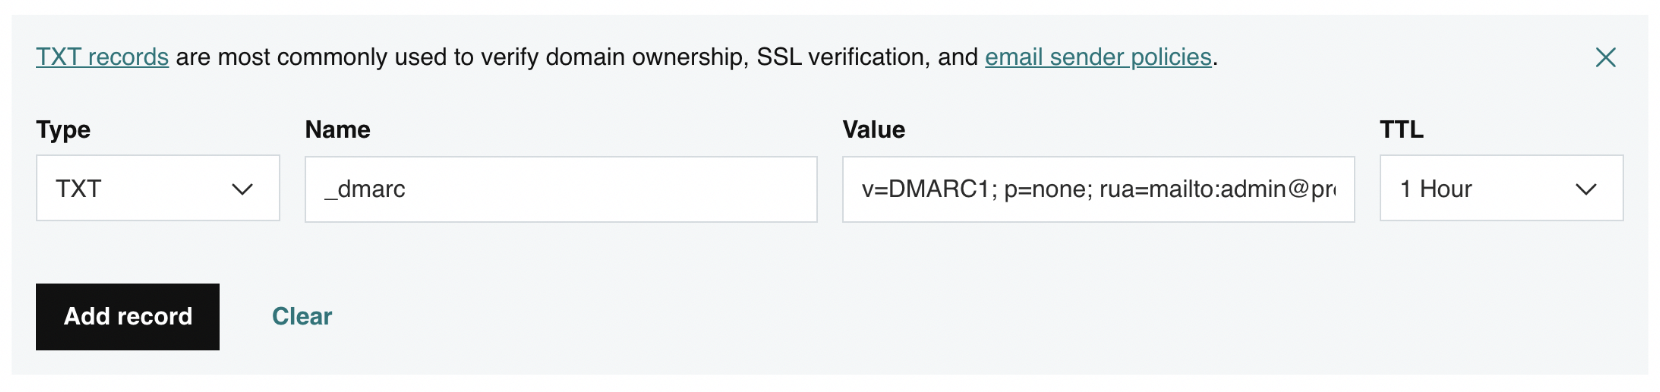
Add DNS Records in Godaddy.
Step 1: Declare TYPE, Add HOST and its VALUE for every record displayed in the Mailmodo dialog box. You can set the TTL for every record for 1 hour.
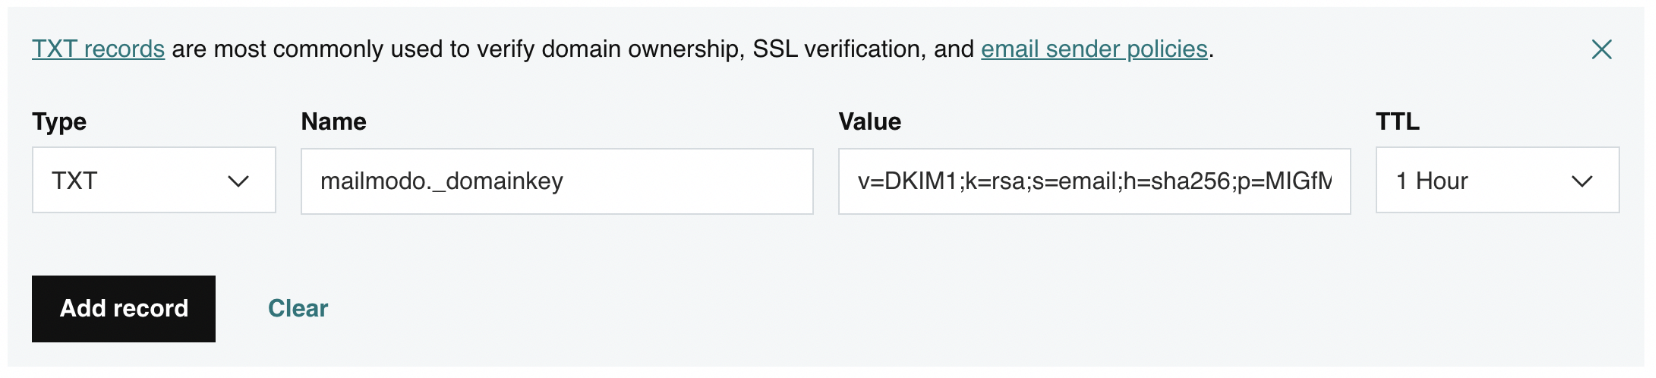
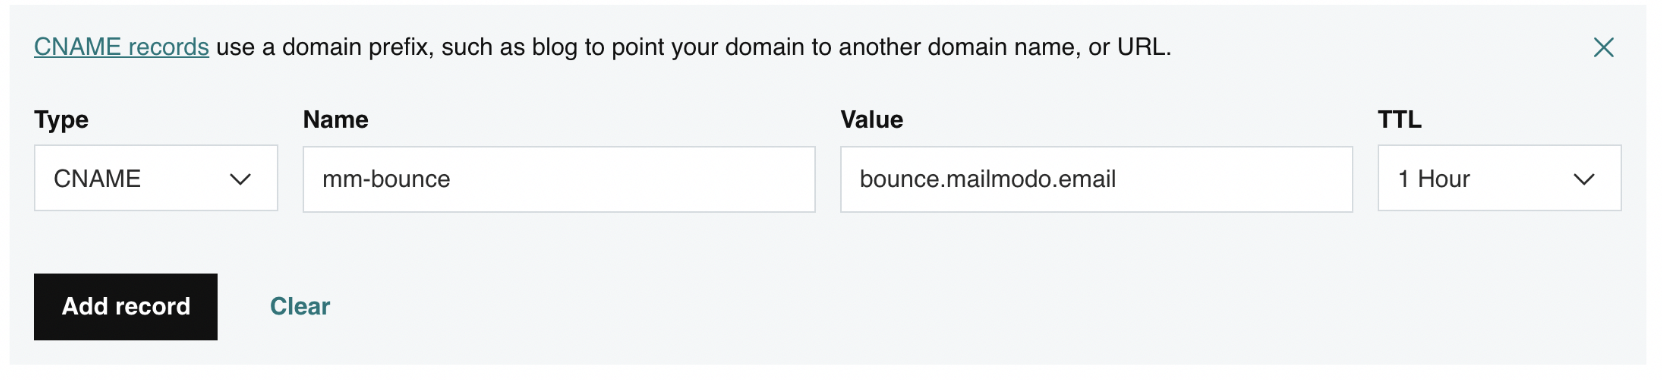
Step 2: Complete all the entries exactly as they are in the Mailmodo dialog box.
Step 3: Click on Refresh and Verify to check the verified status of the records in Mailmodo.
Once all three records get the verified status, the sender id is ready to use for sending campaigns.
Did we miss something? Not to worry! ✌️ ? Use the search bar in our Help Center to find quick guides and walkthroughs. ? Feel free to ping us with your query over the Mailmodo chat. ? You can also send us your queries at help@mailmodo.com