Mailmodo 0ff833fbTry Mailmodo for Free↗️Login Mailmodo↗️

No results

Help CenterCampaign ManagementTriggering your campaignTrigger Campaigns through Lead Squared on Mailmodo

Trigger Campaigns through Lead Squared on Mailmodo

Last updated November 18, 2023

In this article we will see how to configure a transactional campaign triggered by events recorded in LeadSquared.

This article will cover:

1. Setting up a transactional campaign in Mailmodo

2. Lead Squared setup

How to create a transactional campaign in Mailmodo?

Step 1: Go to templates from the vertical menu on the left side. Click on 'Create new template'.

Trigger Campaigns through Lead Squared on Mailmodo

Step 2: Either select a blank template or a pre made template

Trigger Campaigns through Lead Squared on Mailmodo

Step 3: Use the   editor   to edit the template. Save and rename the template upon completion.  After saving, click on the back arrow.

Trigger Campaigns through Lead Squared on Mailmodo

You will be redirected to the template library. The saved template should be visible here.

Trigger Campaigns through Lead Squared on Mailmodo

Step 4:  Go to Trigger under Campaigns from the vertical menu on the left. Click on New Transactional Campaign.

Trigger Campaigns through Lead Squared on Mailmodo


Trigger Campaigns through Lead Squared on Mailmodo

Step 5Select the template you saved before. Click on Next.

Trigger Campaigns through Lead Squared on Mailmodo

Step 6Add Subject line, Pre header Text, From Name and Reply to Email. Select sender email. Click on Next.

Trigger Campaigns through Lead Squared on Mailmodo

Step 7You will be redirected to trigger on events. Select Webhook from list of platforms. Click on Next.

Trigger Campaigns through Lead Squared on Mailmodo

Step 8Review and test your campaign. To test, click on send test campaign->enter email ID->send test email.

Once tested and reviewed, click on enable campaign.

Trigger Campaigns through Lead Squared on Mailmodo

Step 9You would be able to see the Webhook URL. Click on Copy URL. We will use this Webhook URL in LeadSquared Lapp.

Trigger Campaigns through Lead Squared on Mailmodo

LeadSquared Setup

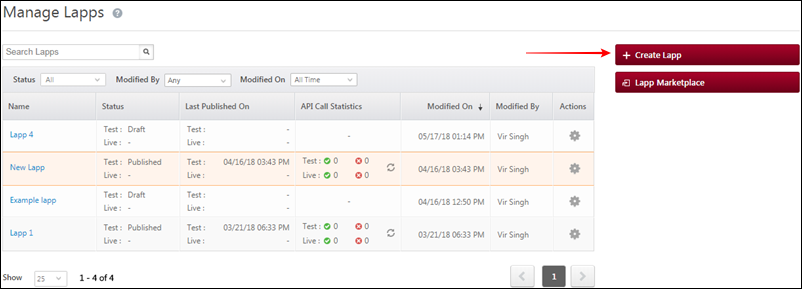
Step 1: Navigate to the Manage Lapps page in the Apps section of the main navigation panel.

Trigger Campaigns through Lead Squared on Mailmodo

Step 2On the Manage Lapps page, click the Add Lapp button.

Trigger Campaigns through Lead Squared on Mailmodo

Step 3: Enter a name and description for the Lapp.

Trigger Campaigns through Lead Squared on Mailmodo

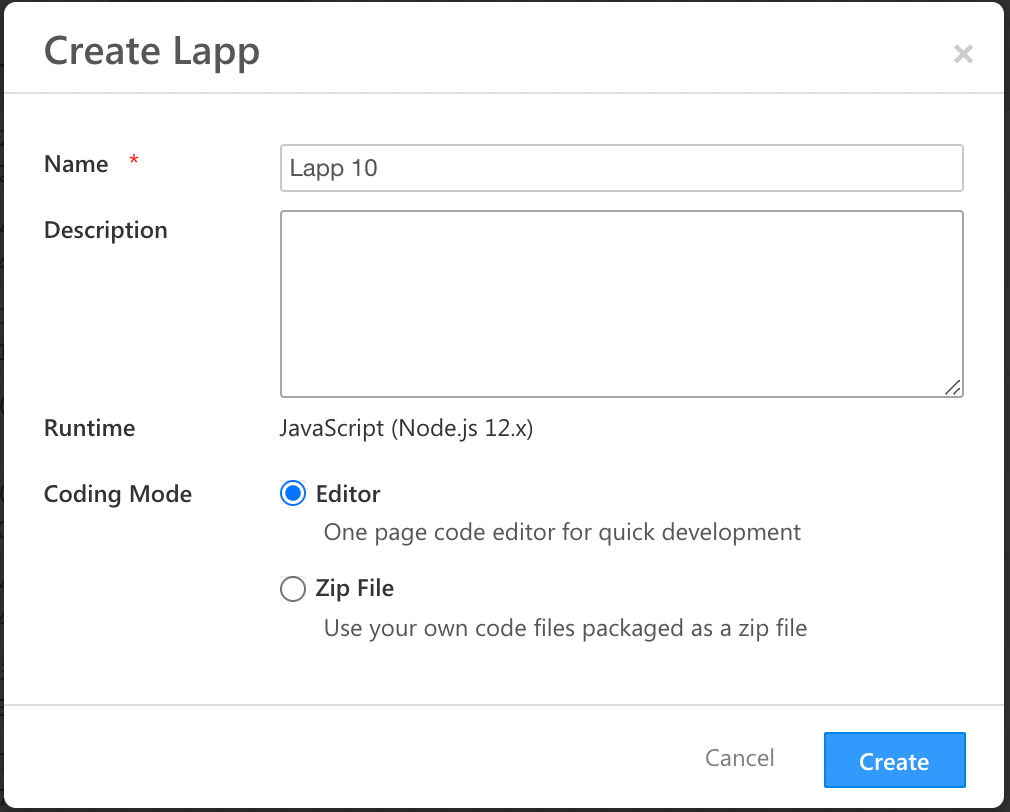
Step 4: Select the Coding Mode as Editor (write your code directly in the Lapps code editor).

function main(queryString, body, callback) {

    ls.log.Info('Lapp called');

    const data = body.Data;

    const name = body.Current.FirstName;

    const email = body.Current.EmailAddress;


    const triggerEmail = {

        url: `<campaign webhook url>`,

        body: {

            email,

            data: {

                name: name,

            },

        },

        headers: {

              'Content-Type': 'application/json',

        },

        json: true,

    };


    request.post(triggerEmail, function(error, response, body) {

        ls.log.Info('Message sent via Mailmodo: ', response);

        if (error) {

            ls.log.Error('Mailmodo message trigger failed: ', error);

            callback(error, null);

        }

    });


    ls.log.Info('Done');

}

Step 5Publish the Lapp to configure it with the workflow.

Step 6: Navigate to   Marketing>Automation   and click Create Automation.

Step 7: After selecting an automation trigger, under the Custom Action, click Call Lapp.

Trigger Campaigns through Lead Squared on Mailmodo

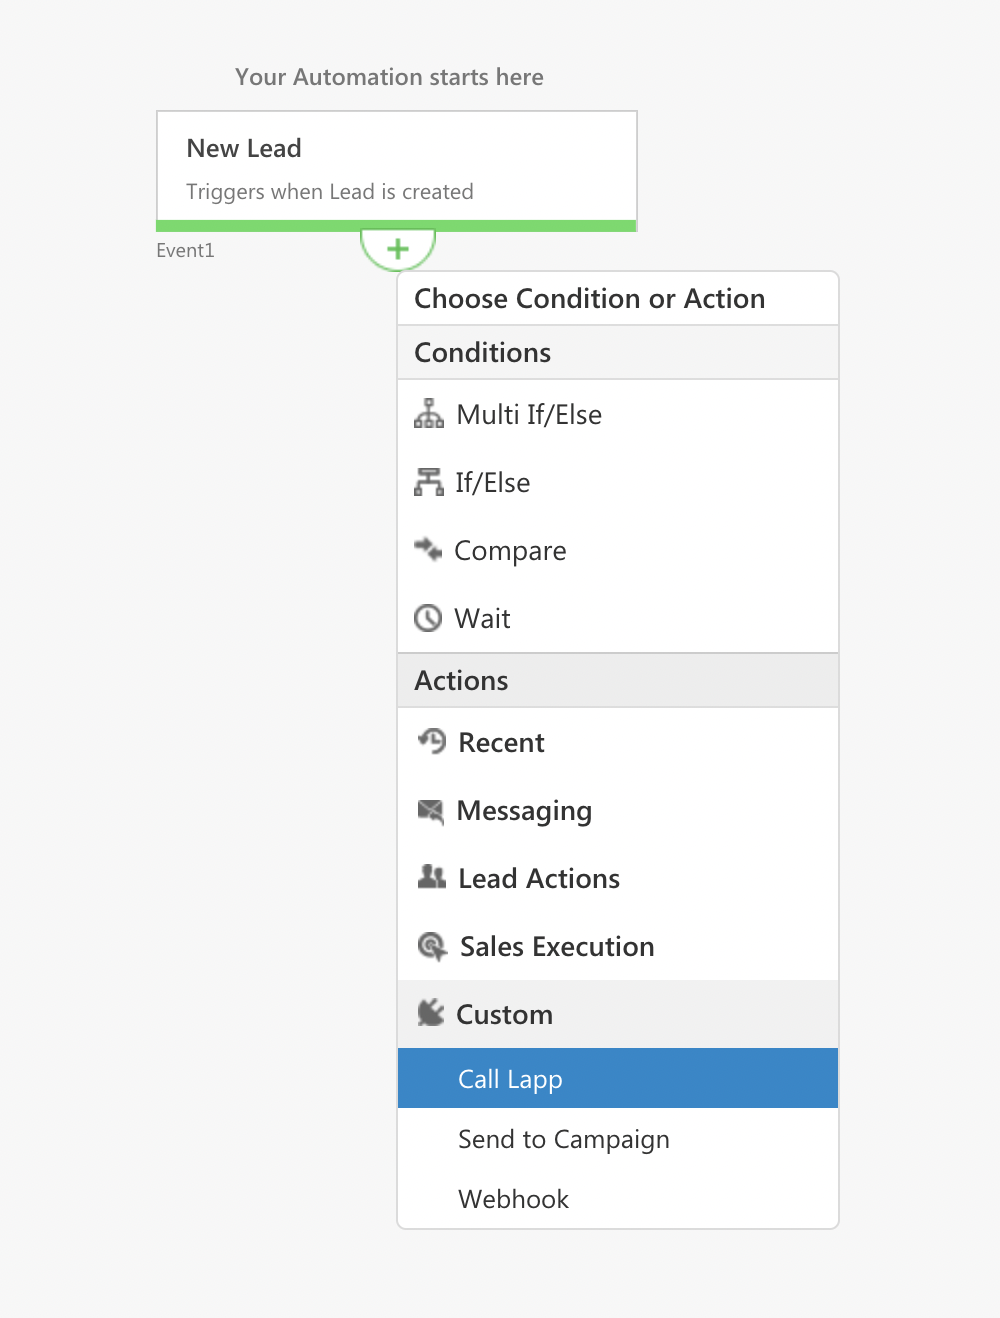
Step 8: In the Call Lapp pop-up, search for your Lapp.

  • Choose the Environment as live or test.
  • Use the Query String field if you wish to pass additional data to the Lapp in the form of key-value pairs.
  • Set the Save Response option to Yes if you want to save the Lapp response and use it to send emails with dynamic content.

Step 9: Click Save when you’re done.

Was this article helpful?