

Trigger Campaigns through WebEngage in Mailmodo
Last updated June 25, 2025
In this article we will go through how you can send transactional campaigns in Mailmodo from your WebEngage account.
You can integrate WebEngage with Mailmodo by following this help doc .
This article will cover:
1. How to create a transactional campaign in Mailmodo
2. Webengage setup
How to create a transactional campaign in Mailmodo?
Step 1: Go to templates from the vertical menu on the left side. Click on create new template.
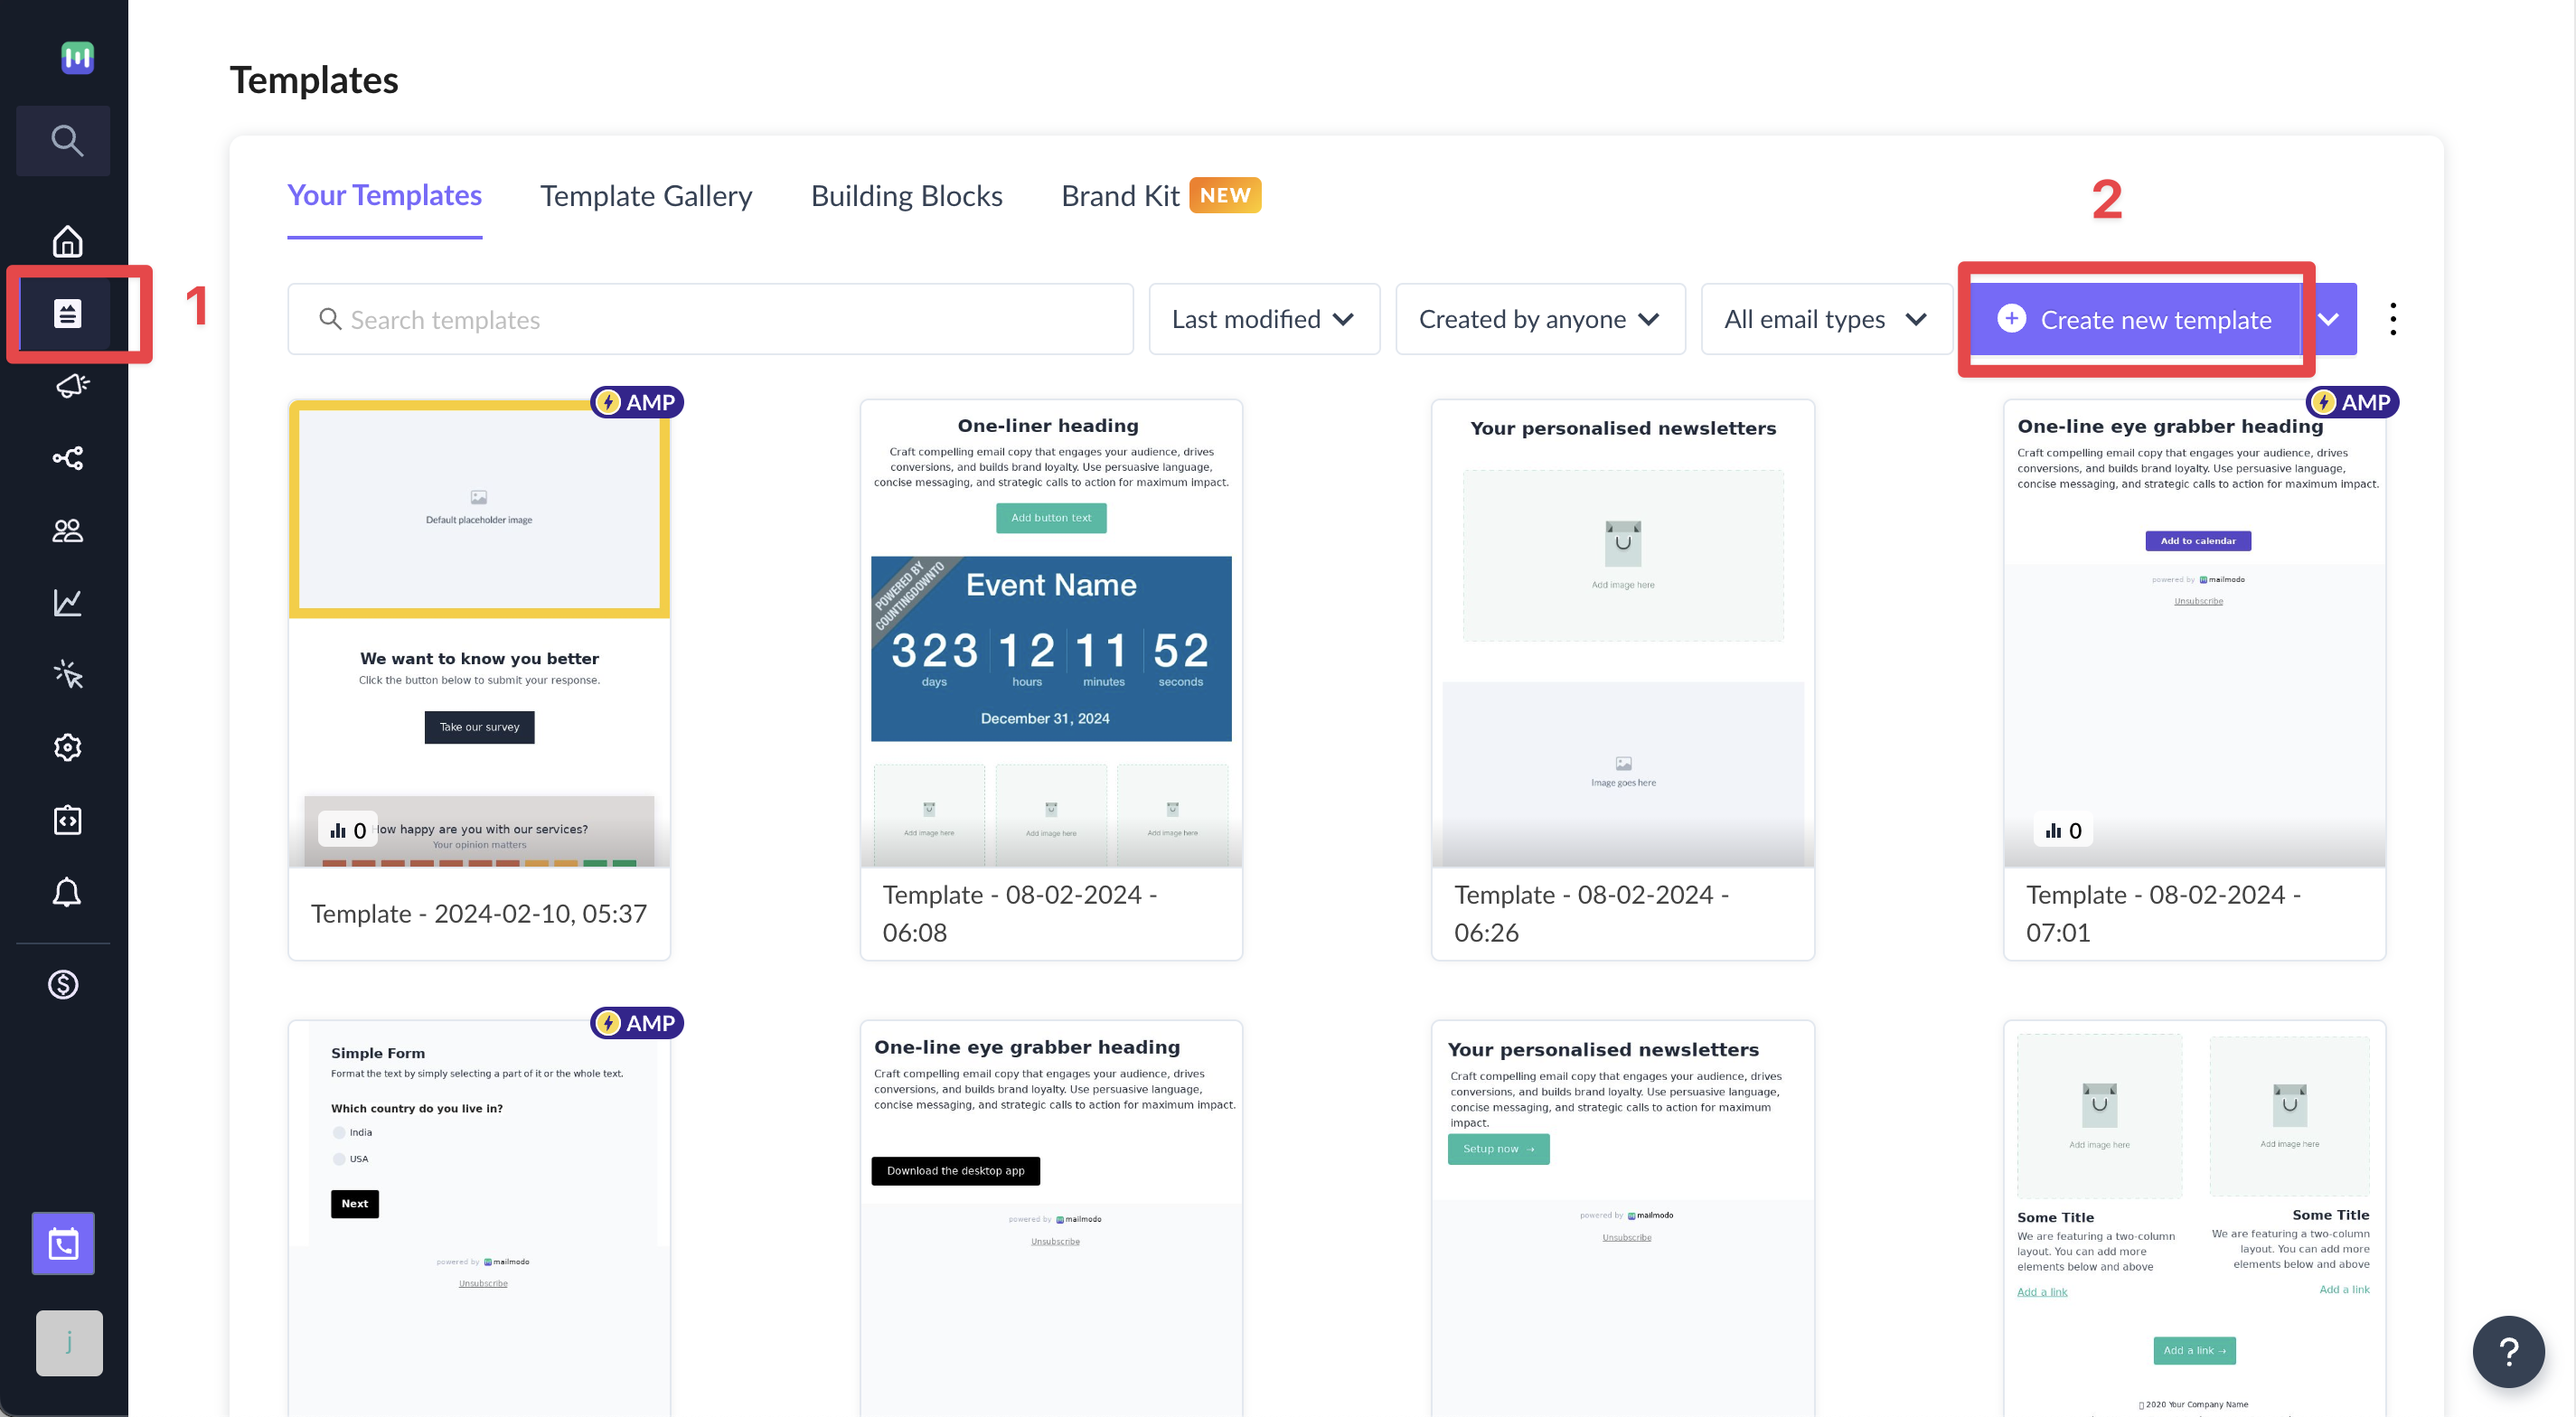
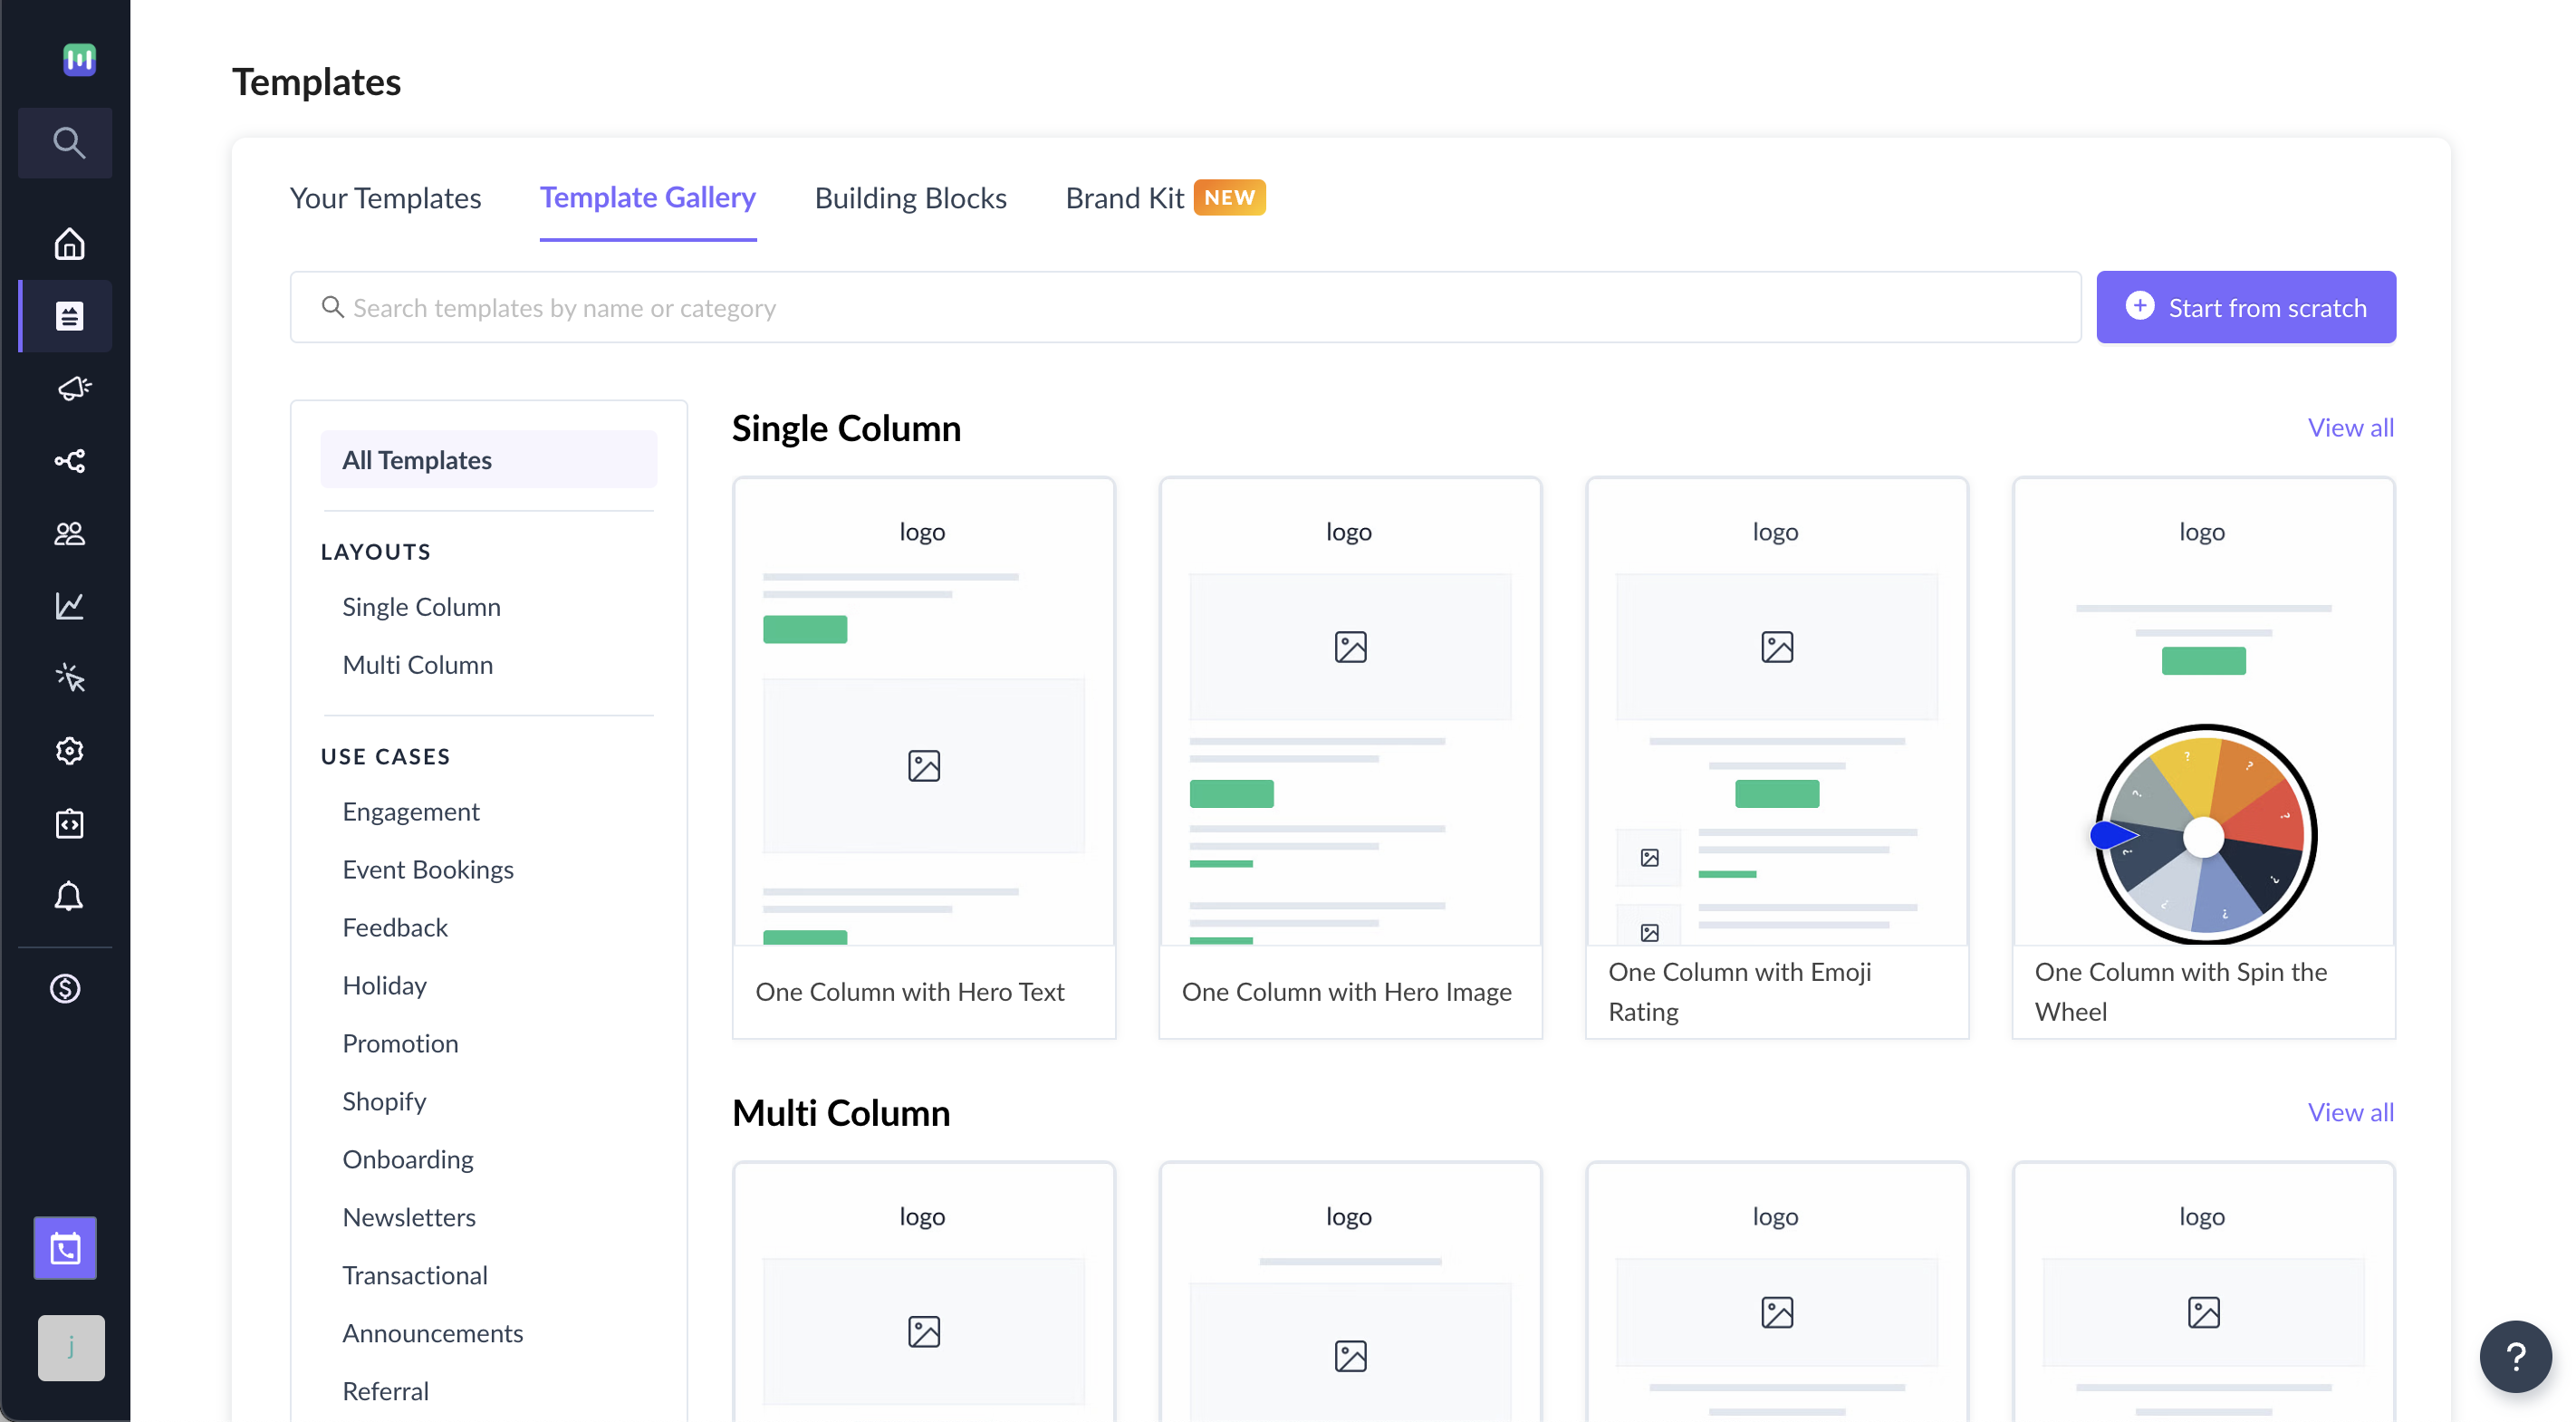
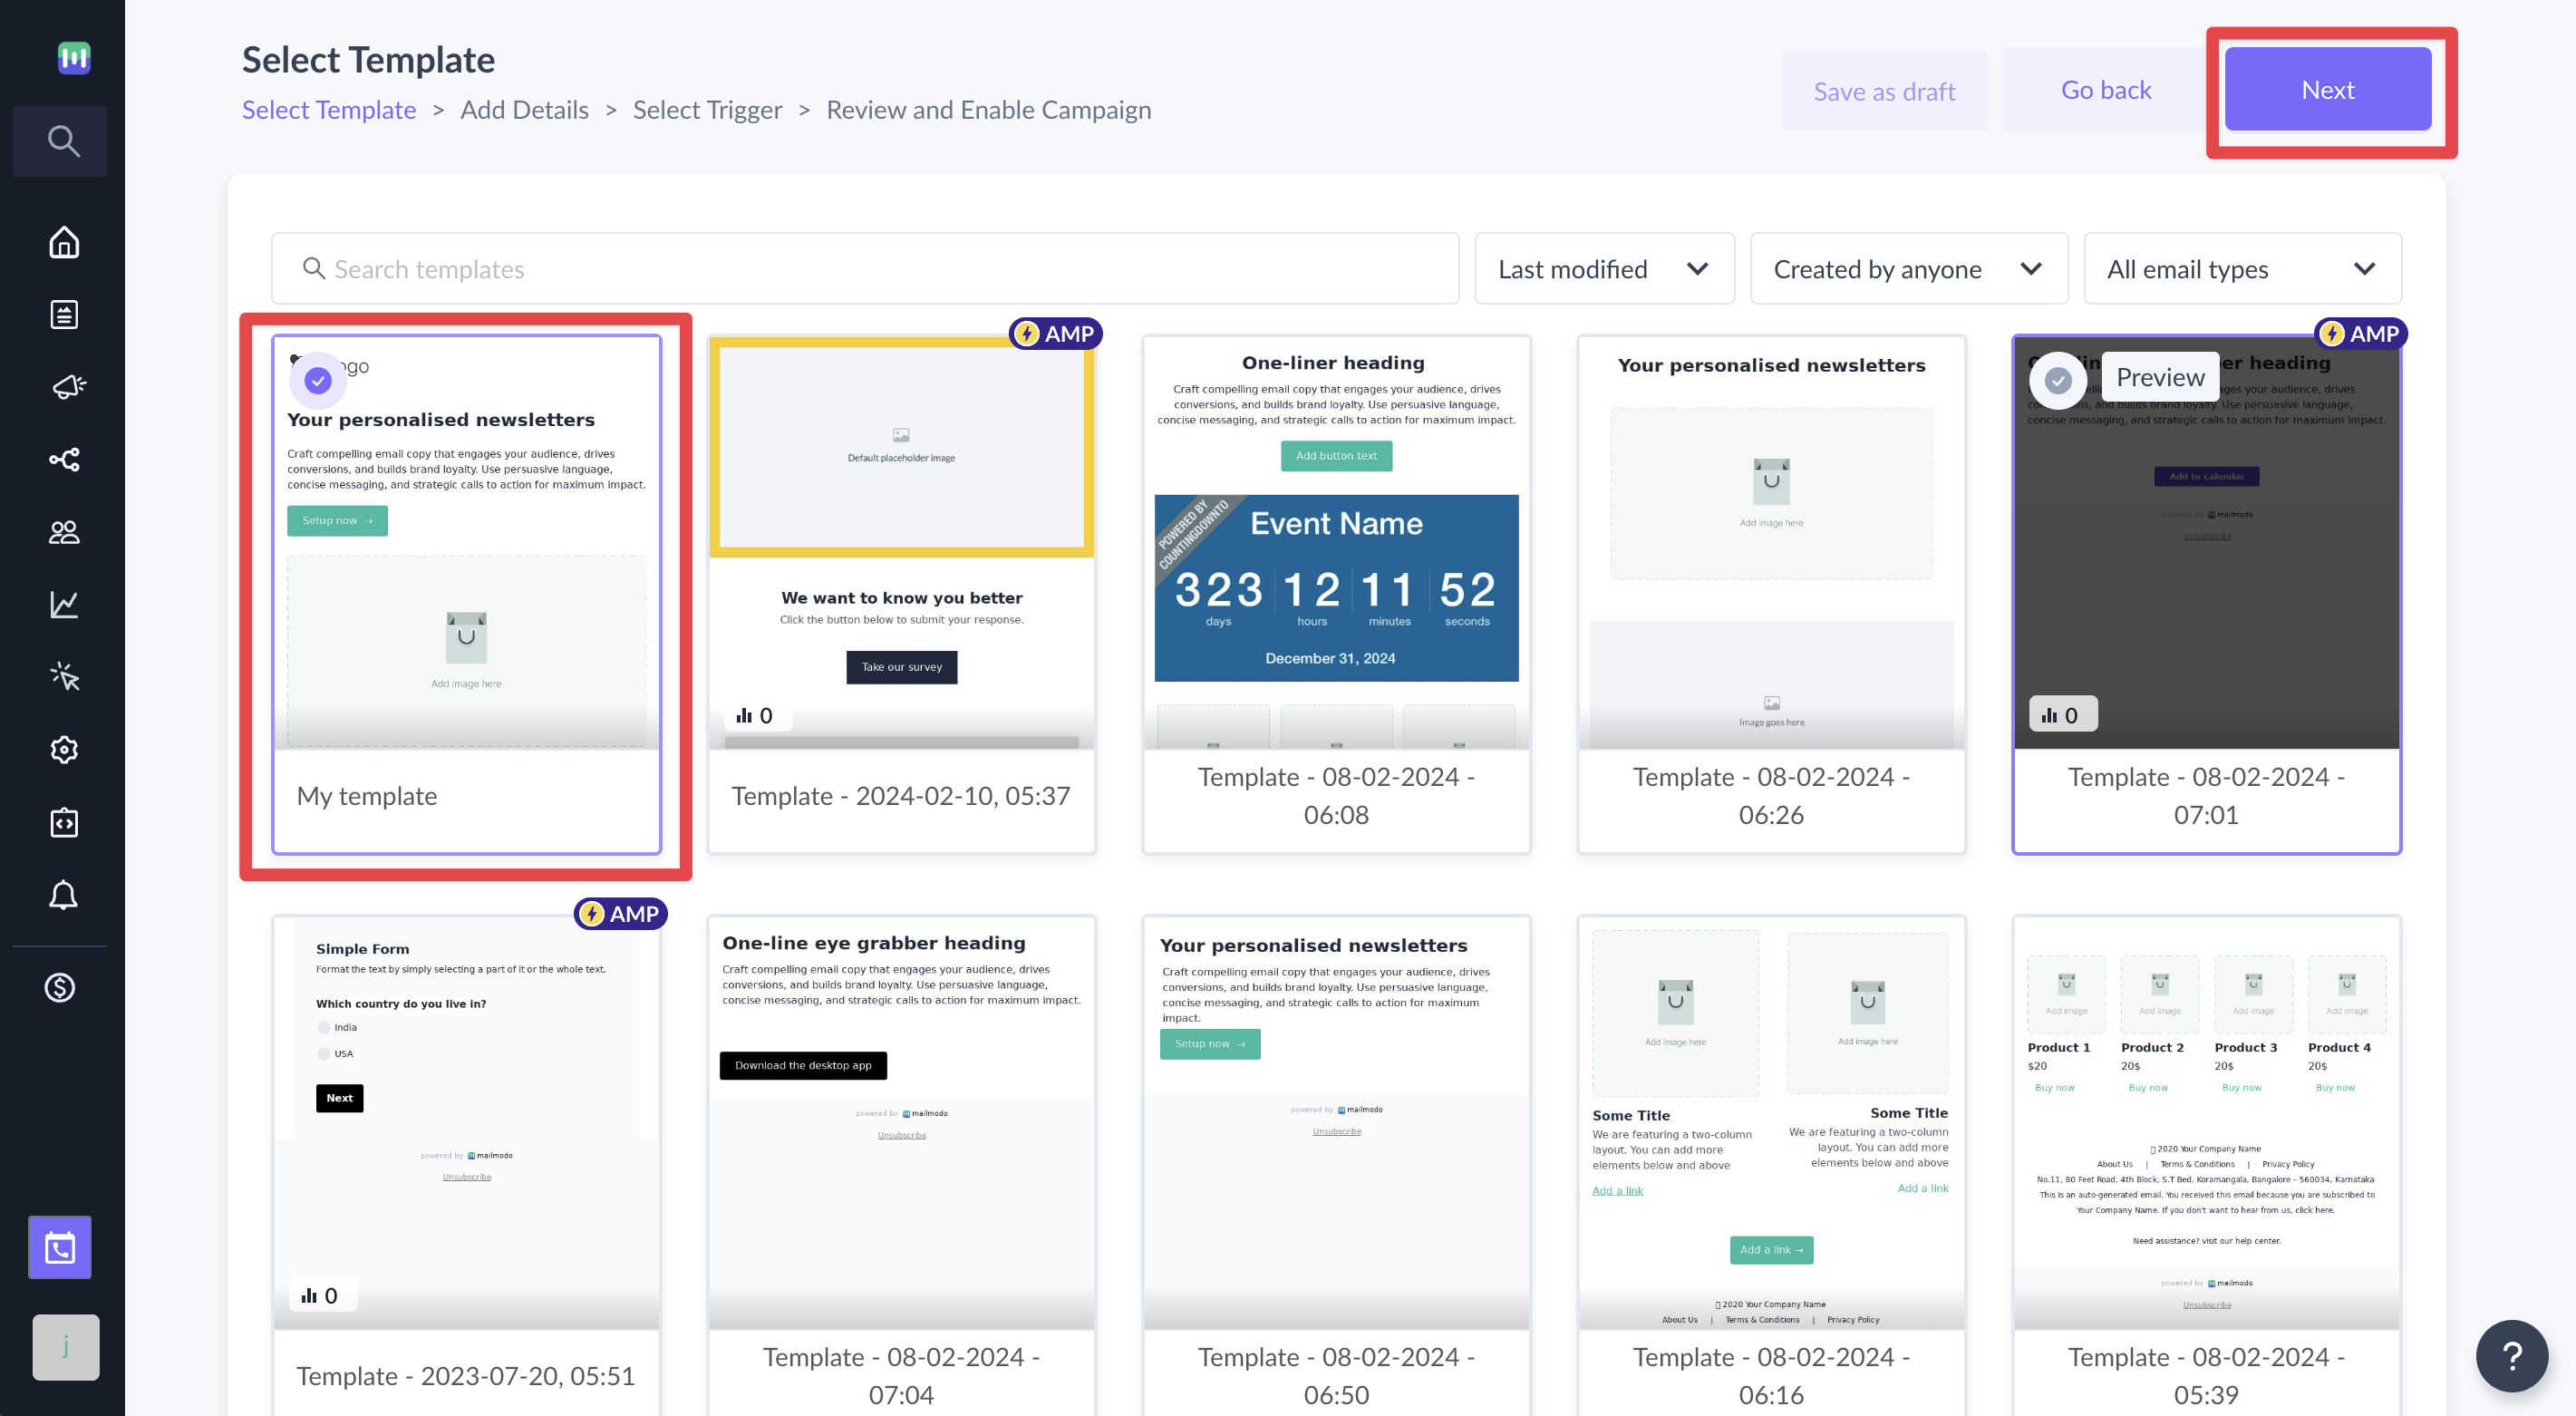
Step 2: Either select a blank template or a pre made Template Gallery
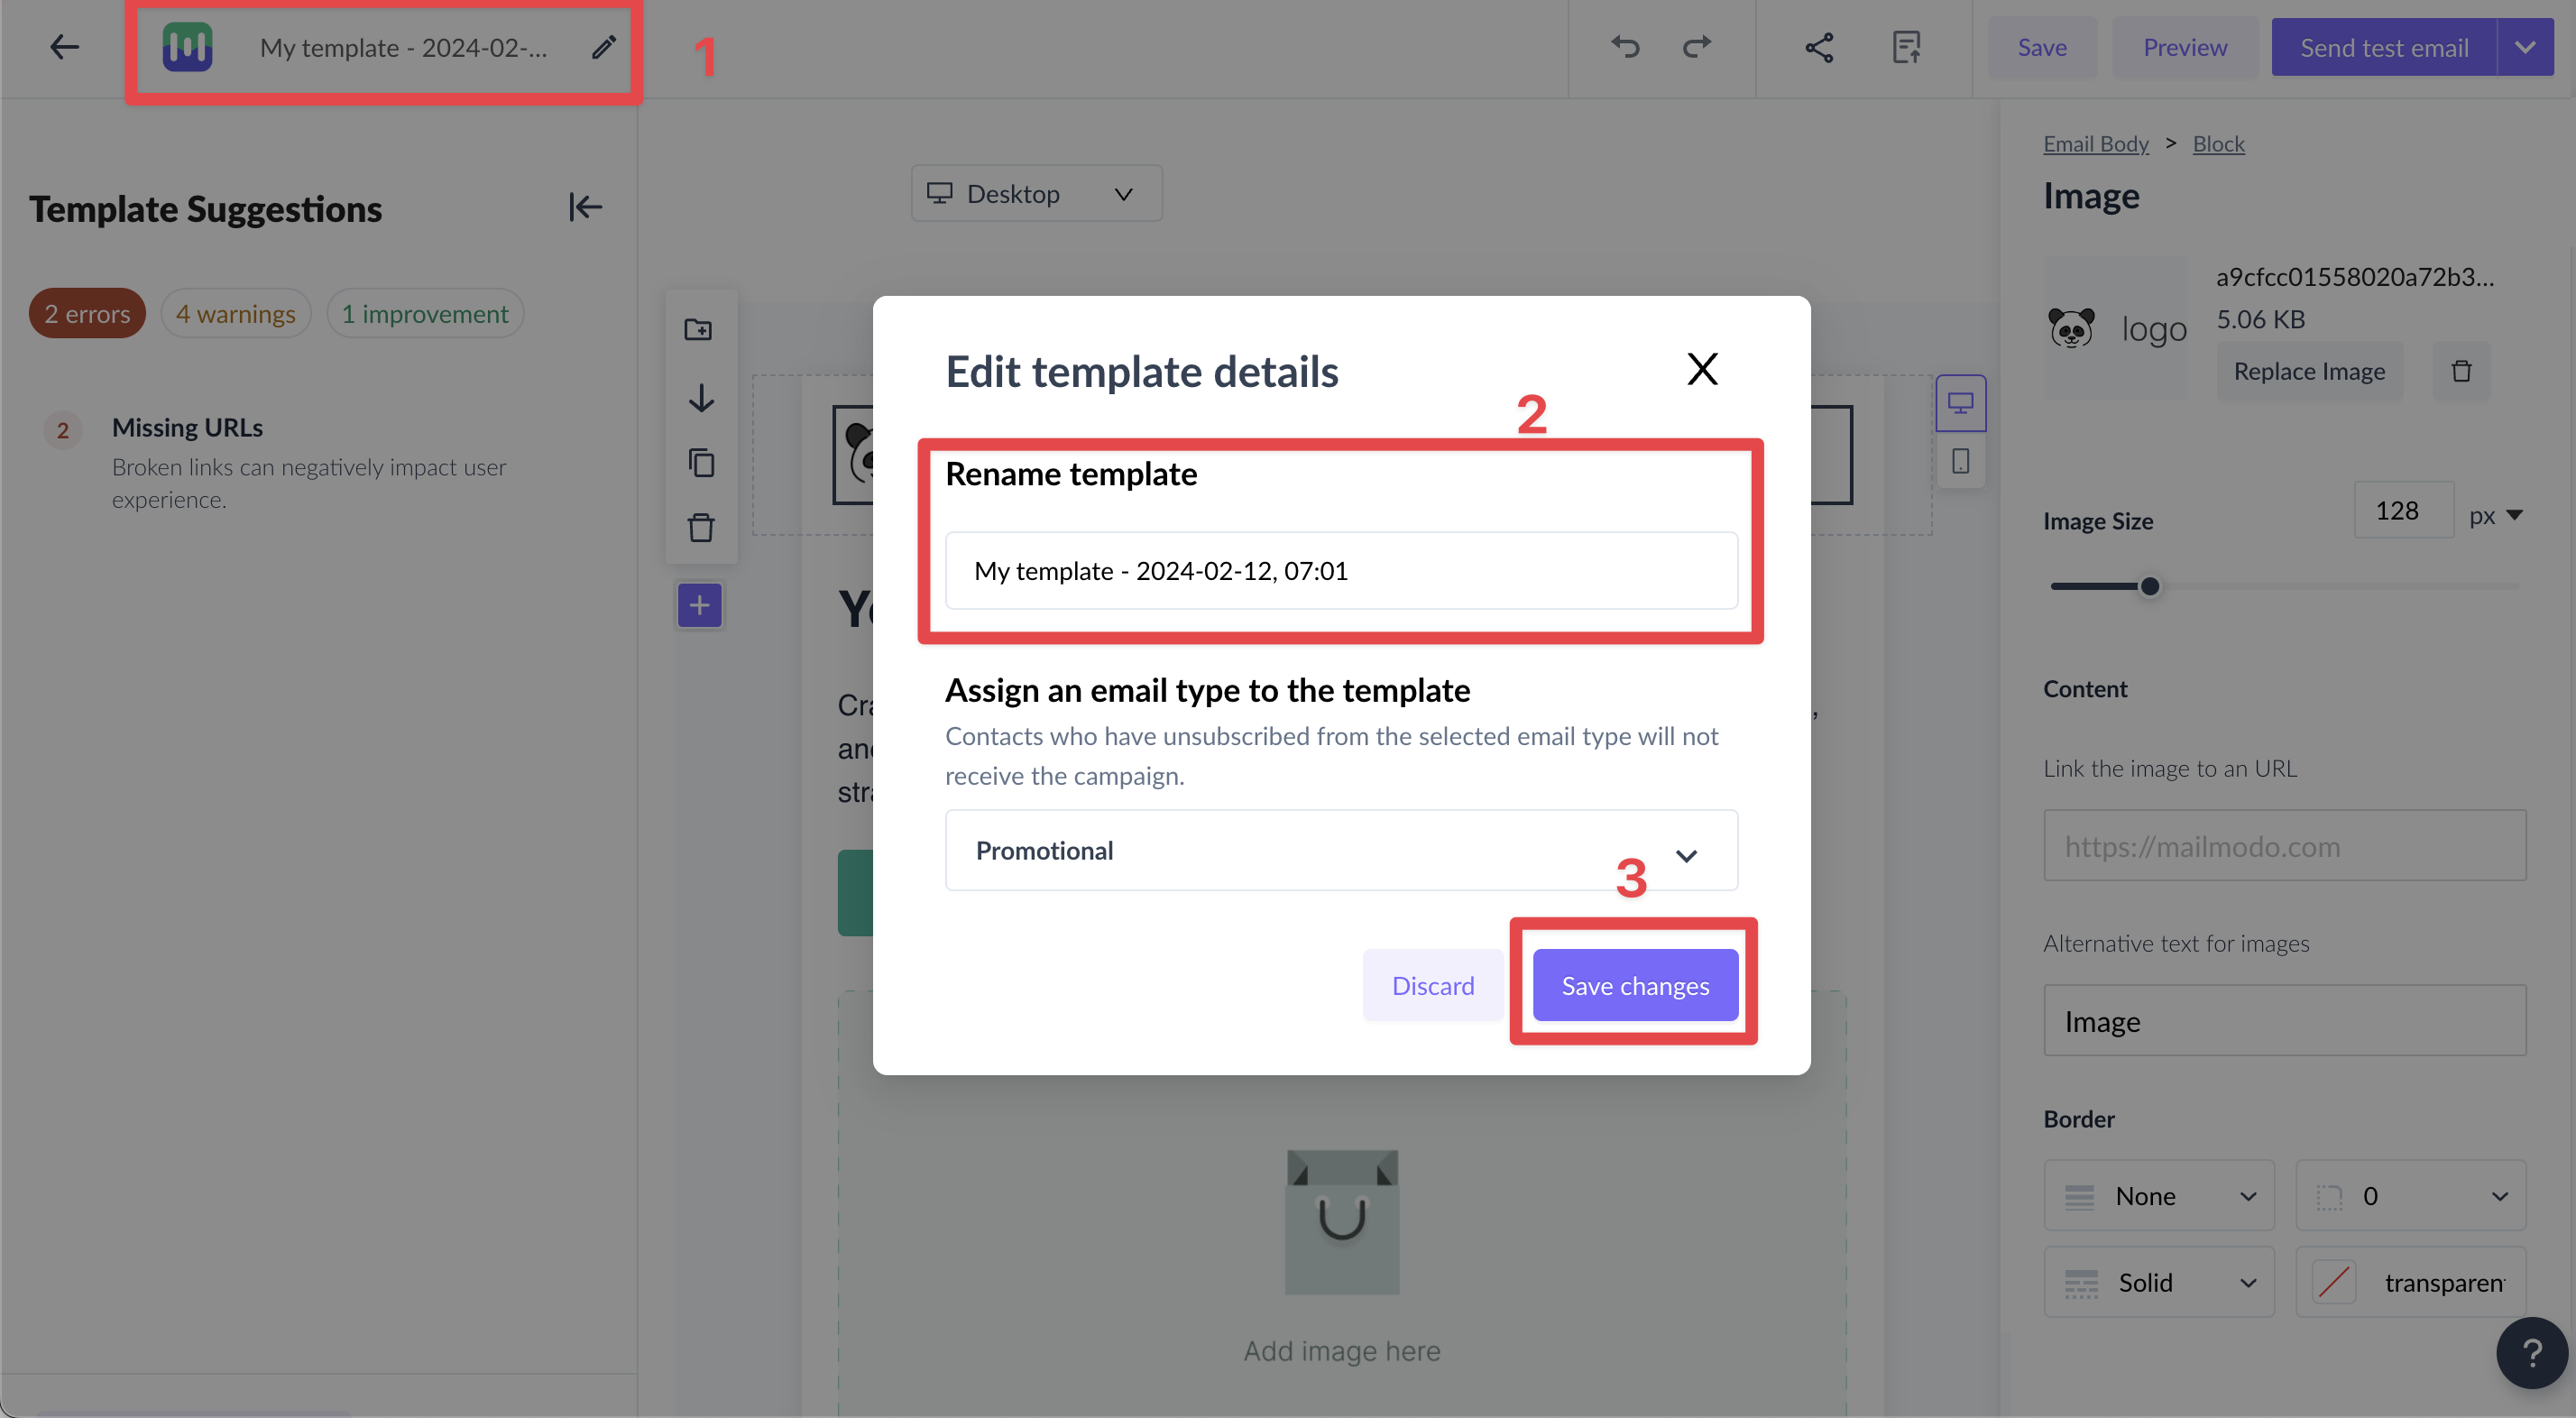
Step 3: Use the editor to edit the template. Save and rename the template upon completion. After saving, click on back
arrow.
Step 4: Click on save and exit.
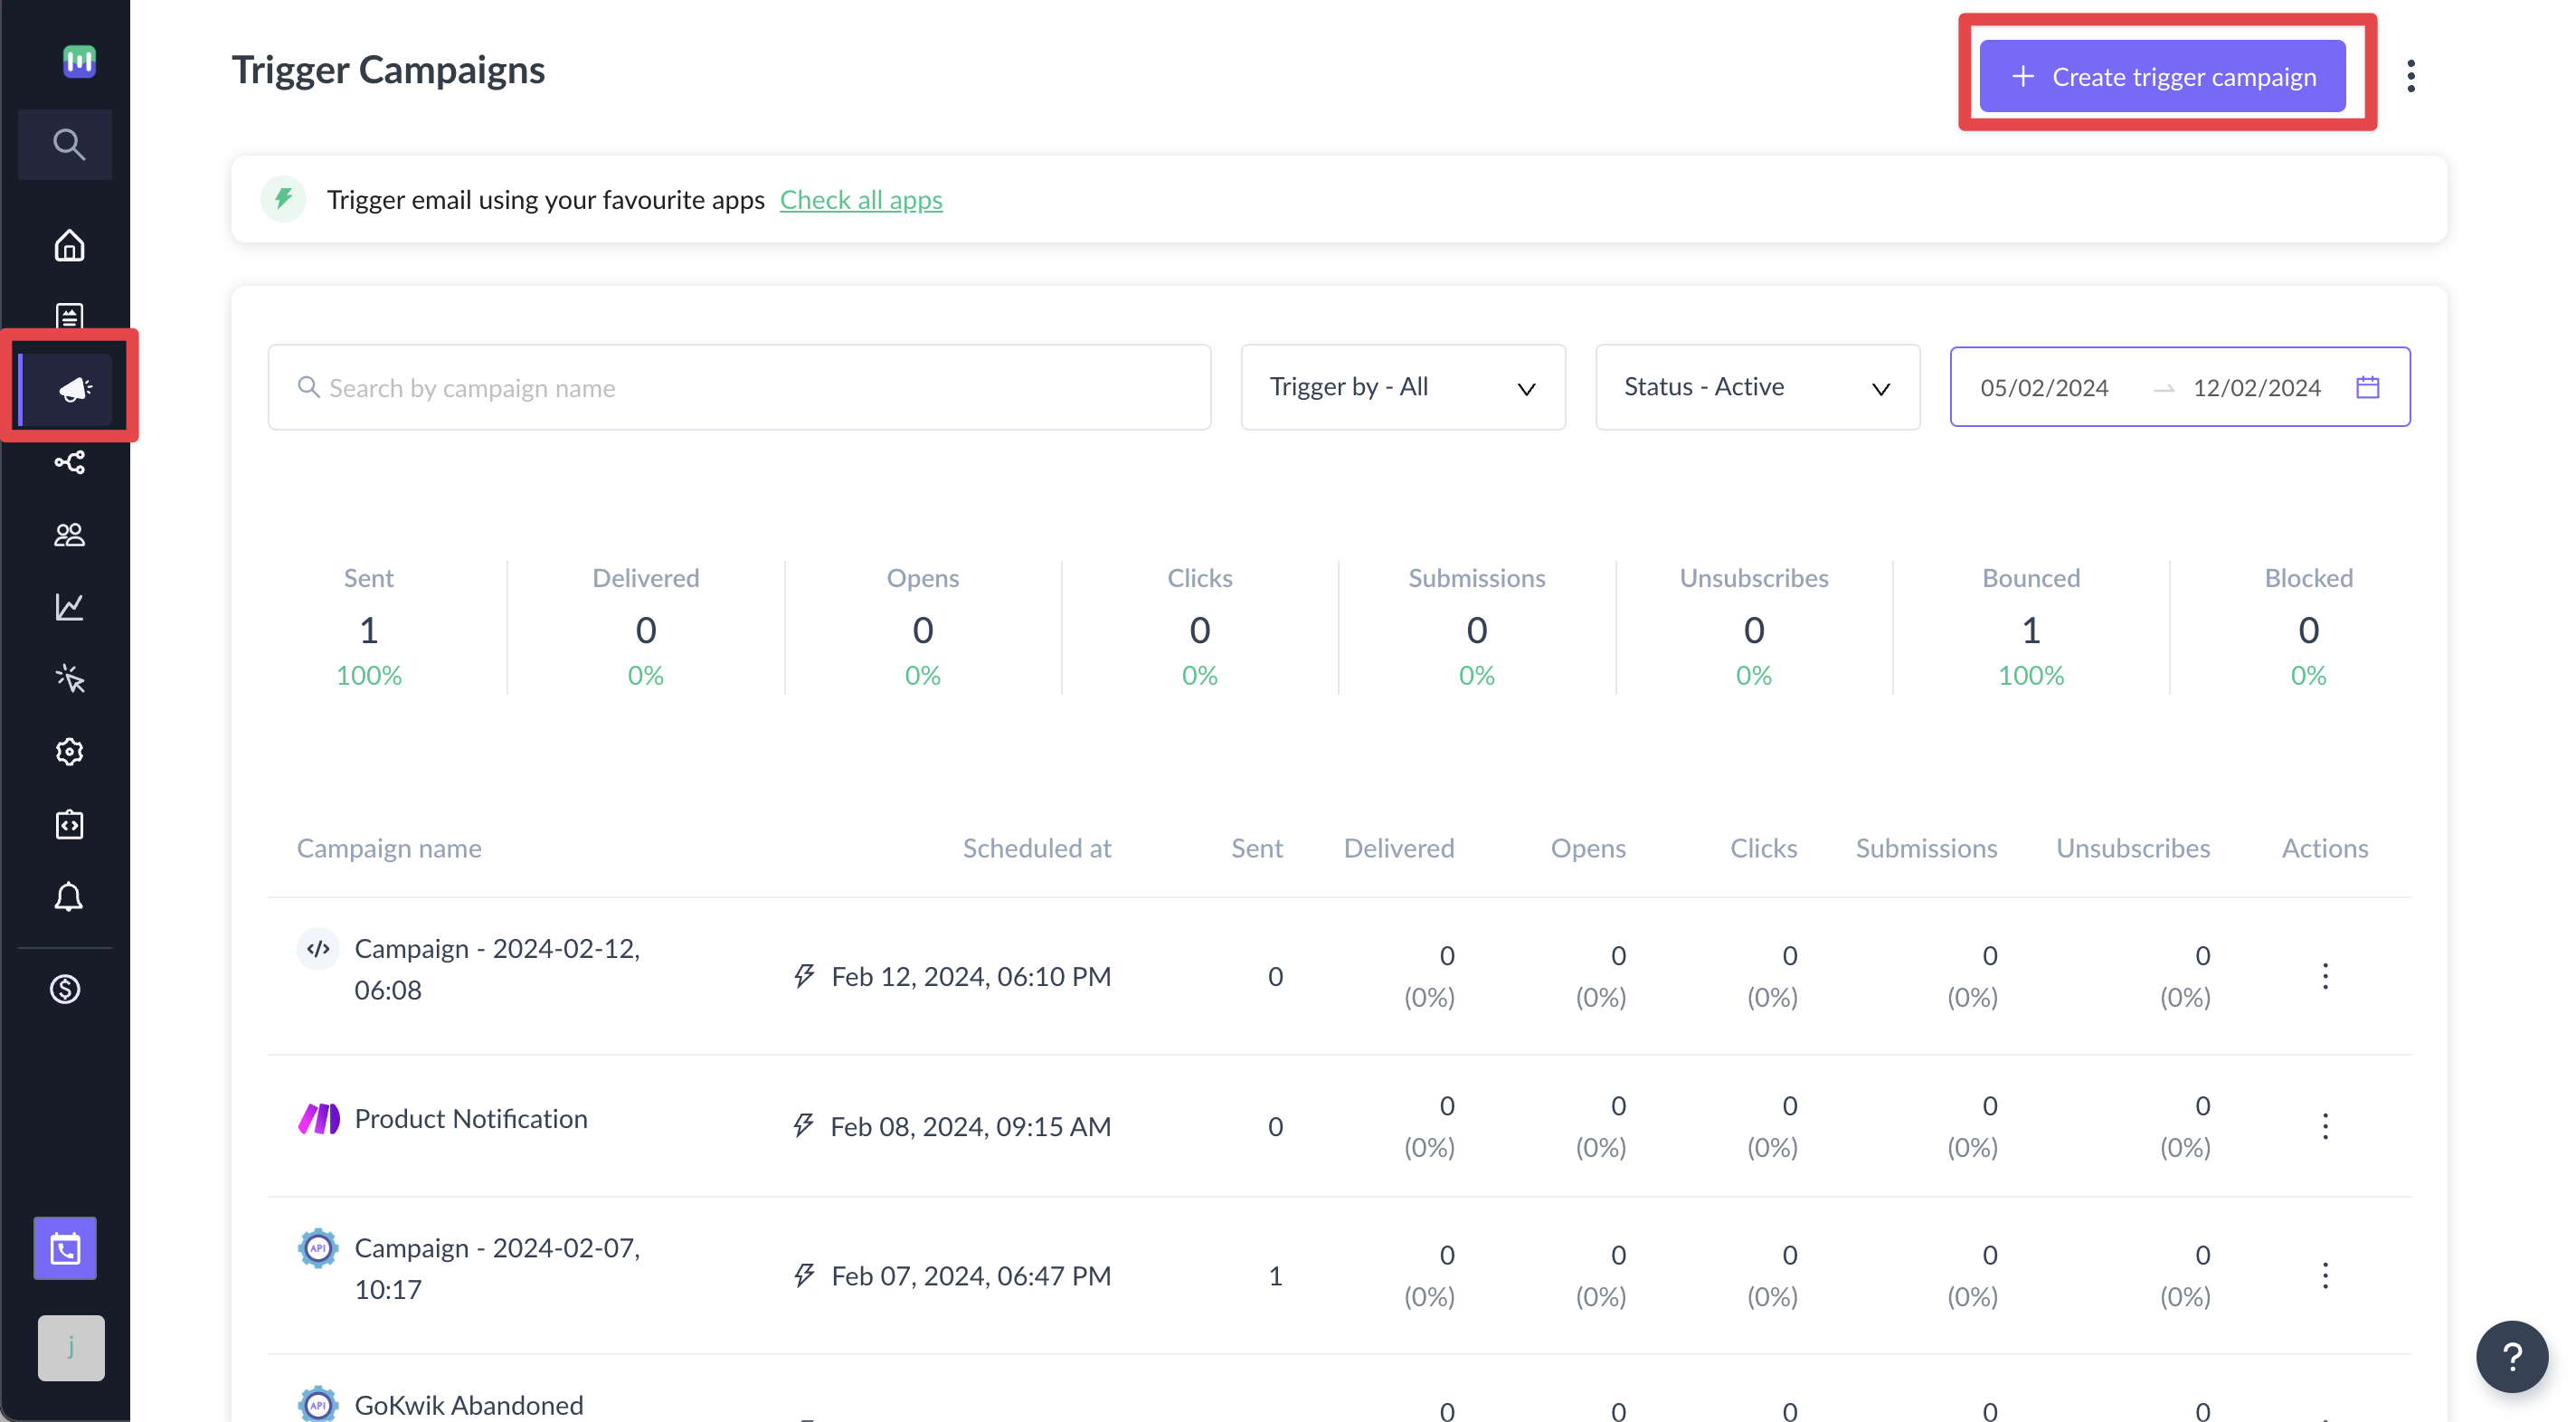
Step 5: You will be redirected to the home page. Click on Trigger under Campaigns from the vertical menu on the left. Next, click on Create trigger campaign.
Step 6: Select the template you saved before. Click on next.
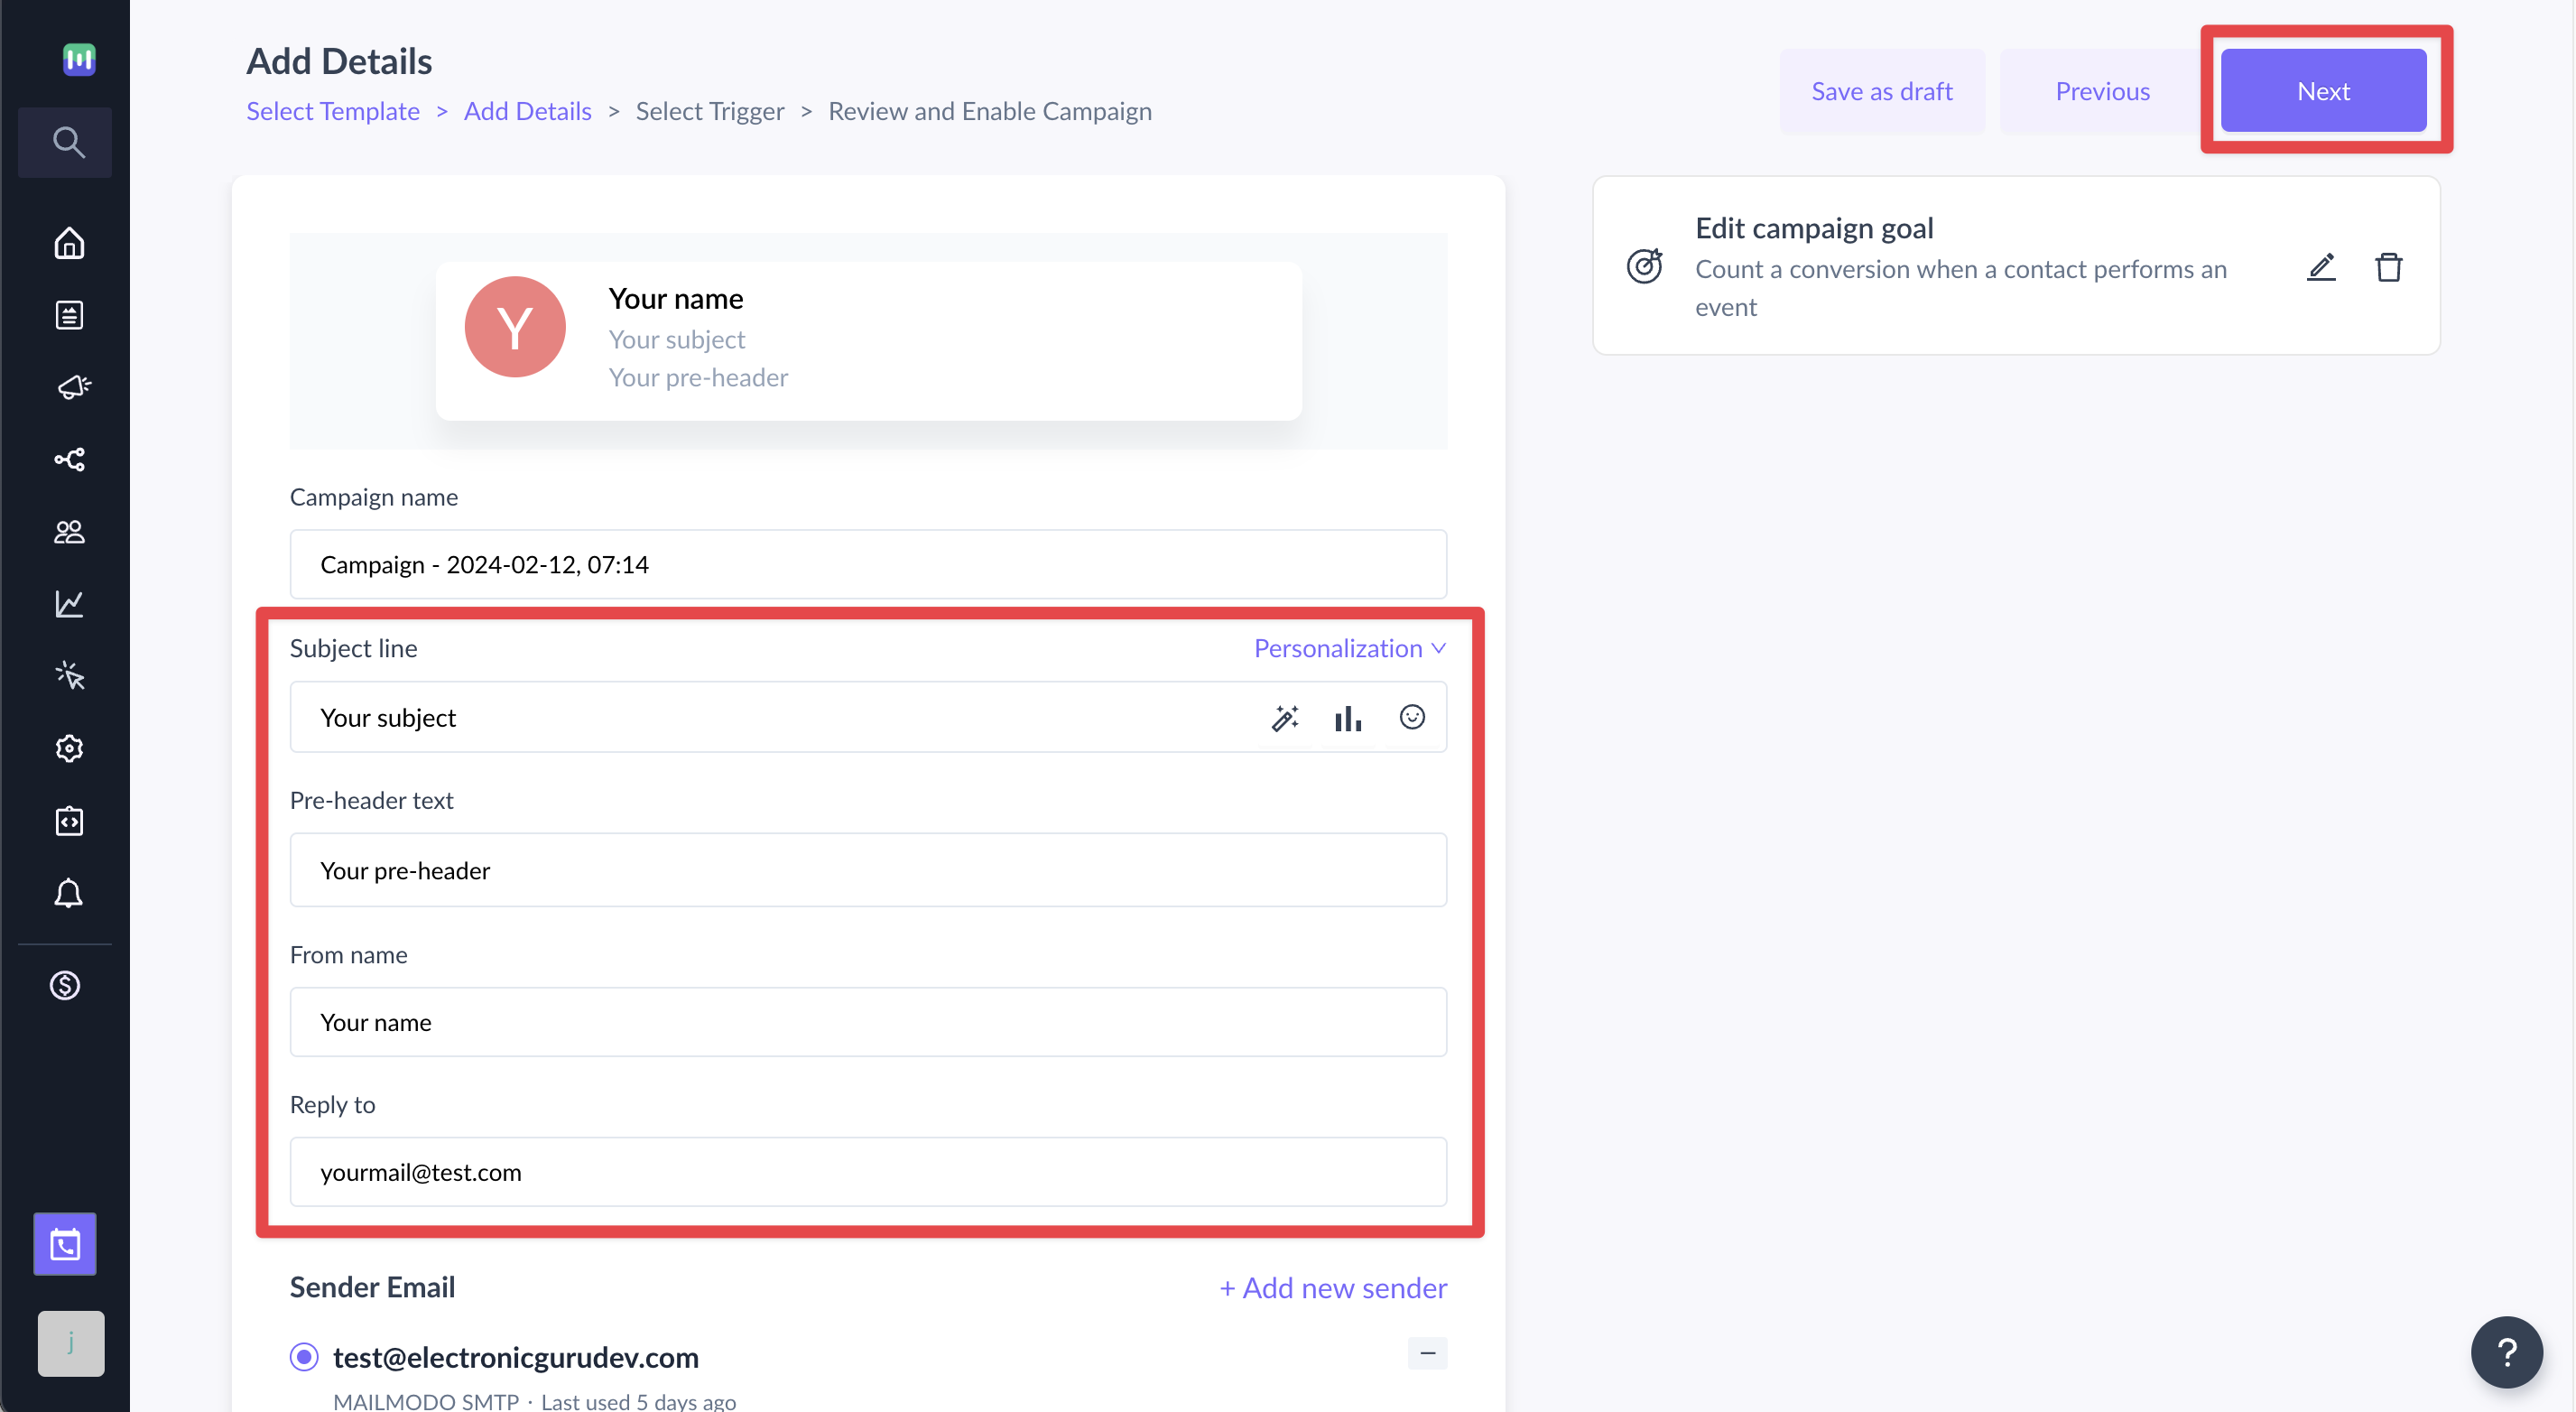
Step 7: Add Subject Line, Pre-header text, From name and Reply to email. Click on next.
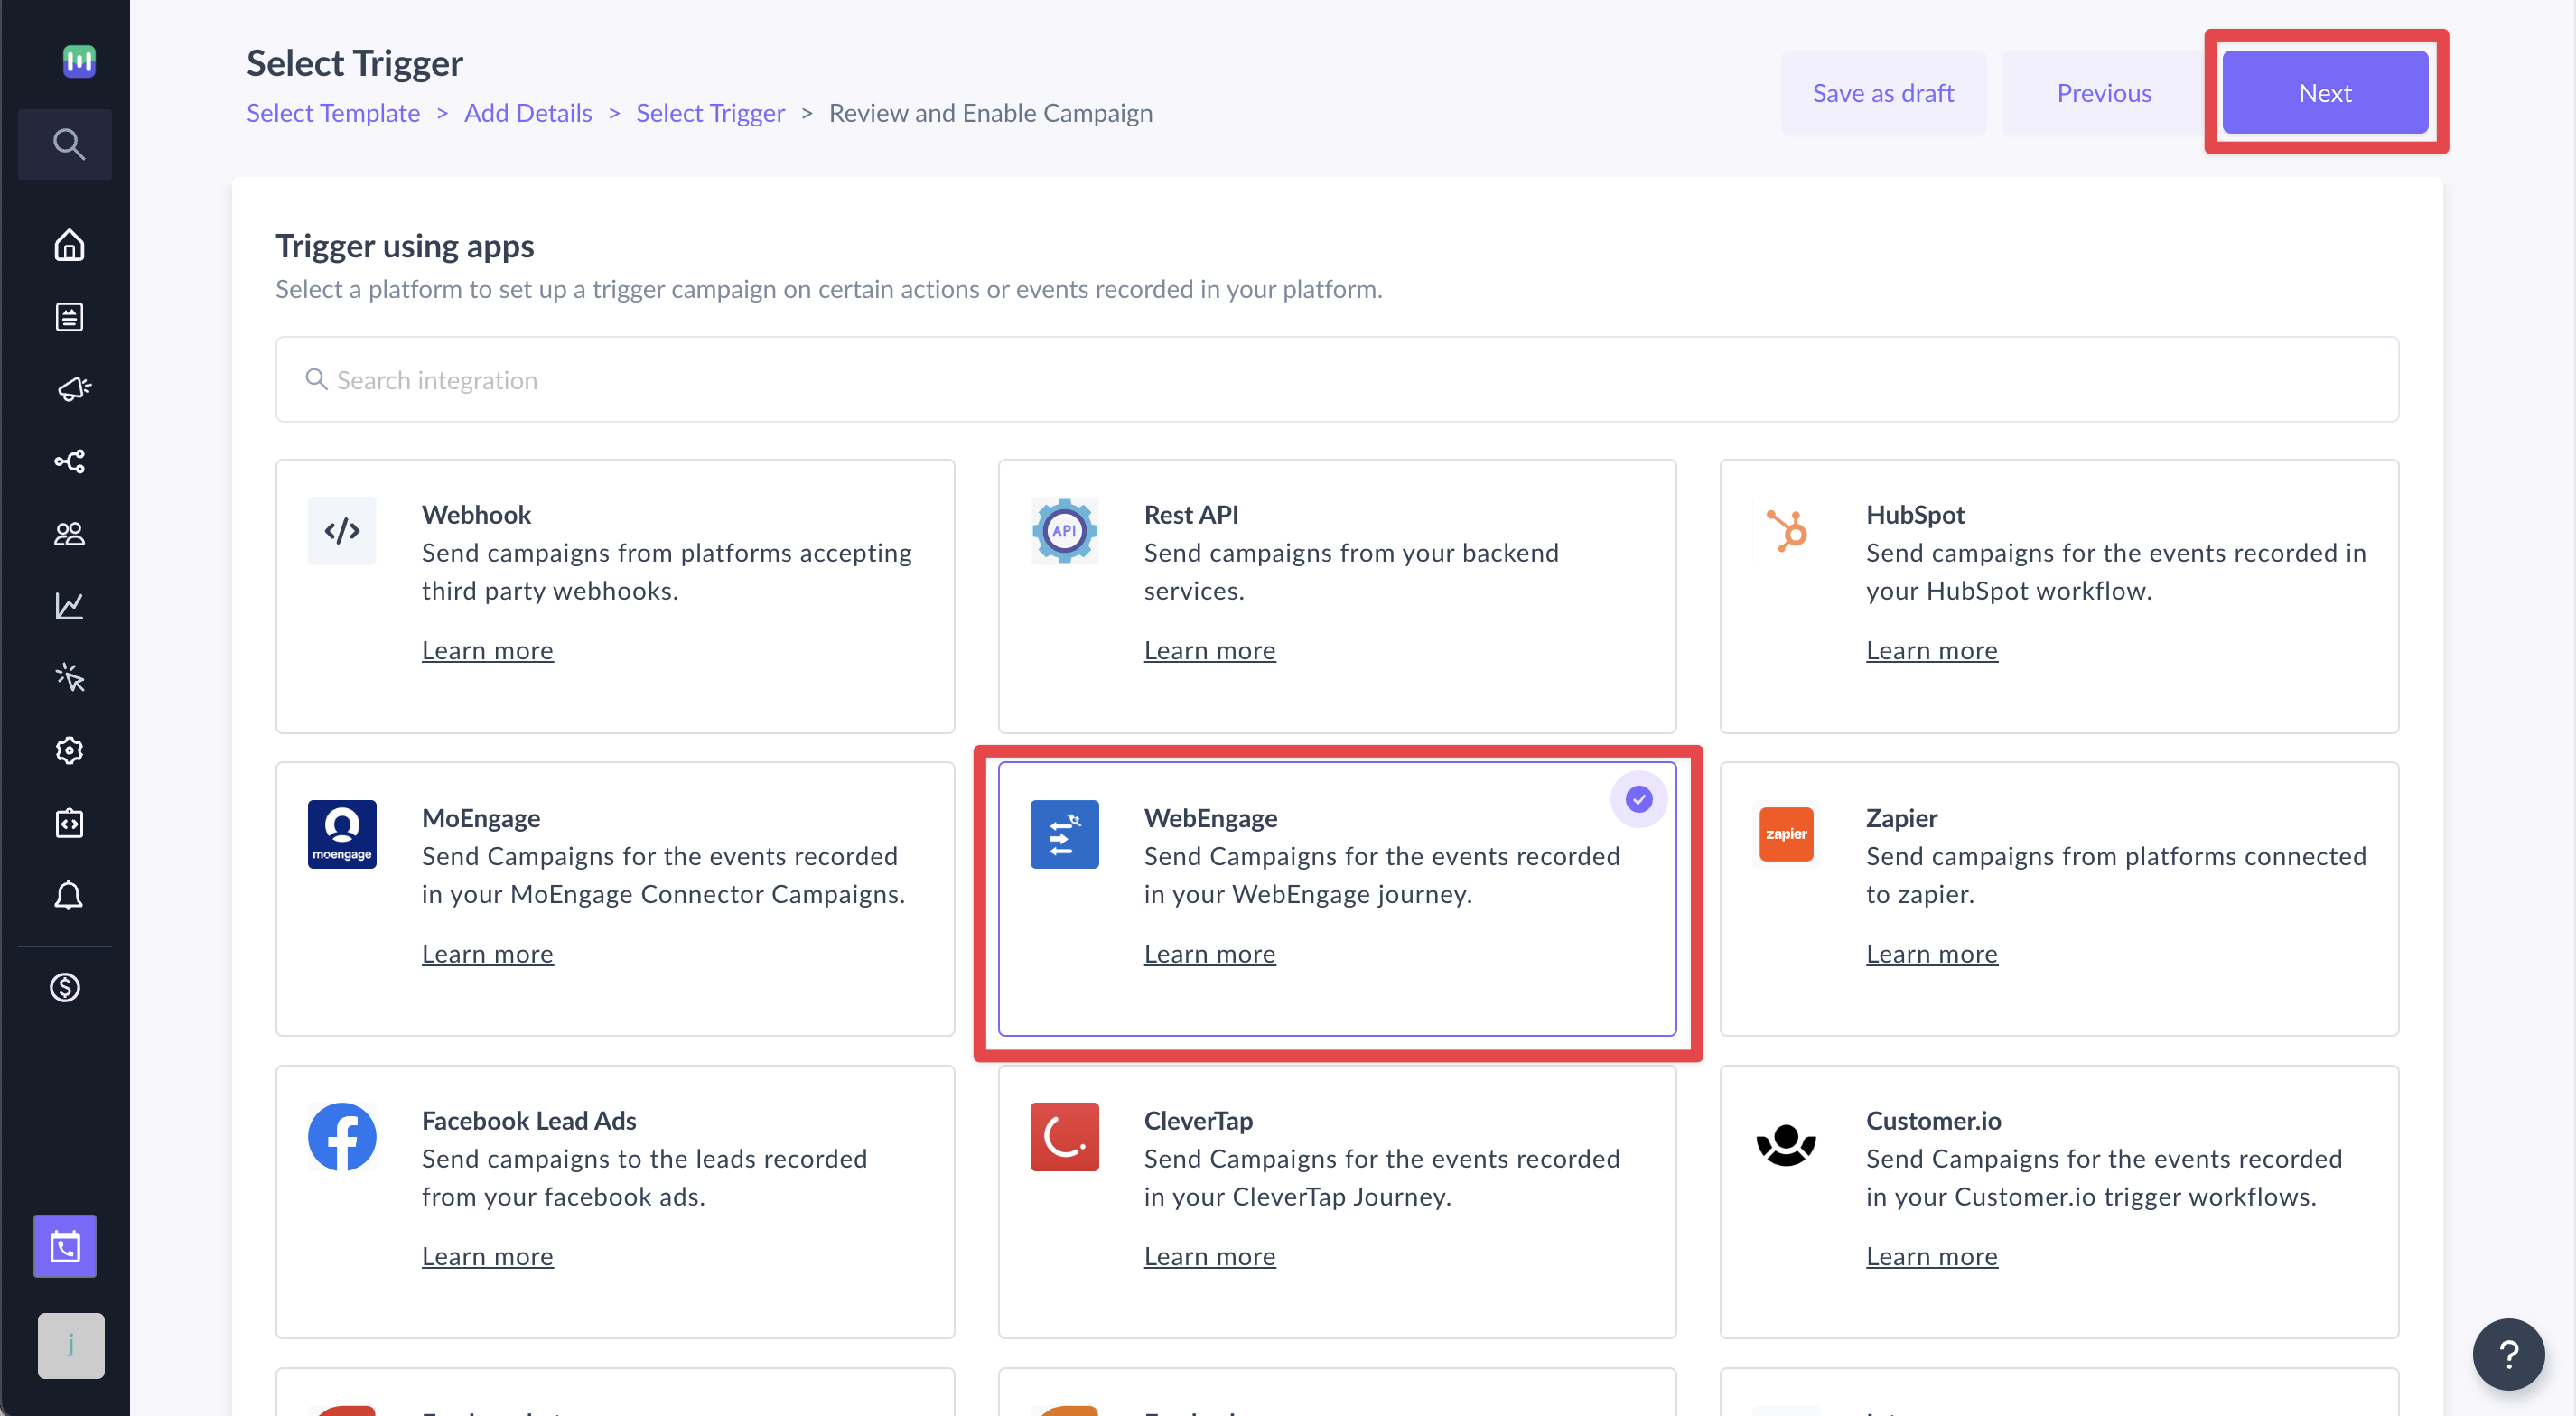
Step 8: You will be redirected to trigger on events. Select WebEngage from the list of platforms. Click on next.
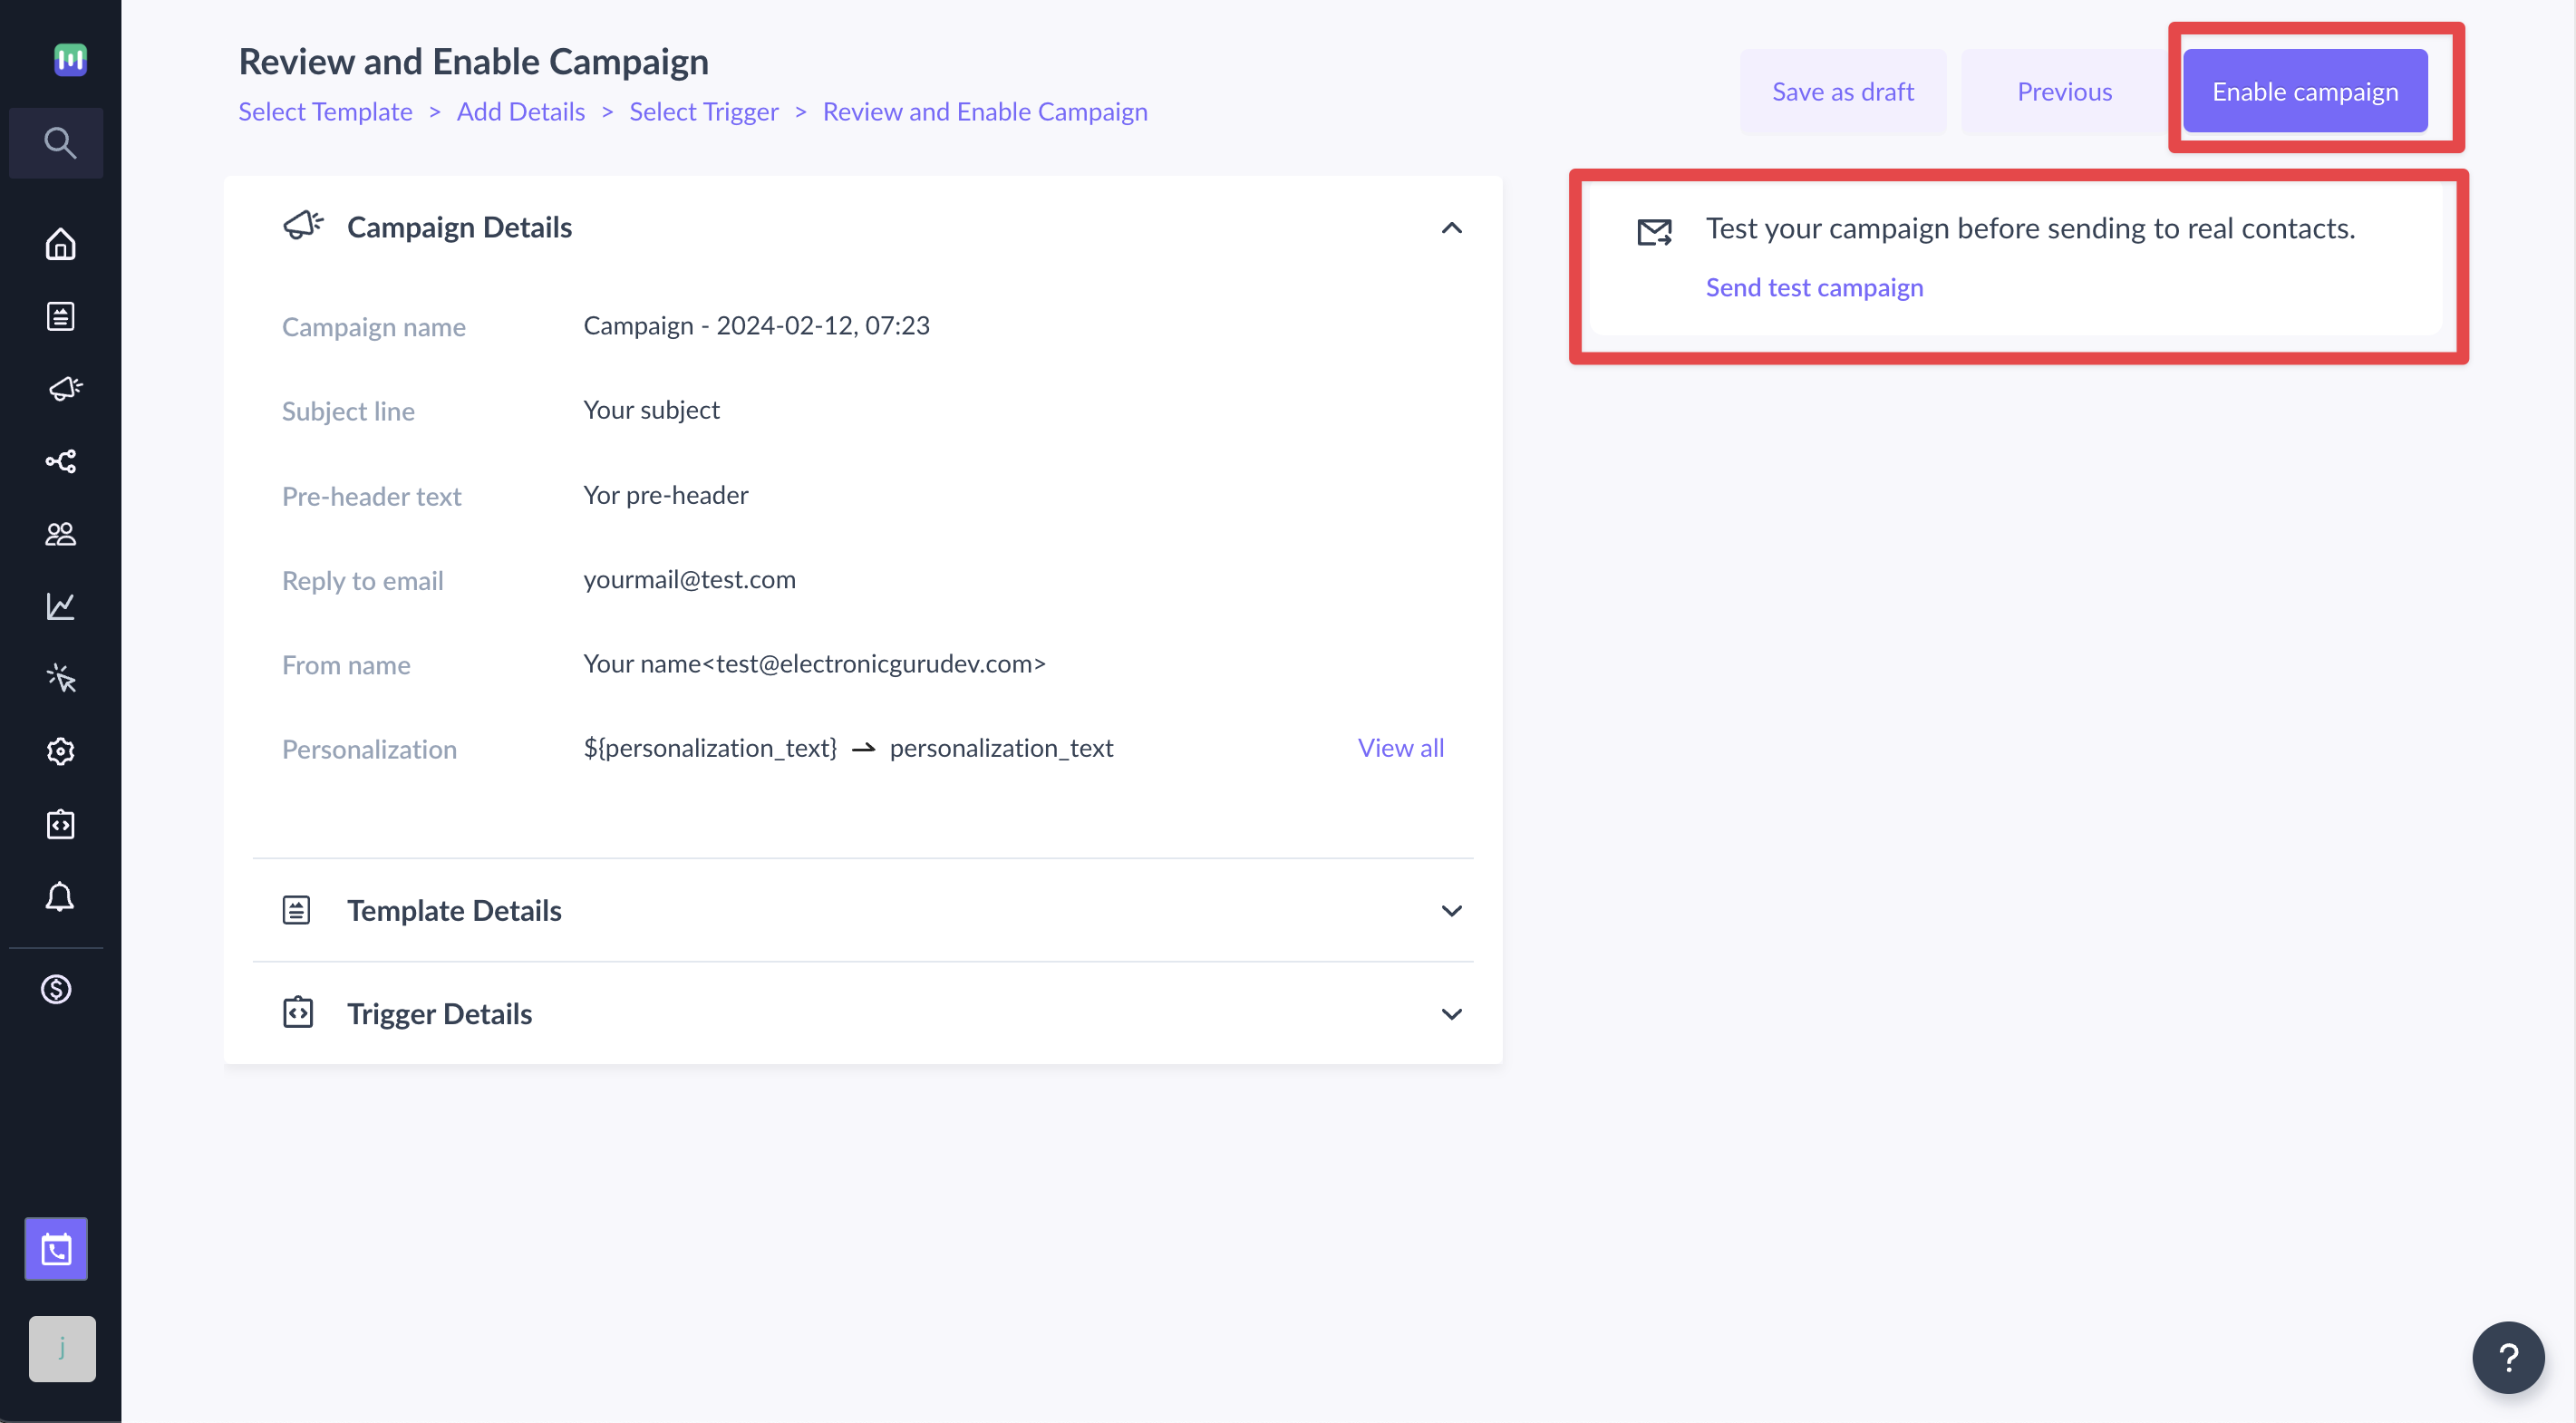
Step 9: Review and test your campaign. To test, click on send test campaign->enter email ID->send test email.
Once tested and reviewed, click on enable campaign.
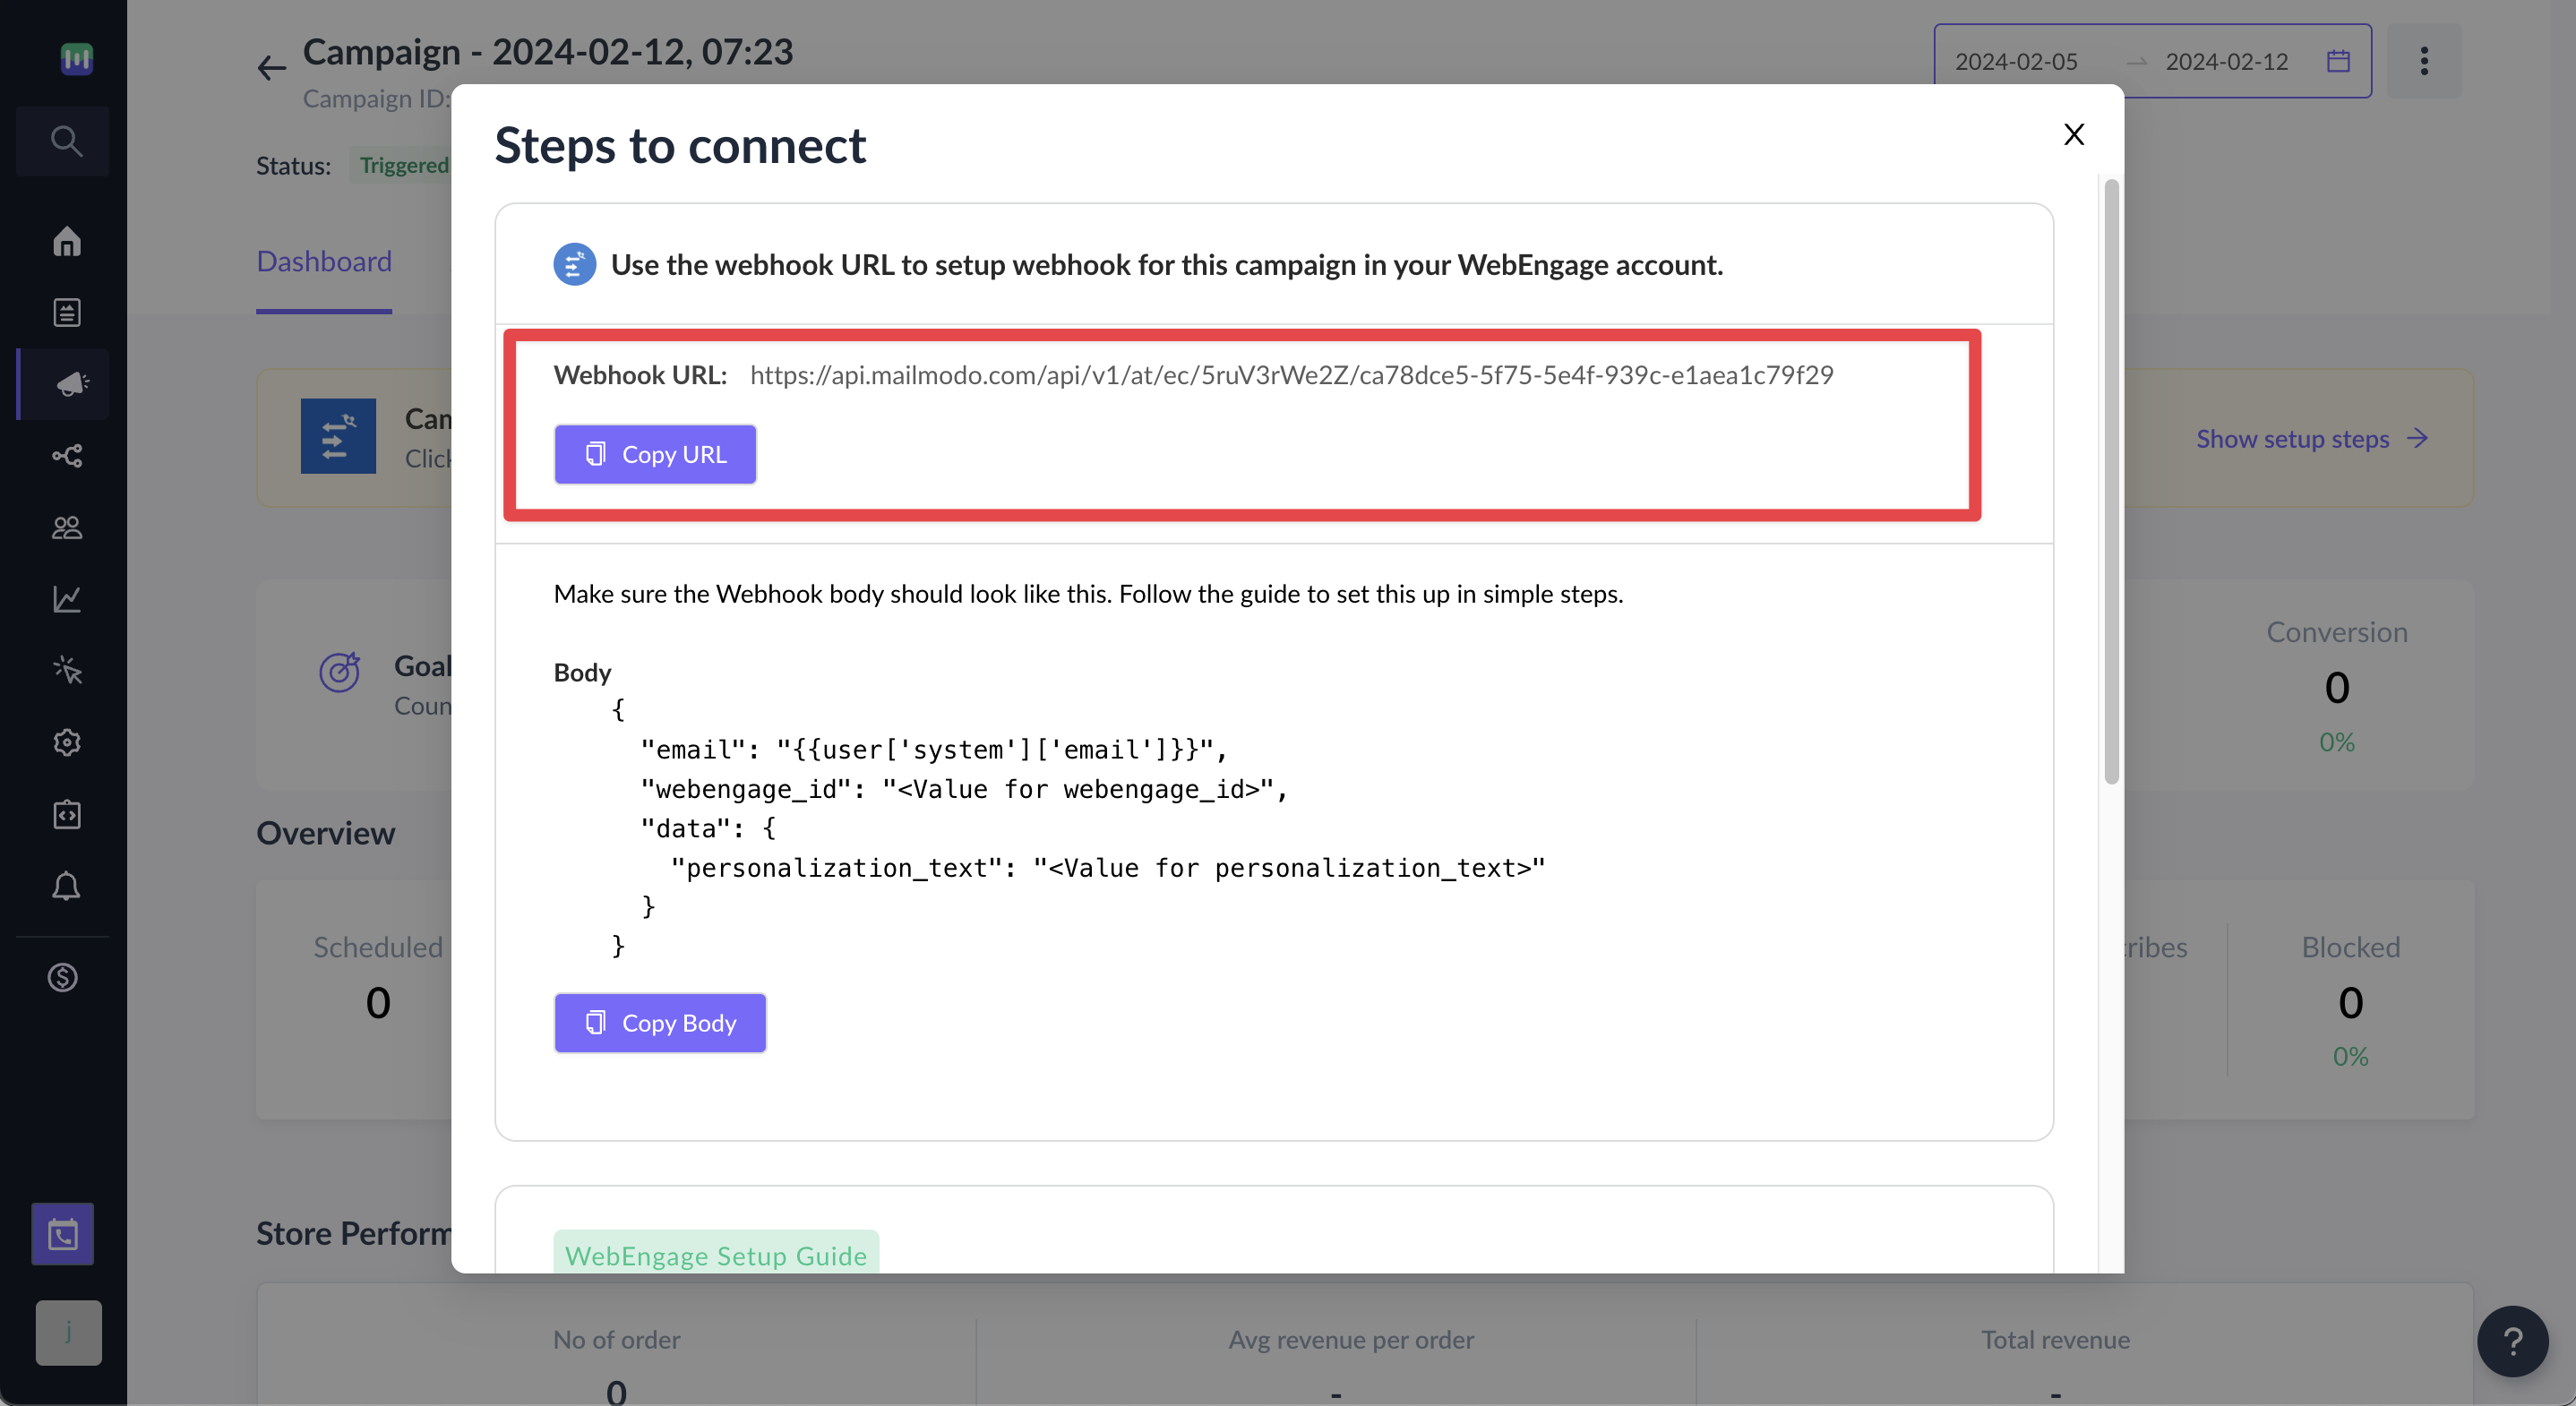
Step 10: You will be redirected to Trigger campaign section. Click on Copy URL button after selecting Show setup steps. We will use this webhook url in WebEngage.
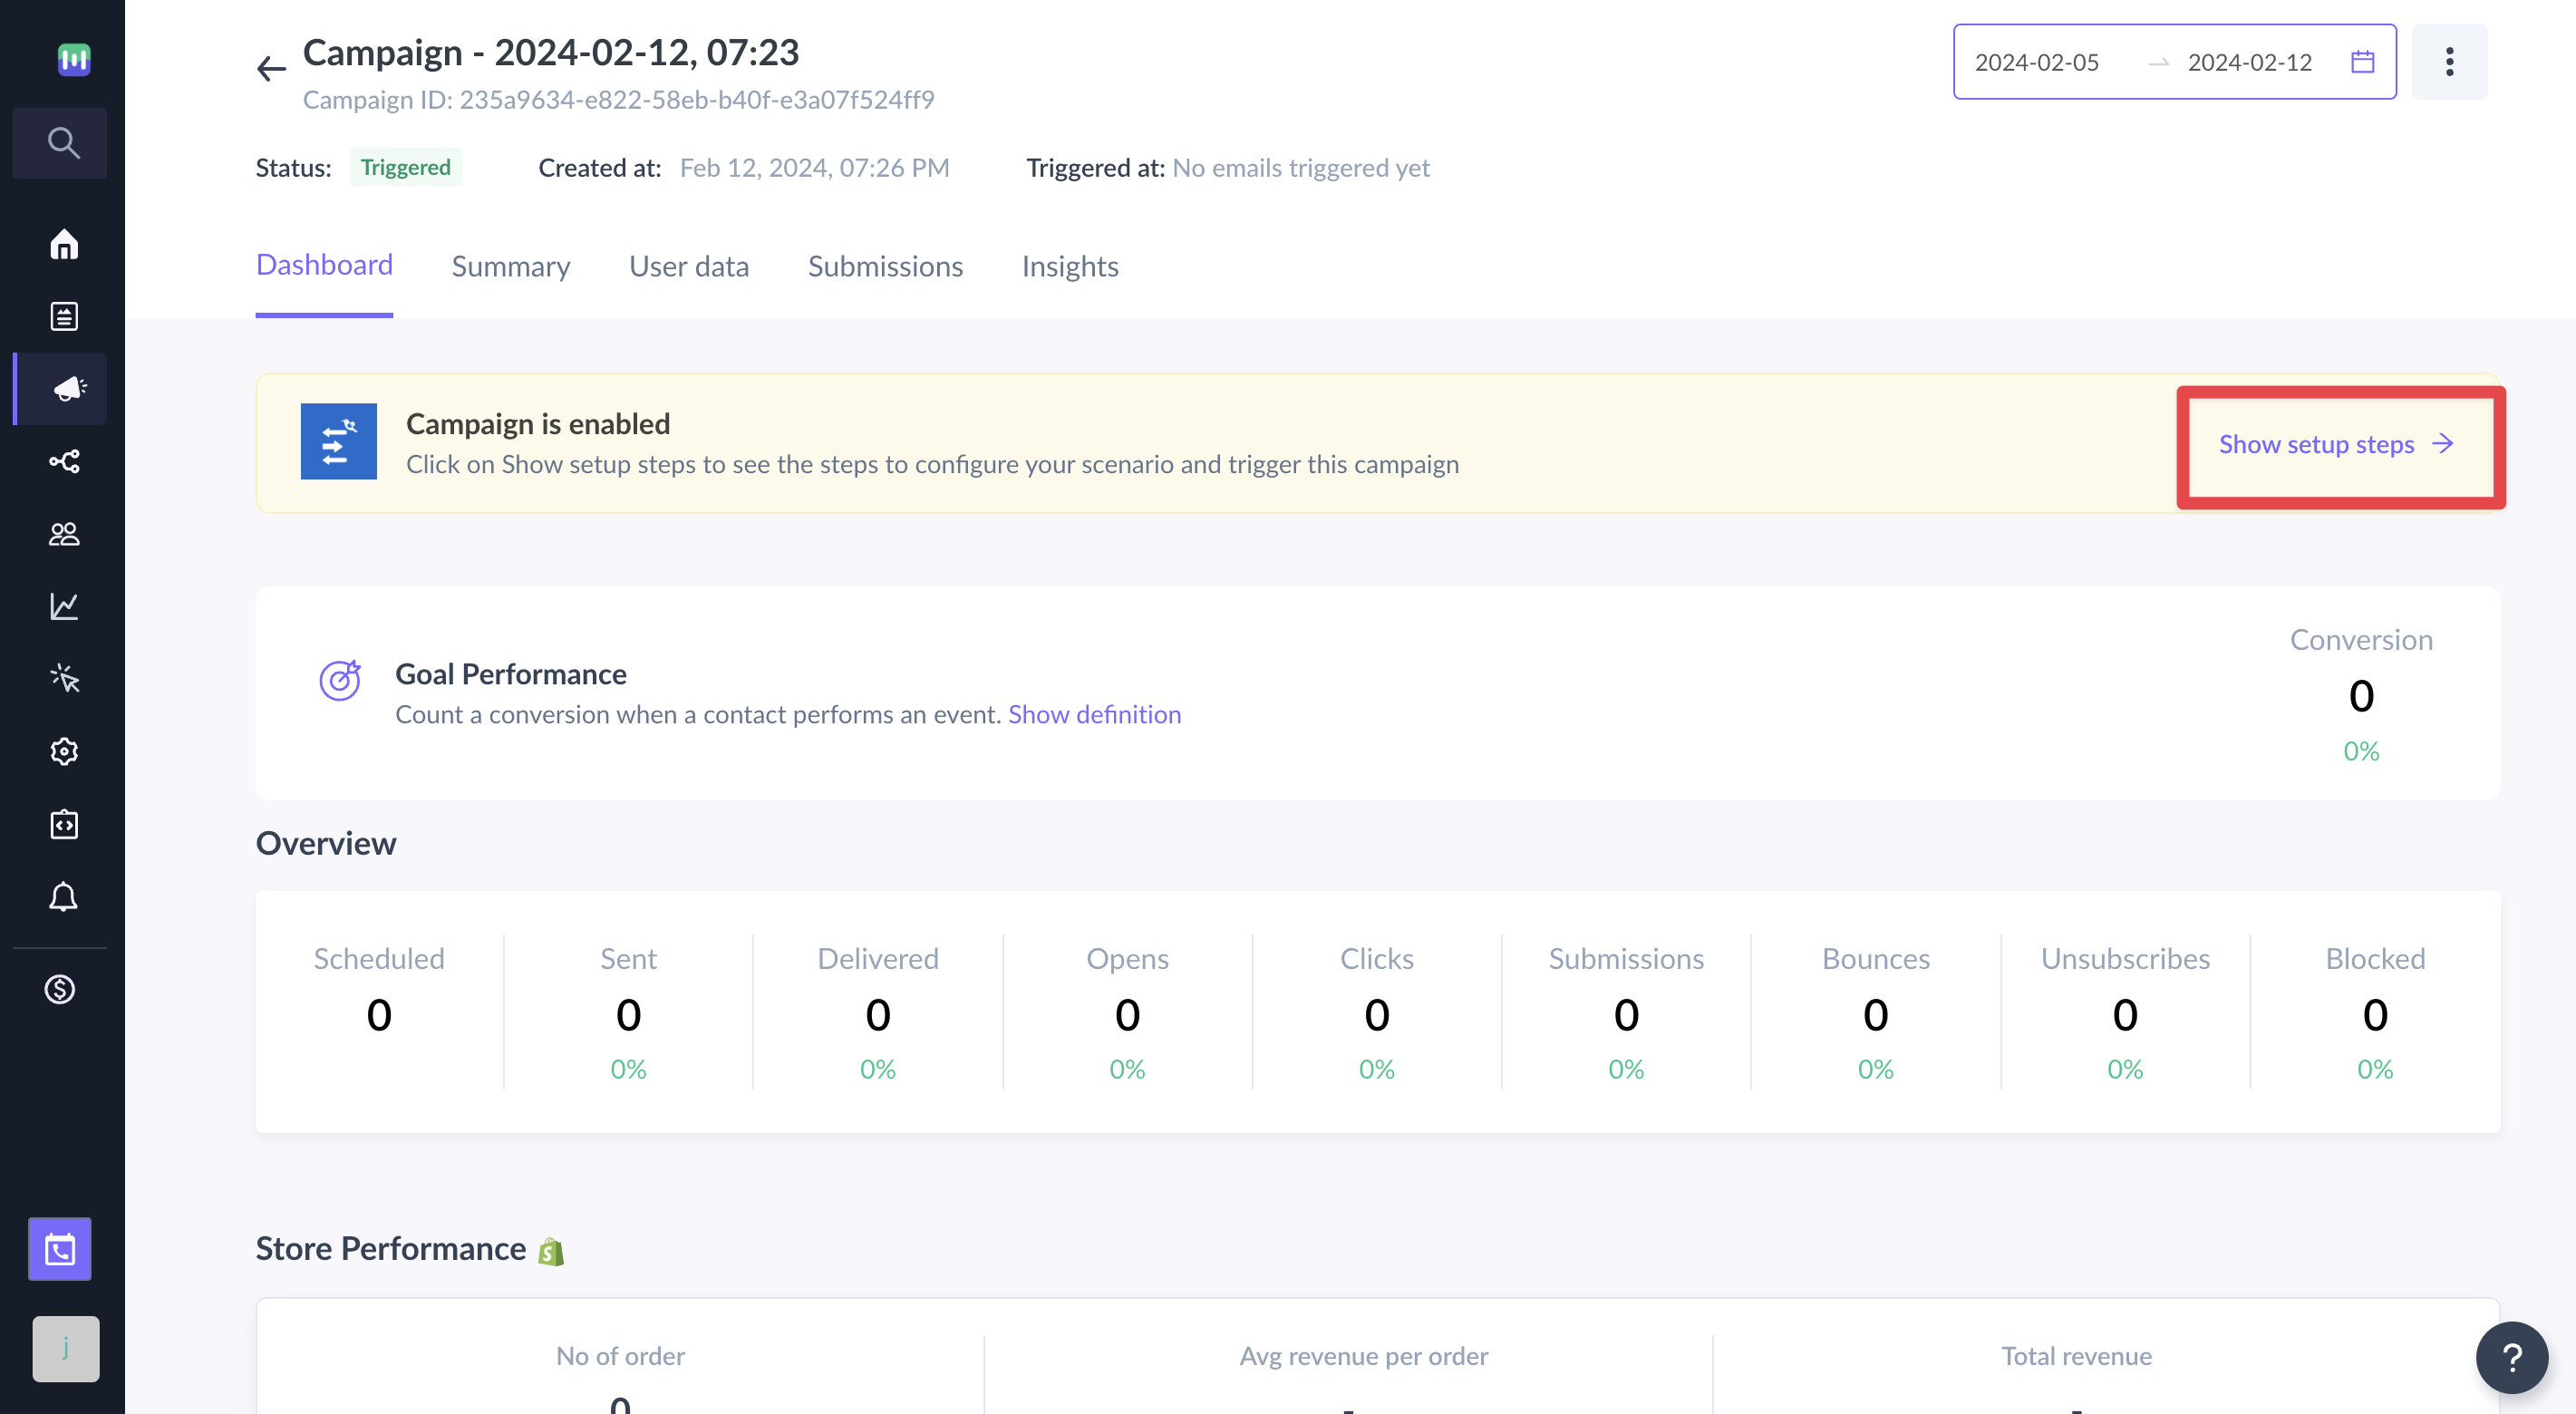
To access this page in future, go to transactional in the vertical menu (left side)->select the campaign-> Show setup steps
WebEngage Setup
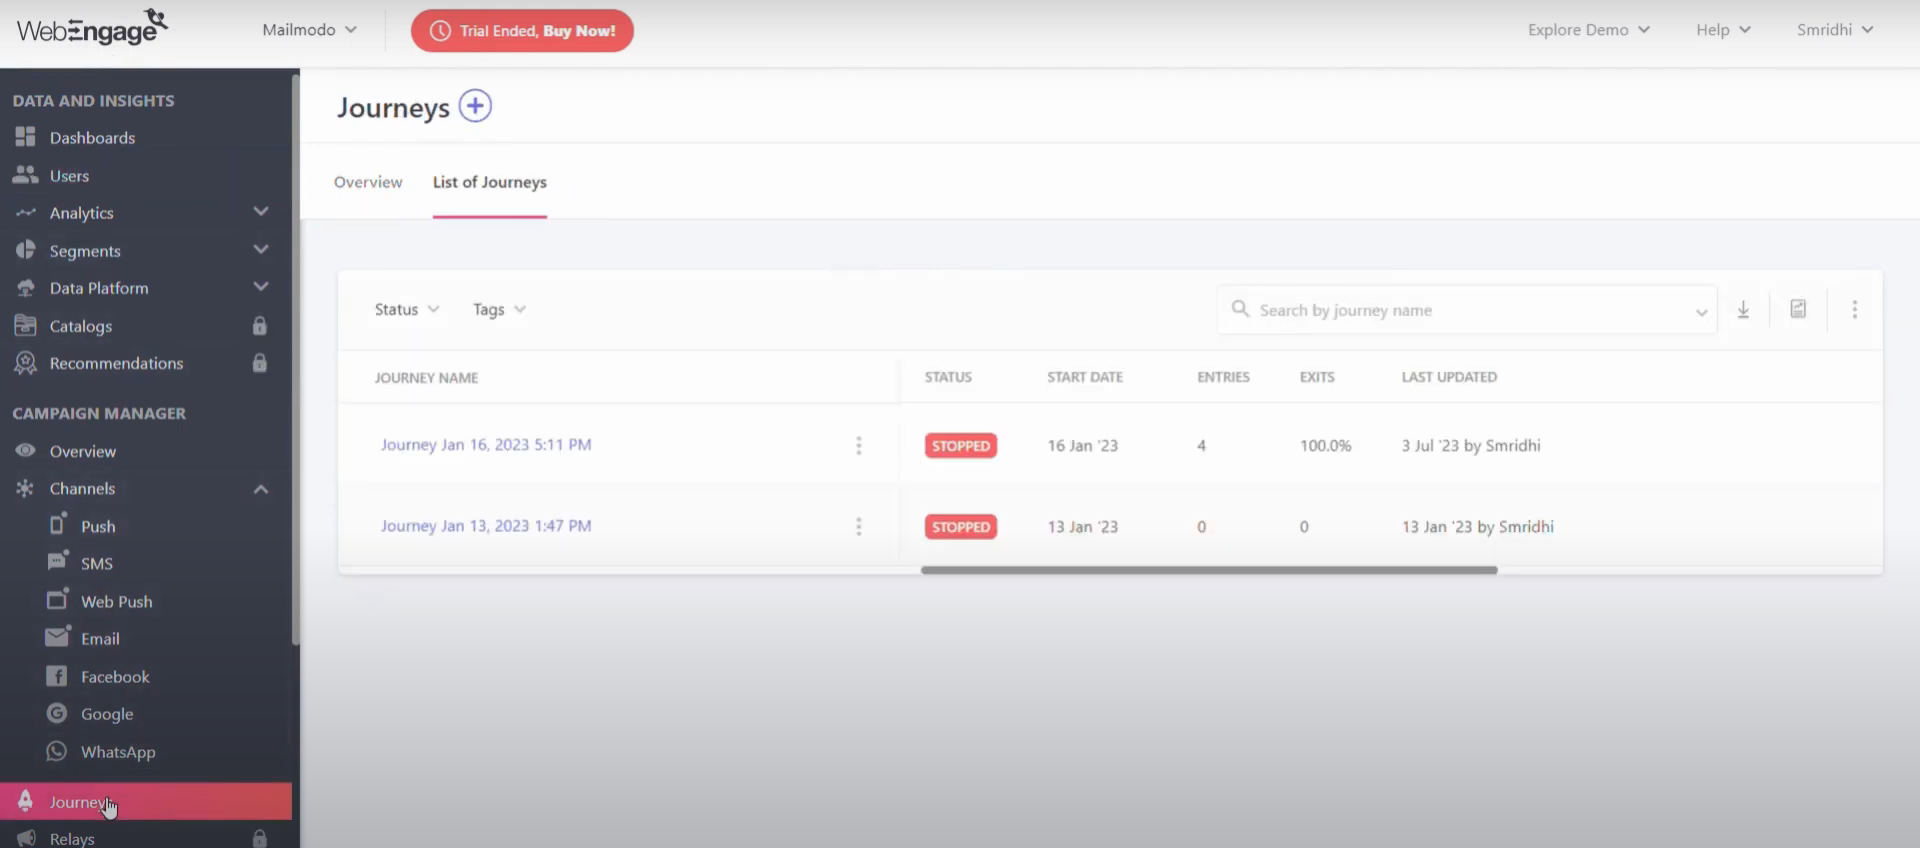
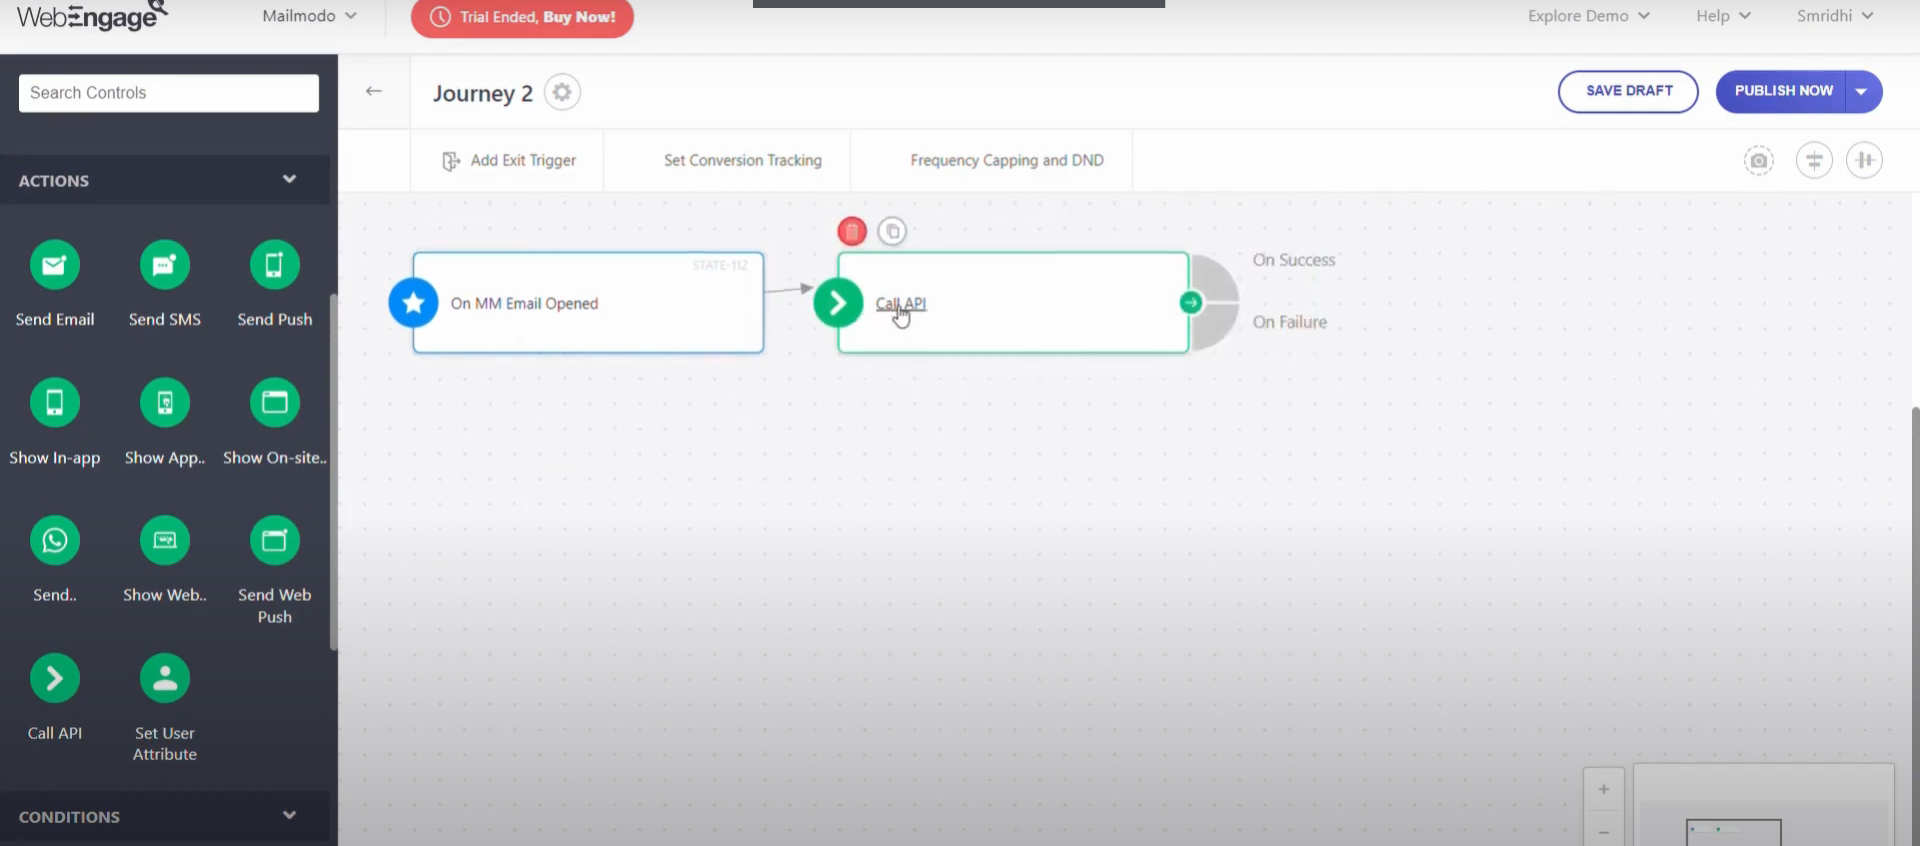
Step 1: In WebEngage go to Journeys → + → Create new journey
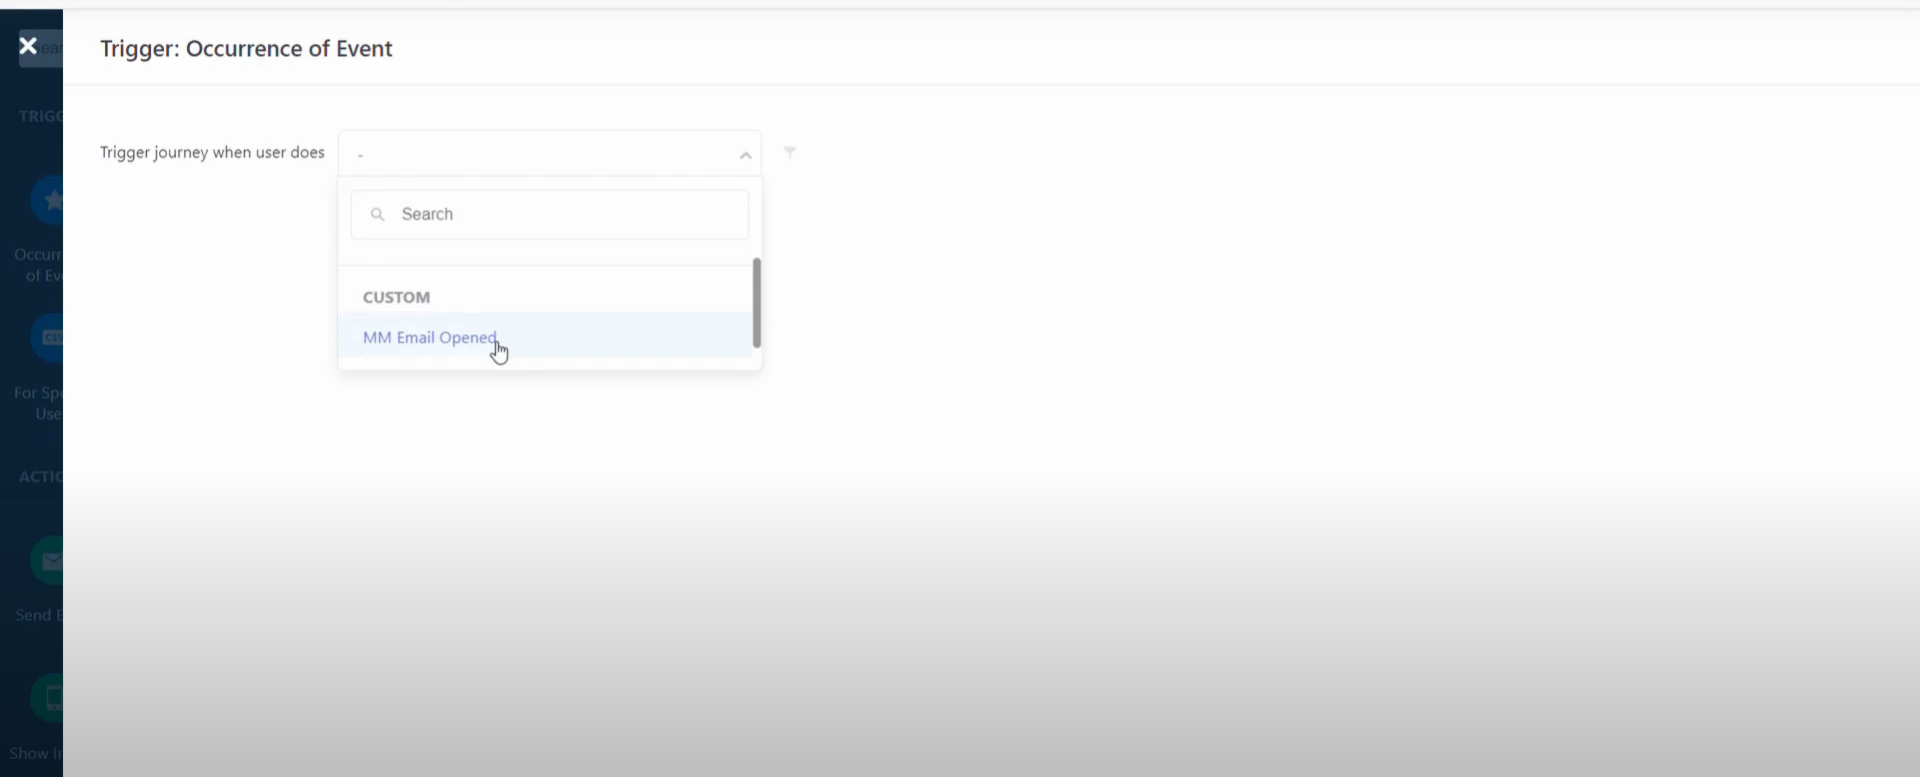
Step 2: In the Journey builder, drag and drop Occurrence of Event and select your event of choice.
Step 3: Add your next event as Call API. Add a connector to this from the event, to call the action whenever the event is triggered.
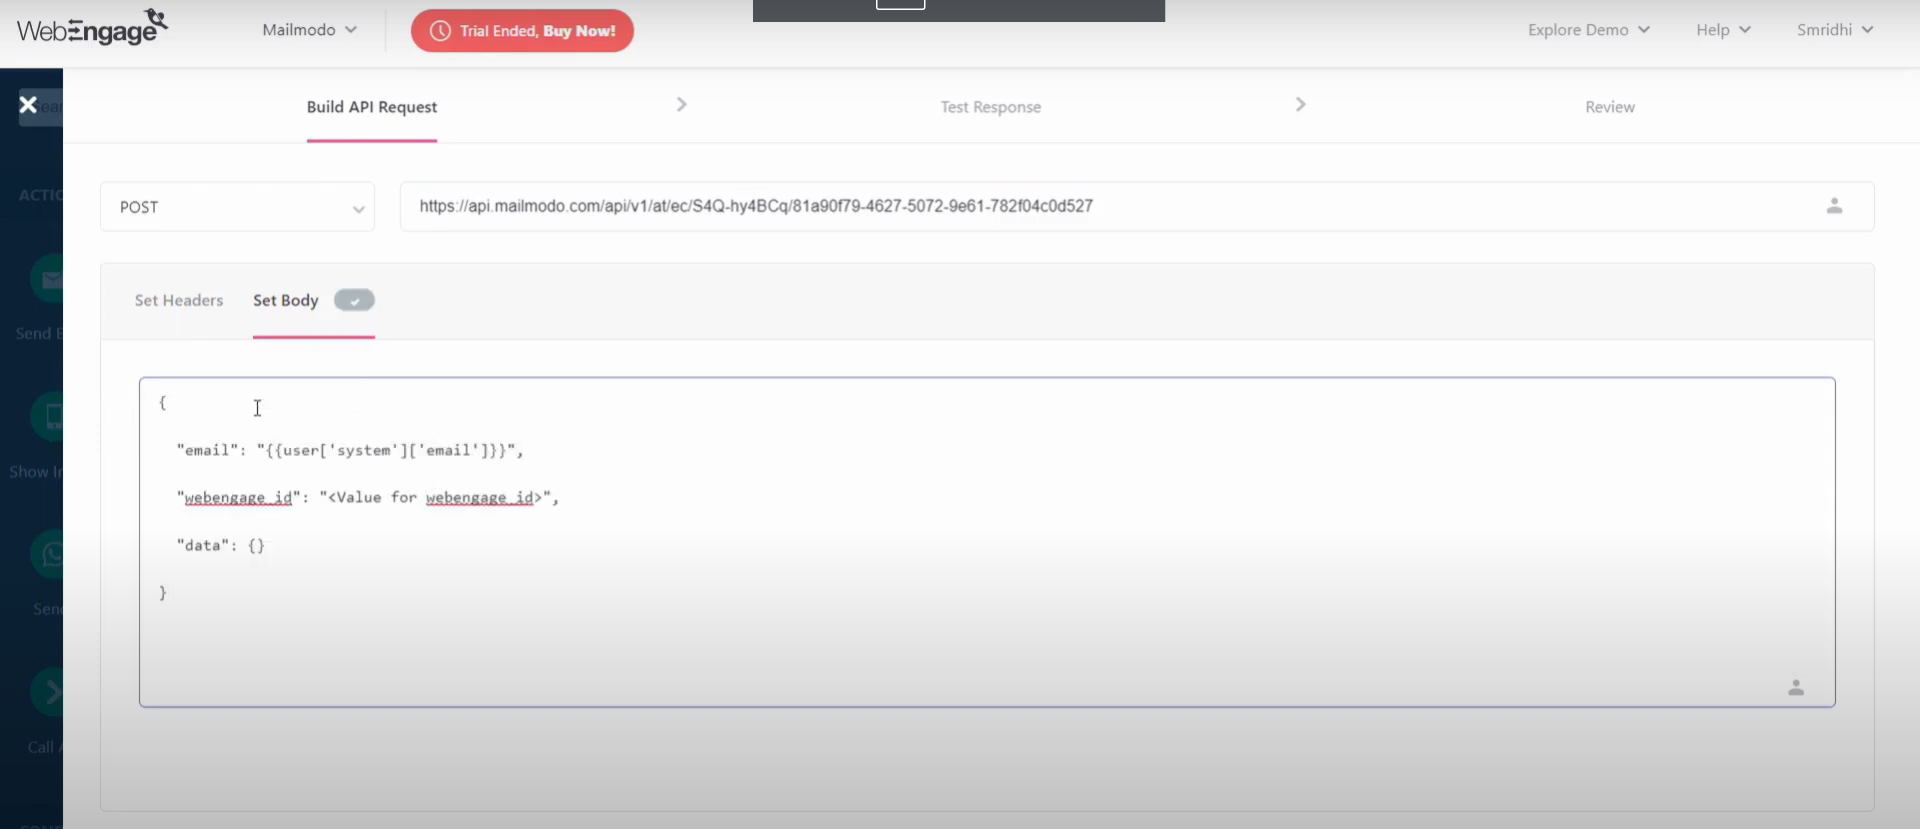
Step 4: Build your API Request, Select POST and paste your webhook url from Mailmodo. Set your body as picked from Mailmodo.
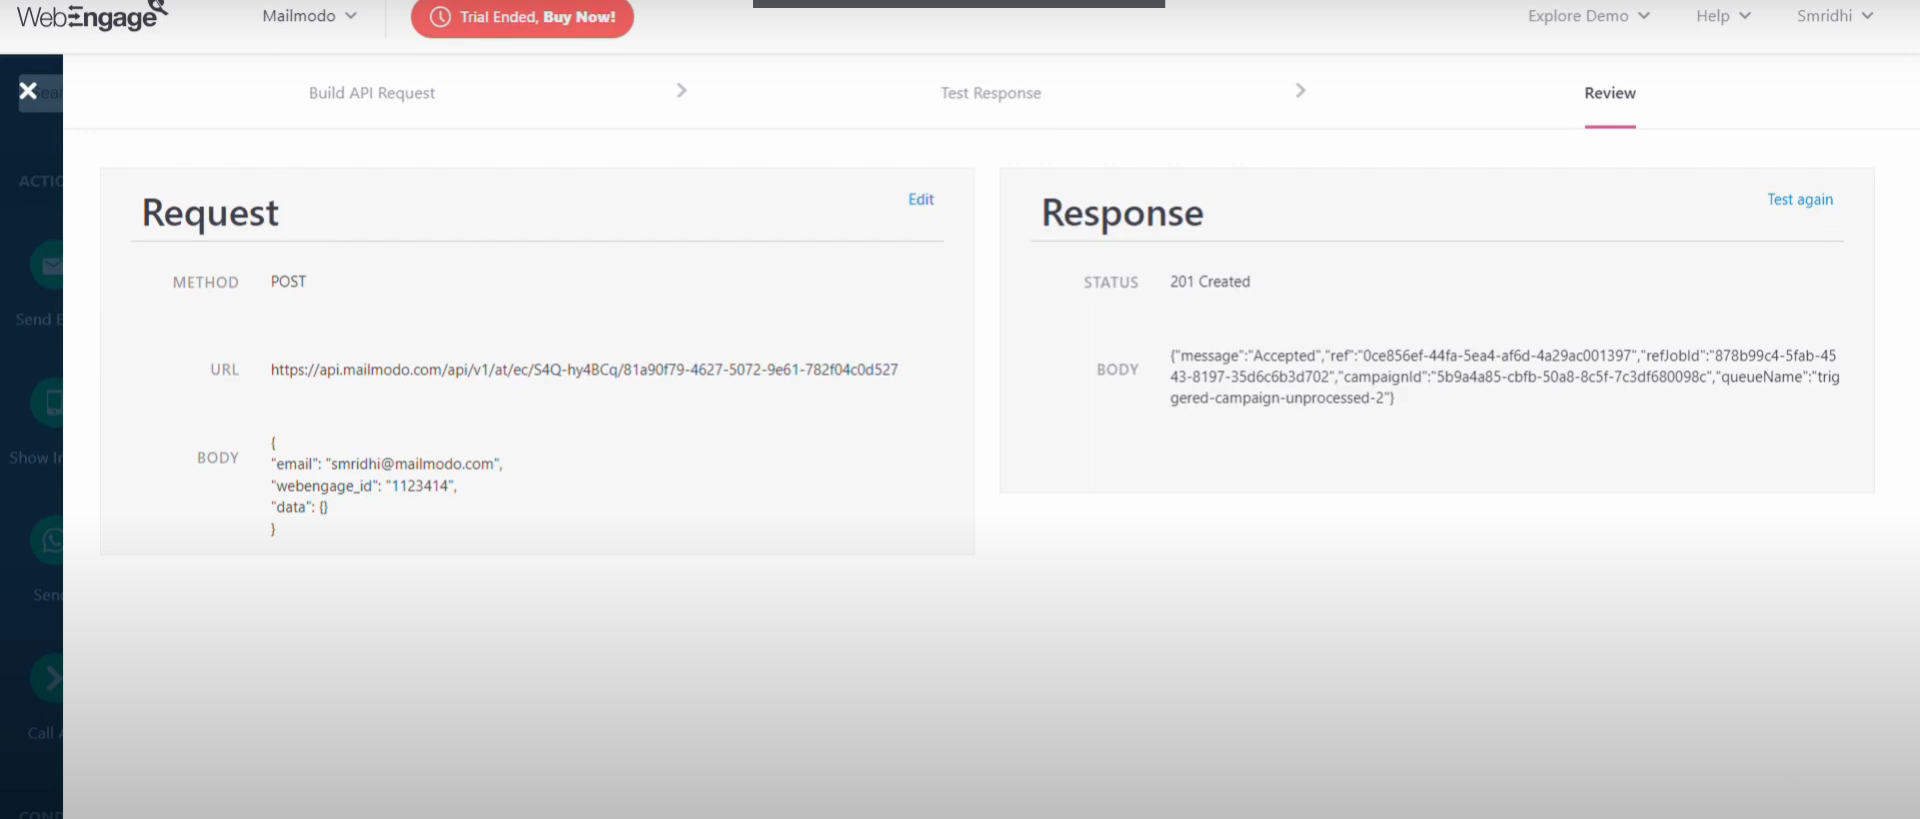
Step 5: Test your response, Review and Save.
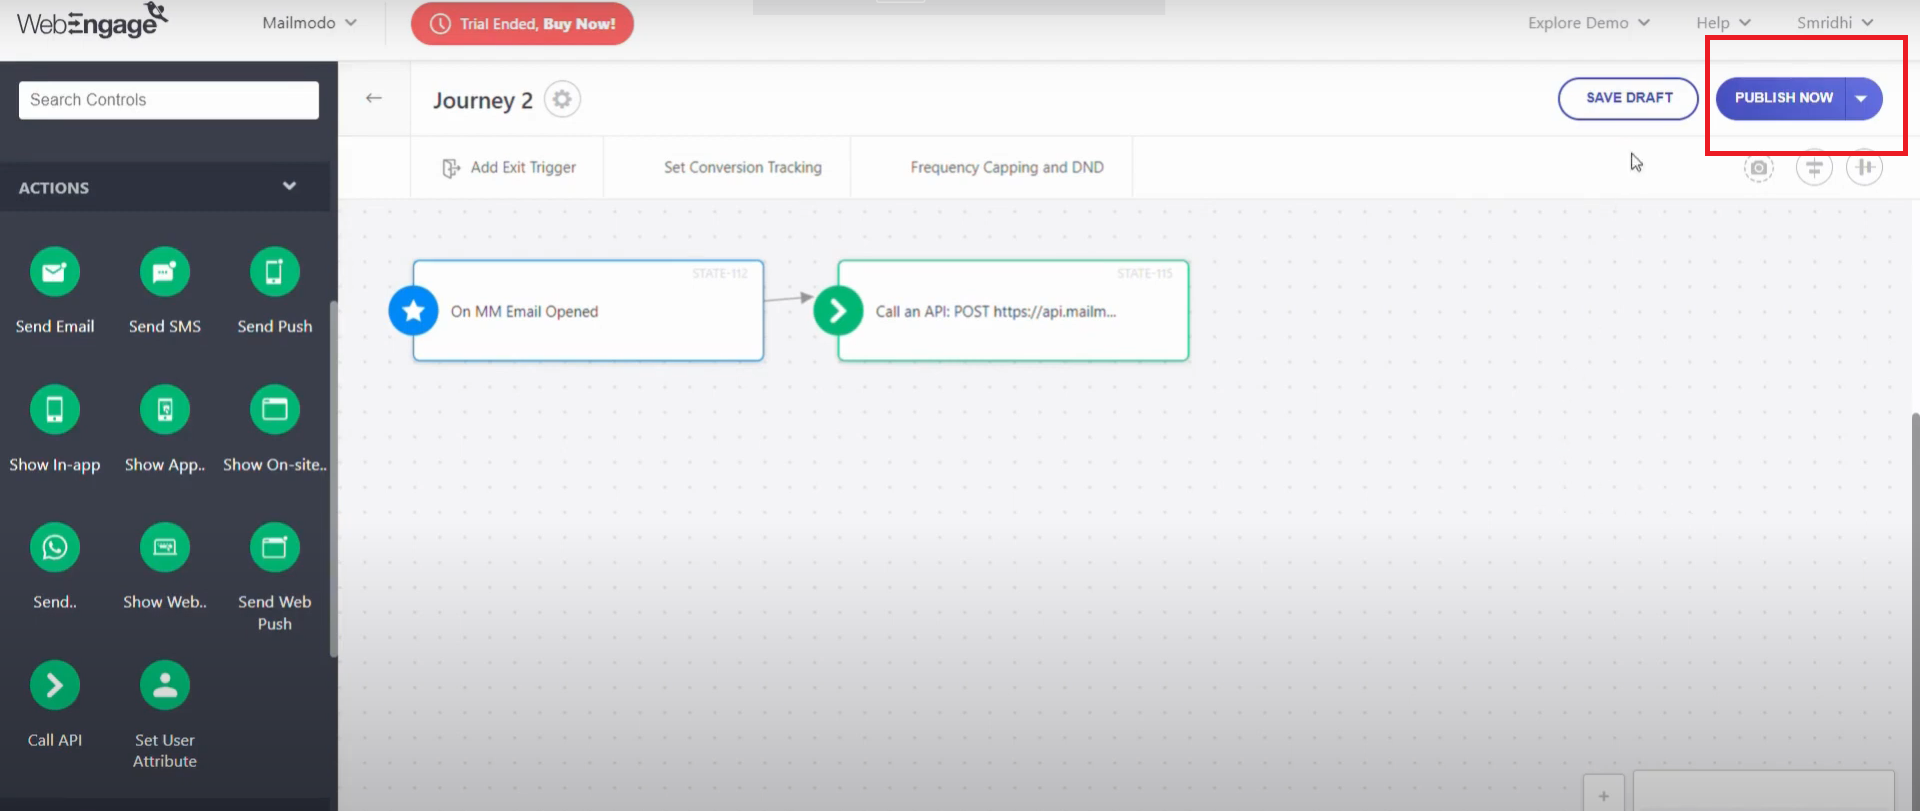
Step 6: Publish your Journey.
That's it! You have successfully created a trigger campaign!
Use the search bar in our Help Center to find quick guides and walkthroughs. If you have any queries, then reach out to us via the chat icon on the bottom right corner of your screen while using Mailmodo. Or reach out to us at Mailmodo Support and share your thoughts at Mailmodo Product Feedback.