

Trigger Campaigns through Zoho CRM in Mailmodo
Last updated September 25, 2025
In this article we will see how to send trigger campaigns in Mailmodo from your Zoho CRM account.
Prerequisite: A valid Zoho CRM account.
How to create a trigger campaign in Mailmodo?
Step 1: Go to templates from the vertical menu on the left side. Click on create new template.

Step 2: Either select a blank template or a pre-existing template

Step 3: Use the editor to edit the template. Save and rename the template upon completion. After saving, click on back arrow.

Step 4: You will be redirected to the home page. Click on Trigger under Campaigns from the vertical menu on the left. Next, click on Create trigger campaign.

Step 5: Select the template you saved before. Click on next.

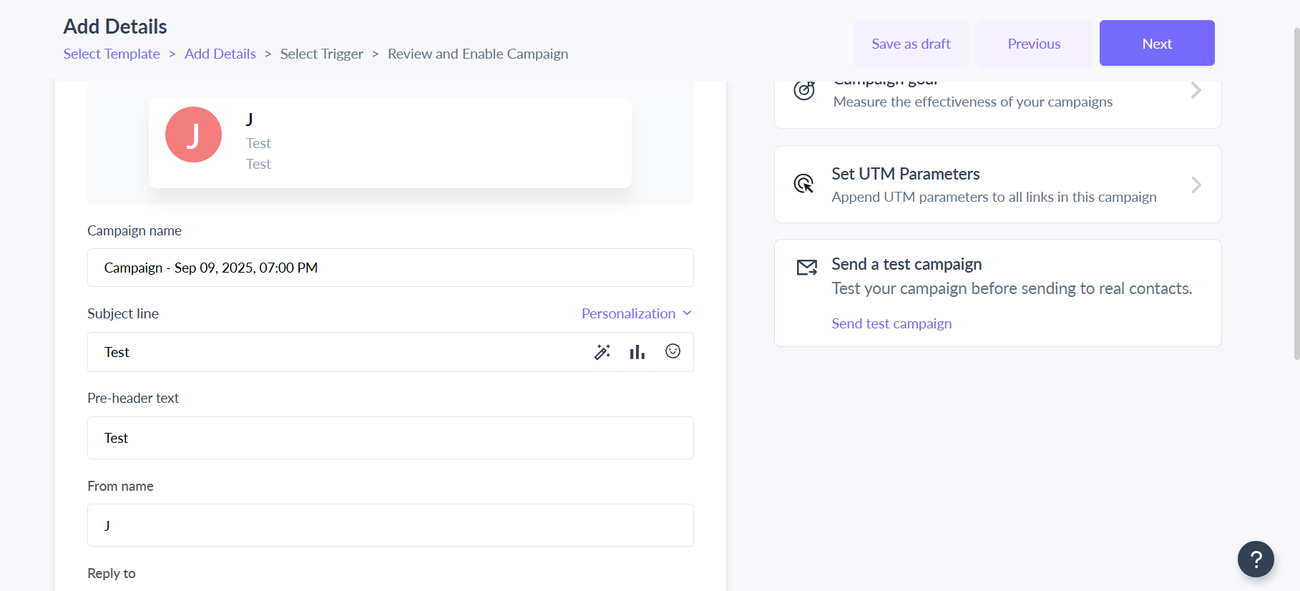
Step 6: Add Subject Line, Pre-header text, From name and Reply to email. Click on next.
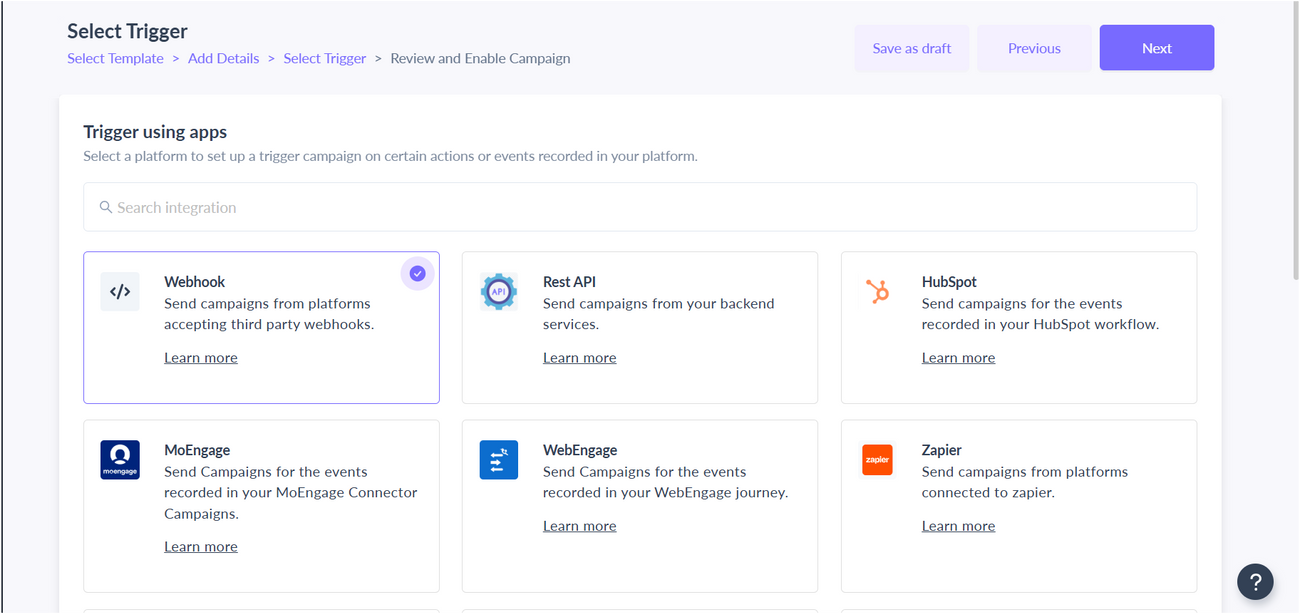
Step 7: You will be redirected to trigger on events. Select Webhook from the list of platforms. Click on next.
Step 8: Review and test your campaign. To test, click on send test campaign->enter email ID->send test email.
Once tested and reviewed, click on enable campaign.

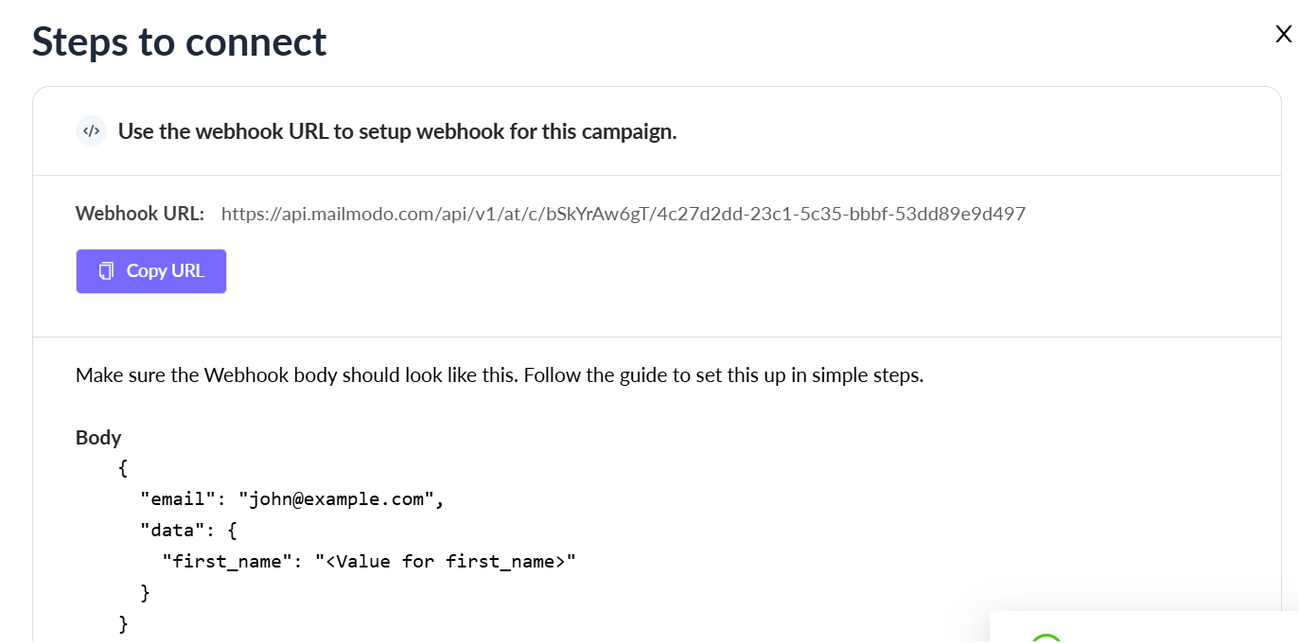
Step 9: You will be redirected to Campaign page. Select setup steps -> Click on Copy URL button. We will use this webhook url in Zoho CRM.
To access this page in future, go to trigger in the vertical menu (left side)->select the campaign-> setup steps
Zoho CRM Setup
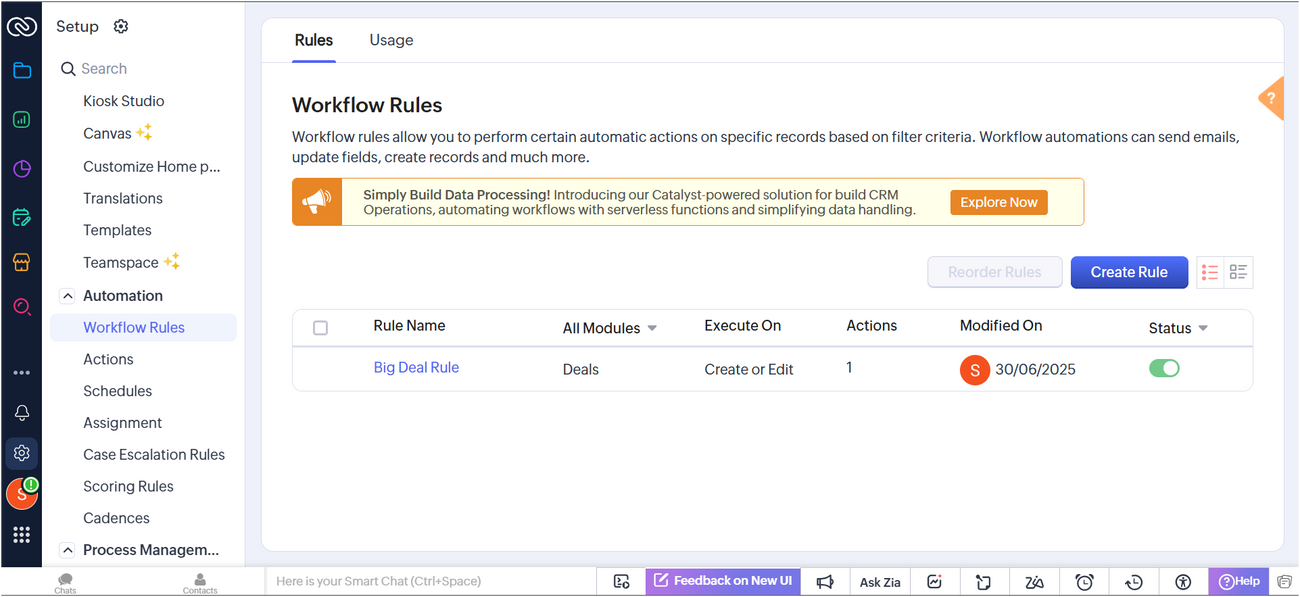
Step 1: From your Zoho CRM home page, click on Setup (Gear Icon)->Automations->Workflow Rules


Step 2: Click on Create Rule -> Select a Module, for ex -> Contacts -> Add Rule Name and Click Next

Step 3: Add an event by selecting an option for, 'Execute this workflow rule based on'.
For example, Select, 'Record action' -> Create. It would mean, You want to execute this workflow when a contact is created.


Step 4: Click Next to add conditions in the workflow. For example, here you can select, 'All Contacts', this would mean that this workflow would consider all the contacts.

Step 5: Click Next and Choose Webhook as an Instant action.
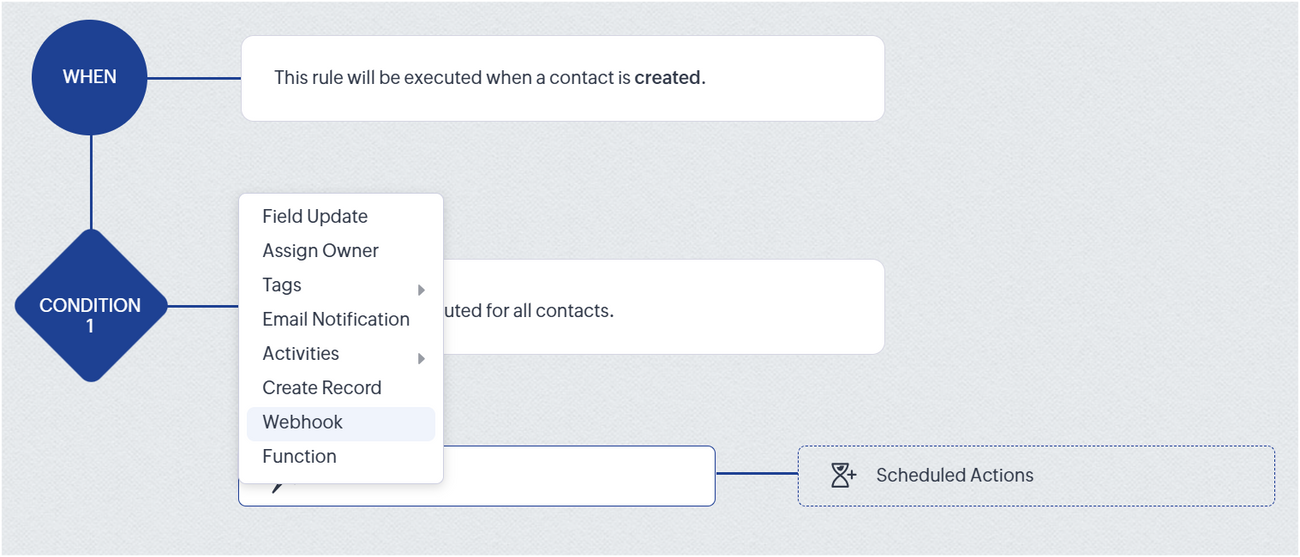
Paste the URL copied from Mailmodo's Trigger Info section. Select request Method as POST.

Step 6: Select body type as raw and format as JSON. Copy and paste the following code snippet in the body :
{ "email": "", "data": {} }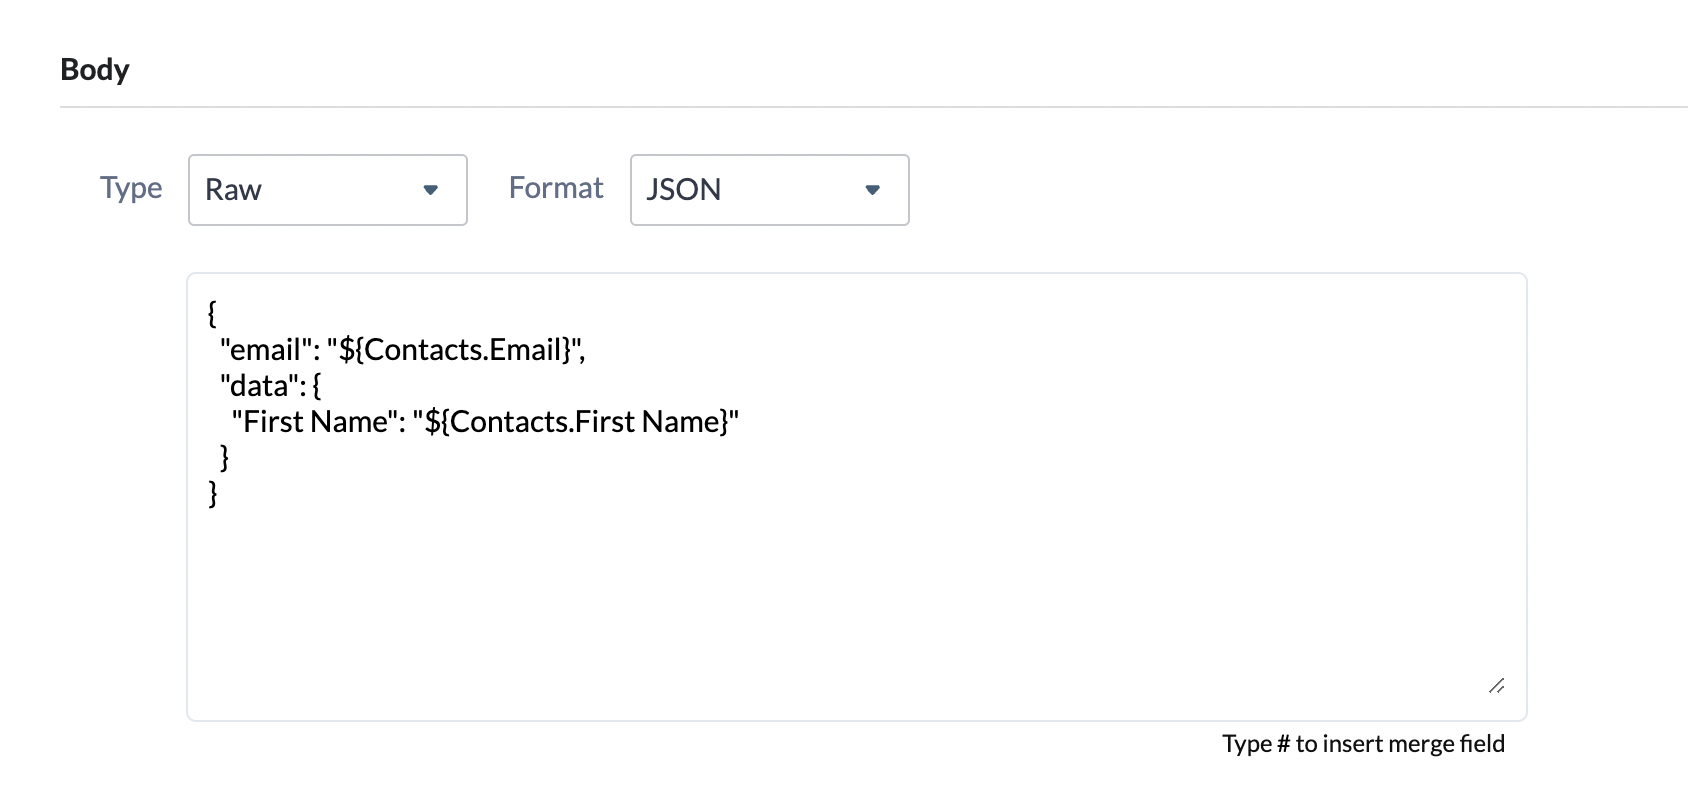
Map the respective parameters as shown in the video. Place the cursor in between the double quotes and type "#". Select the relevant user attribute from the drop-down list.
After mapping, the body should look like this:
{ "email": "${Contacts.Email}", "data": {} }The argument to “email” points to recipient emails and “data” points to the personalisation parameters.
NOTE: You can add more parameters (depending on the campaign) by adding a few extra lines of code in the “data” section.
Make sure that the key of the parameter is exactly same as the key written in the email.
For example:
{ "email":"abc@gmail.com", "data":{ "first_name":"John", “last_name”:”Doe”, “Age”:”18”, }
}
Replace the parameter ‘John’ with ‘#’ and select the appropriate field matching the parameter ‘first_name’.
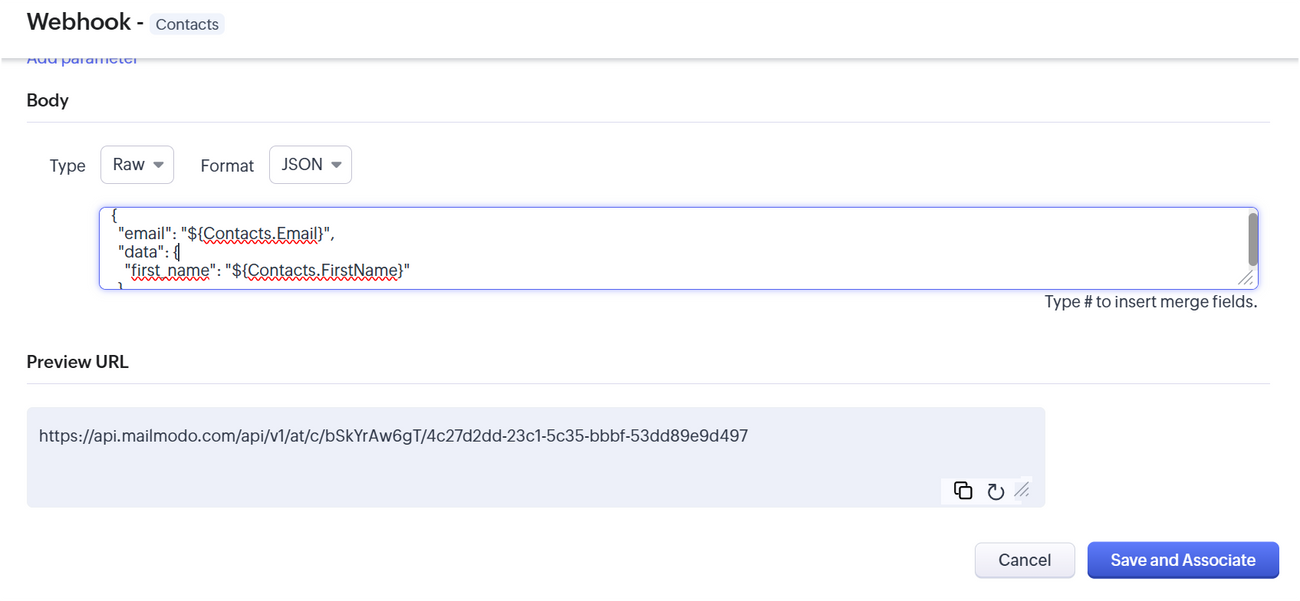
Step 7: Click on Save and Associate to complete the setup.
Once everything is configured, click on Save to set the Rule active.
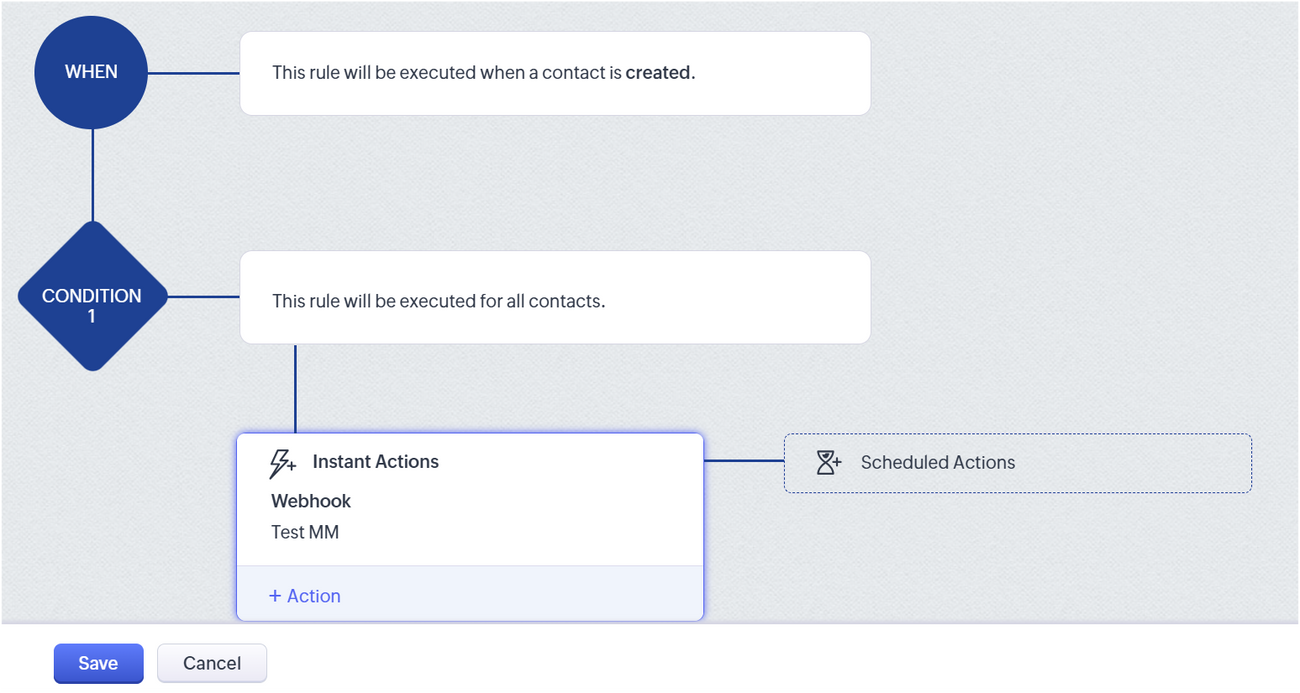
You have successfully created a trigger campaign!
You may also find these guides helpful: 1. Pass data from Zoho CRM to Mailmodo as contacts 2. Pass events from Zoho CRM to Mailmodo