How to segment contacts based on 'Custom Events'
Last updated November 5, 2025
This article takes you through the process of segmenting your contacts based on ‘Custom Events’ sent to Mailmodo
Here is our definitive guide to understanding custom events, their properties and prerequisites for sending them to Mailmodo
- Sending 'Custom Events' to Mailmodo allows you to create segments on the occurrence as well as the not occurrence of those events thereby enabling you to create targeted segments and run personalized campaigns
- You can also send event properties to filter using segments further thereby hyper-personalizing your campaigns and taking your segmentation to the next level.
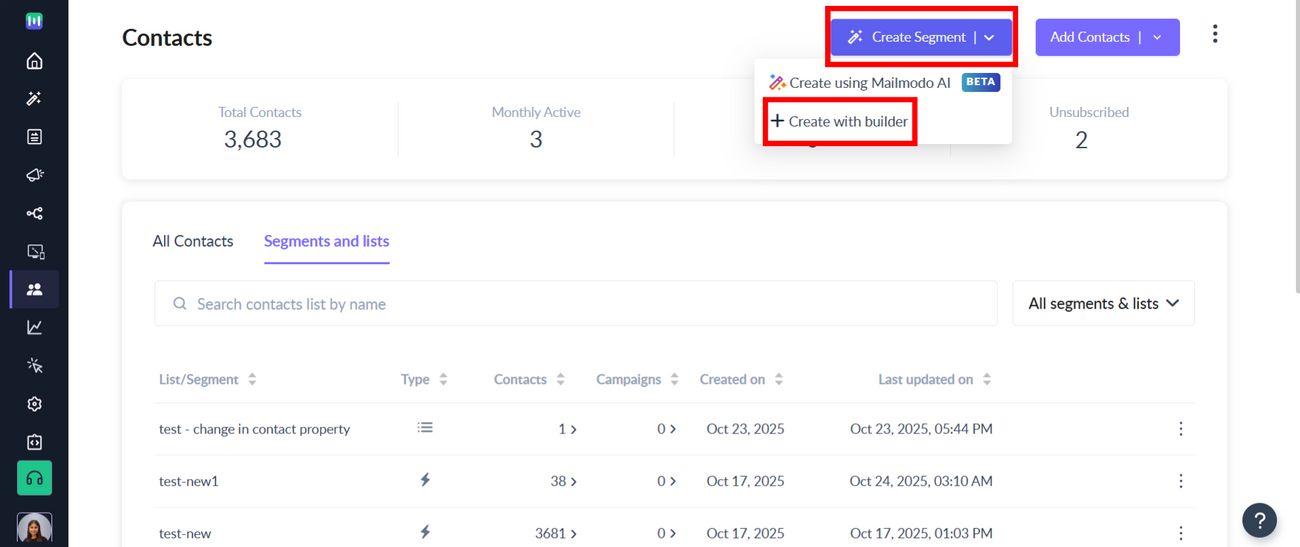
With Mailmodo AI✨, you can easily create segments based on your requirements, complex audience segments are now just a prompt away! Try it out today.

Segmenting contacts using custom events manually:
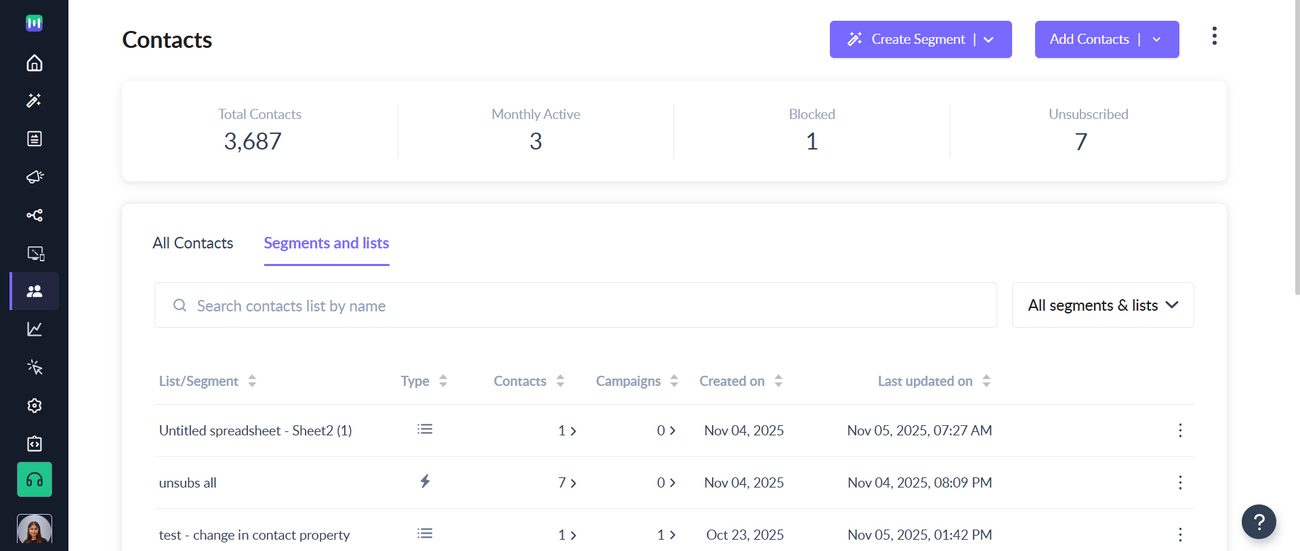
Step 1: Go to the Contacts Page.
Step 2: Click on Create Segment -> Start from scratch.
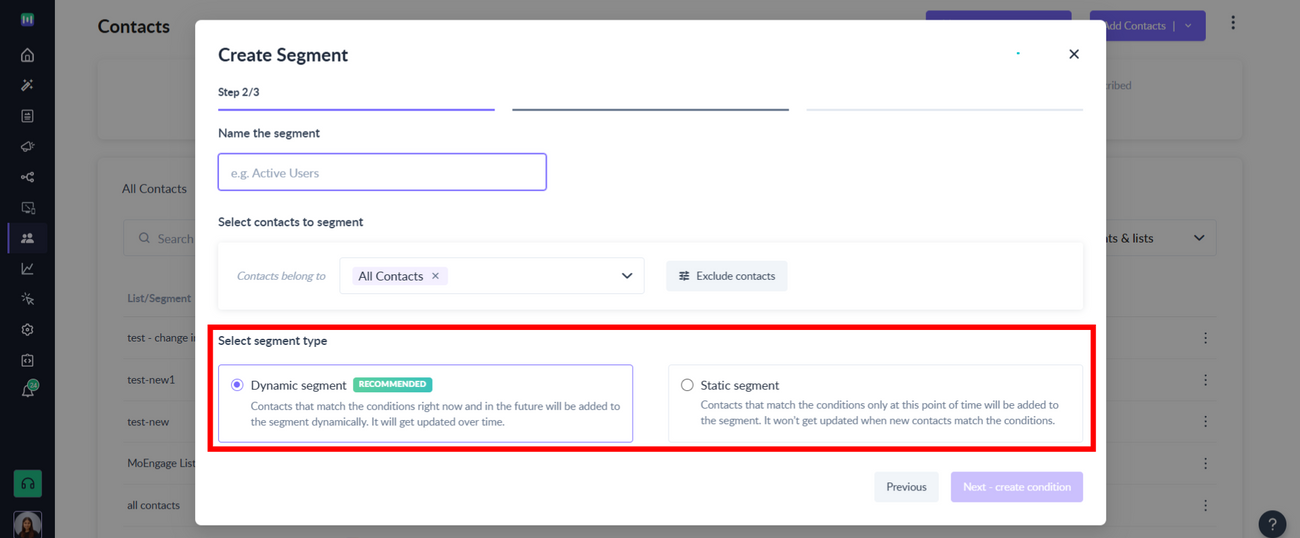
Step 3: Enter the name of your choice in the Name Segment field.
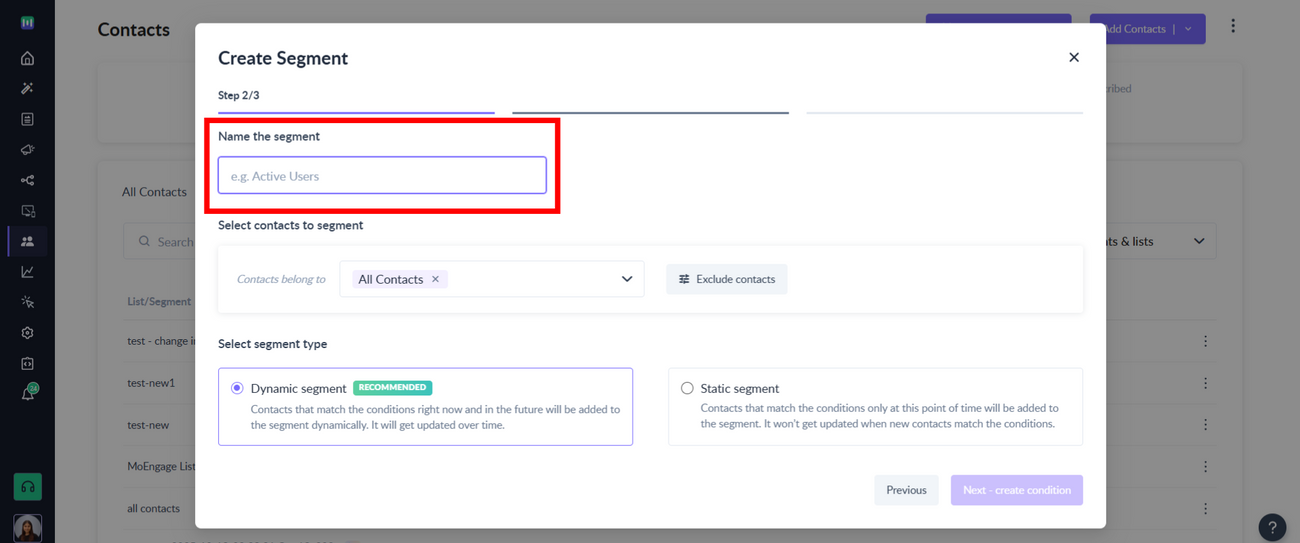
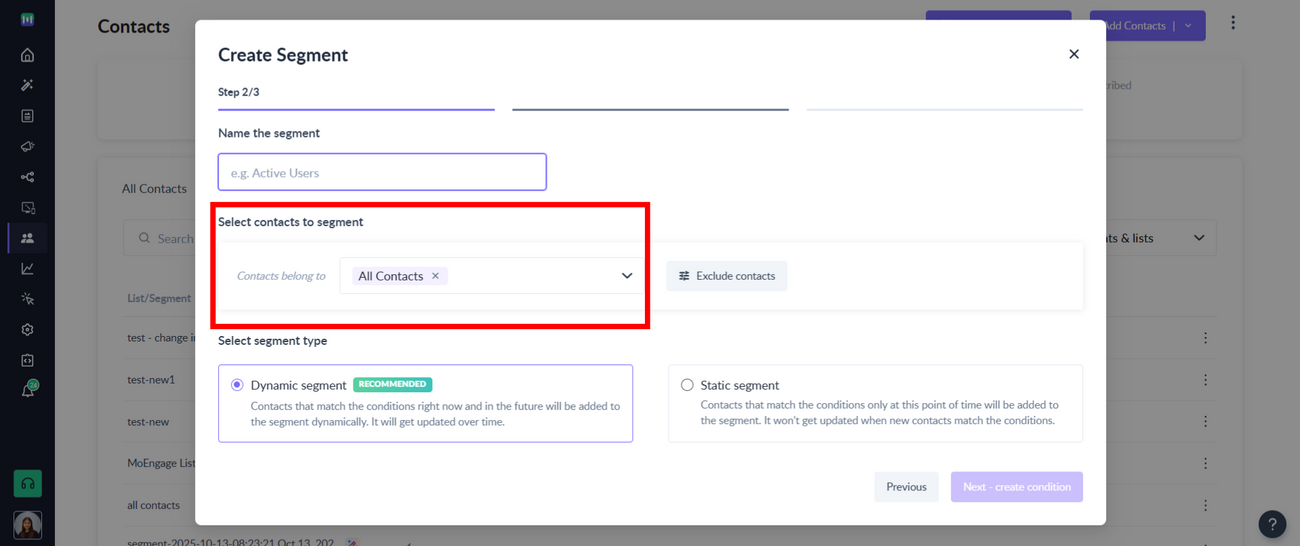
Step 4: Use All Contacts or choose contacts of your choice to Segment from the Choose contacts to segment dropdown.
Step 5: Choose Dynamic or Static Segment as per your requirement in the Select segment type section and Click on Next.
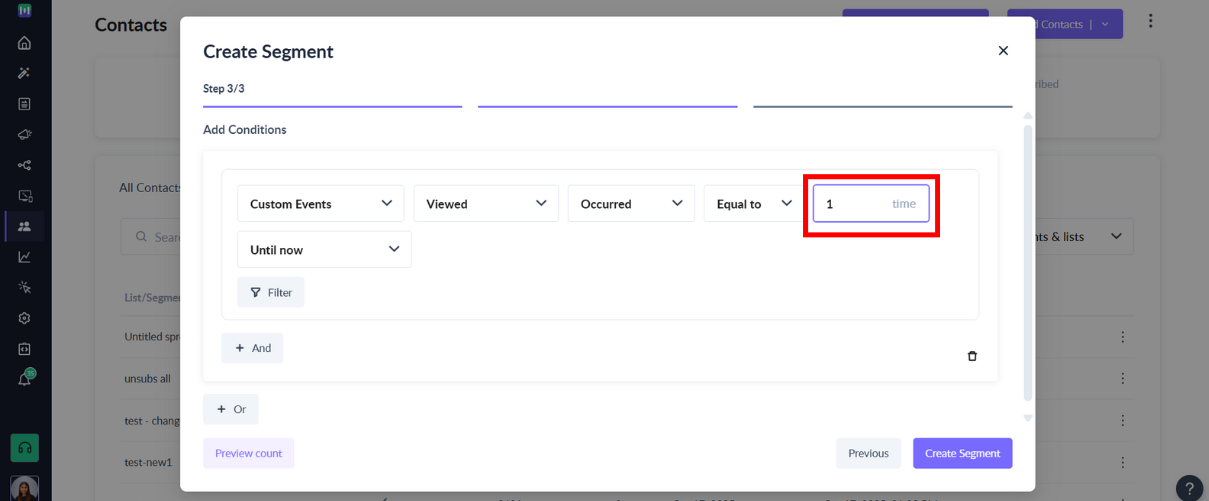
Step 6: Choose Custom Events in the Select Condition drop down inside the Create Conditions section.
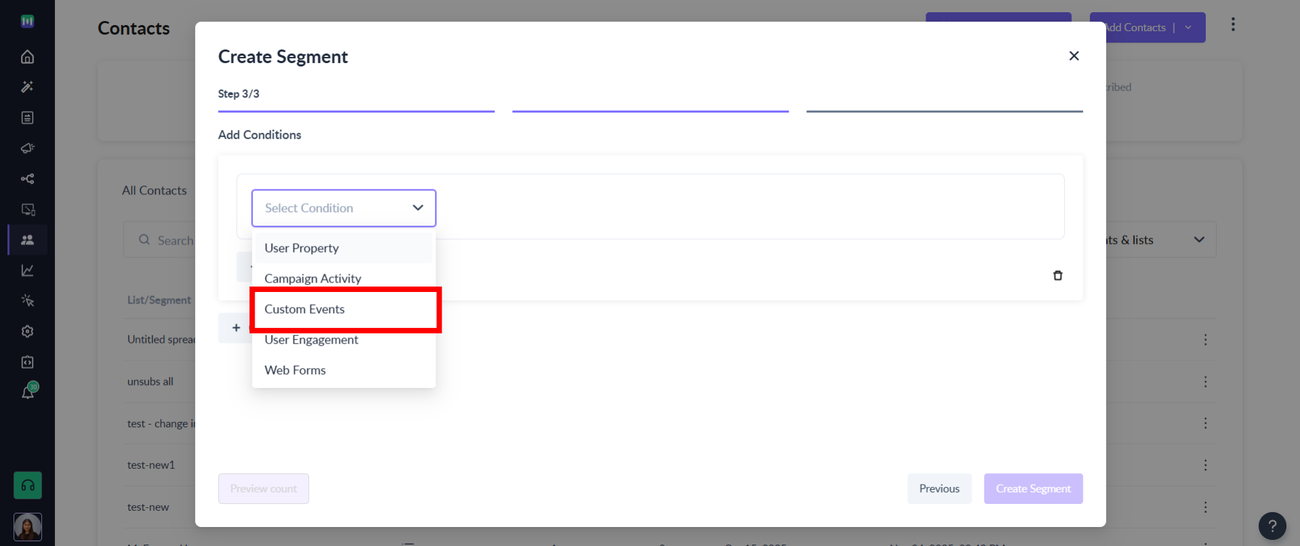
Please visit the Add Event API documentation for more information on sending events to Mailmodo.
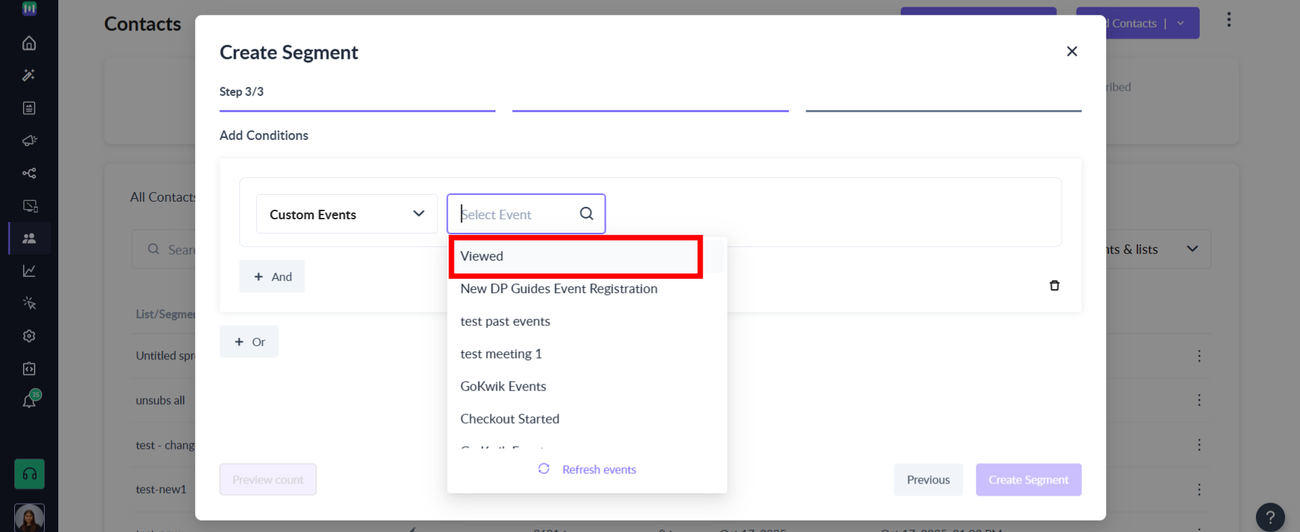
Step 7: Select the event using which you want to segment users from the list of all the events you’ve sent to date from the Select Event dropdown.
Step 8: Now, you can filter the segment further using Occurred and Not Occurred conditions from the next dropdown.

Step 9: Select from At least, At most, More than, Less than, and Equal to from the Select Operator drop-down to add the number of times of occurrence of the event. Note: This step will not be shown if you select Not occurred in the previous step.
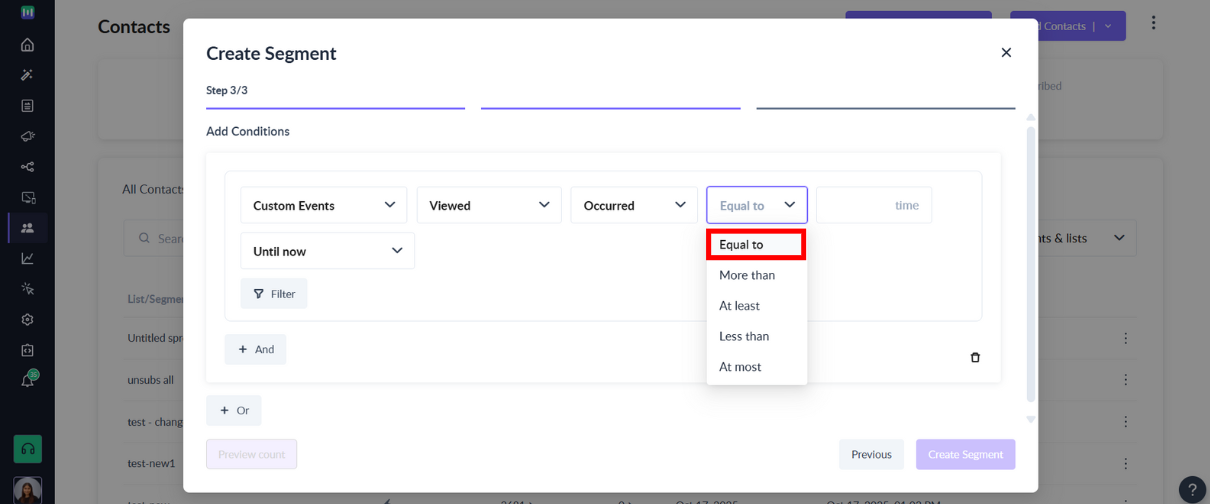
Step 10: Enter the number of times of occurrence of the event as per your requirement.
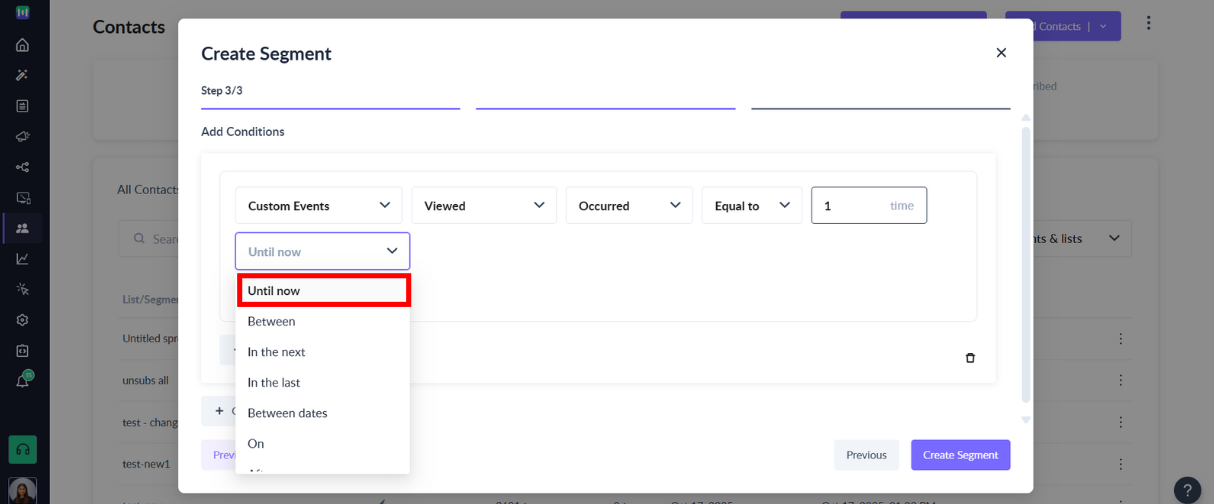
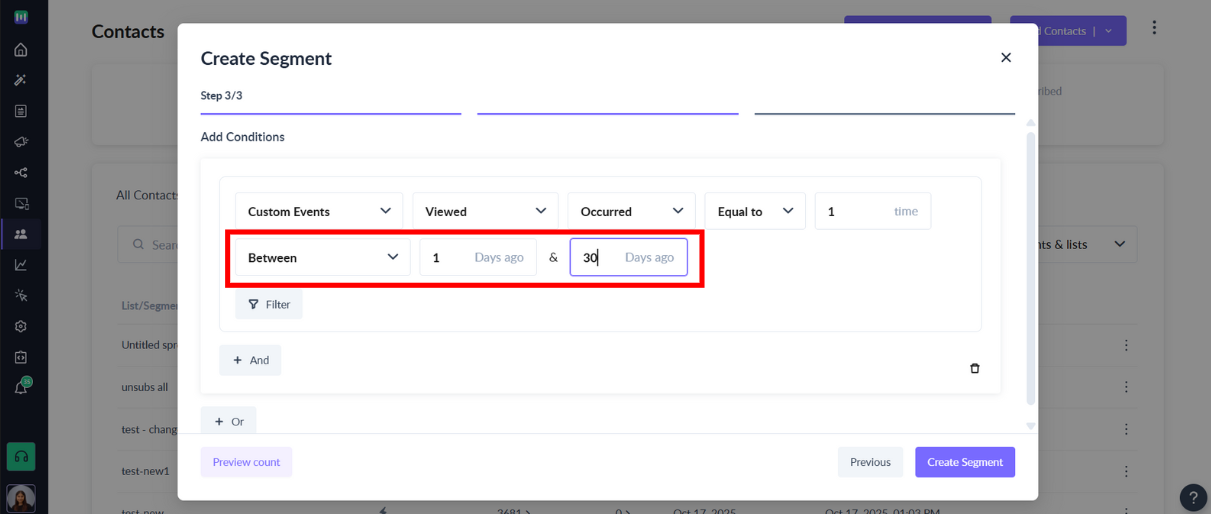
Step 11: You can filter the segment further using Until now, In the last, Between, and Between dates from the Select Range dropdown.
Step 12: Enter the value/s as per your requirement if you’ve selected In the last, Between, and Between dates in the last step
- In the last- Number of days
- Between- Number of days and Number of days
- Between dates- Range of dates
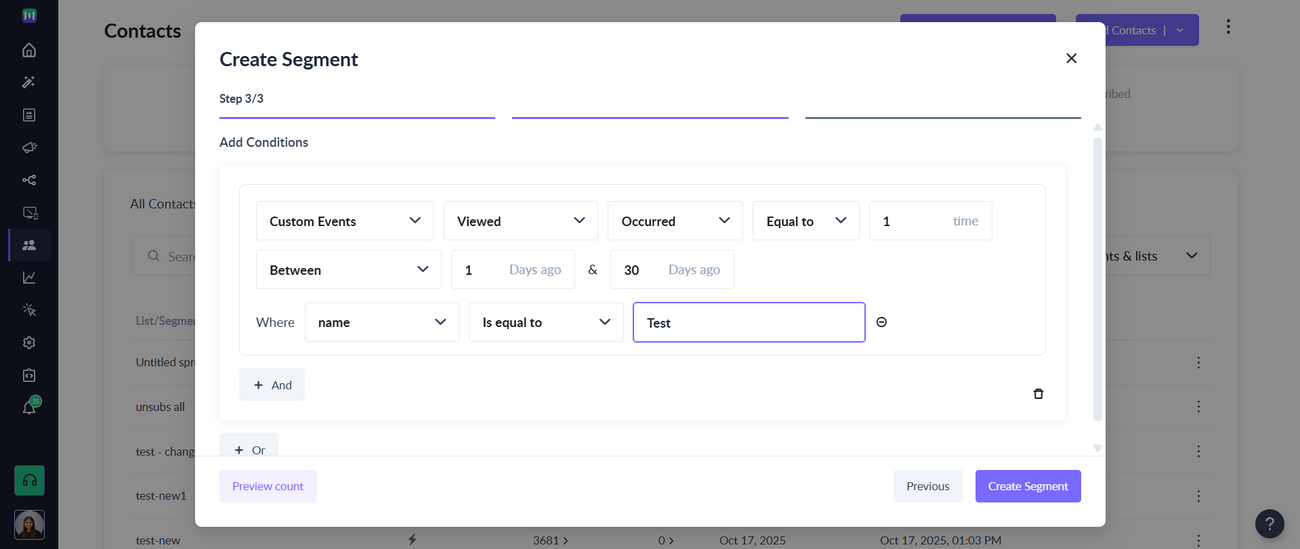
Step 13: You can also filter the segment further using event properties sent for the event selected by clicking on Filter.
Step 14: Select the property as per requirement from the list of properties sent against the event in the Select Property dropdown.
Step 15: You can use filter to filter out events based on contact property.
Step 16: Click on Create Segment.
Please note that you can also use the AND and OR operators to add more conditions as per your requirement.

Please visit this section for more information on all the filtering options available for Segmentation
You’ve now successfully created a segment using Custom Events which will be available in the Segments/lists tab.