How to trigger campaigns via Webhooks
Last updated June 16, 2025
You can send campaigns from Mailmodo, triggered by events recorded in any third-party platform. For this, you just need to configure Mailmodo's pre-authorised webhook. Here is the step-by-step process to do so.
Prerequisites: The third-party platform should accept webhooks.
Step-by-step guide to trigger campaign via Webhook
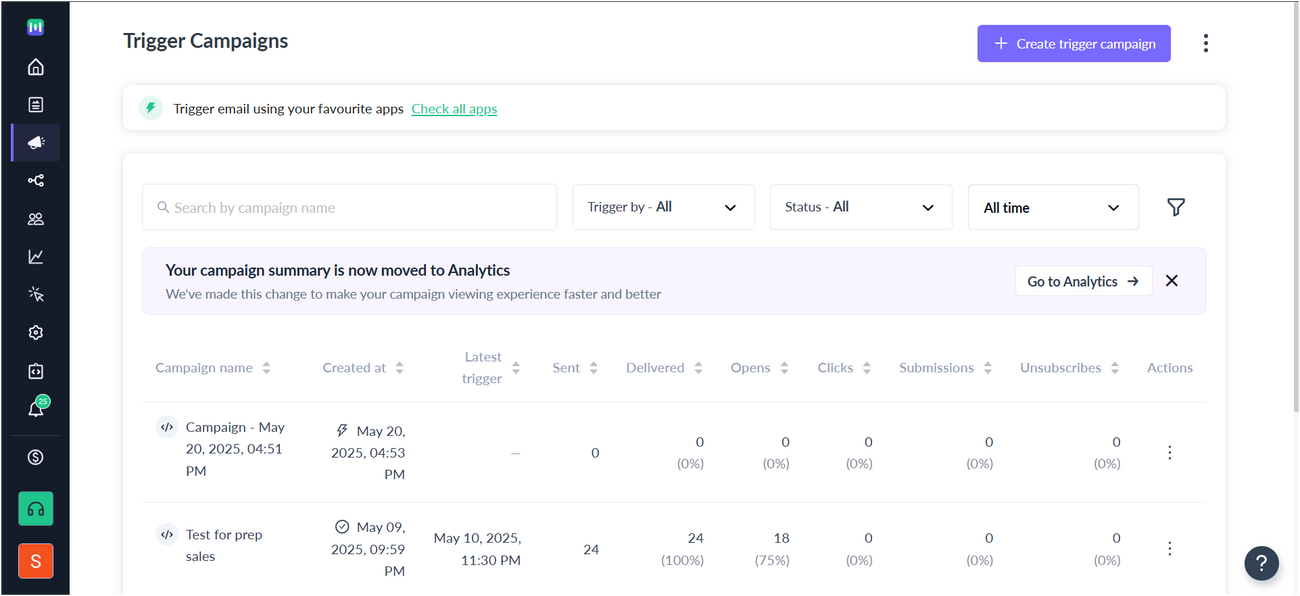
Step 1: Go to Trigger from the vertical menu on the left. Click on Create trigger campaign.
Step 2: Select a pre-existing template or create a new template. Click here to learn how to create a template in Mailmodo.
Step 3: Give your campaign a suitable name. Add a Subject line, Pre-header Text, From Name, and Reply To Email. Select sender email. Click on Next.
Step 4: Select Webhook as the external trigger.
Step 5: Review and test your campaign. To test, click on send test campaign->enter email ID->send test email.
Once tested and reviewed, click on enable campaign.
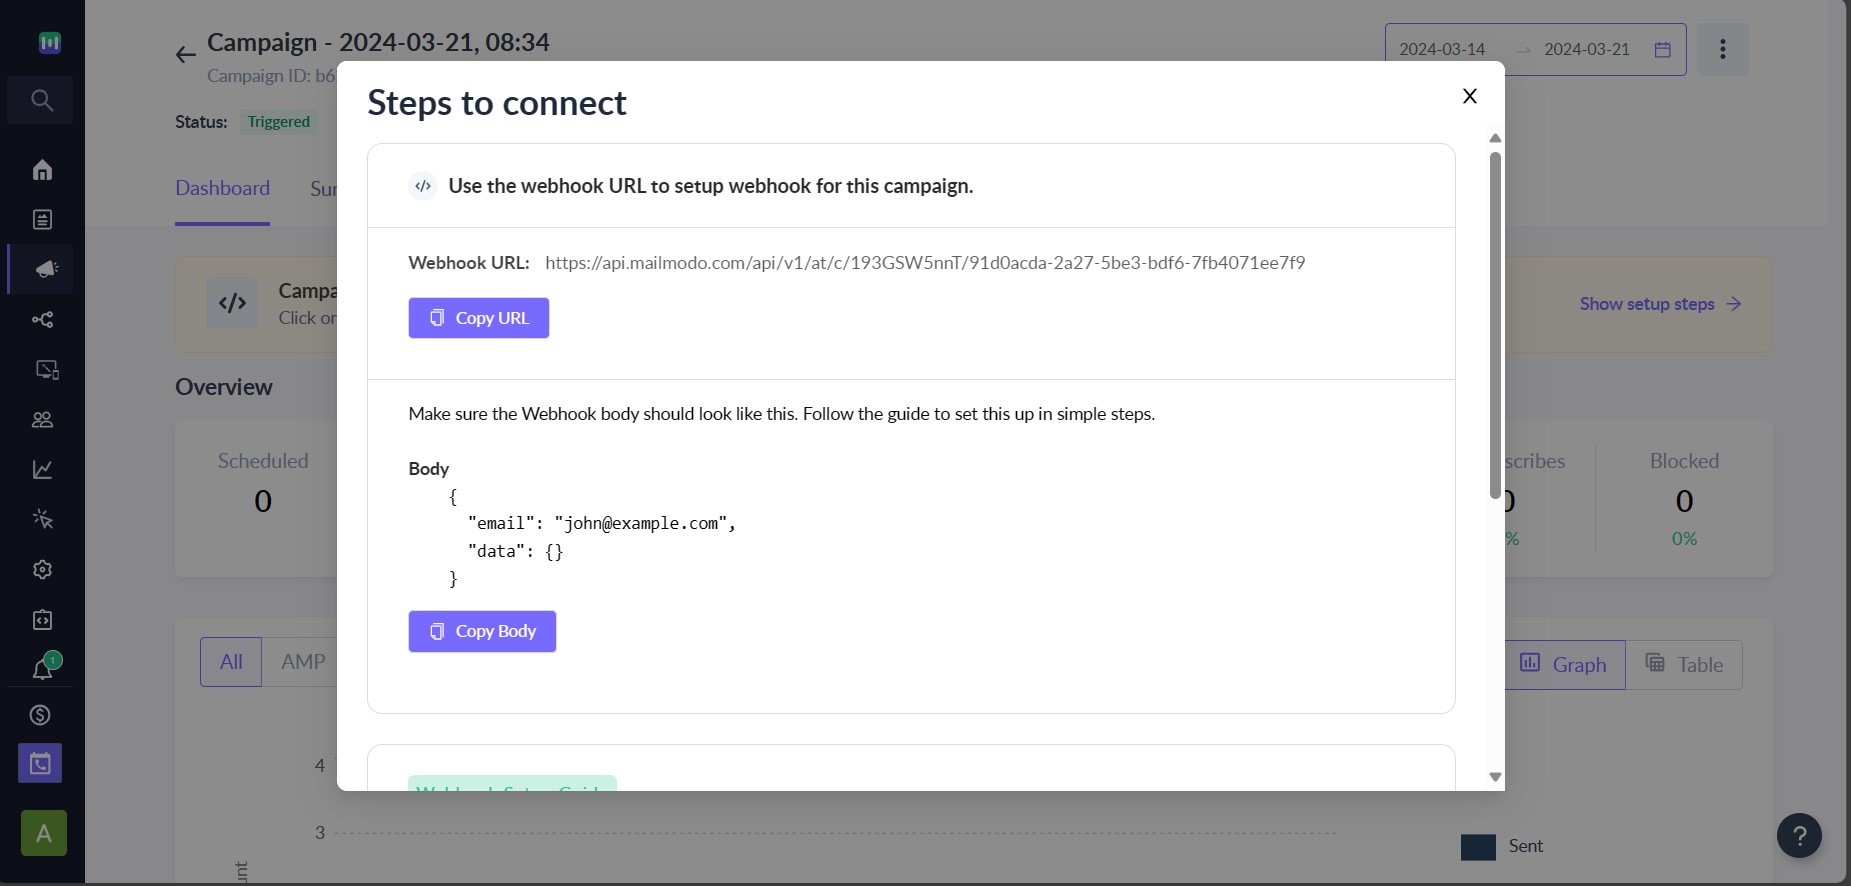
Step 6: A Webhook URL will be generated which can be accessed from setup steps. Click on Copy URL.
Step 7: Create a workflow/journey in the platform of your choice. Select the event which will trigger the journey. Select the Action as ‘trigger webhook’/ ‘webhook’ / ‘call API to set up the Webhook'.
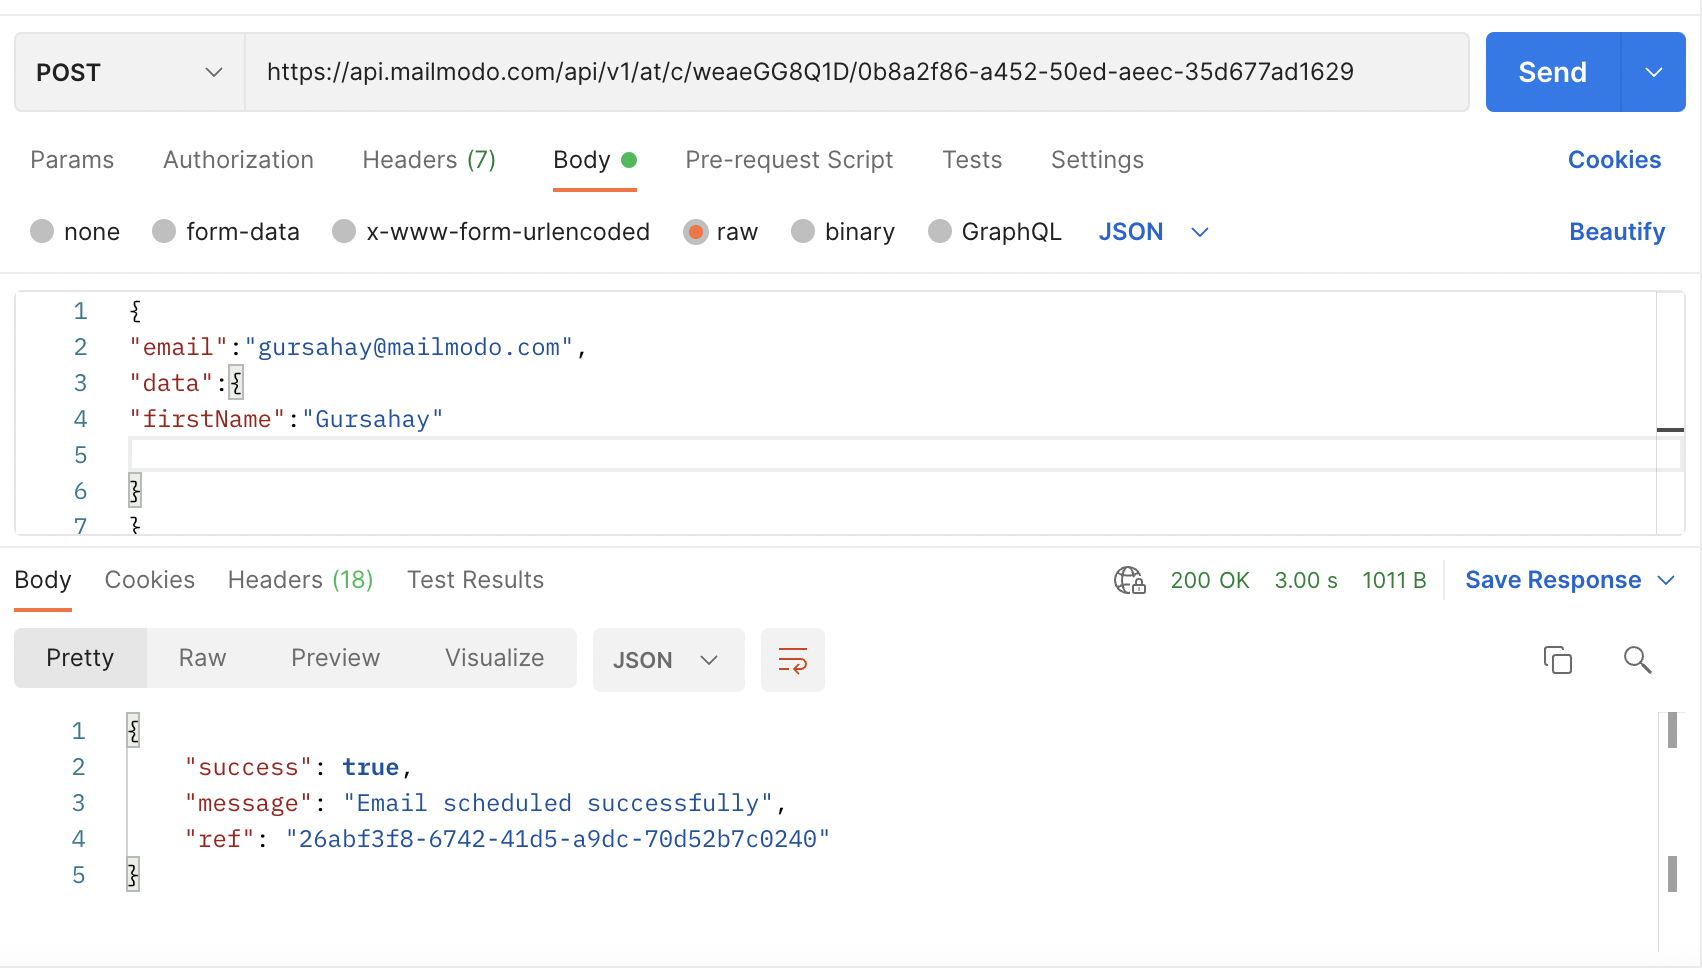
Step 8: Select the request type as POST. Paste the webhook URL copied from Mailmodo.
For the purpose of this tutorial, we are going to trigger this webhook via Postman.
Step 9: Select the body type as raw/custom payload. You need to set the body of the webhook in the following format-
{ "email": "john@example.com",
    "data": {
        "first name": "<Value for first name>",
        "personalization_text": "<Value for personalization_text>"
    }
}
The argument to “email” points to the recipient's email and “data” points to the personalization parameters.
The body is in JSON format. Each parameter has a key-value pair. "Email" is the key "john@example.com" is the value.
Step 10: To map the right attributes/properties of the payload, you need to either click ‘@’/'#', or locate the ‘personalization’ option in the platform.
The personalization method is different for different platforms. It is advised to consult the help doc for configuring the webhook.
It is important to make sure that the attributes/properties in the structure are mapped properly.
You can add other personalization parameters in the "data" section. Make sure that the key of the parameter is exactly the same as the key written in the email campaign.
For example:
{ "email": "abc@gmail.com",
    "data": {
        "firstName": "John",
        "lastName": "Doe",
        "Age": "18"
    }
}
Step 11: To test the webhook, enter your email id against the "email key". Enter your name against the "first_name" key. Test your webhook by clicking on Send.
The email should be scheduled successfully. You will receive the email in your inbox.
Here, the webhook was triggered by us. In your actual workflow/journey, the webhook will be triggered by an event recorded in the third-party platform. For eg. When a new user subscribes, a welcome email will be sent to them.
You are all set to send campaigns triggered by webhooks!
Check our trigger campaigns category to learn how to send trigger campaigns from your favorite platforms like WebEngage, Clevertap, Zoho, and much more!
If you face any problem then reach out to us at Mailmodo Support or share your thoughts at Mailmodo Product Feedback .


