

Getting started with Pop-up forms
Last updated August 6, 2024
Pop-up forms is currently available for Pro plans and above but if you are really interested to get access. Please reach out to our support team or your account manager incase you are already a customer.
Adding pop-up forms to your website can boost email subscriptions and attract potential customers. They are effective for promoting deals, announcements, and guiding user actions like newsletter sign-ups. When designed and targeted well, pop-ups enhance user experience by providing timely information without being intrusive.
In this article, we'll learn how to create and publish a pop-up form to convert visitors into subscribers and showcase offers.
You can customise and deploy these forms on landing pages, websites, and Shopify stores, and nurture subscribers with automation to build customer loyalty.
Video Guide
To save your time, we have added a quick video guide to walk you through the steps and get you started.
Navigating to Pop-up form builder
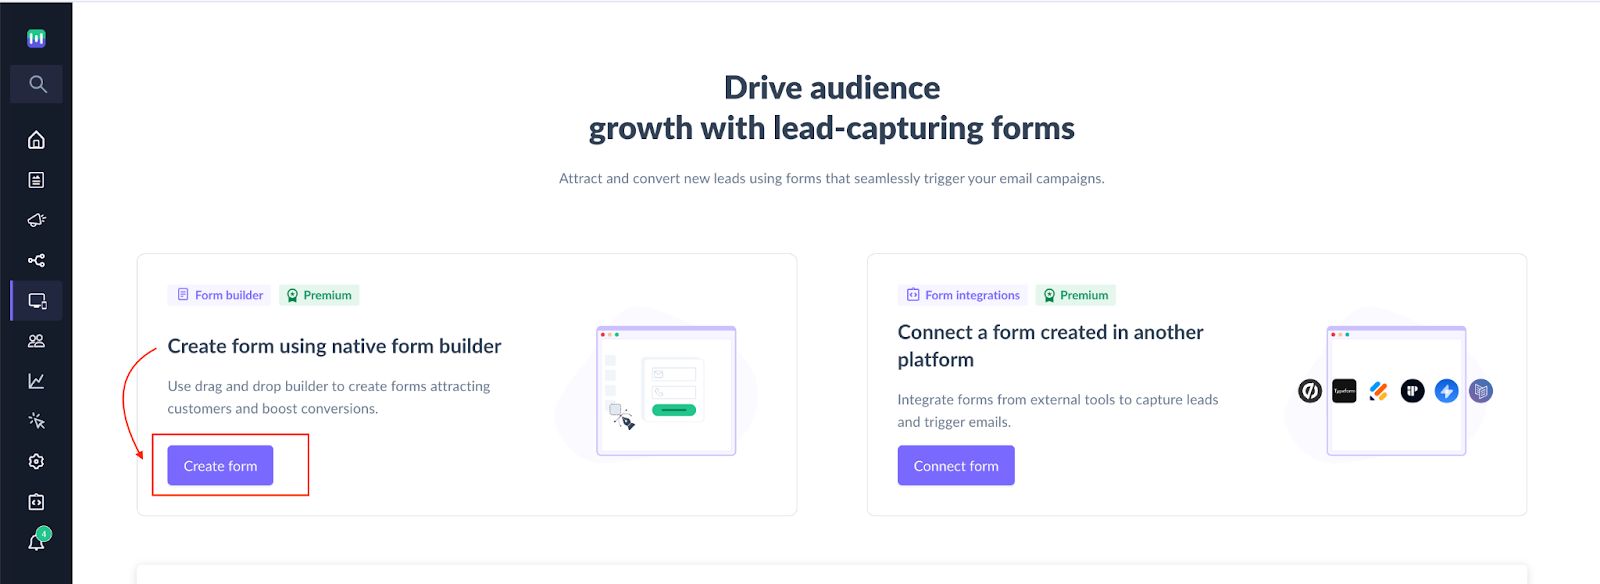
To start creating a pop-up form, you’ll first need to open the form builder.
Step 1: Go to Pages and Forms → Pop-up forms in the main navigation.

Step 2: To open the form builder, click on “Create form”.
Your form builder will load up and you can get started.
Designing your pop-up form
Step 1: The next step is to choose from a variety of templates or start from scratch to design a pop-up form that aligns perfectly with your website's branding and style.
If you choose to build from scratch, you can use the different elements in the form builder to customise the pop-up form as per your need.

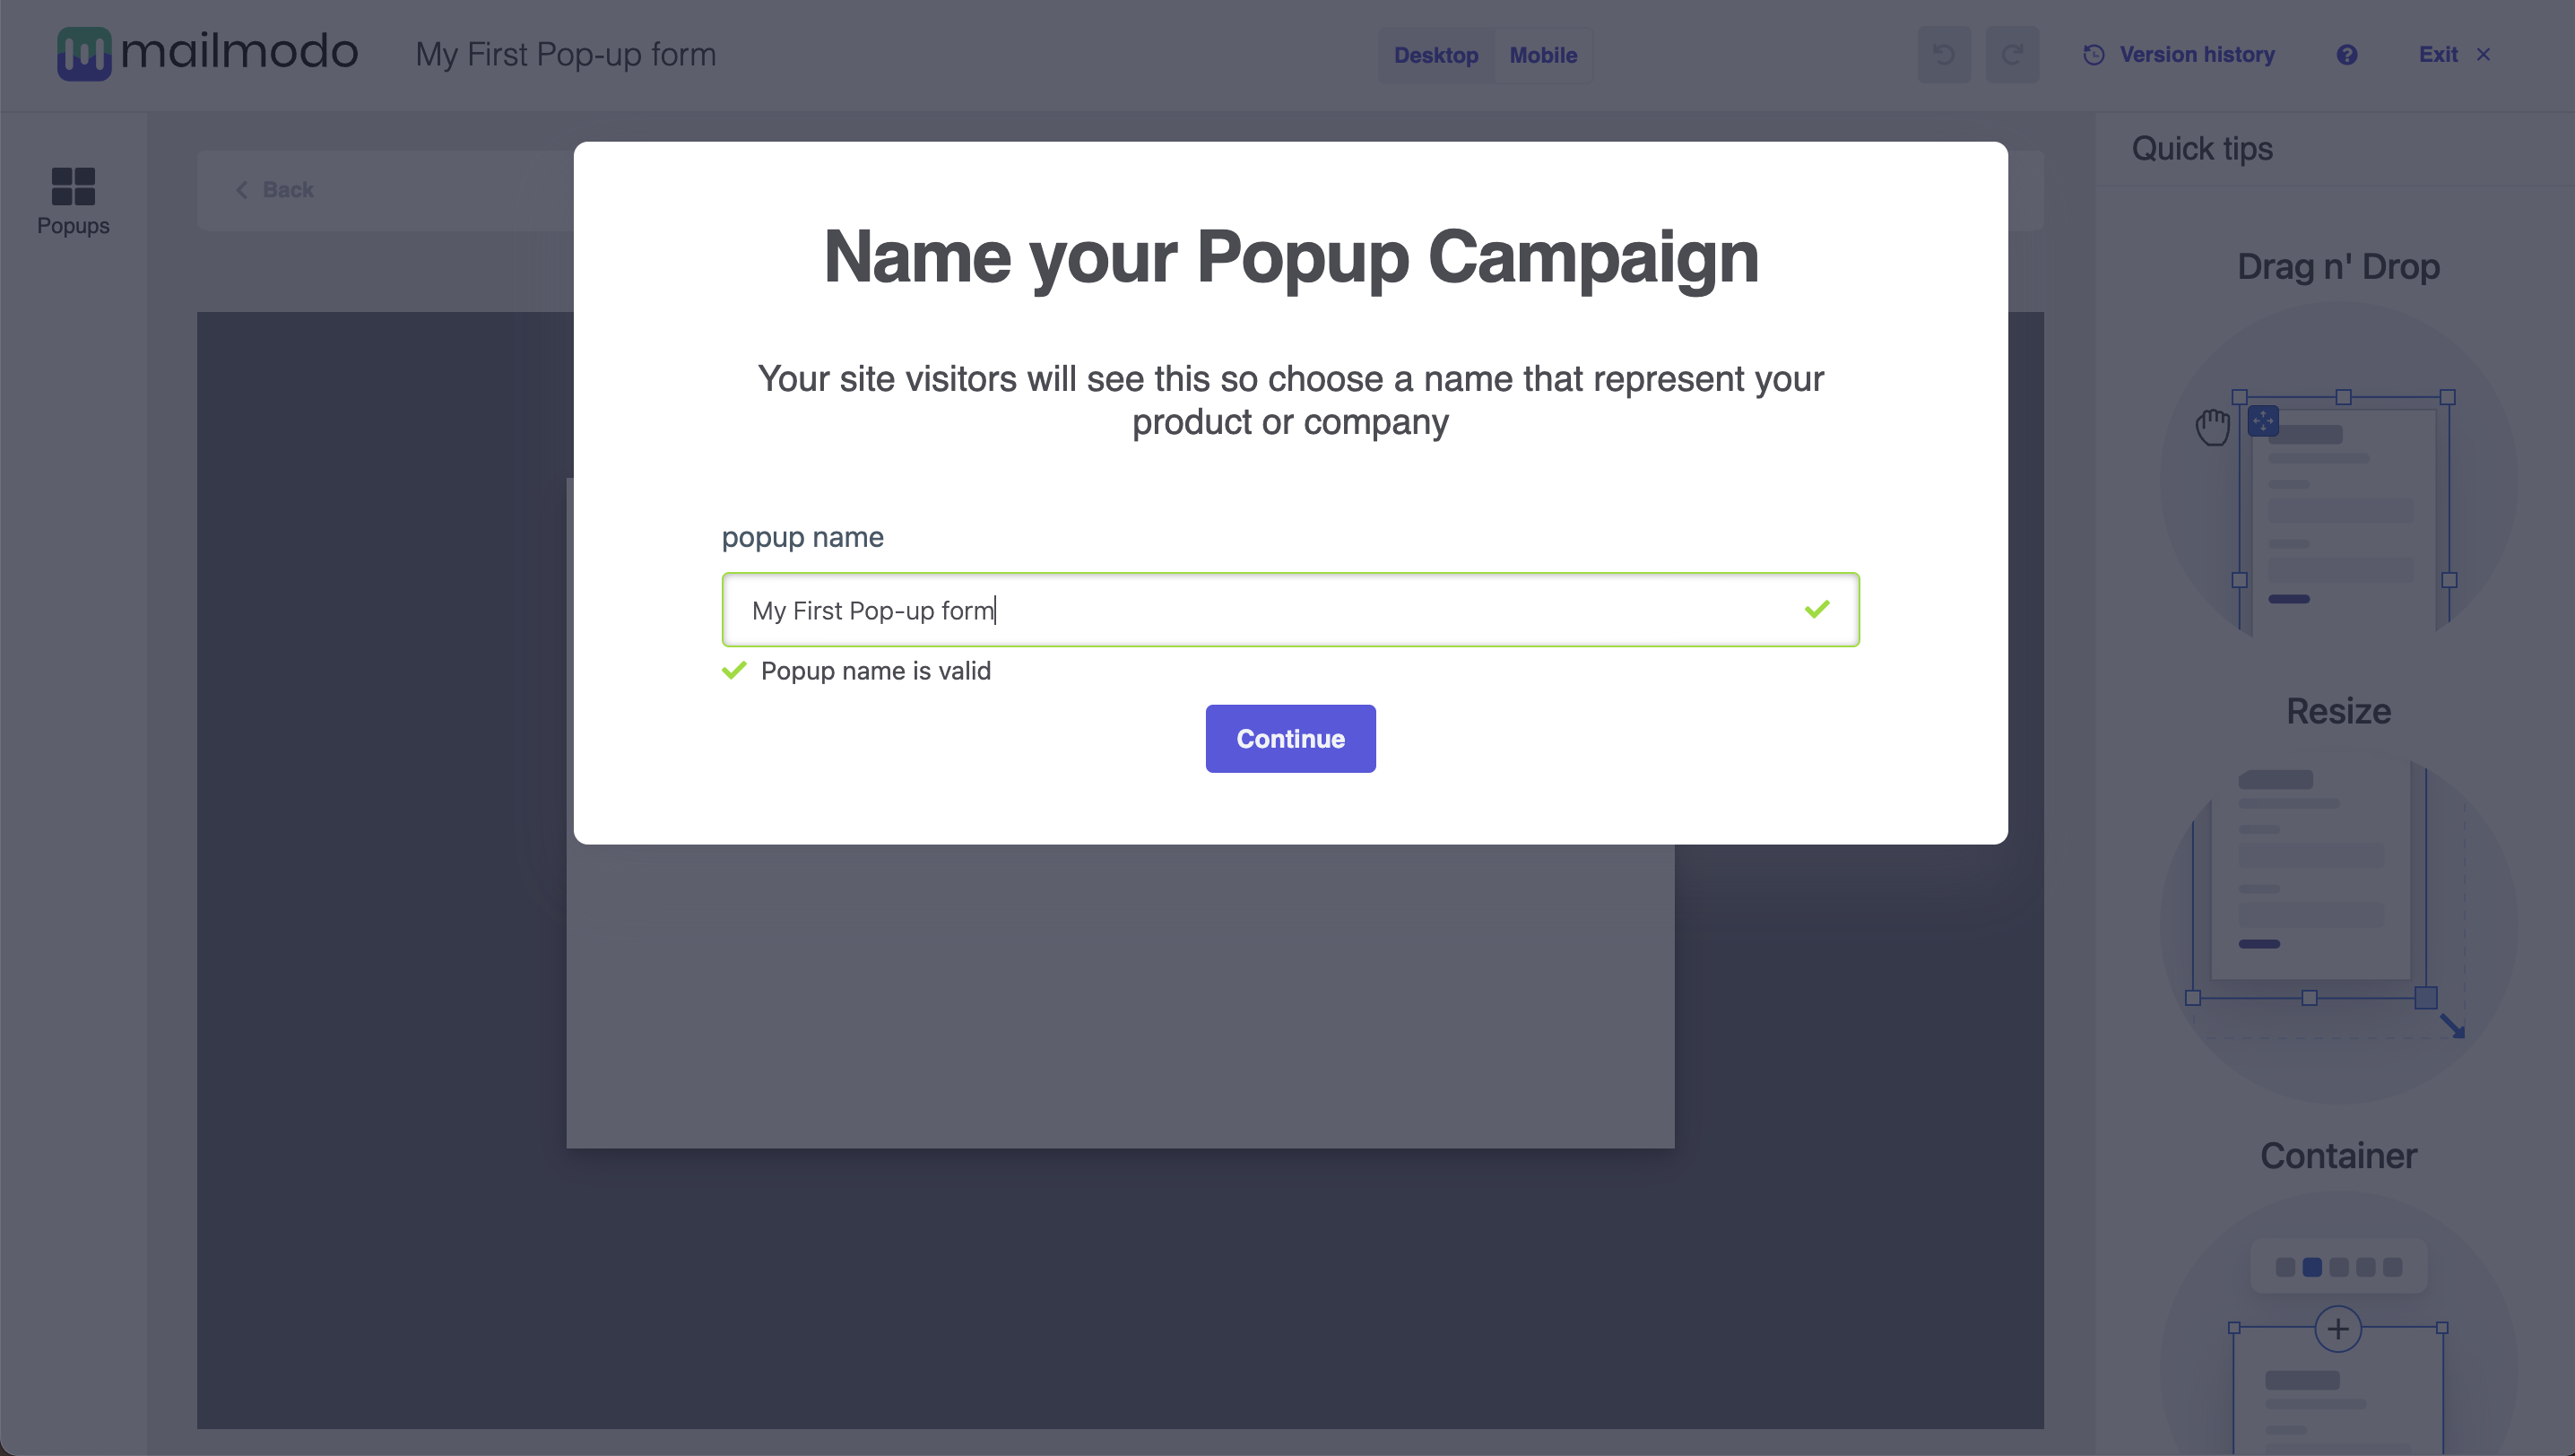
Step 2: Once you take any of the step, the next thing to do is to name your Pop-up form. Enter your Pop-up form name and click on Continue.
Step 3: Using elements
- You can also use different elements present in the form builder. The builder provides a good mix of basic and advanced elements.
- With basic elements like "Add image" and "Add video", most of your requirements would be met, but for folks who like to be more technical, the builder provides a "Code snippet" element as well to add your own custom CSS and JS code.
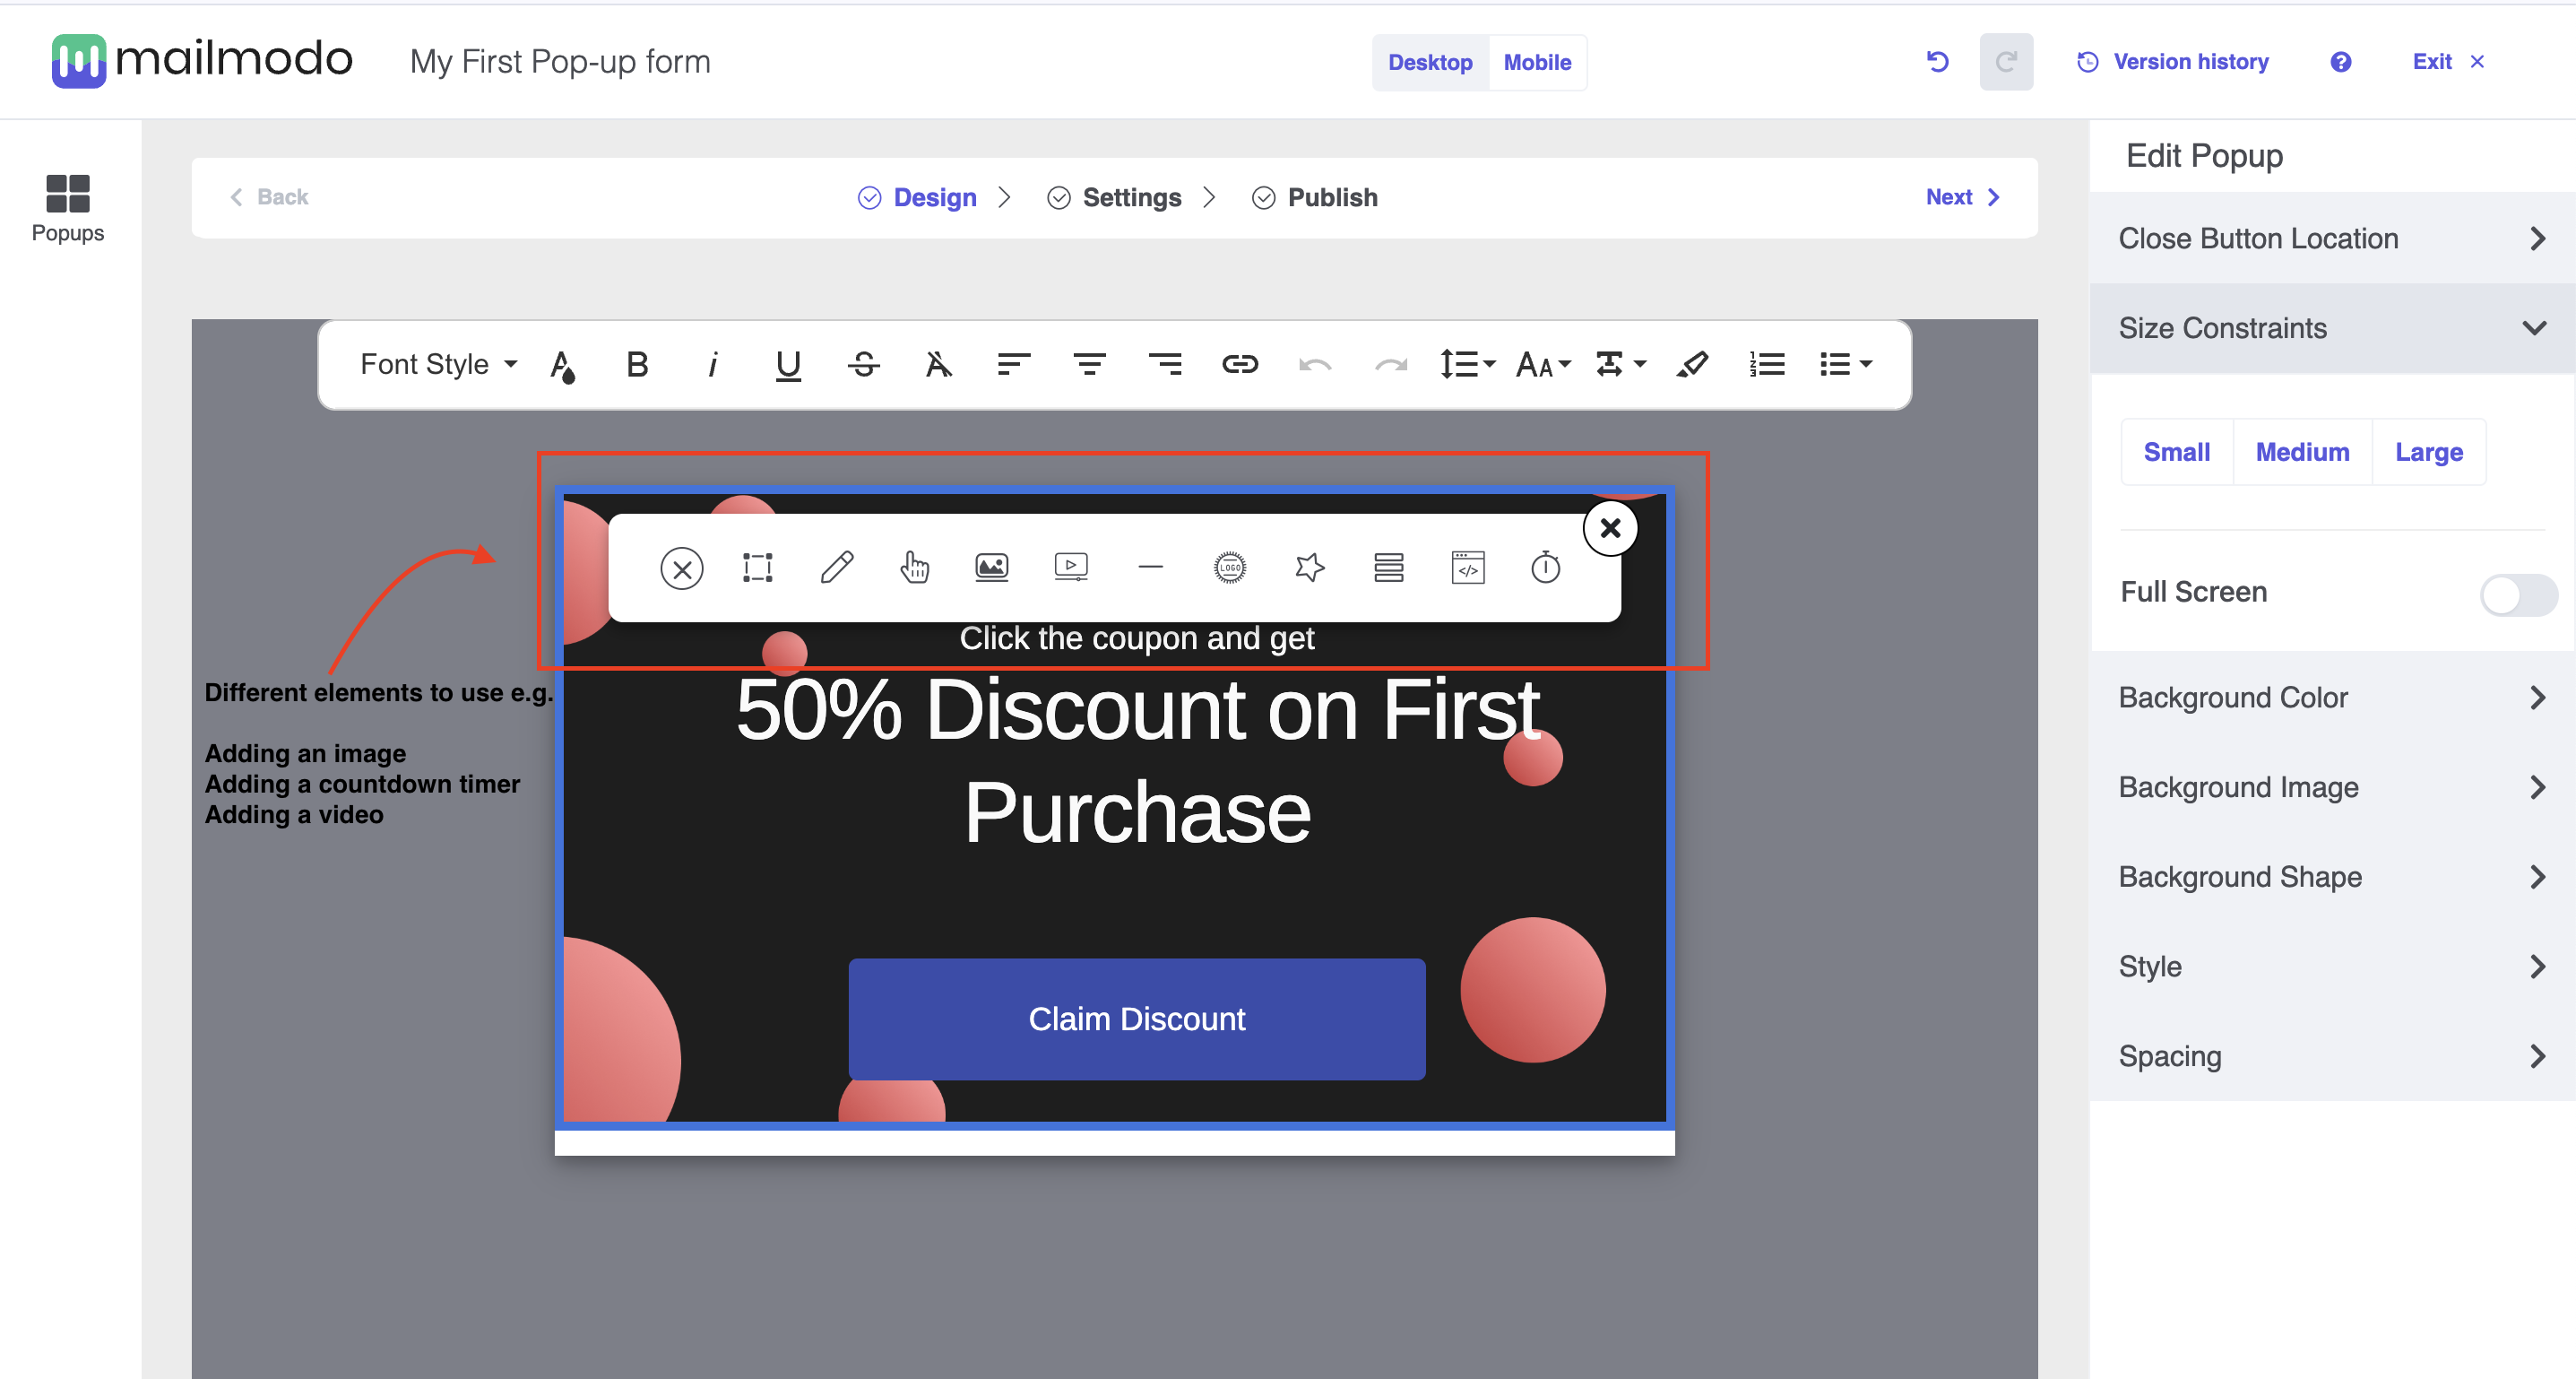
- We also have some cool elements as well - like the countdown timer, which you can use to create a sense of urgency on your pop-up. This is a handy way to drive more sales and subscription when you publish a popup form on your website.
- You can customise parts of elements and your form such as BG color, shade, size and other things. It's best to try these things out in the builder itself to play around and customise the form as per your design language.
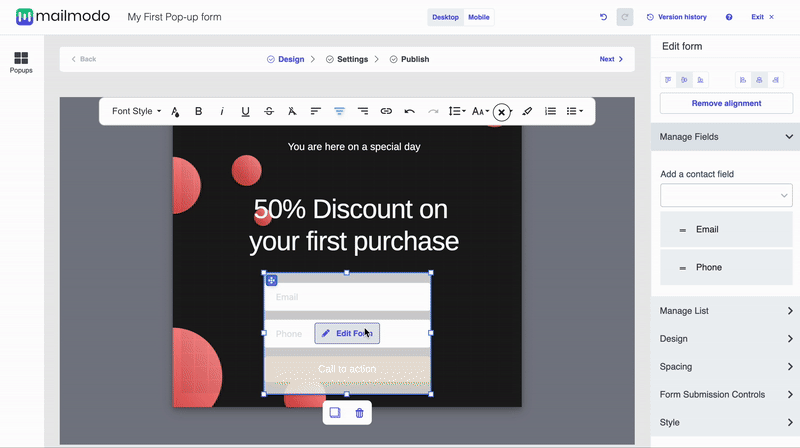
- For adding a form element, it's crucial to select the contact fields like email or anything else you want to capture. You also need to select the list from a dropdown. All your submissions will be added in this list. P.S. We show all the lists that you created in Mailmodo and you can create a new one as well.
Setting up your pop-up form
Setup different rules to decide how, when and for whom your pop-up form will appear
1) Audience
Let's you decide about who should be seeing this popup form, this is referred to as targeting. You can do so based on Visitor Types or Traffic Sources.
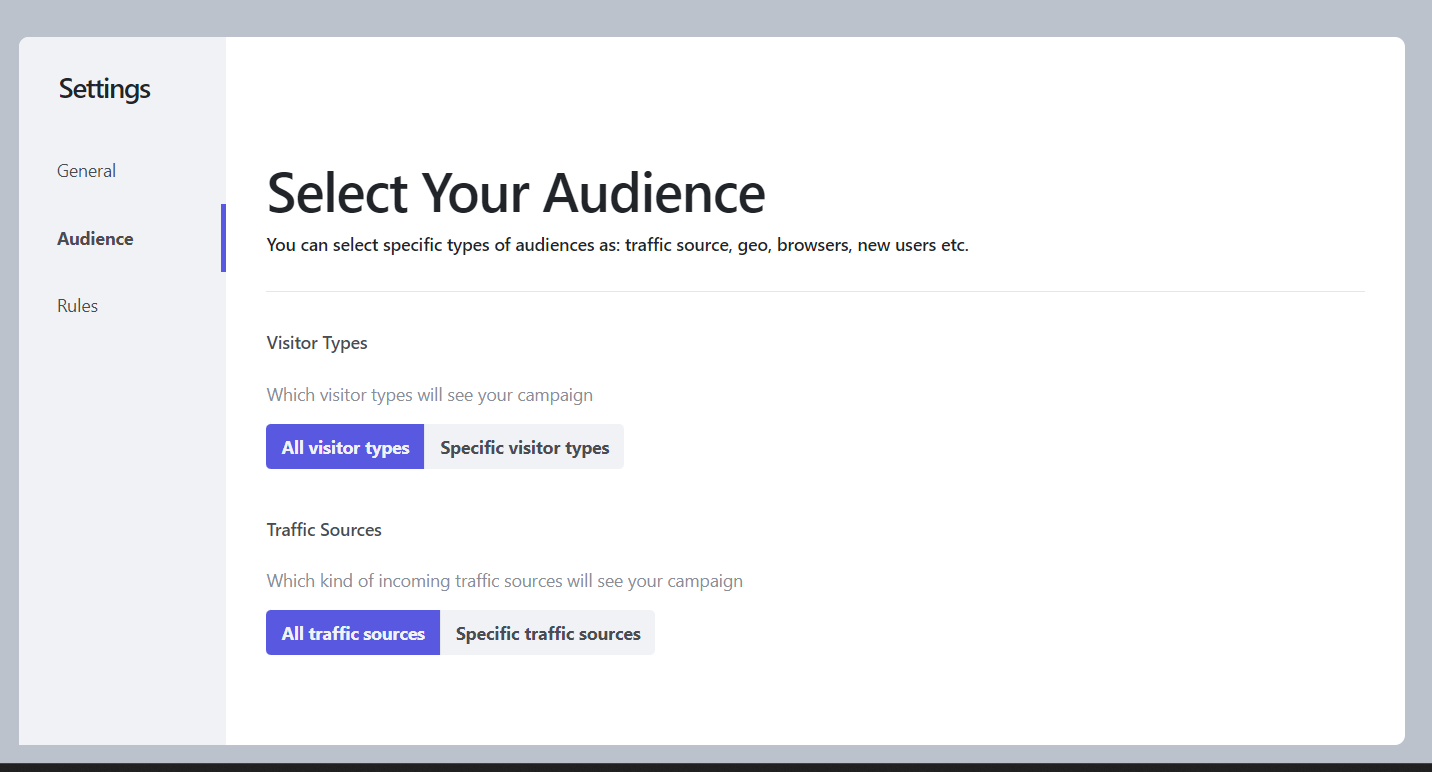
Visitor Types:
You can choose to show your pop to everyone or to specific people.
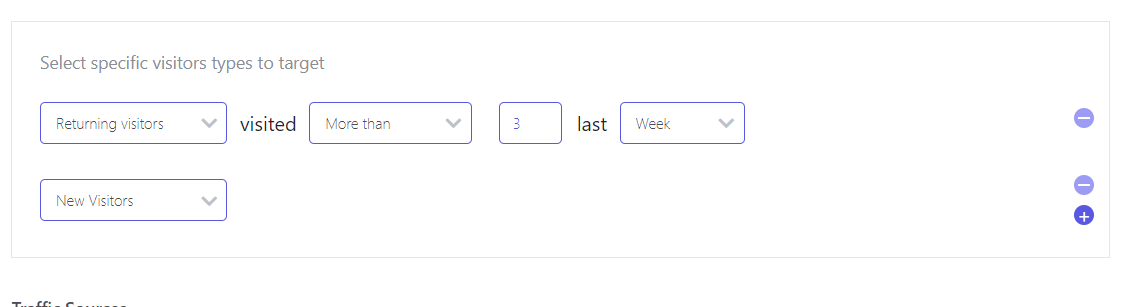
The specific visitor can be new or returning. If they are returning then you will have to set the condition based on number of times they returned as well as the timeframe.
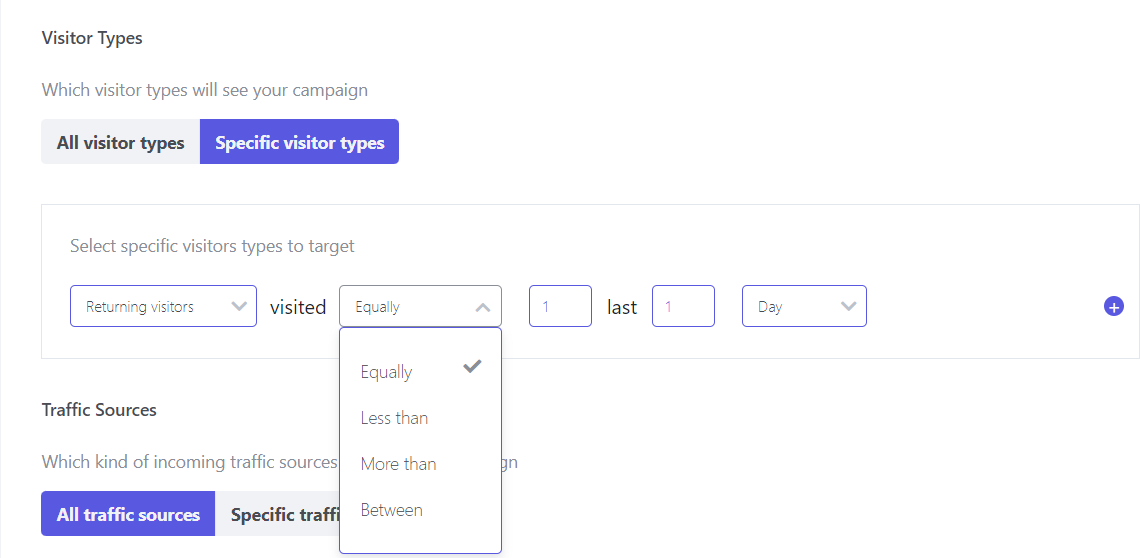
You can add more than one condition to target specific visitors.
Traffic sources:
You can either target audience coming from all traffic sources or specific sources to whom the pop will appear.
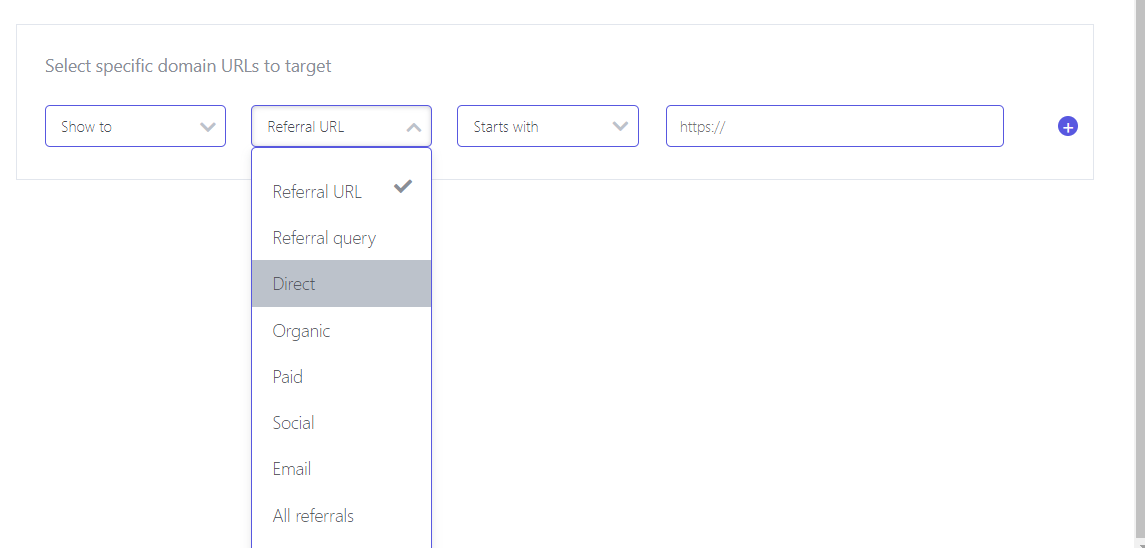
There are many traffic sources to choose from. If you are selecting 'Referral URL', then you will have to provide the URL or a part of it.
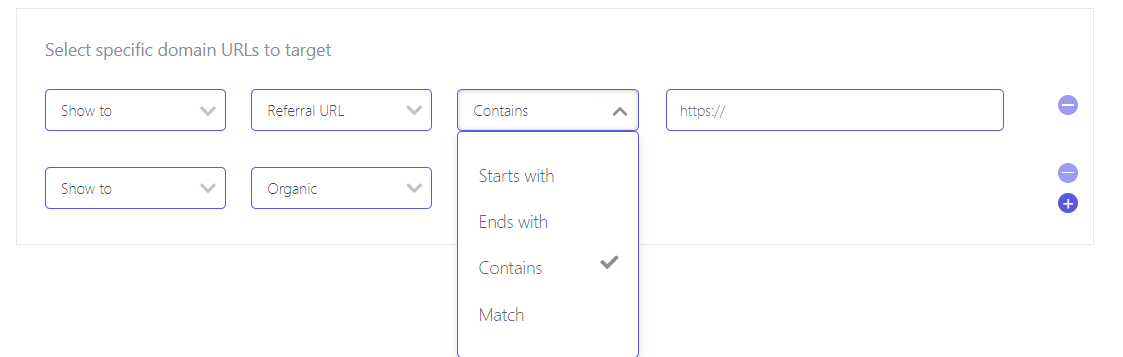
Here too, you can add more than one condition to target various sources.
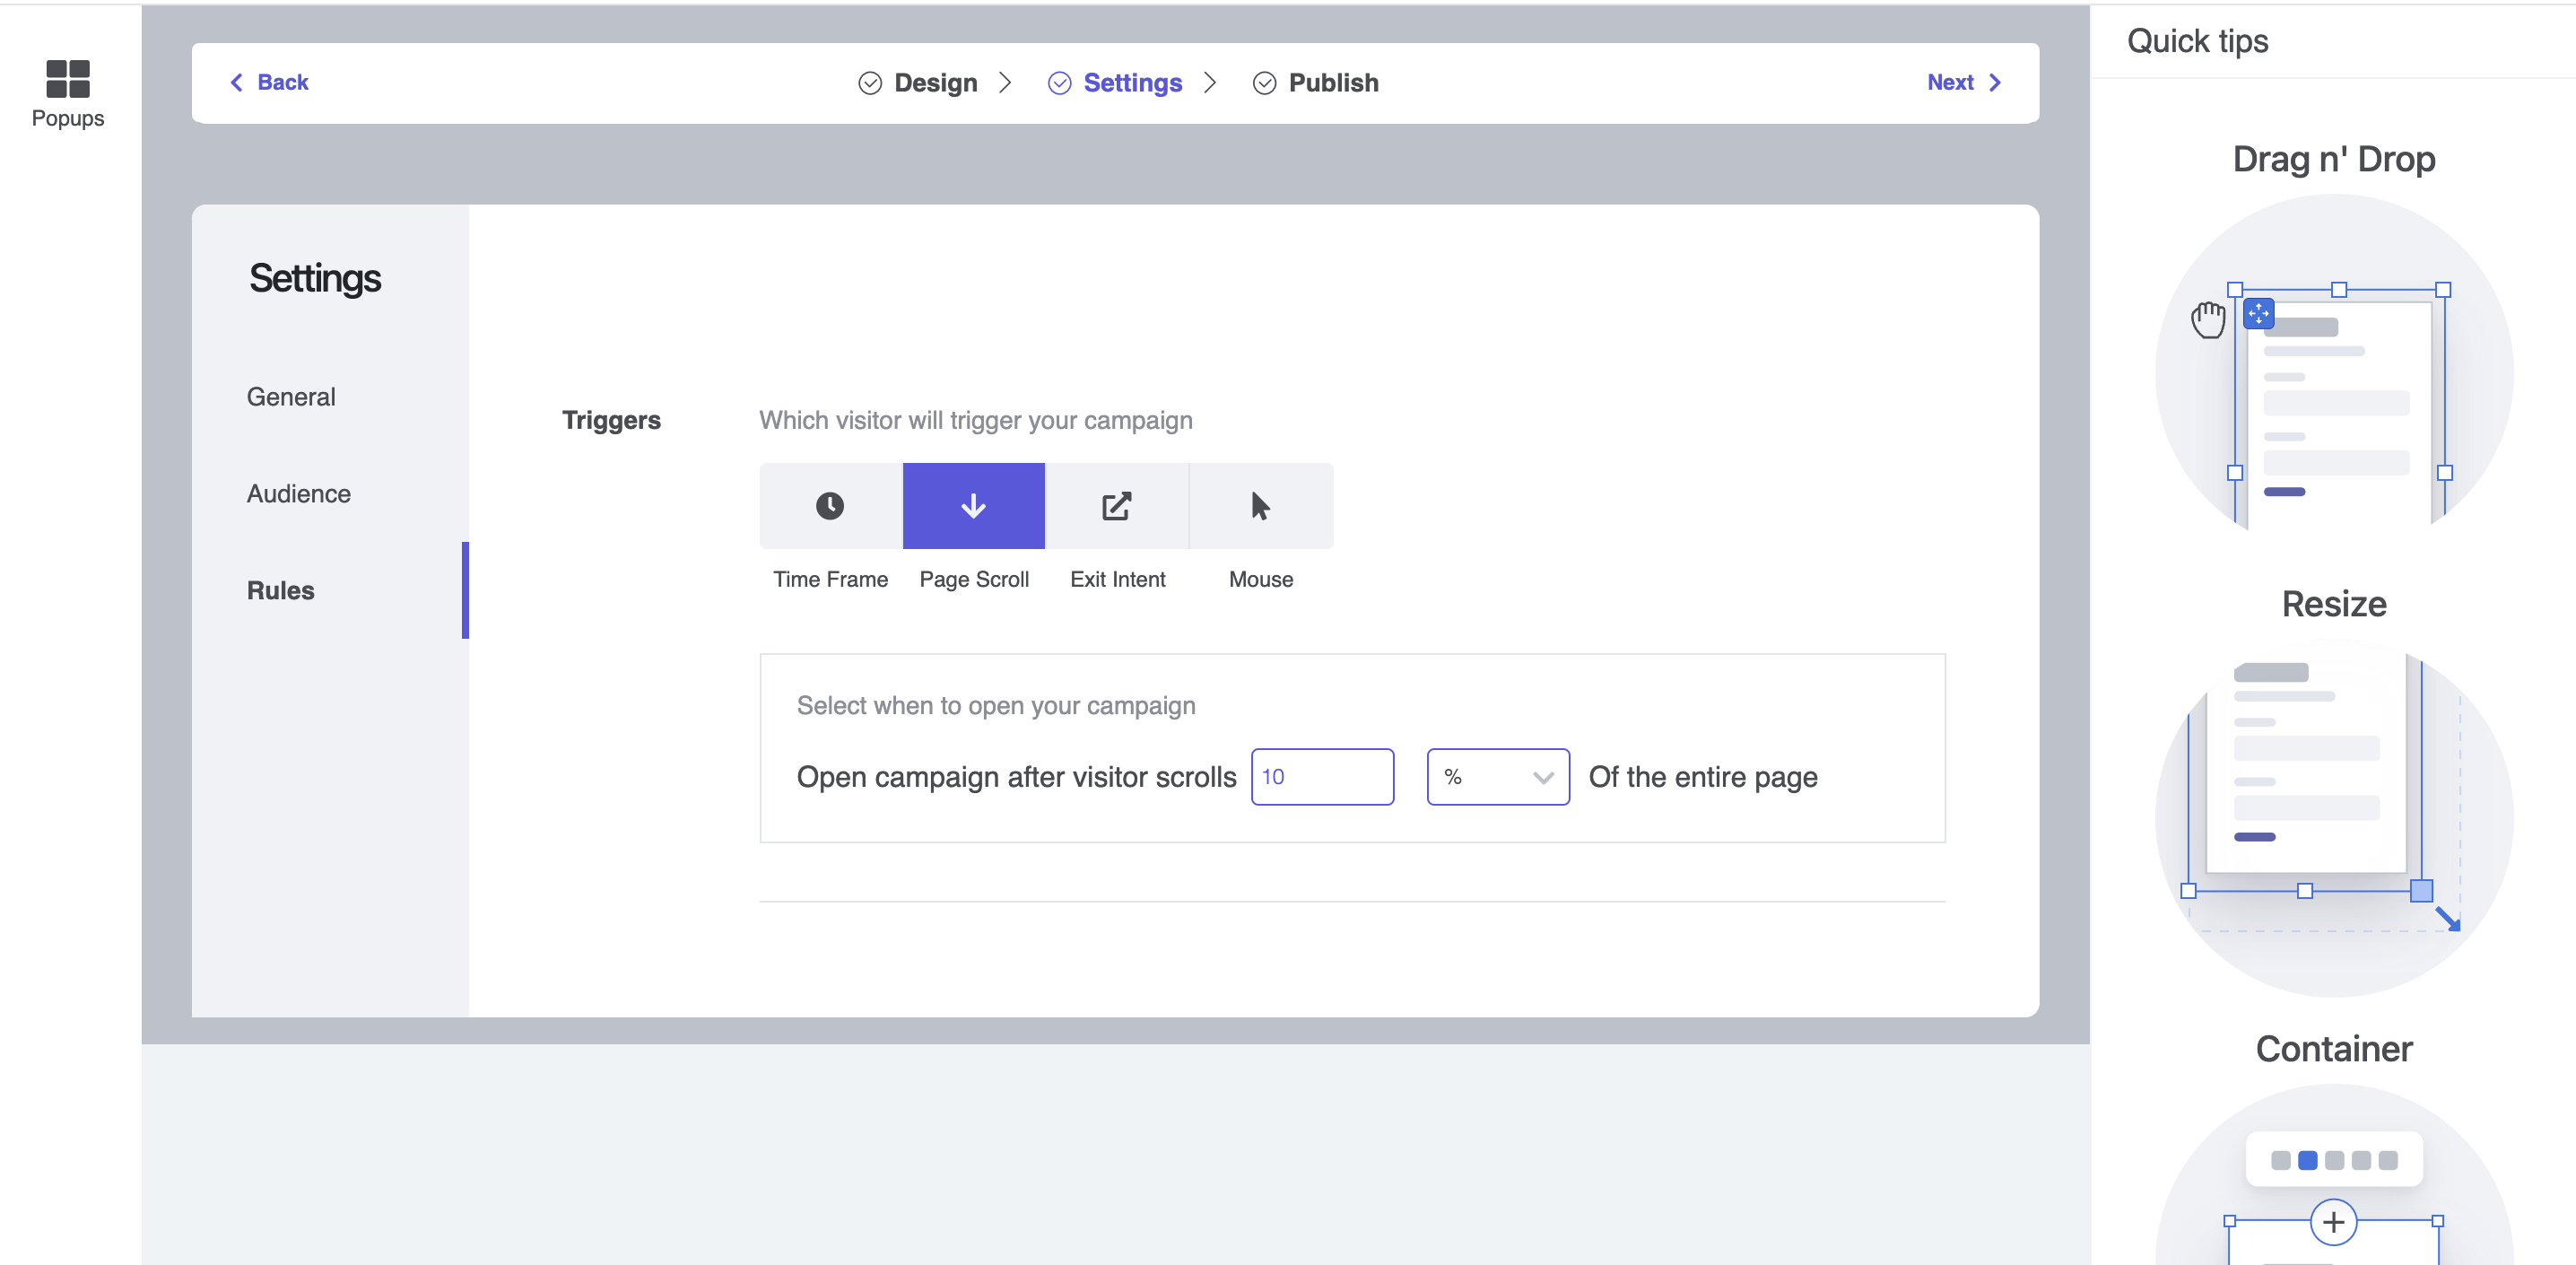
2) Rules
Let's you decide about when should the pop-up form appear for your visitor.
We have different rules in setup configuration of the popup form. For. e.g. in the below image, you can see that the pop up form will appear when 10% of your your website (first page where you will show the pop-up form) is scrolled through.
Publishing your pop-up form
Decide the website or landing page where you want to publish your Pop-up form.
Step 1: You need to first connect the website by entering it into the field and clicking on Connect.

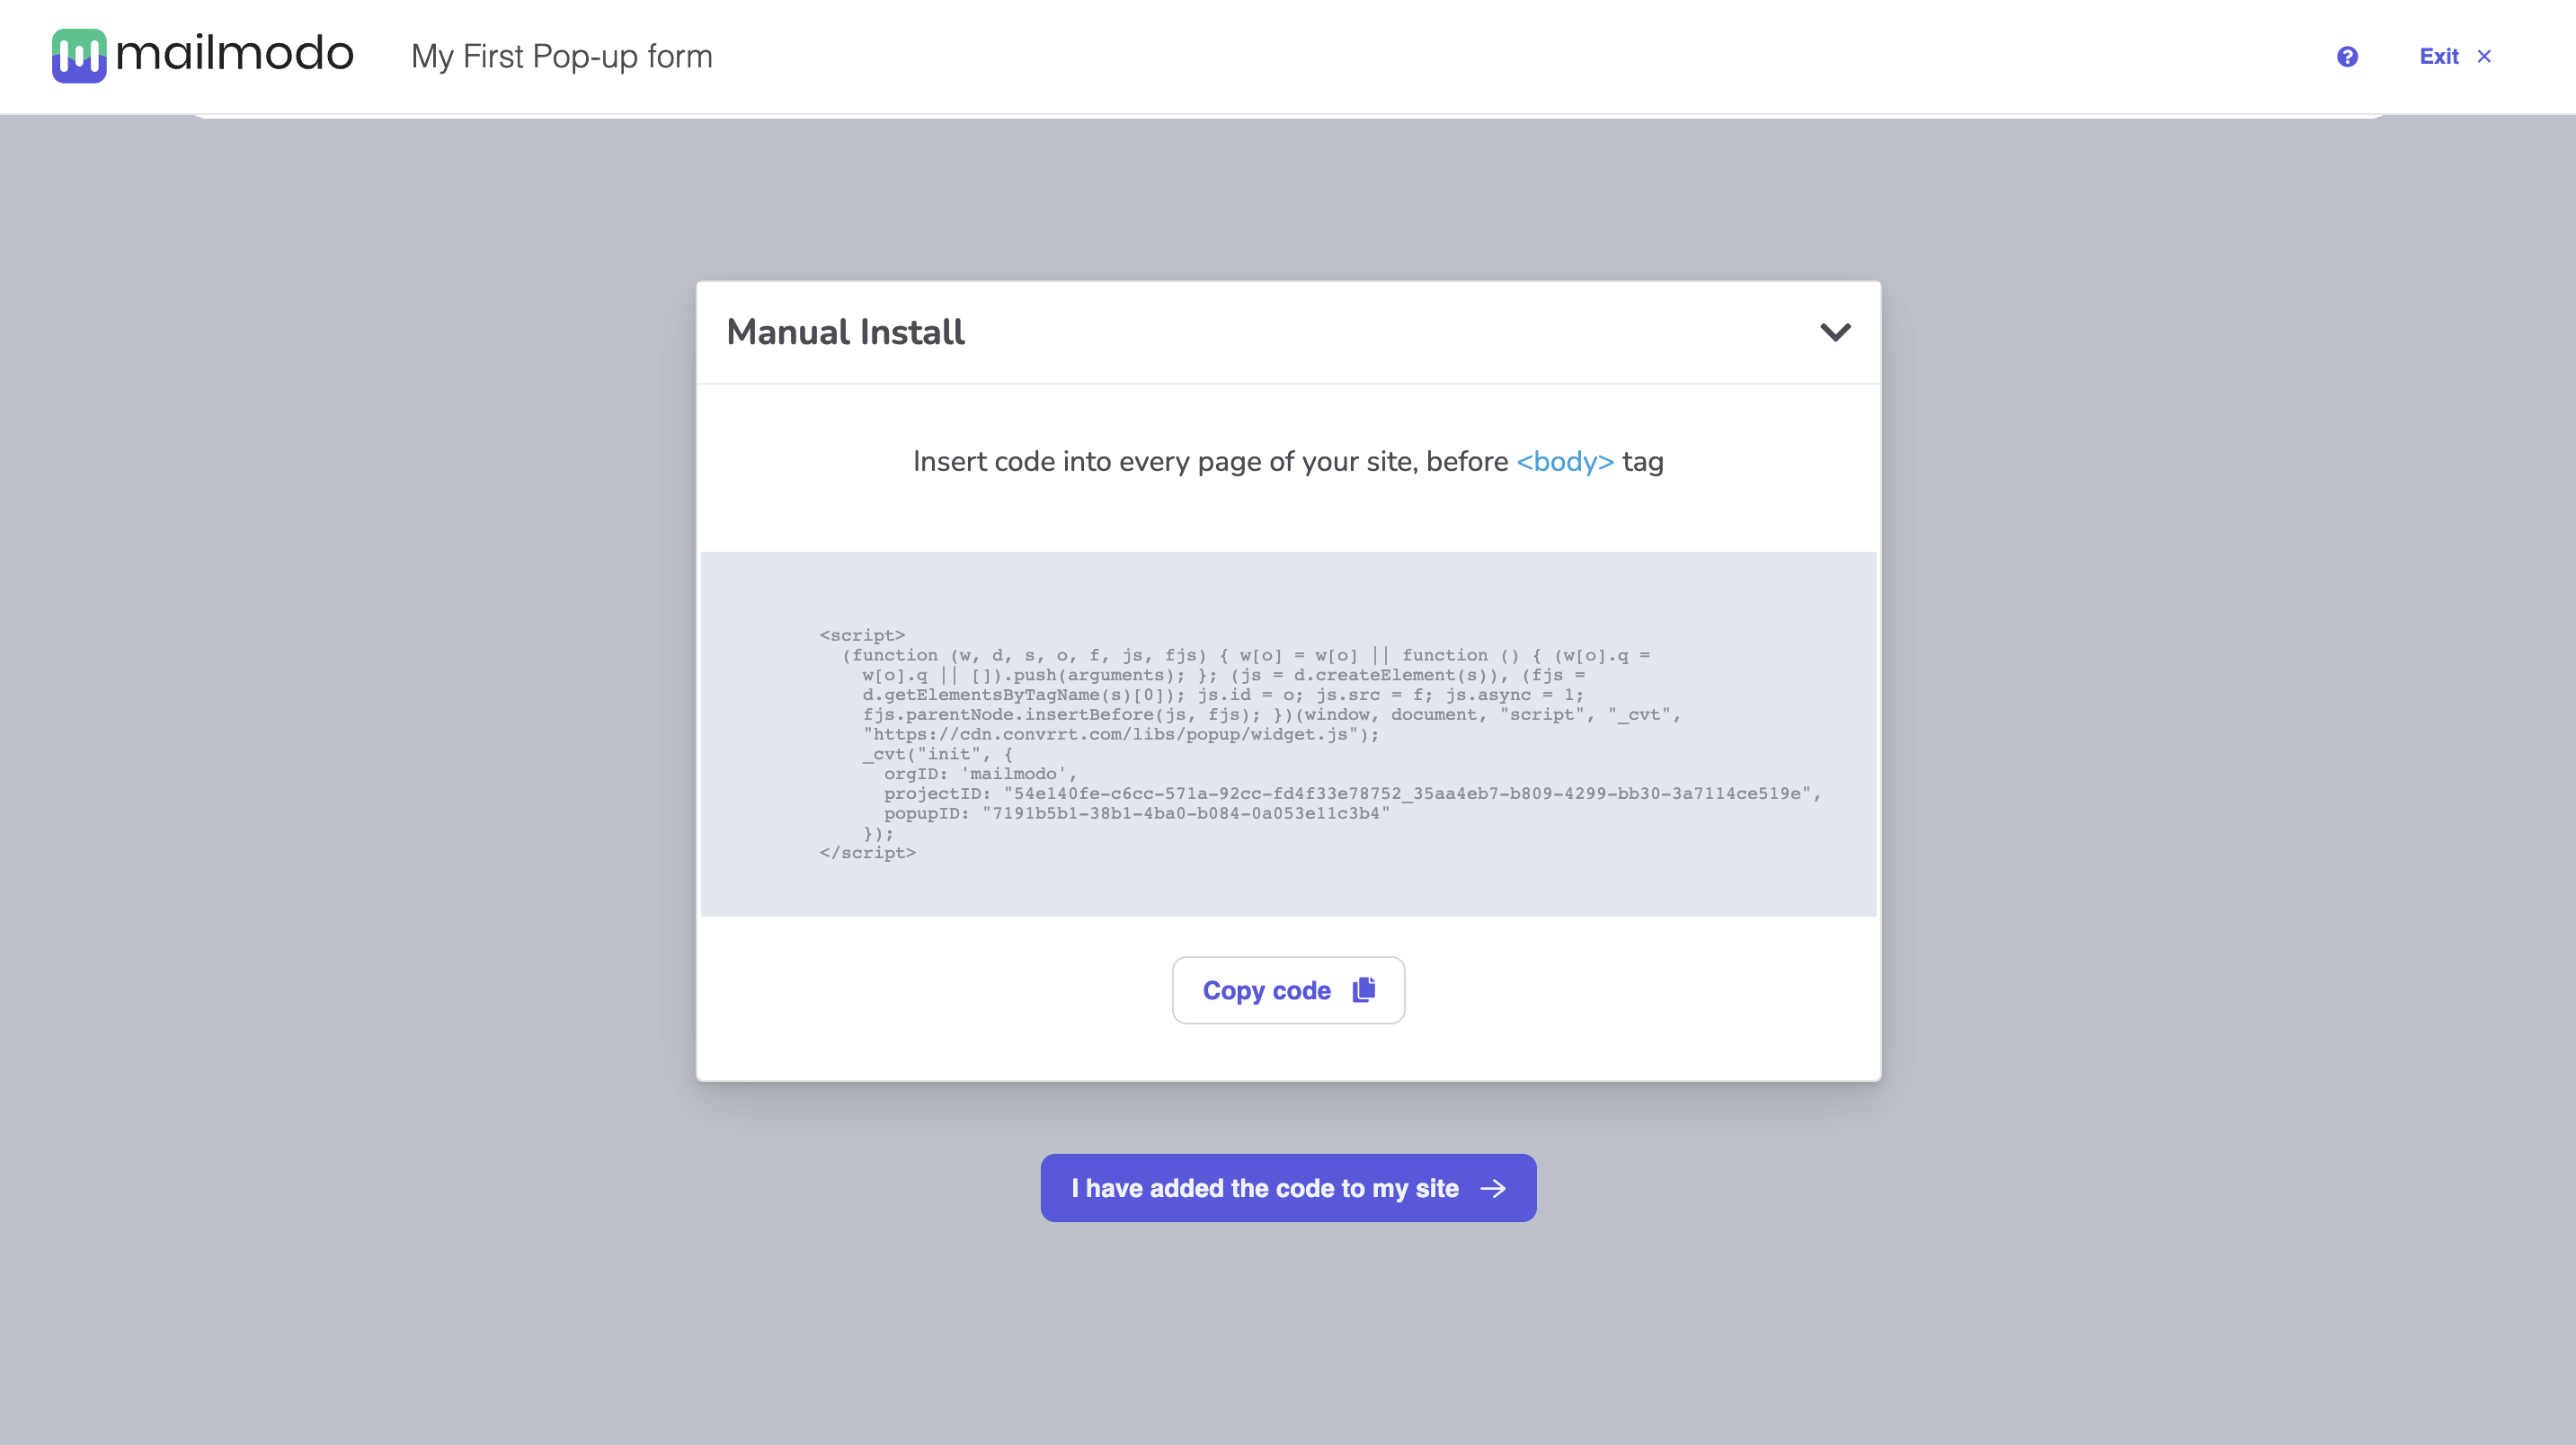
Step 2: Once done, you'll see a code that you copy-paste into every page of your site, before the <body> tag
Step 3: Once the code is copied, you can acknowledge that on the builder and publish the pop-up form. You have now successfully published a pop-up form on your website.