

Send Webhook as an action in a journey
Last updated July 31, 2024
Overview
A webhook allows one application (like Mailmodo) to send real-time data to another application or system whenever a specific event or trigger occurs.
Let’s assume you have created a journey with a trigger like a new user signing up, a payment being made, or a form being filled in your campaign. By adding the webhook block in the journey, as soon as a user signs up or matches the trigger, the webhook is triggered.
This initiates the process of sending a welcome email as soon as a user registers. It ensures that the welcome email is sent in real-time, creating a positive and seamless user experience. Additionally, the webhook can be customized to include specific data or instructions for the welcome email, making it highly personalized for each user.
Some specific examples when webhook can be used are:
- When a user subscribes to a newsletter, a webhook can trigger a welcome email sequence.
- A webhook can be used to notify a sales team when a lead reaches a certain engagement score, triggering follow-up actions.
- When a contact updates their email address on a subscription form, a webhook updates the email address in the company's CRM system. This ensures all systems have the latest contact information.
A real time use-case
You want your sales team to reach out to new customers who have signed up for a free trial. You have also noticed that success rates of converting these customers to paid plan increases if the team reaches out within the first 5 hours.
You decide to connect your welcome flow on Mailmodo to Slack so that your team receives real-time notifications of new signups. To do so, you add a Webhook which connects to a zap (Zapier).
The zap has Send Channel Message(on Slack) as an action.
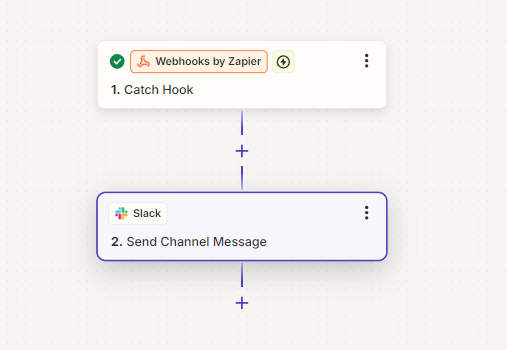
Your team gets the message and starts preparing to connect with the customer.
By the time the team reaches out, the customer will have already gotten a campaign guiding them about the product and informing them that your team will be connecting. All this is achieved within minutes by using webhooks in journeys.
Pre-requirements
When creating a webhook, the receiving application must accept POST requests and have an API. In addition, we only support sending HTTPS requests to the default HTTPS port.
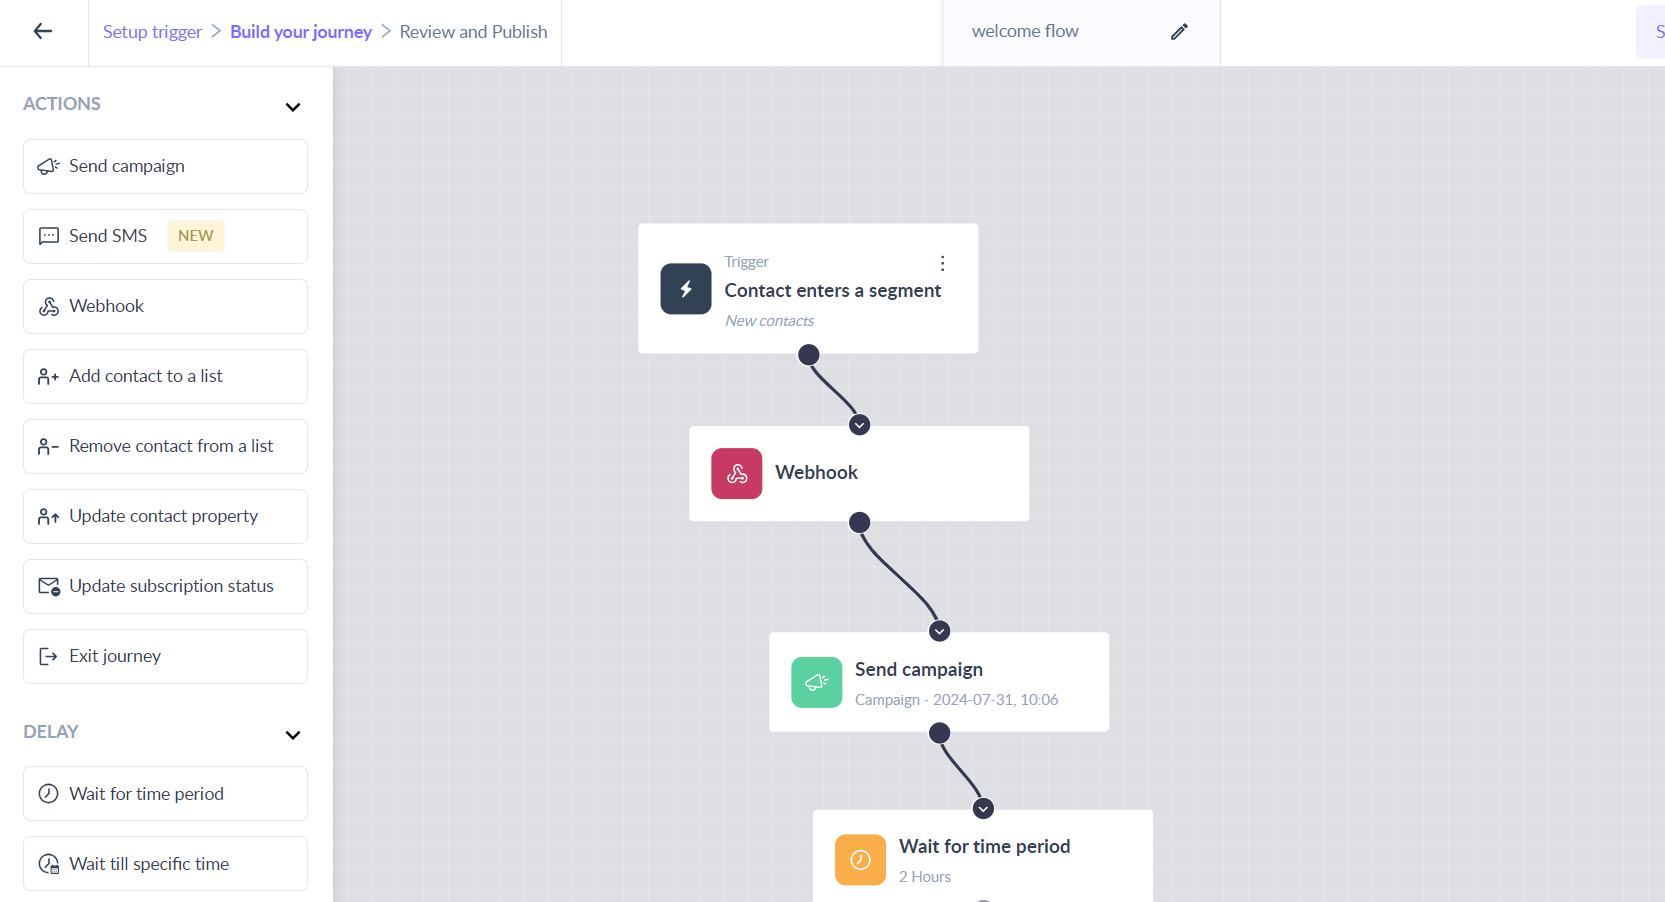
How to add a webhook block as an action?
Step 1: Drag and drop the Webhook card from Actions in the left panel.
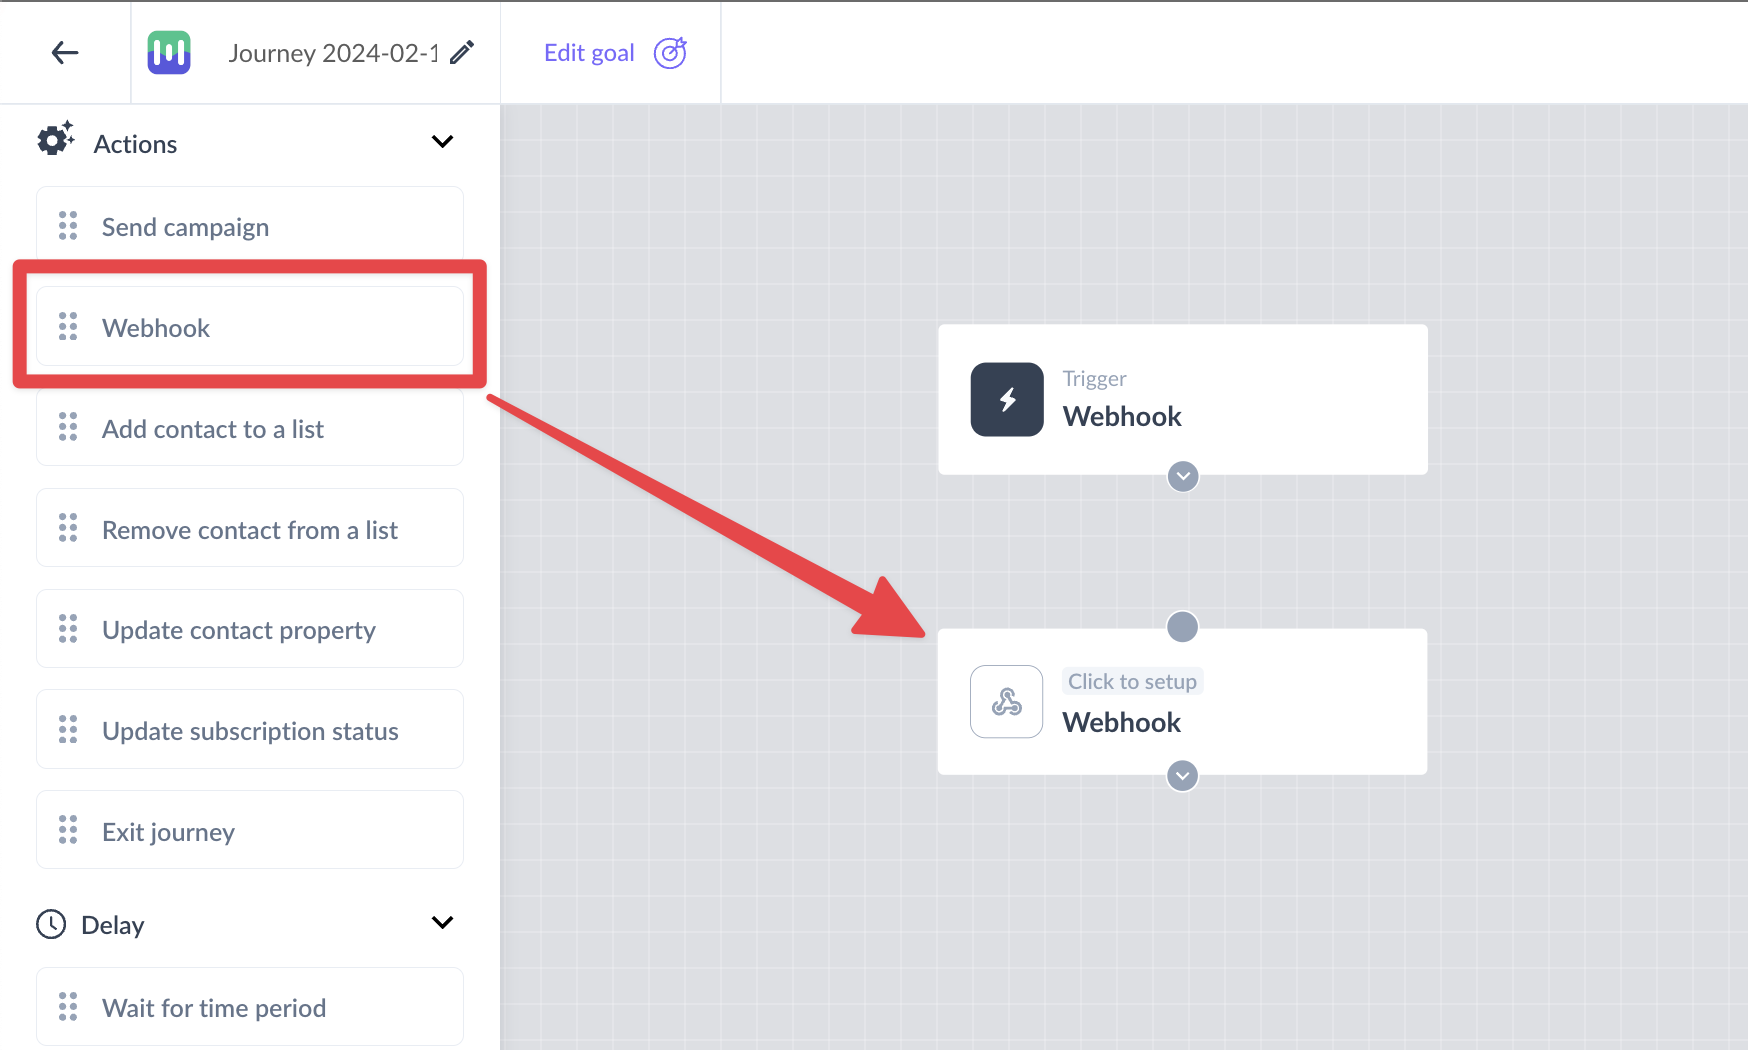
Step 2: Connect it to the relevant card in the journey as per your requirement.
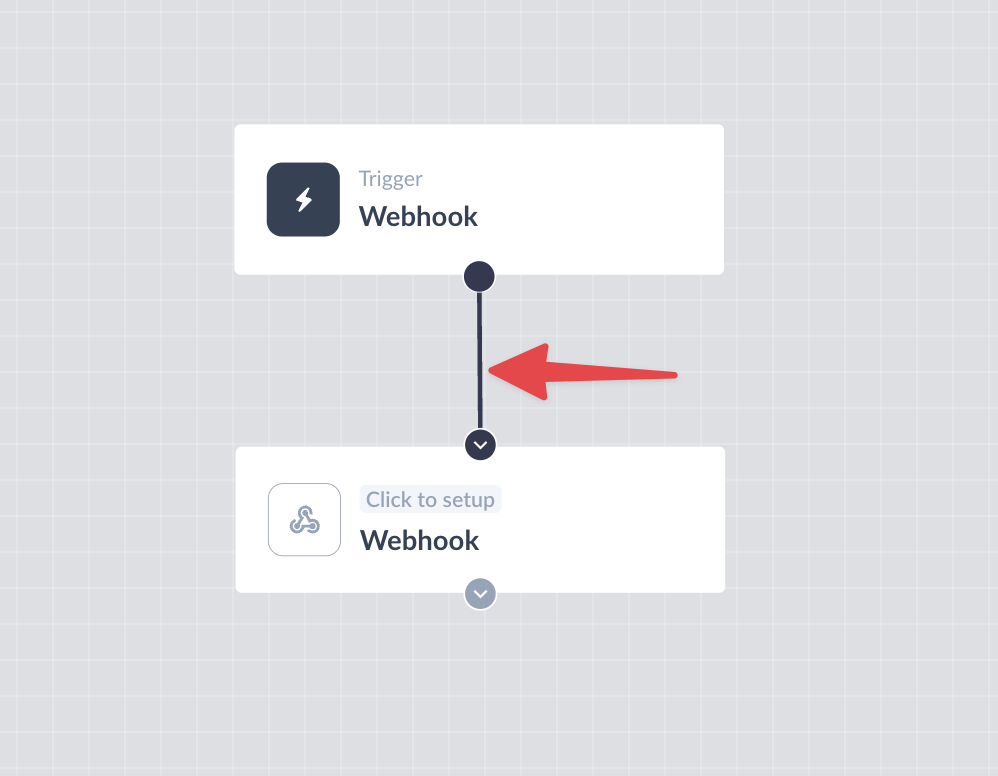
Step 3: Click on the Webhook card which will open a right panel for setting up the Webhook
For setting up the Webhook, you will need to enter the following information:
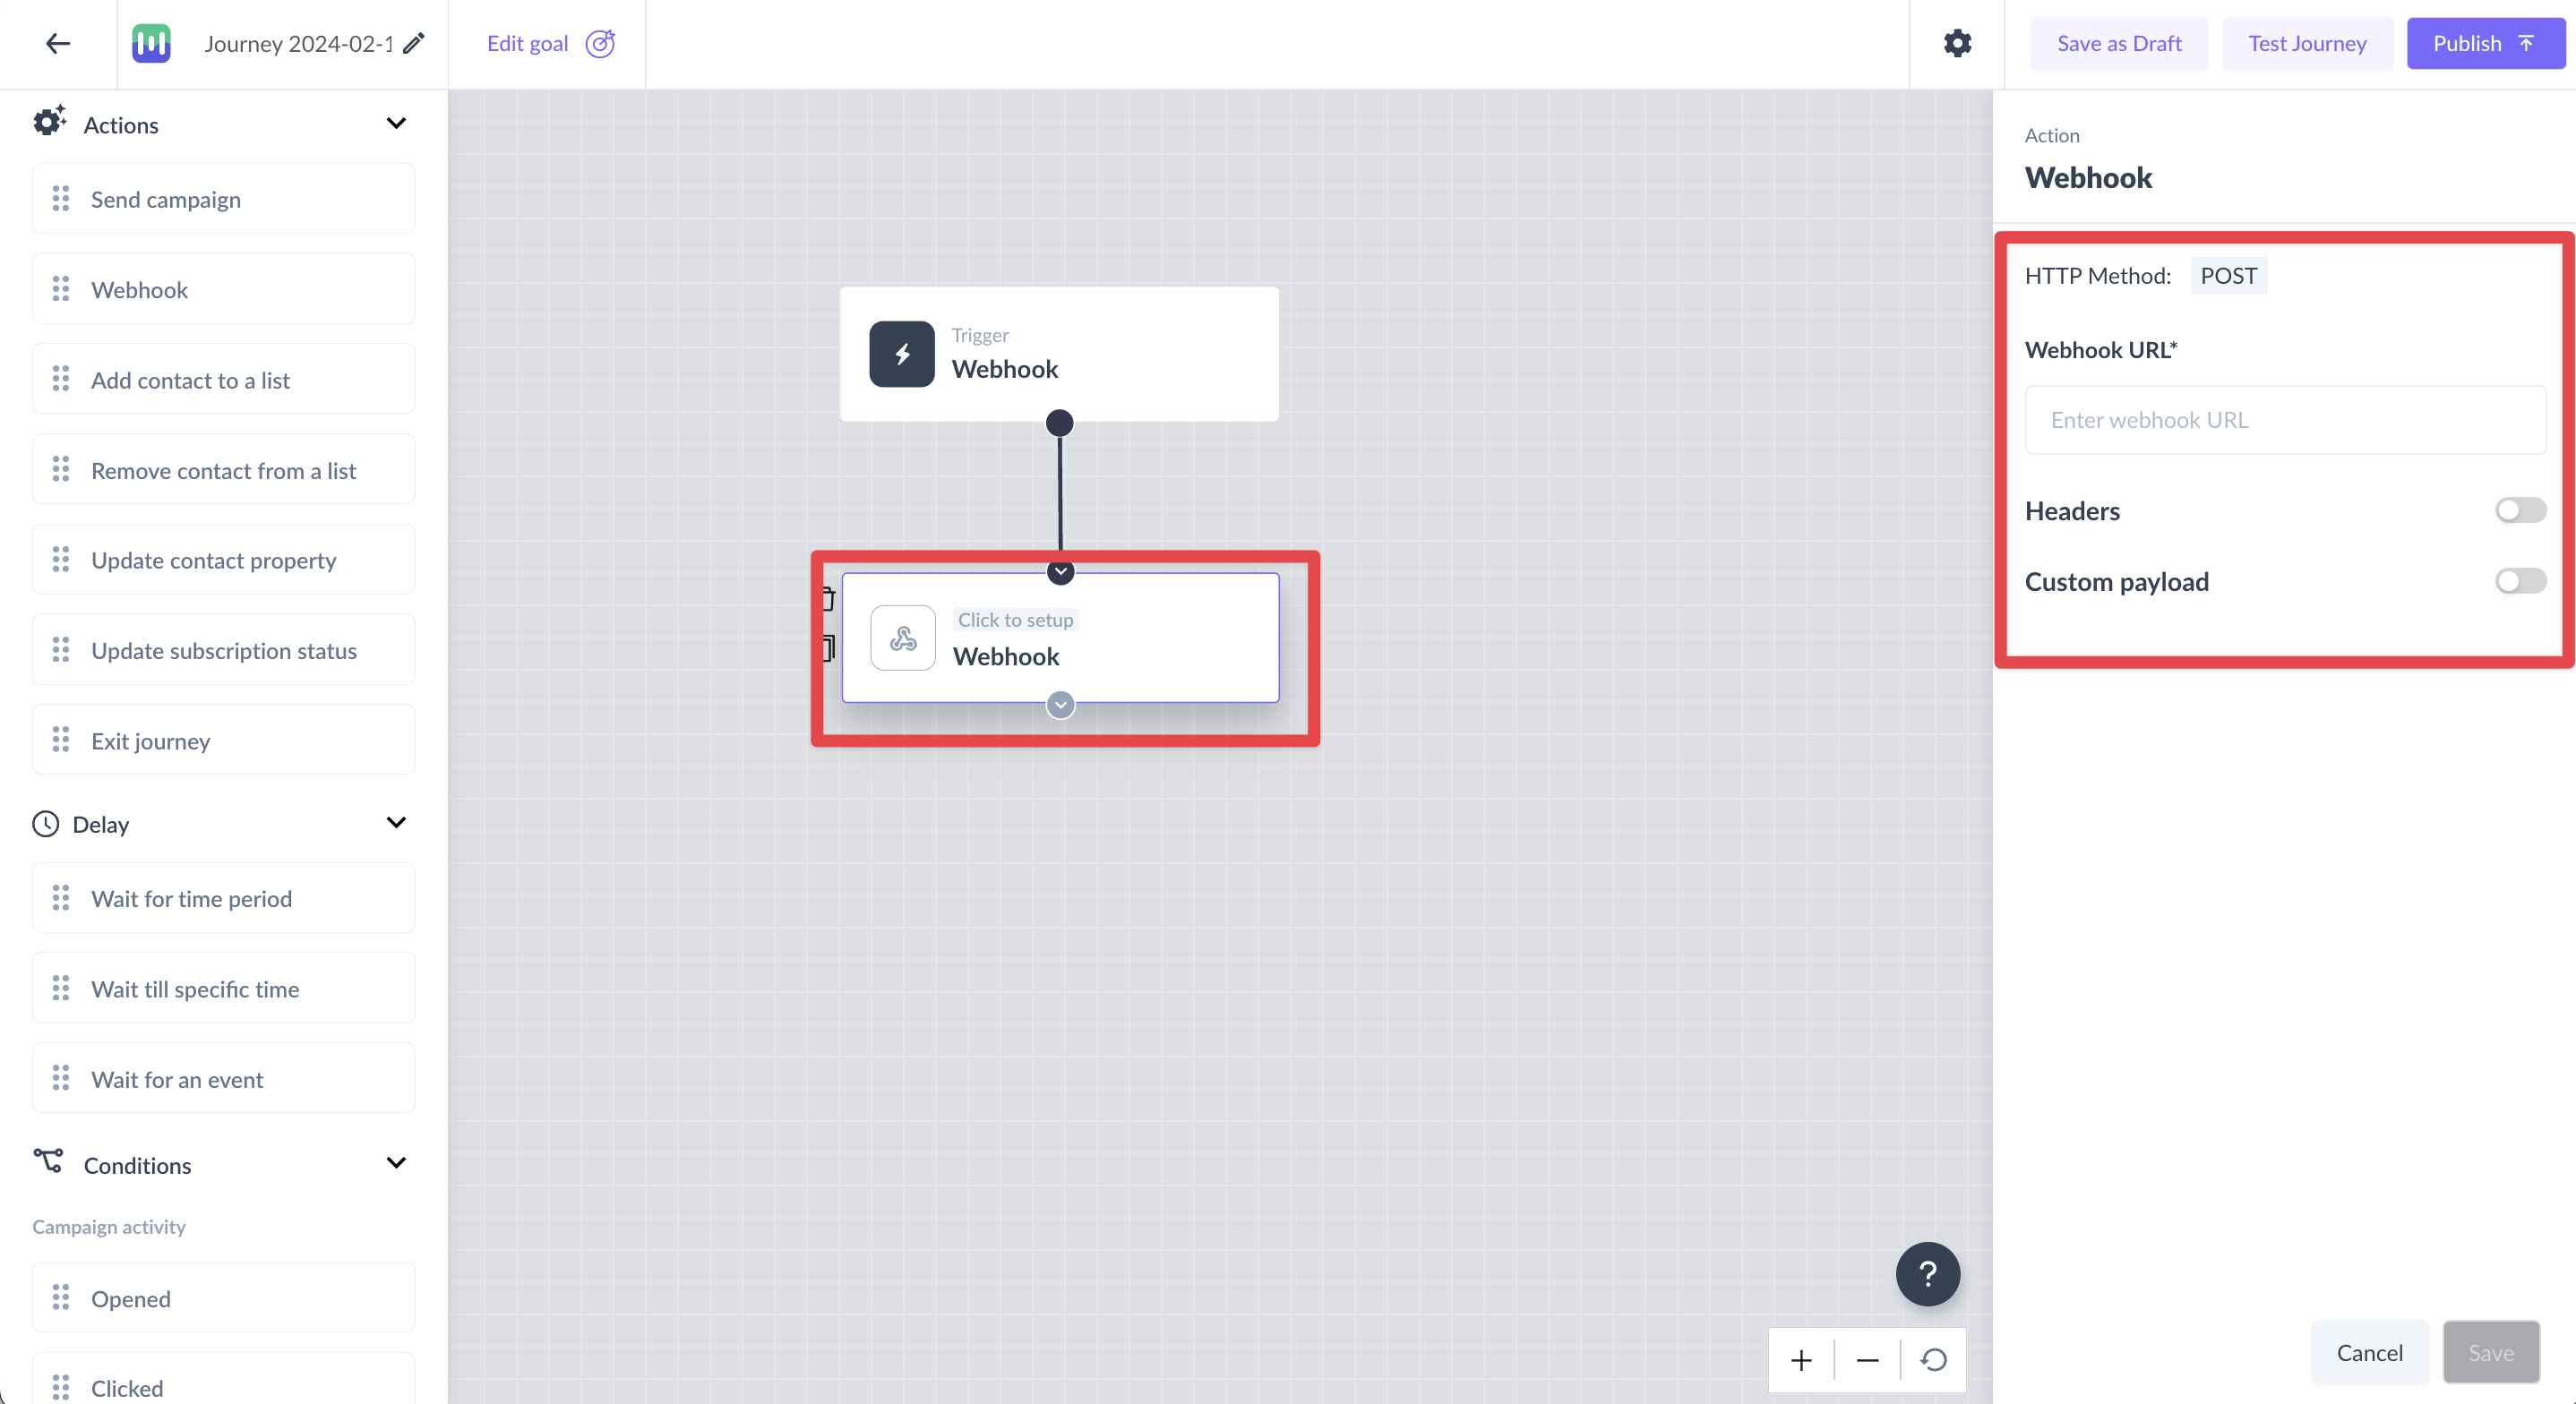
- Request URL Mailmodo needs a URL to deliver requests to. This means you need to set up a URL accessible from the public web. This is usually done through a backend panel or an API.
- Headers You can customize the headers that are sent along with the HTTP request when the webhook is triggered. The following are some of the examples of customer headers: a. Authentication tokensFor example - Authorization: Bearer your_api_token_here b. Specify the format of the data being sent For example - Content-Type: application/json
- Custom payload a. You can also customize and configure the payload which ensures that the information is relevant, well-structured, and protected, promoting efficient data exchange and integration while accommodating various use cases and versions of the recipient application.{ "user": "John Doe", "email": "johndoe@example.com", "age": 30} b. You can add personalization parameters to the payload by adding the '$' symbol. You can also enter the fallback value for the parameter selected.
How to test a webhook?
- Visit Webhook.site: Go to the Webhook.site website. The URL is usually something like
https://webhook.site/your-unique-identifier. You'll see a screen with a unique URL generated for your testing session. - Copy the Webhook URL: Copy the unique URL provided on the Webhook.site page. This URL is where you'll send your webhook data for testing.
- Add Webhook block in the journey: Go back to your journey builder and add the Webhook block in the journey. Paste the webhook URL in this webhook block and JSON payload if any.
- Test the Journeyof: Click on the “Test journey” button on the top right corner in the journey builder enter the email ID (preferably yours) and start the journey.
- View Webhook Data: Go back to the Webhook.site page in your browser. You should see the details of the webhook request that was sent, including the headers, payload, and any other relevant information.
If your webhook testing fails, below might be some reasons
- Your have used an incorrect webhook URL
- Your server is not reachable or the server is currently down.
- Your webhook payload/header validation fails due to some reason.
- Mailmodo domain is not whitelisted in your server so we won't be able to read the webhook response
If you have any queries, then reach out to us at Mailmodo Support or share your thoughts at Mailmodo Product Feedback.