Enhancing Landing Page Functionality: Forms & Tracking
Last updated May 27, 2024
This article will guide you through the process of incorporating a form into your landing page and utilizing the advanced features offered by the landing page builder.
This is the first article in a list of articles designed by Mailmodo to help you launch a landing page:
- Setting up landing pages in Mailmodo
- Defining landing page structure
- Adjusting landing page elements
- Enhancing landing page functionality: Forms & Tracking (here)
- Launching your landing page
Now, let us dive right in.
Form element
Utilizing forms enables you to gather specific information about your contacts and automatically include them in your contact lists within Mailmodo.
Form element is added as all other elements are, to learn follow Define landing page structure.
Deep dive into form setup
Alignment
We have covered it under Common settings in Adjusting landing page elements.
Manage Fields
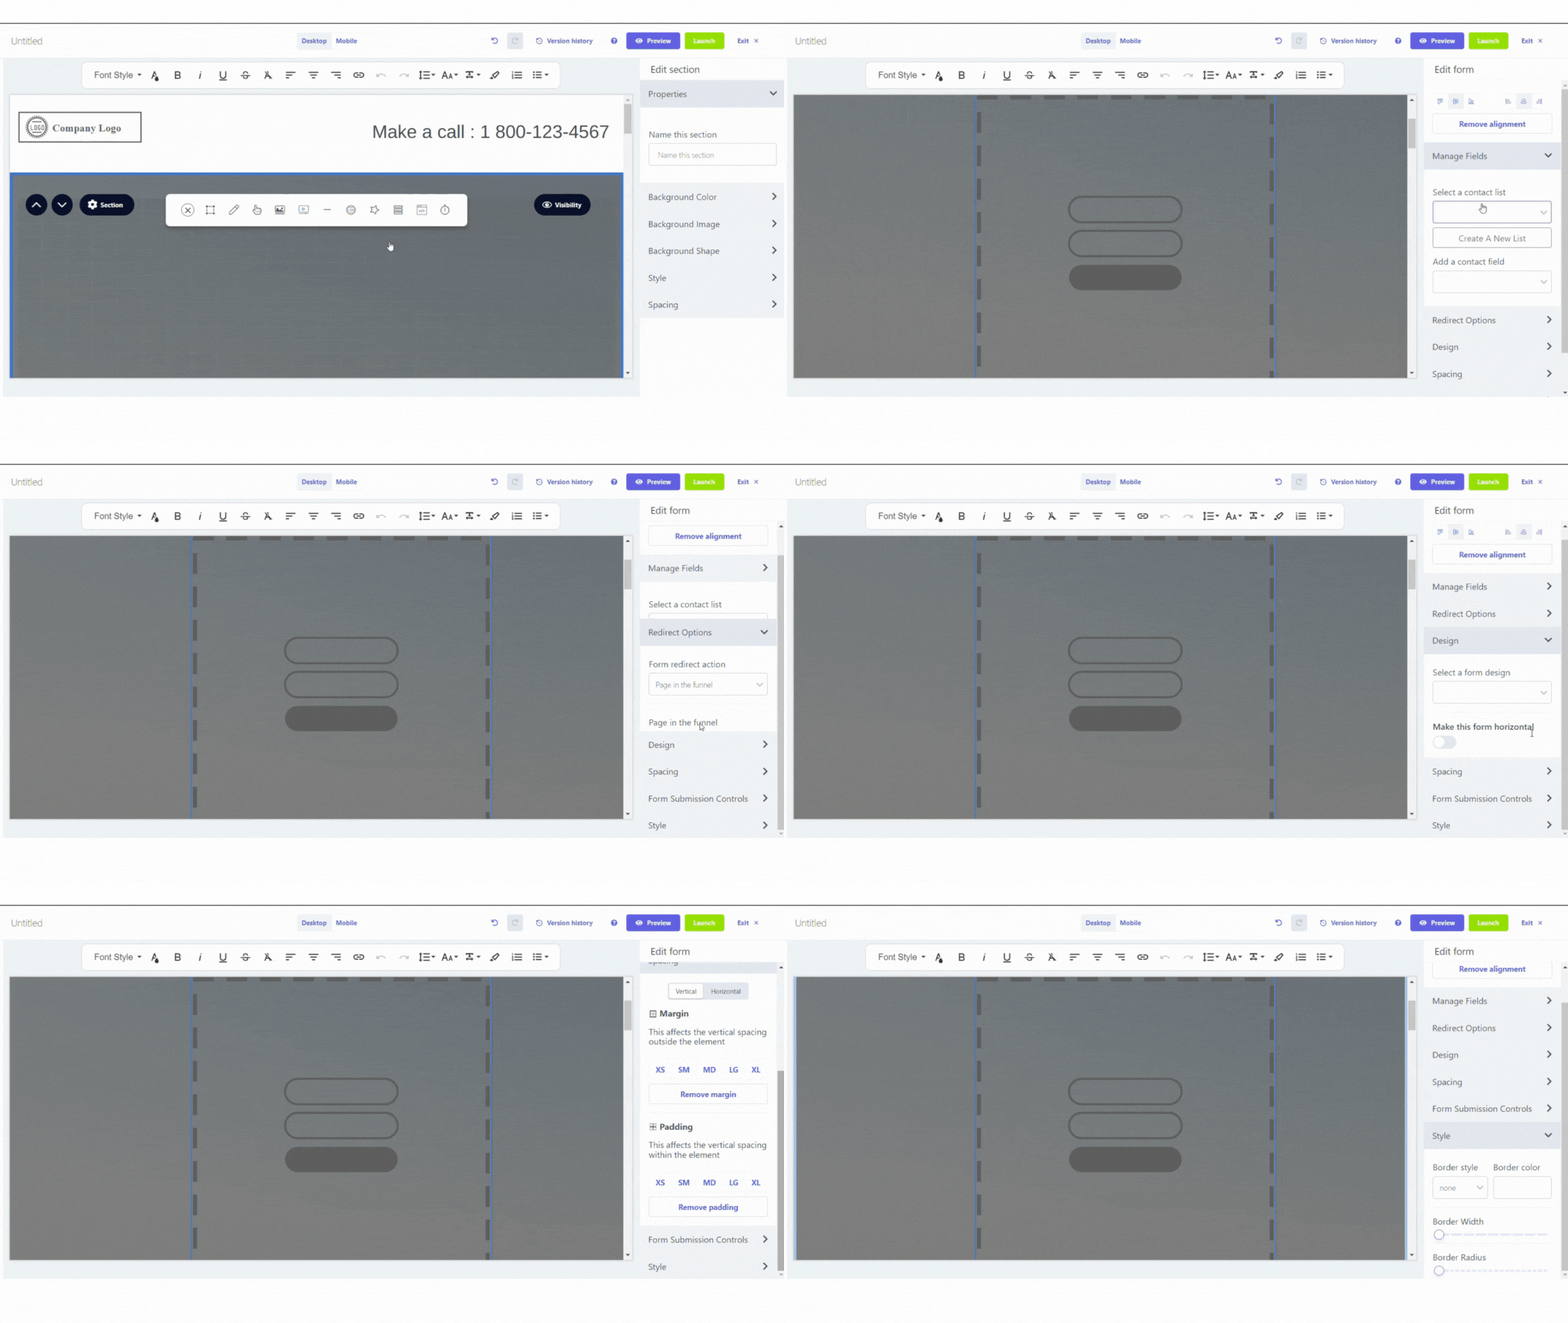
The Manage Fields settings provide the flexibility to determine the storage location for contacts gathered through the form and specify the information you wish to collect from them. You can either store contacts in pre existing list or make a new one. You can add more than one contact field depending on your need.
Click on form->Manage field will appear on right hand panel->Select or create list->Add contact field.
You edit the settings of the fields you add according to your need.
Select a field to configure its settings:
- Label: Determine whether to display the label above the field.
- Hidden: Choose whether the field should be visible or hidden in the form. Hidden fields are useful when you want data to be automatically filled through URL query parameters.
- Required: Specify if the field is mandatory for submitting the form.
Depending on the field type, various settings are available:
- Label: Modify the label name displayed above the field.
- Placeholder: Input the text displayed in the field; by default, it matches the label.
- Help text: Enter text displayed beneath the field, providing helpful suggestions.
- Default value: Specify the value synchronized in your Brevo contact list if the visitor doesn't fill in the field.
- URL Param: Input the value automatically inserted into the form field, which can be overridden by your contact if necessary.
Redirect Options
The Redirect Options setting provides you with the ability to determine the destination when users submit their information. Utilize the Form redirect action to redirect your contacts either to a page within the funnel (a sub-page of your landing page) or to a specific URL:
- Page in the funnel: Choose the funnel page to which you want to redirect your contacts.
- Link to a URL: Input the link to the external page where you wish to redirect your contacts.
Design
The Design setting empowers you to select the appearance of your fields: none, outlined, curved outline, underlined with background, underlined no background. Additionally, you have the option to present your form in a horizontal layout. If you opt for a horizontal form, it is advisable to omit the labels of your fields. Background colour is covered in Adjusting Your landing Page Elements.
Spacing
We have covered it under Common settings in Adjusting landing page elements.
Form subscription control
The Form Subscription Controls setting provides options for configuring the behavior of your form upon submission:
- Disable reCAPTCHA: Deactivate the default built-in Google reCaptcha on your published landing page.
- Disable URL Parameters on form submission: By default, URL parameters are visible upon form submission, displaying additional contact data in the URL (e.g., /thank-you.html/?firstName=Jane). This feature is advantageous as it avoids redundant data entry on subsequent pages when collecting multiple sets of information through a series of landing pages in your funnel. However, if Google notifies you about URL parameters being displayed in form submissions for ads, you can disable this feature and republish your landing page.
Style
The Style setting empowers you to specify the visual presentation of your form:
- Border style and color: Apply a border to your form and choose its color.
- Border width: Determine the width of your form's border.
- Border radius: Choose the level of roundness for the borders of your form.
Tracking
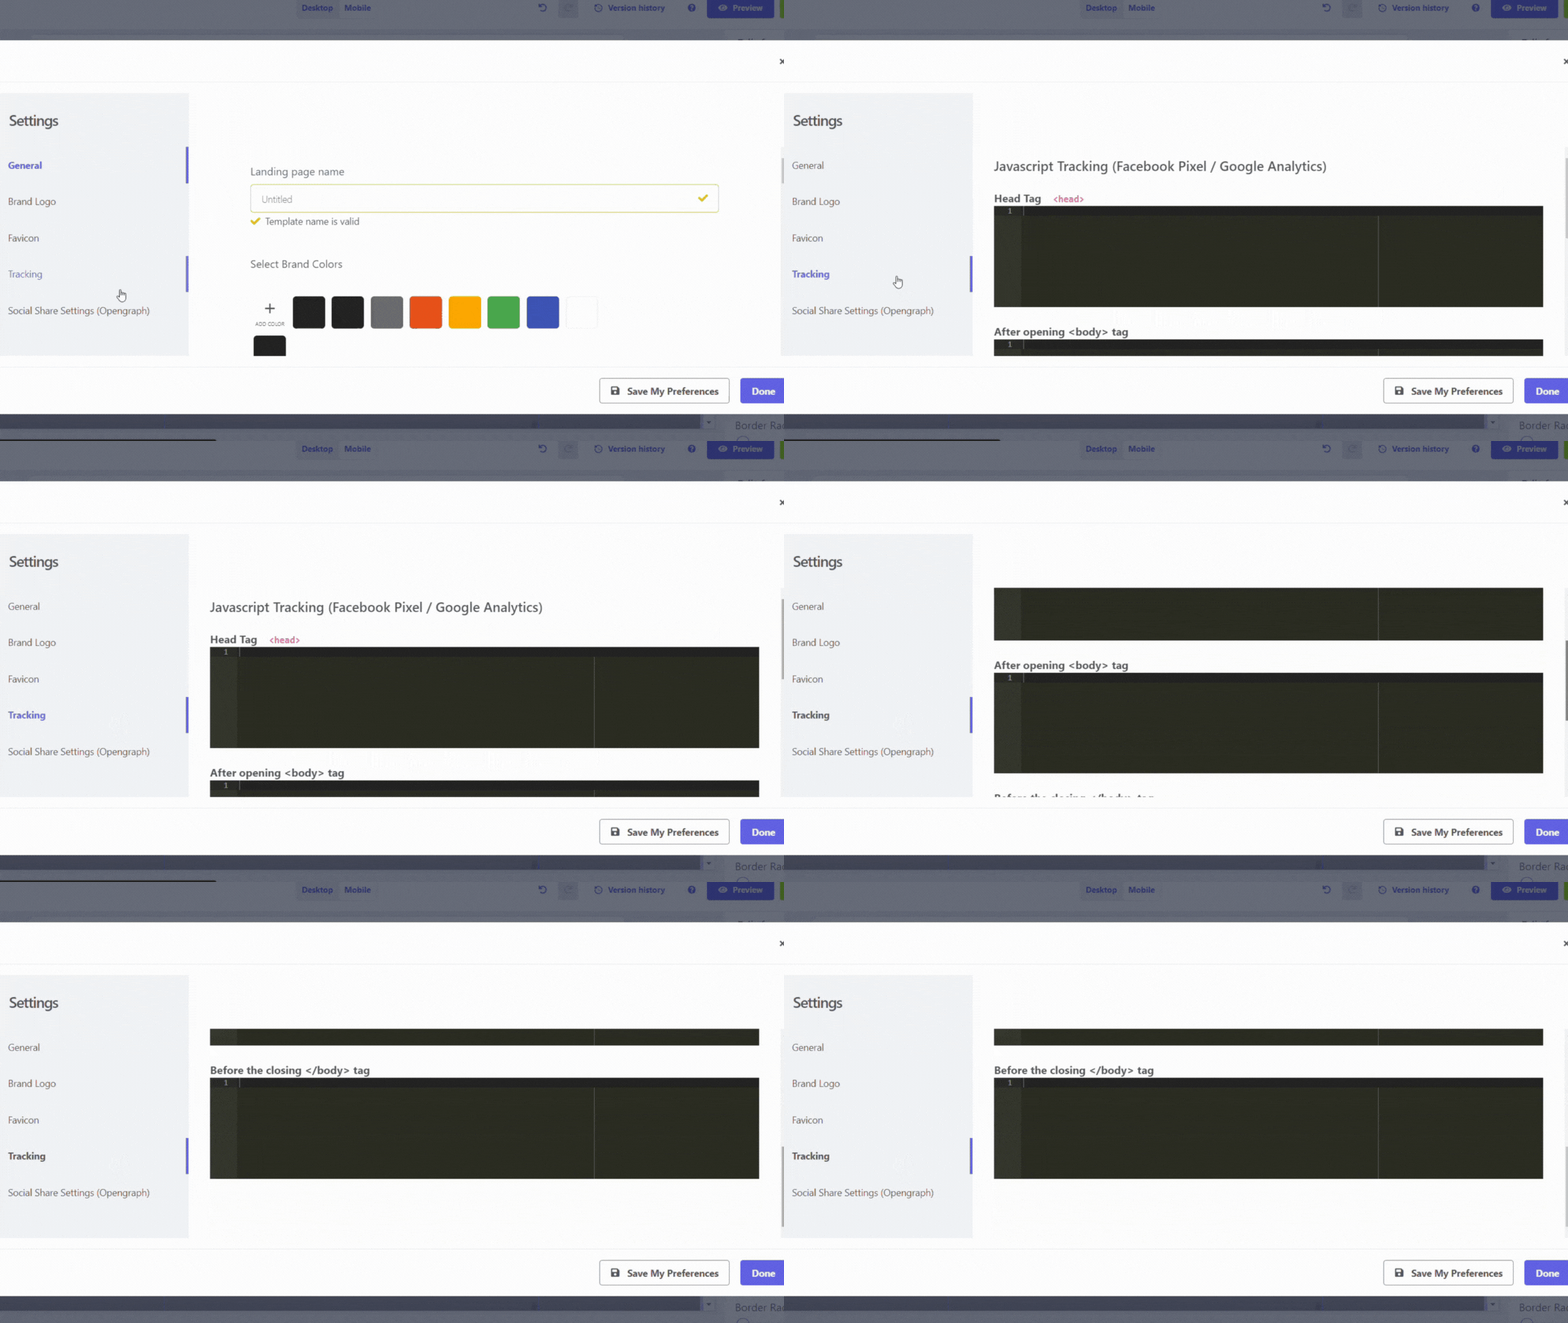
The Tracking setting on your landing page provides the option to incorporate tracking scripts at specific locations on the page. A tracking script is a piece of code designed to monitor the number of users visiting a page. These scripts facilitate the analysis of visitor behavior, including their duration on the page, points of interest, and interactions with the content.
To incorporate a tracking script into your landing page:
- Within the landing page builder, click on Settings located in the bottom left corner.
- Choose Tracking.
- Compose the tracking script within the relevant tag. You have the option to add the script in:
- the Head tag <head>,
- the After opening <body> tag,
- or the Before the closing </body> tag.
- Click Done
Platforms like Facebook Pixel and Google Analytics necessitate placing the script in the head tag, whereas other services might require it in the body. Be sure to consult the instructions provided by your tracking service to ascertain the appropriate location for incorporating the script.
You can embed FB comment plugin and embed Google font of your choice , using this feature.
Devices
The options for Desktop and Mobile located at the top of your landing page enable you to evaluate how your landing page appears on various devices.
As we have covered all the basics, now you can finally launch your page, Launching your landing page .
If you face any problem then reach out to us at Mailmodo Support or share your thoughts at Mailmodo Product Feedback .


