

Getting Started with Braze Integration
Last updated October 23, 2024
Mailmodo and Braze integration allows you to create interactive email templates in Mailmodo Studio and export these templates to Braze. This integration enables you to send engaging campaigns through Braze while collecting data from your recipients seamlessly.
In this article, we will provide step by step guide on how to get started with Mailmodo Studio with Braze:
Prerequisites for the integration
Before starting the integration, ensure you have the following:
- An active Mailmodo Studio account.
- An active Braze account .
- Permissions to create an API key in Mailmodo.
- Your sender domain / email address is approved by Google and Yahoo to send AMP.
For getting approval, you will need a send a production ready AMP template to Google and Yahoo from your verified sender domain. If you sender id is not already AMP approved, you can first create the template in Mailmodo and send the exported template to Google & Yahoo for approval.
Step by step guide to get started with Braze integration
Step 1: Integrate Braze with Mailmodo
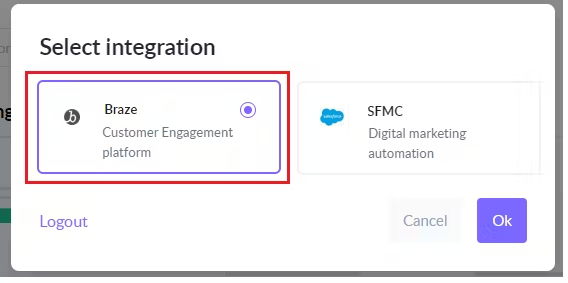
- Create a new account or login to your existing account
- You will be asked to integrate a platform. Select Braze from the list of available integrations.
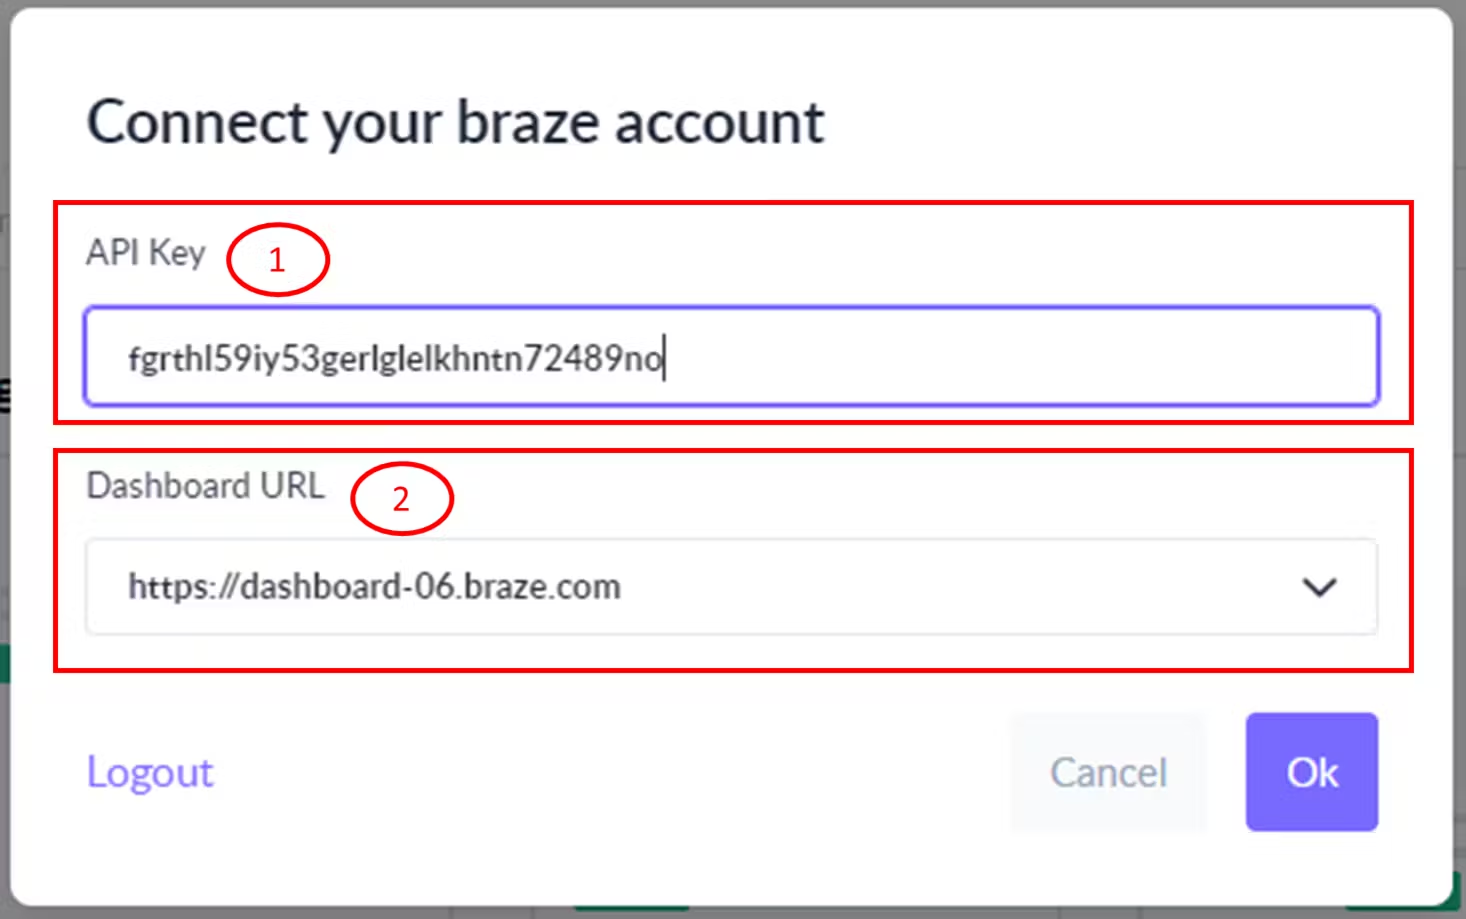
- In the connect your braze account screen, enter the API key and dashboard URL to complete the integration.
- Checkout the detail Braze guide on how to get the API key
- Enter your dashboard URL → This is the URL you will see in the address bar after logging into your Braze account. For e.g. https://dashboard-06.braze.com/
- Once successfully integrated, you can start using Mailmodo for creating templates.
While creating the API key, please make sure following permission are enabled for Mailmodo <> Braze integration to work properly: 1. Templates → All permissions 2. Content Blocks → All permissions
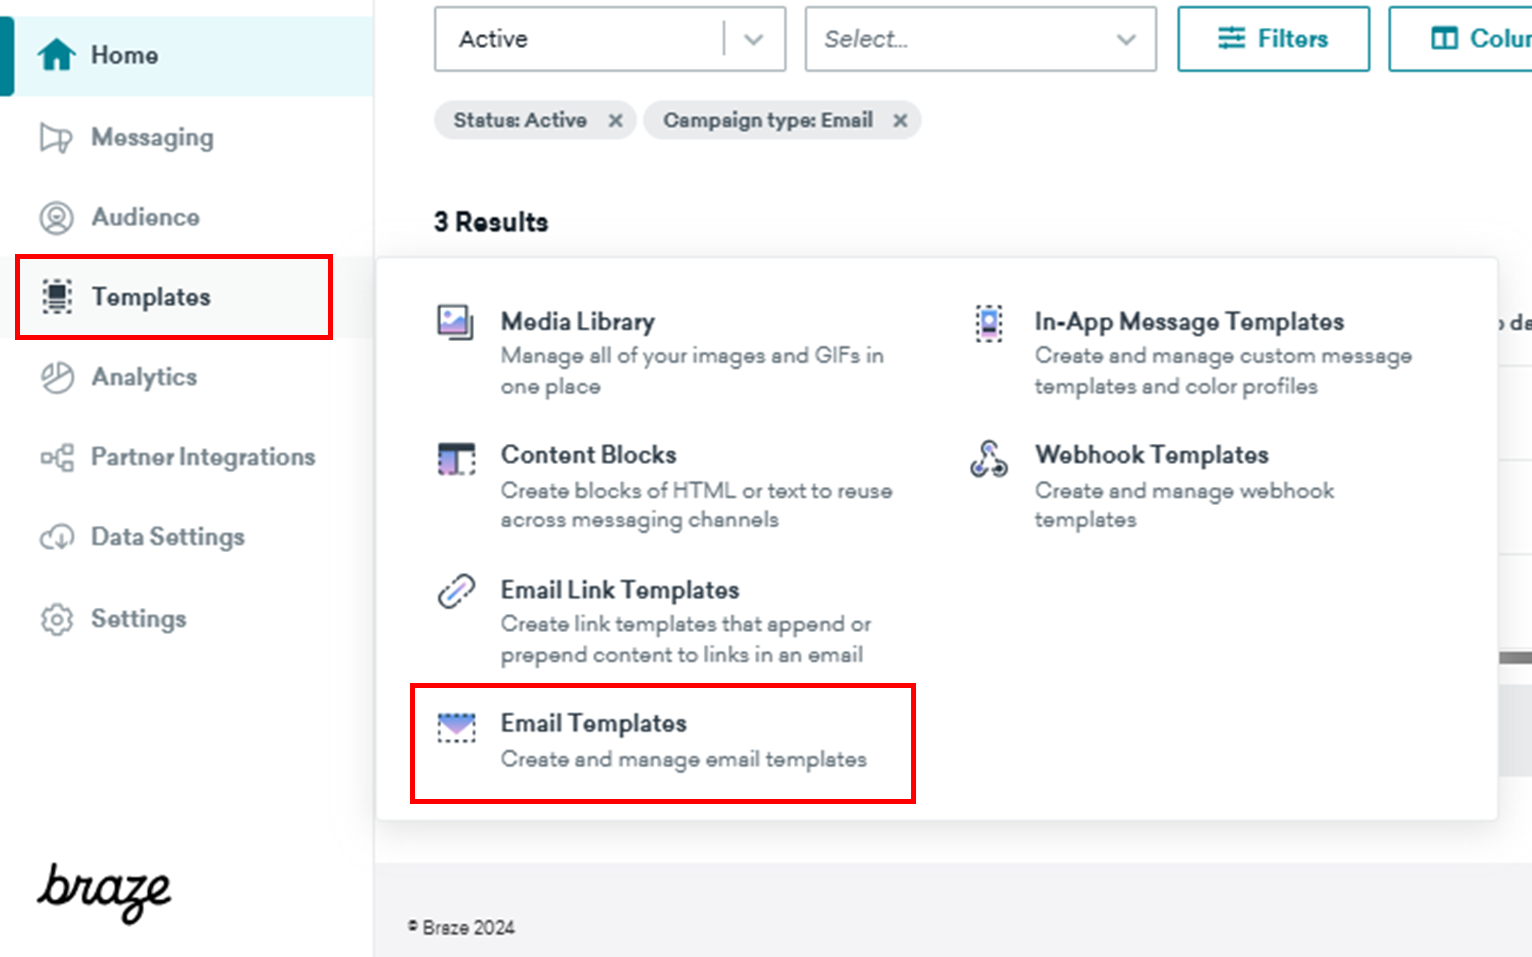
Step 2: Create a Template in Mailmodo
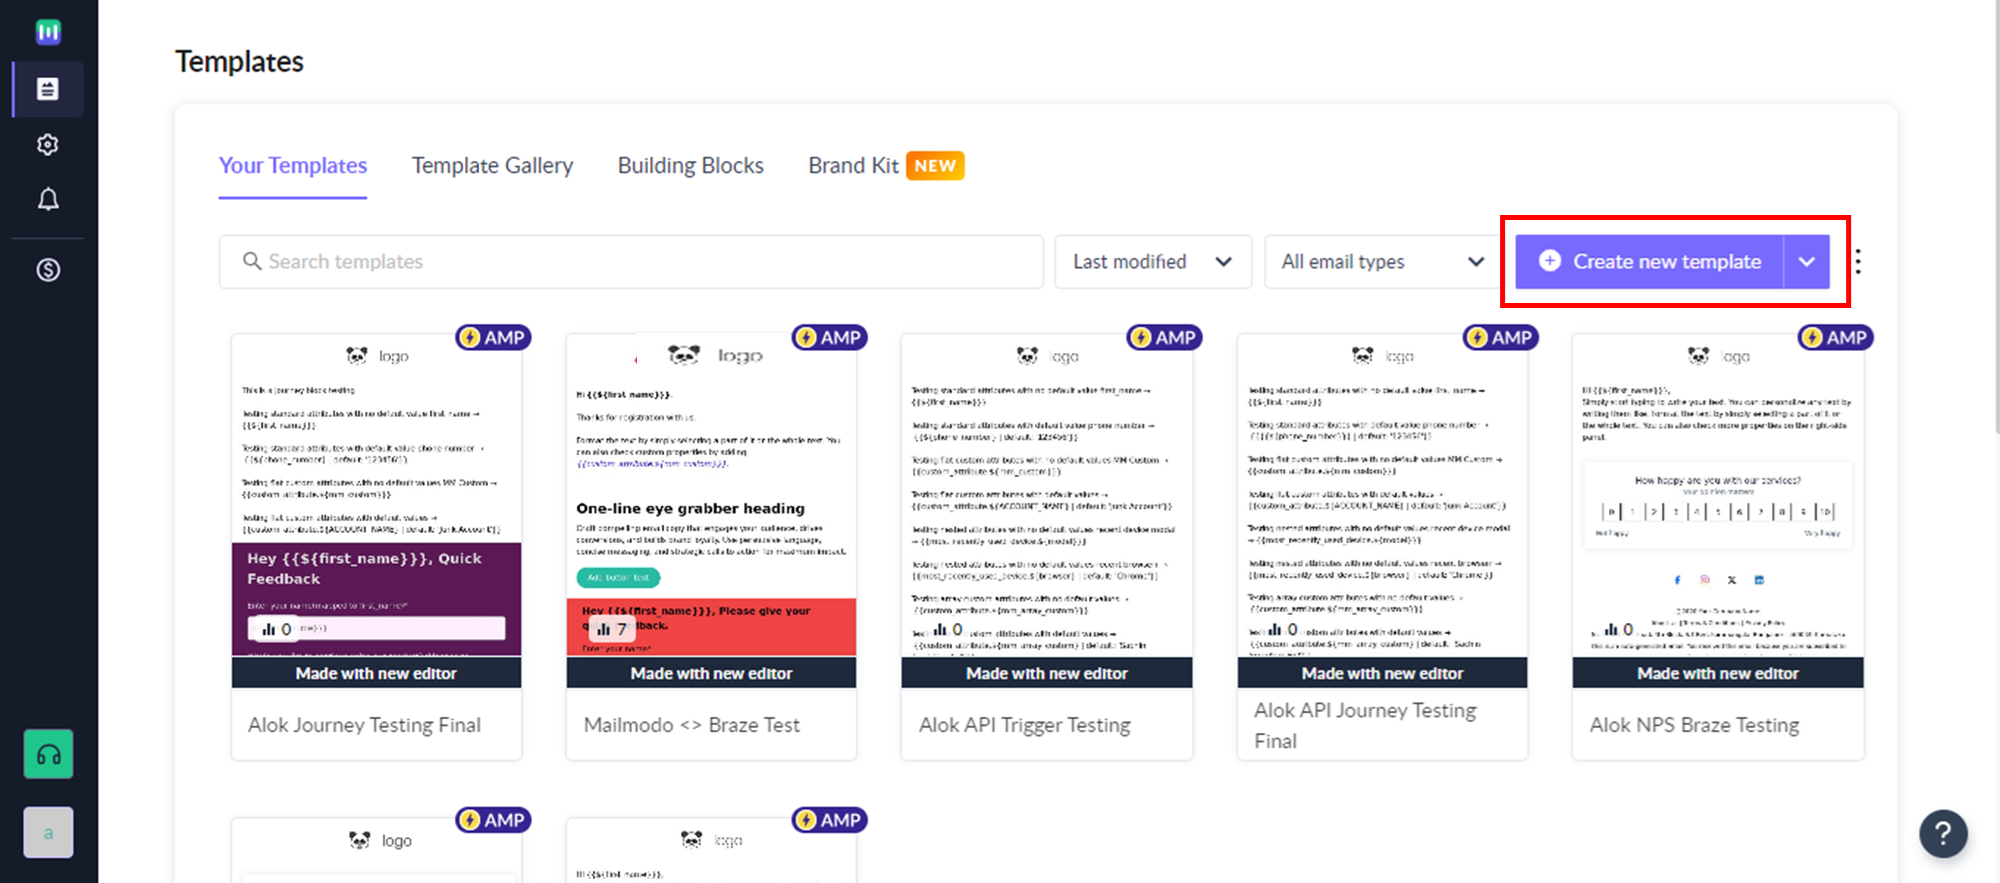
- Go to the Templates section in Mailmodo.
- Click on "Create New Template".
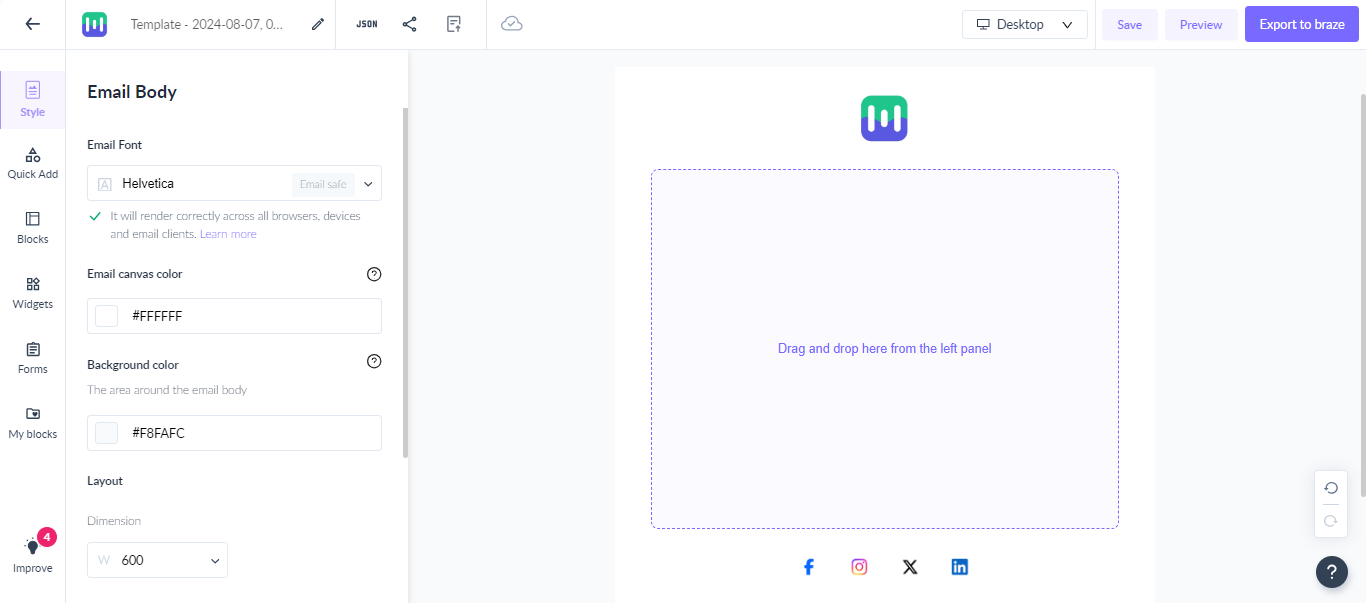
- Now, you can start adding HTML blocks, AMP forms and Widgets to create engaging email template for your audience. To learn more, see our detailed guides on how to create template using Mailmodo Editor .
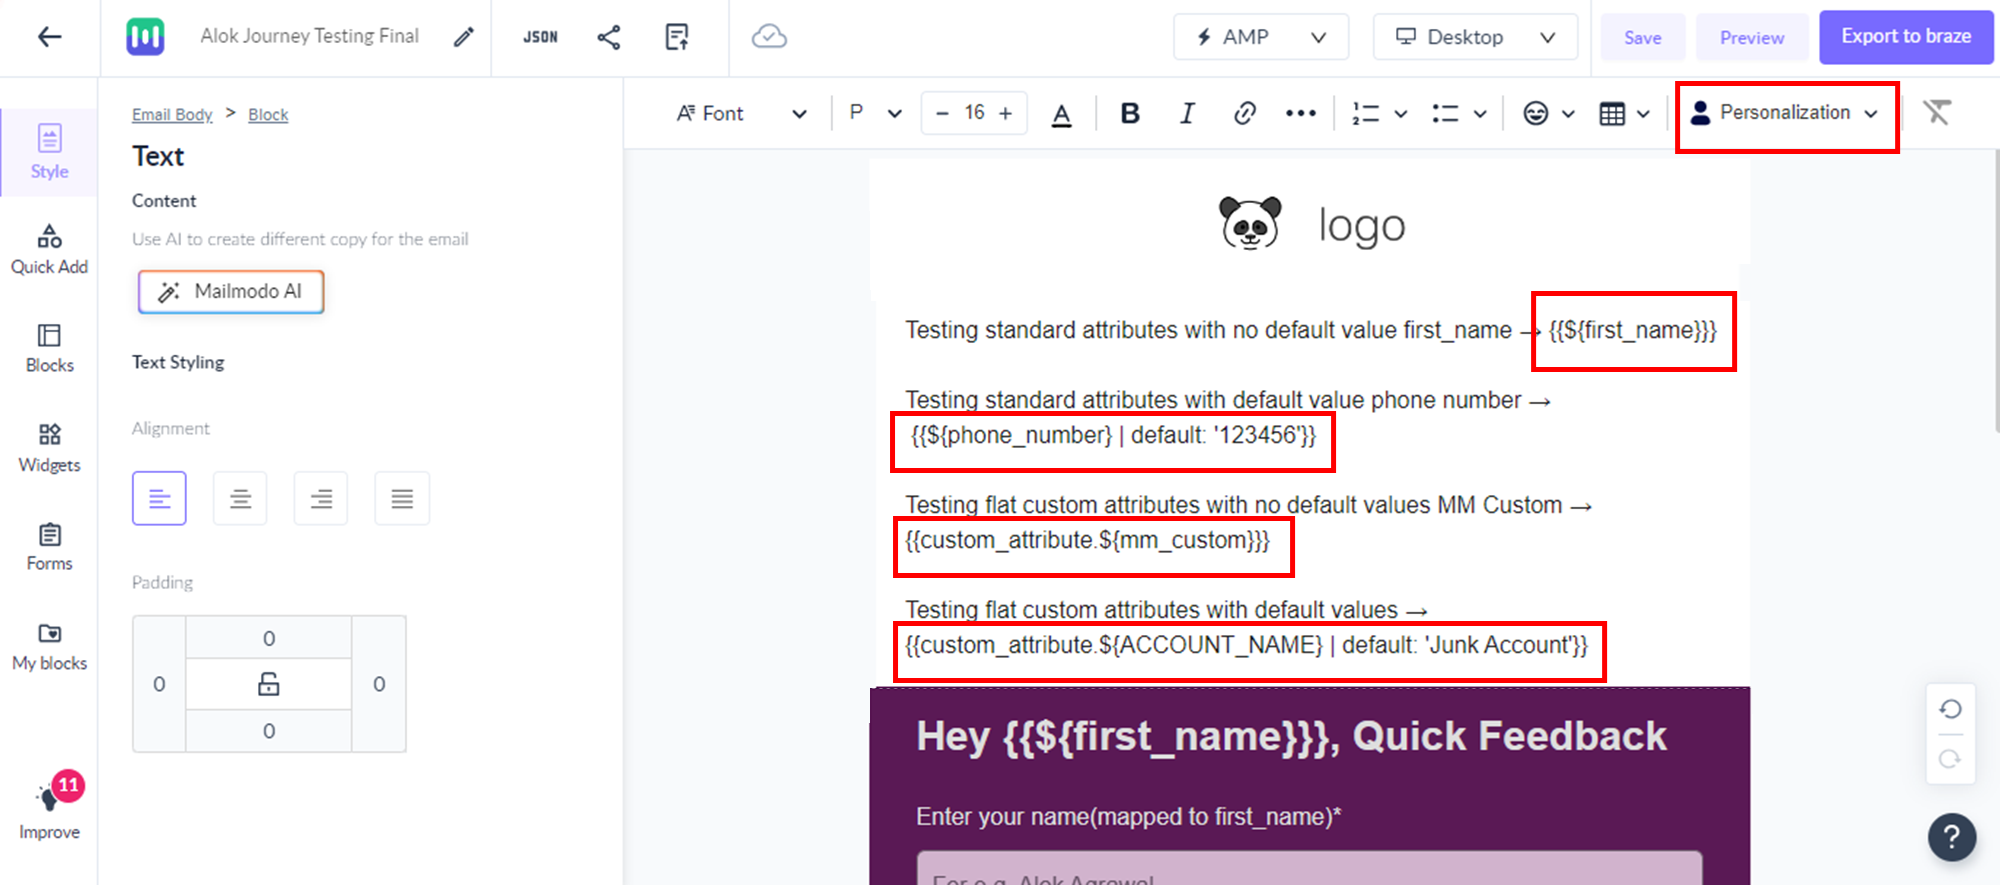
- In the template, you can use Braze liquid tags to personalize your email and add dynamic content. You can use either standard attributes from the Personalization dropdown or manually add custom attribute of choice in the template as highlighted in the screenshot below.
Please ensure the personalization parameters added are in a valid liquid format.
When content blocks are added in the template than AMP might not render on support client (like Gmail) if content block contains invalid AMP tag. For e.g. if content block contains images but they are not added as <amp-img> than AMP won’t render.
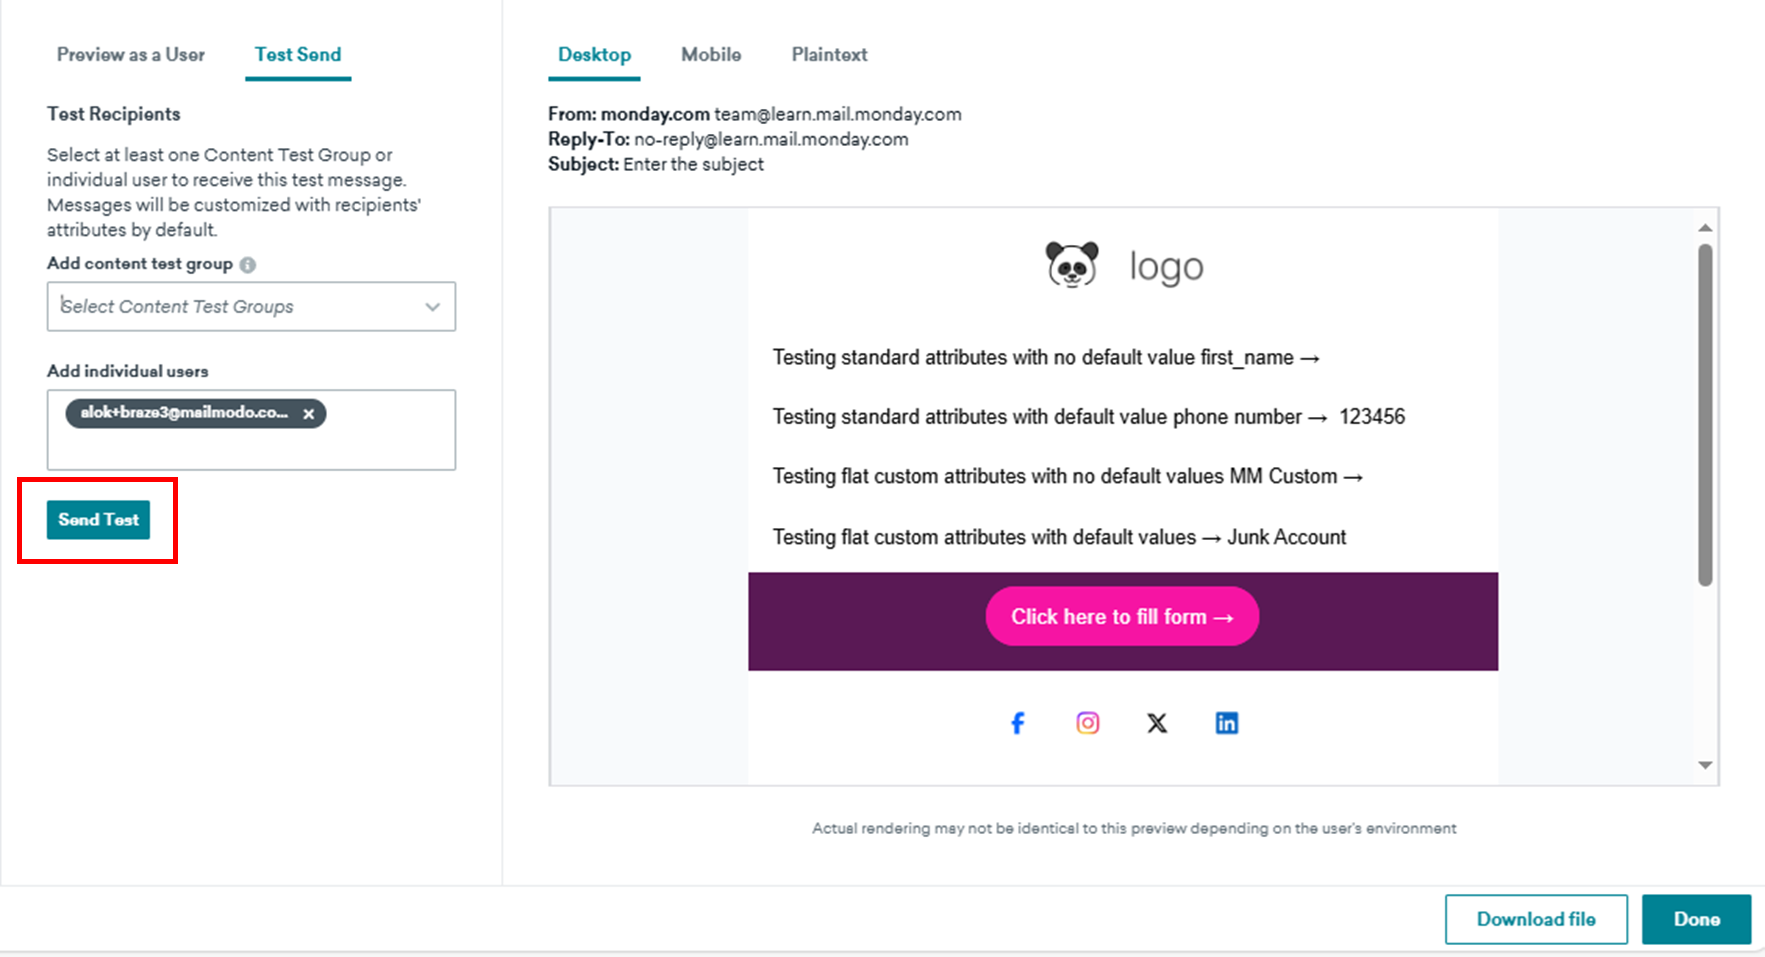
Step 3: [Mailmodo] Preview or Send a Test Email
- Once you are done creating the templates, click on "Preview" to see how it looks.
- You can also send a test email from the preview page to see how the email will look in your inbox

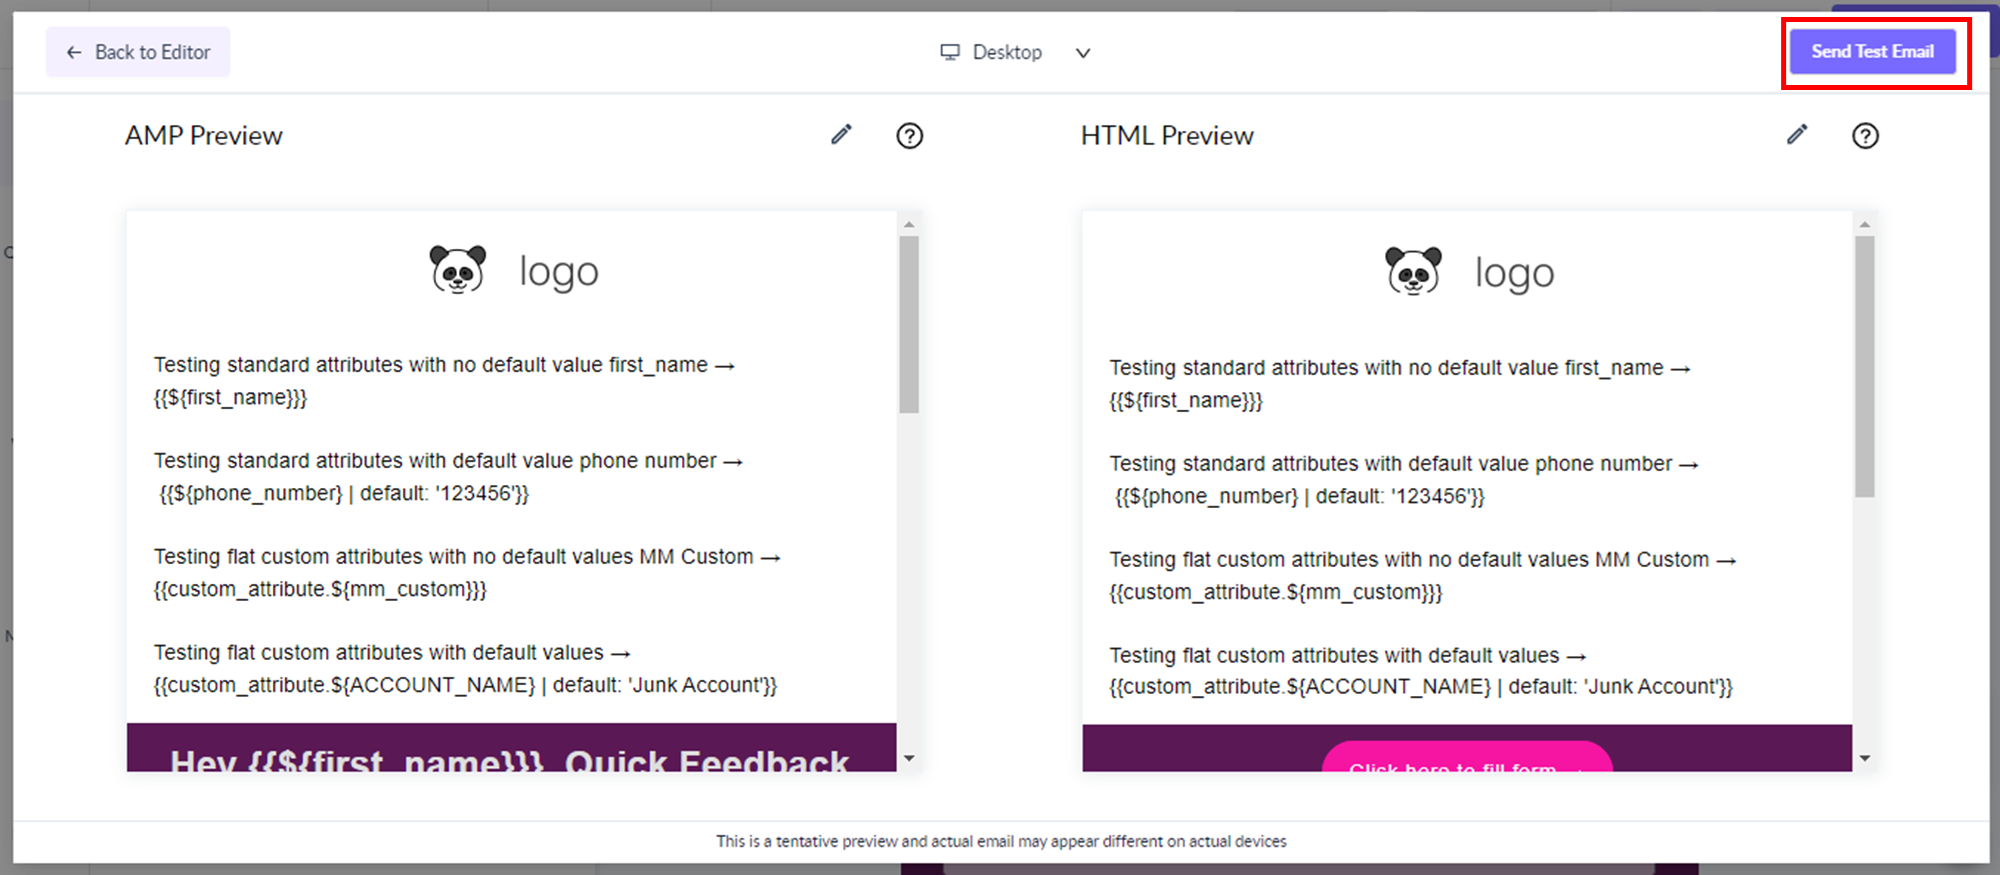

The personalization parameters will not be replaced with contact data in the test emails sent from Mailmodo. If required, you can manually update the test values in the test email modal.
Step 4: Set Up Webhook to Push Submissions to Braze from Mailmodo
If you have AMP elements in the template, you can setup export submission to send data to Braze or any other external webhook end point of your choice. Given below are the steps for sending data to Braze:
- In Mailmodo, click on the export submission option on the top bar

- Next, click on the setup option where you will be asked to provide the webhook URL and map the form properties in the payload information.
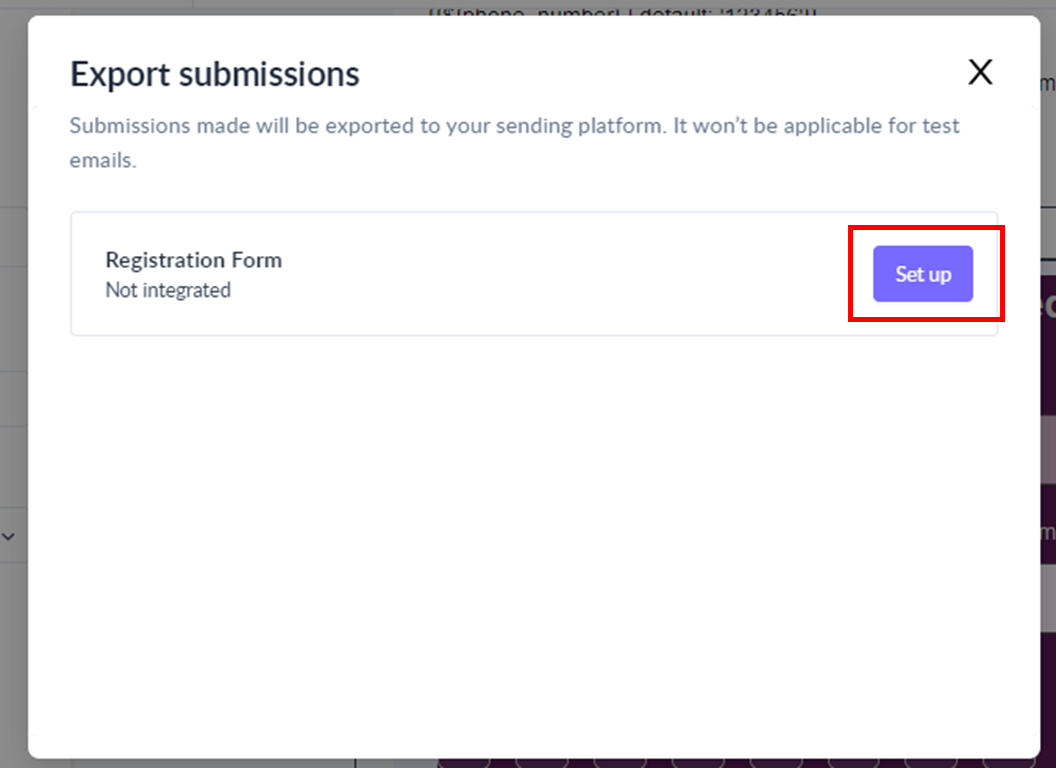
- Fill the details as highlighted below and click on Save
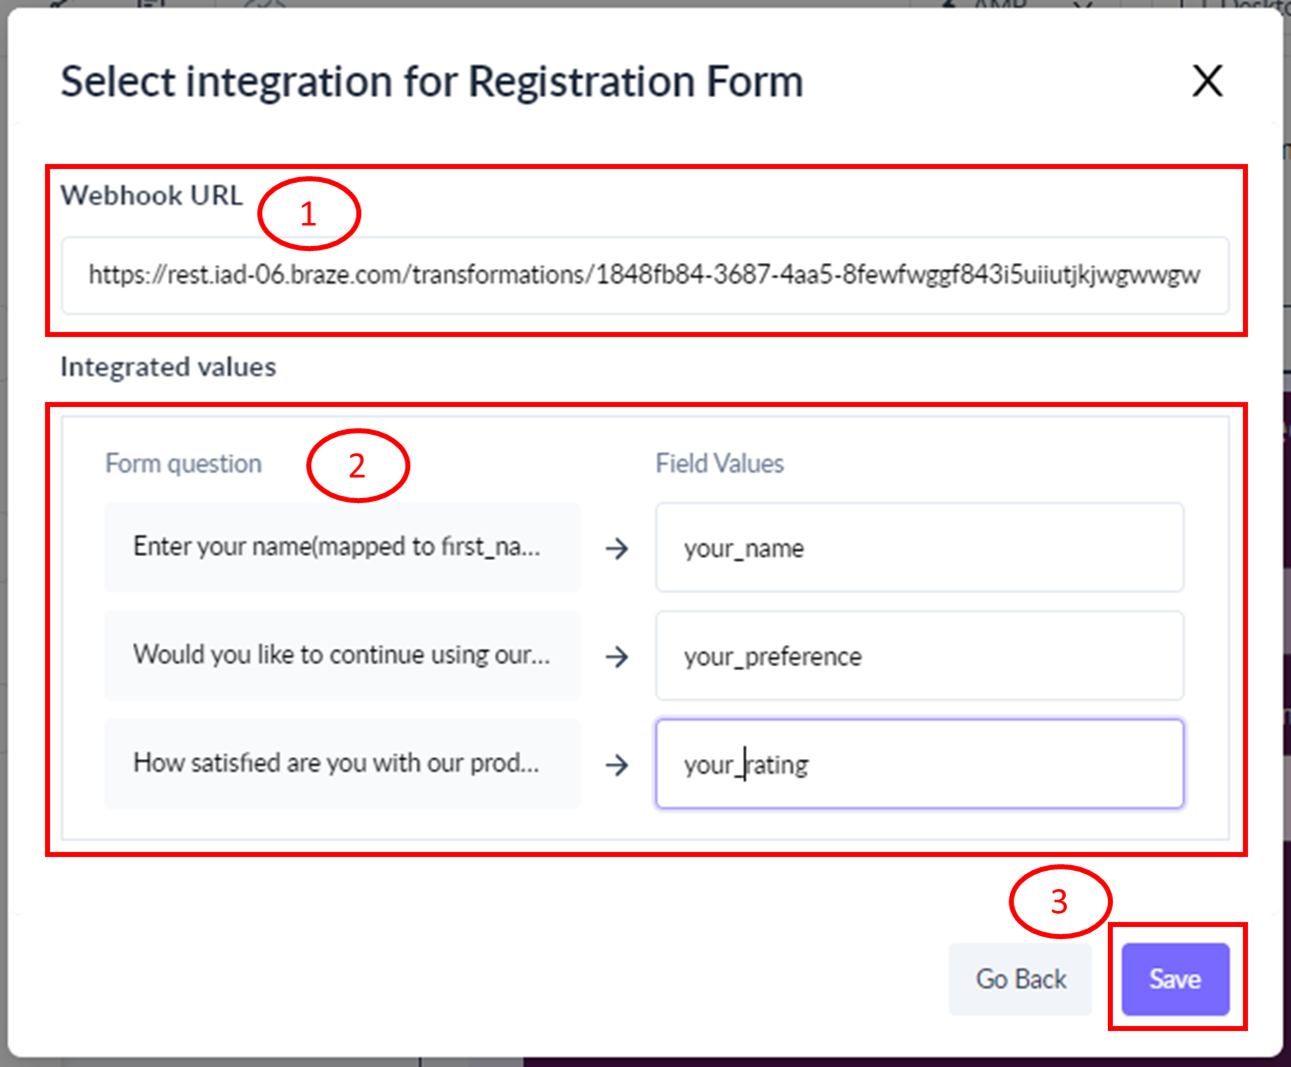
- To get the webhook URL, perform the following:
- Go to your Braze account, and create a new data transformation of type POST: Track users
- You can name the data transformation as per your choice.
- Copy the Webhook URL provided in Braze and paste the same in the input field.
- Now, map the form questions to the field values you want to send to webhook payload.
- On save, we will send a test submission to the webhook endpoint to validate the integration.
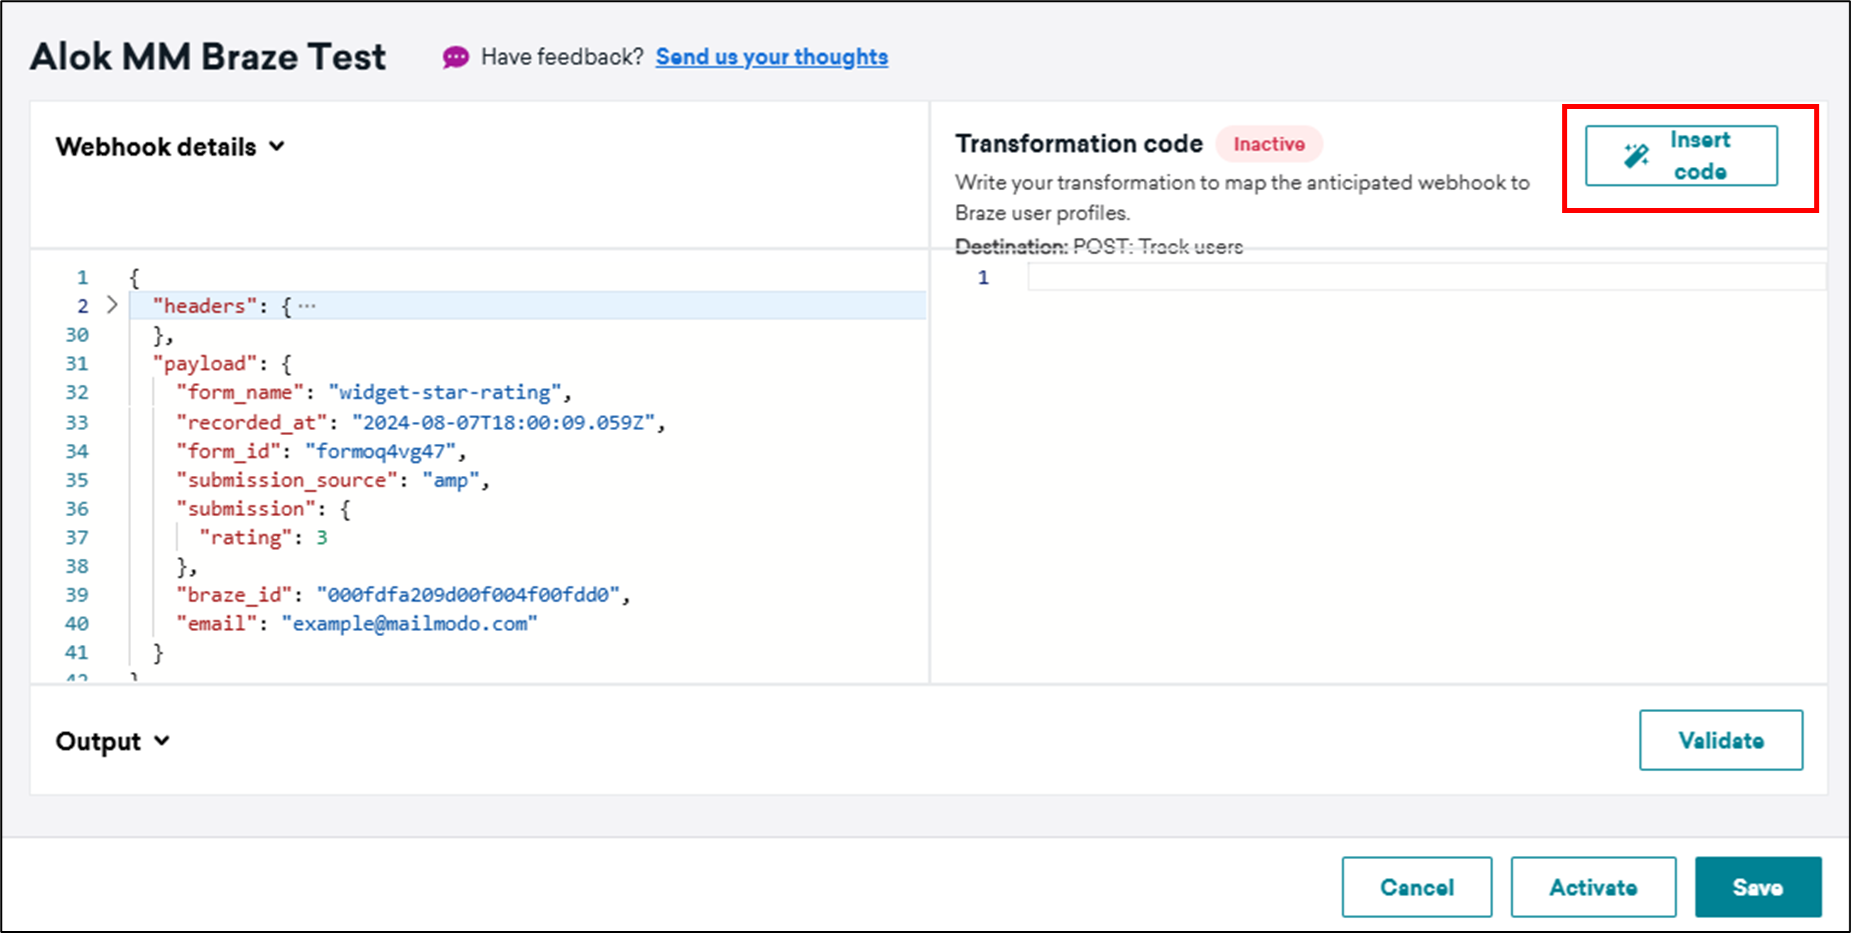
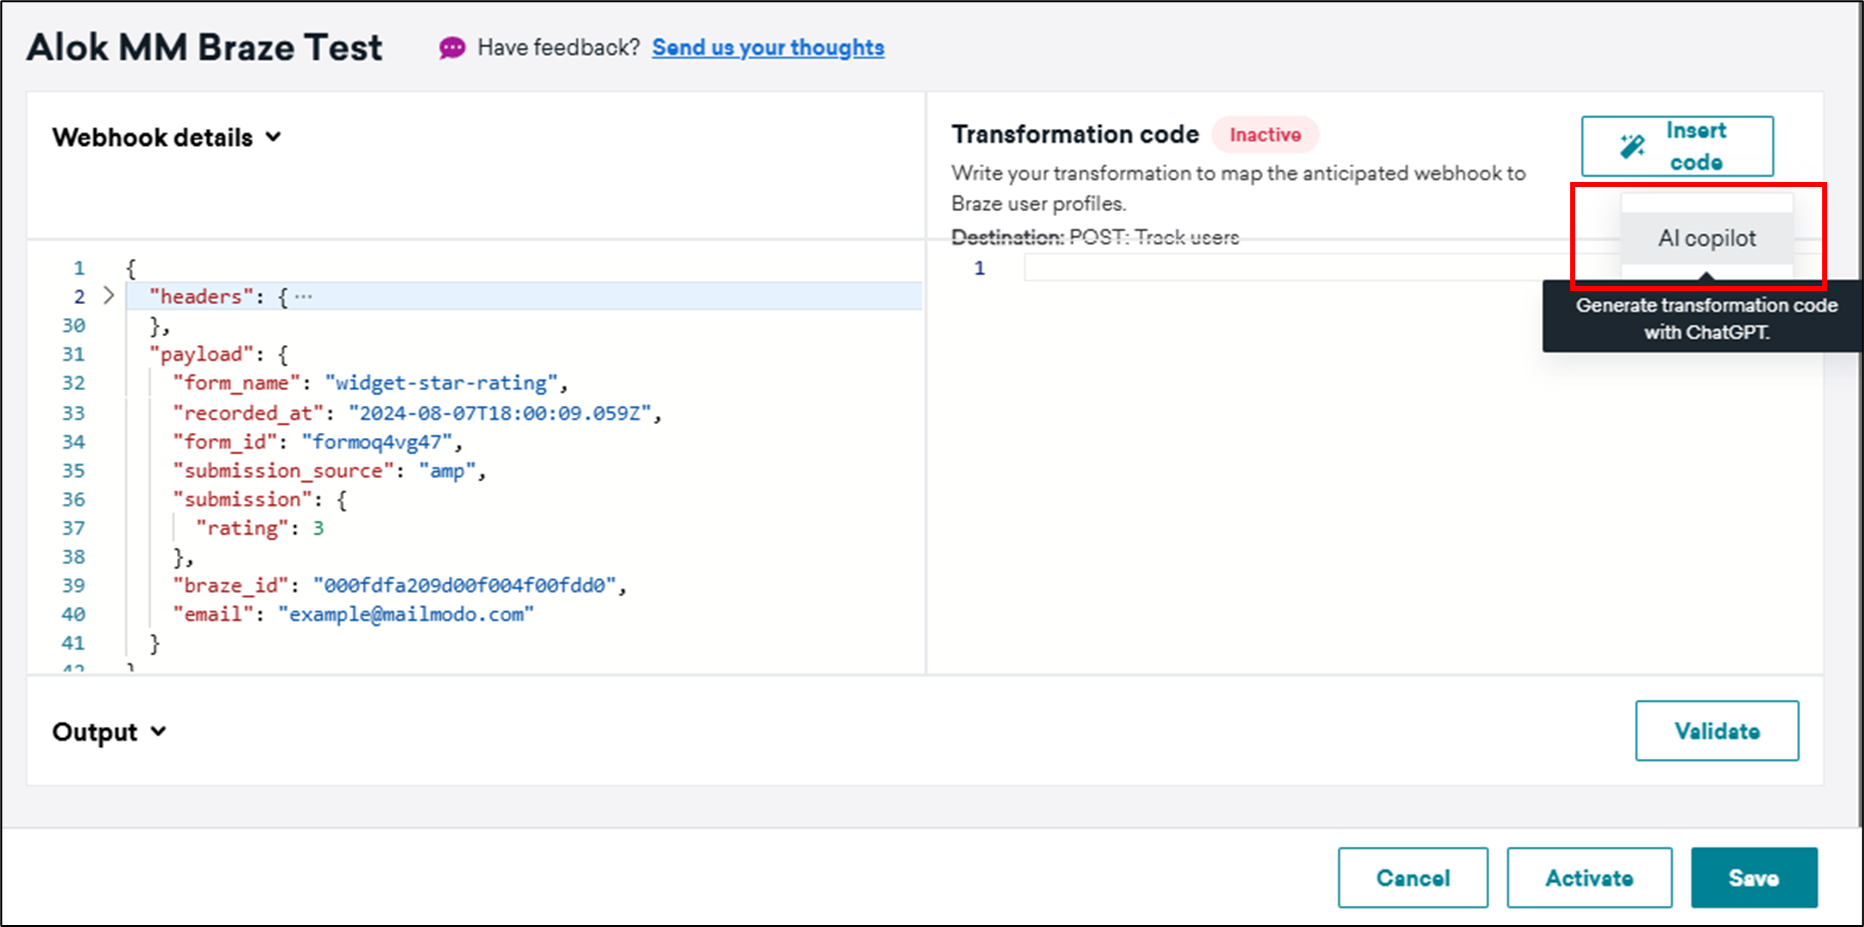
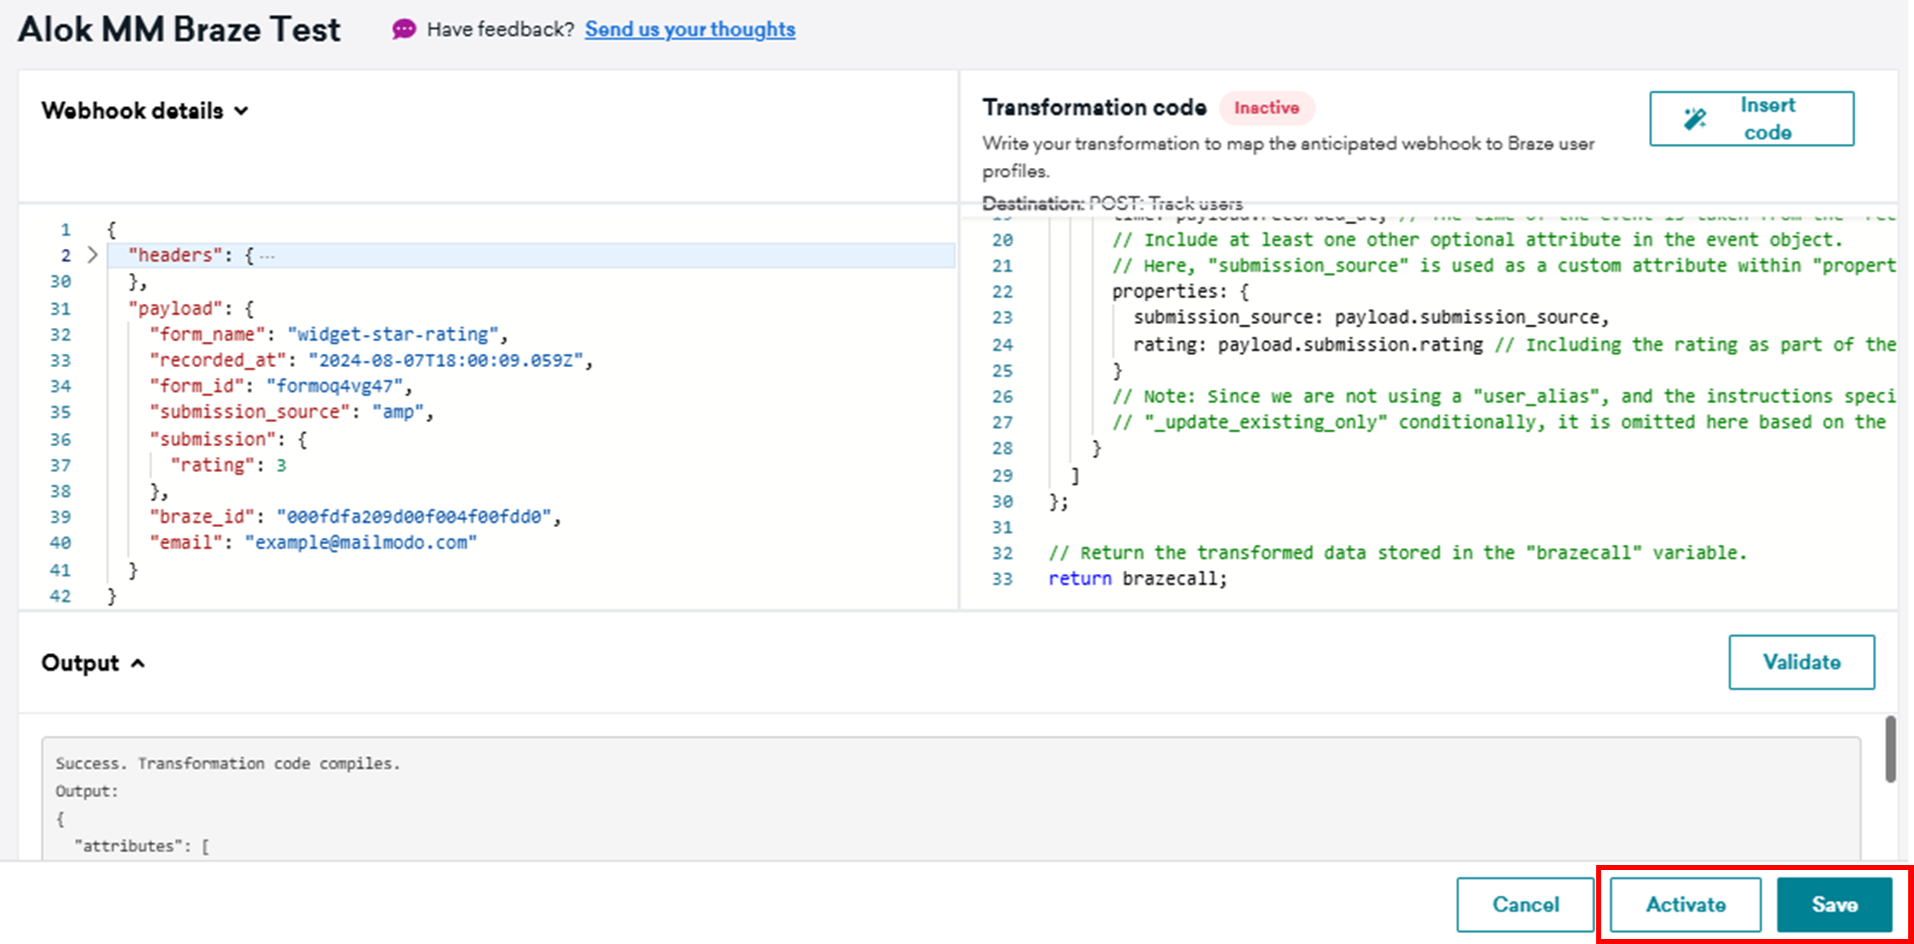
- Go to your braze account, and write your own data transformation code to update user profile attributes or events. You can leverage AI Copilot functionality to quickly setup your basic transformation:
- Click on the Insert code option and select AI Copilot option
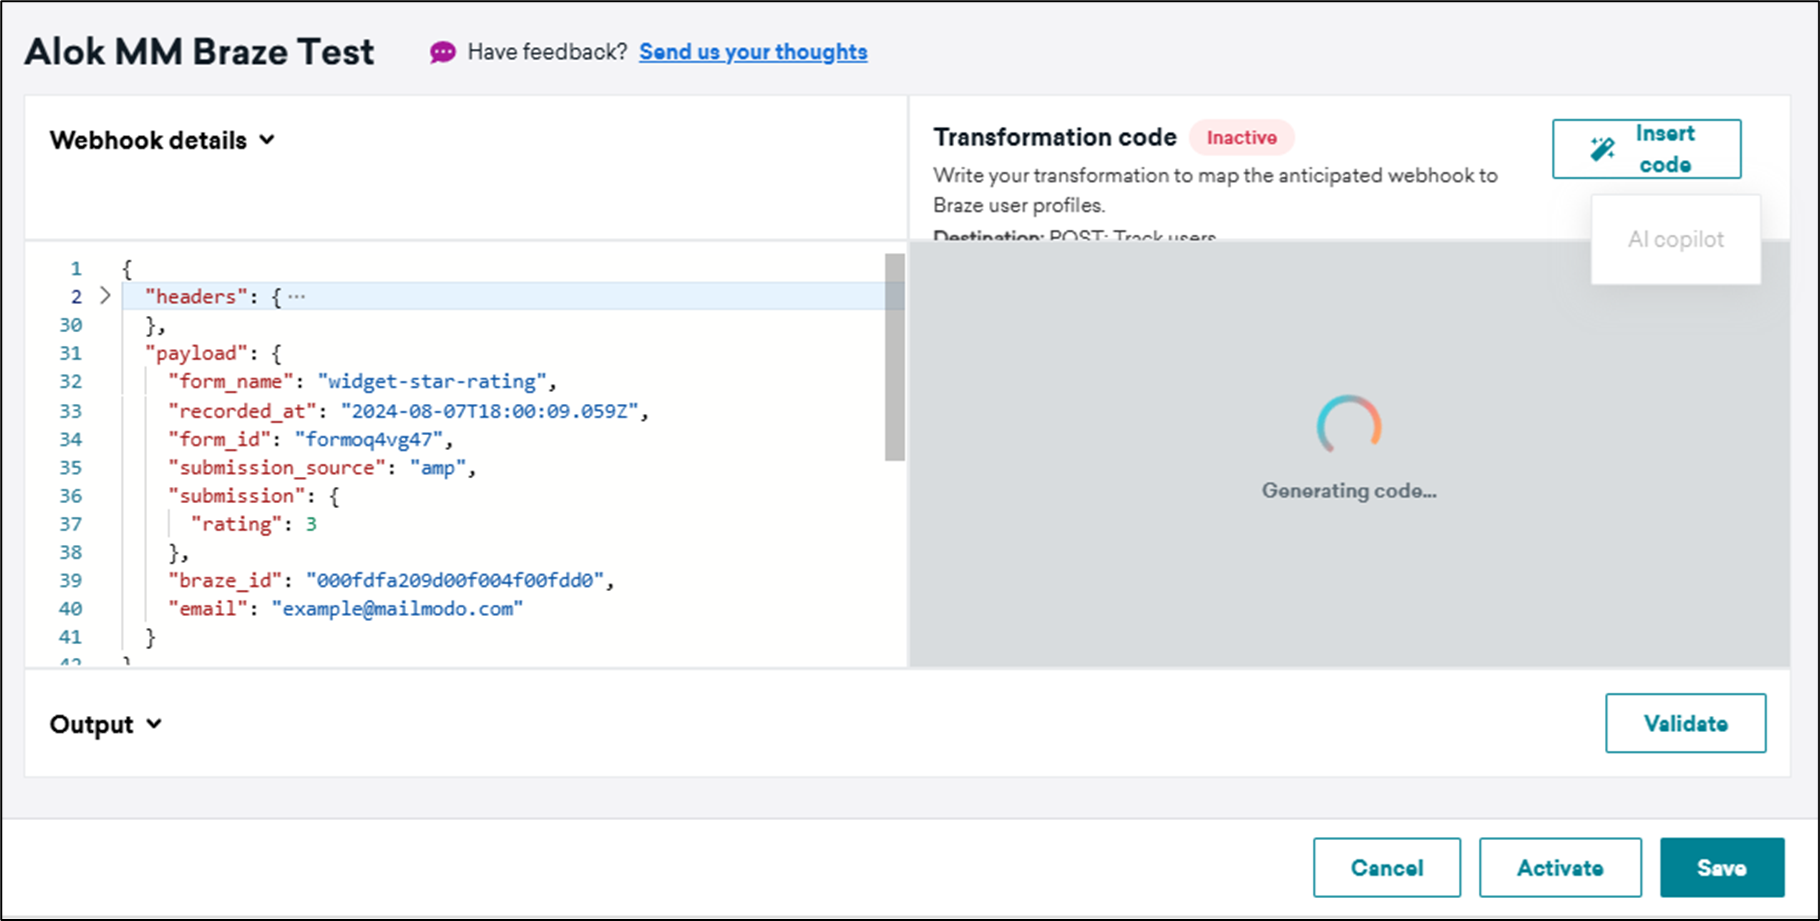
- Braze will generate a sample code using the webhook payload sent in the previous step
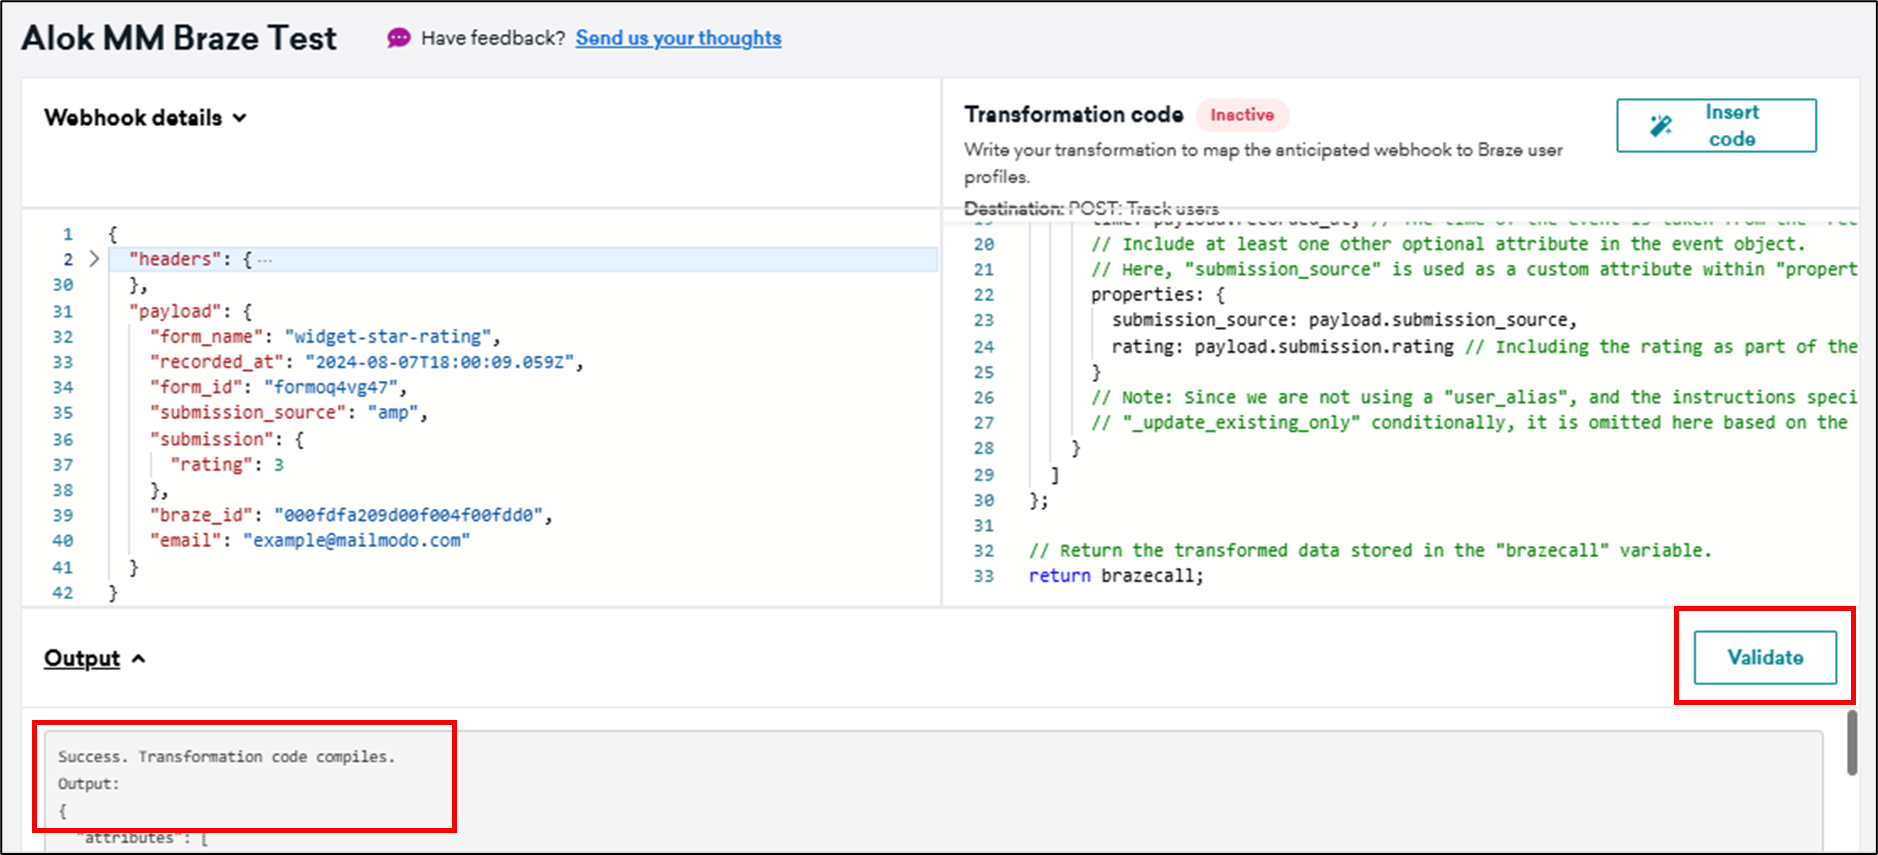
- Make changes to the code (if required) to ensure the form submission data is mapped to right attributes and events
- Click on Validate to confirm that the code has compiled properly and correct output is generated
- Next, Save and Activate the data transformation so that it can process actual submission for the campaigns
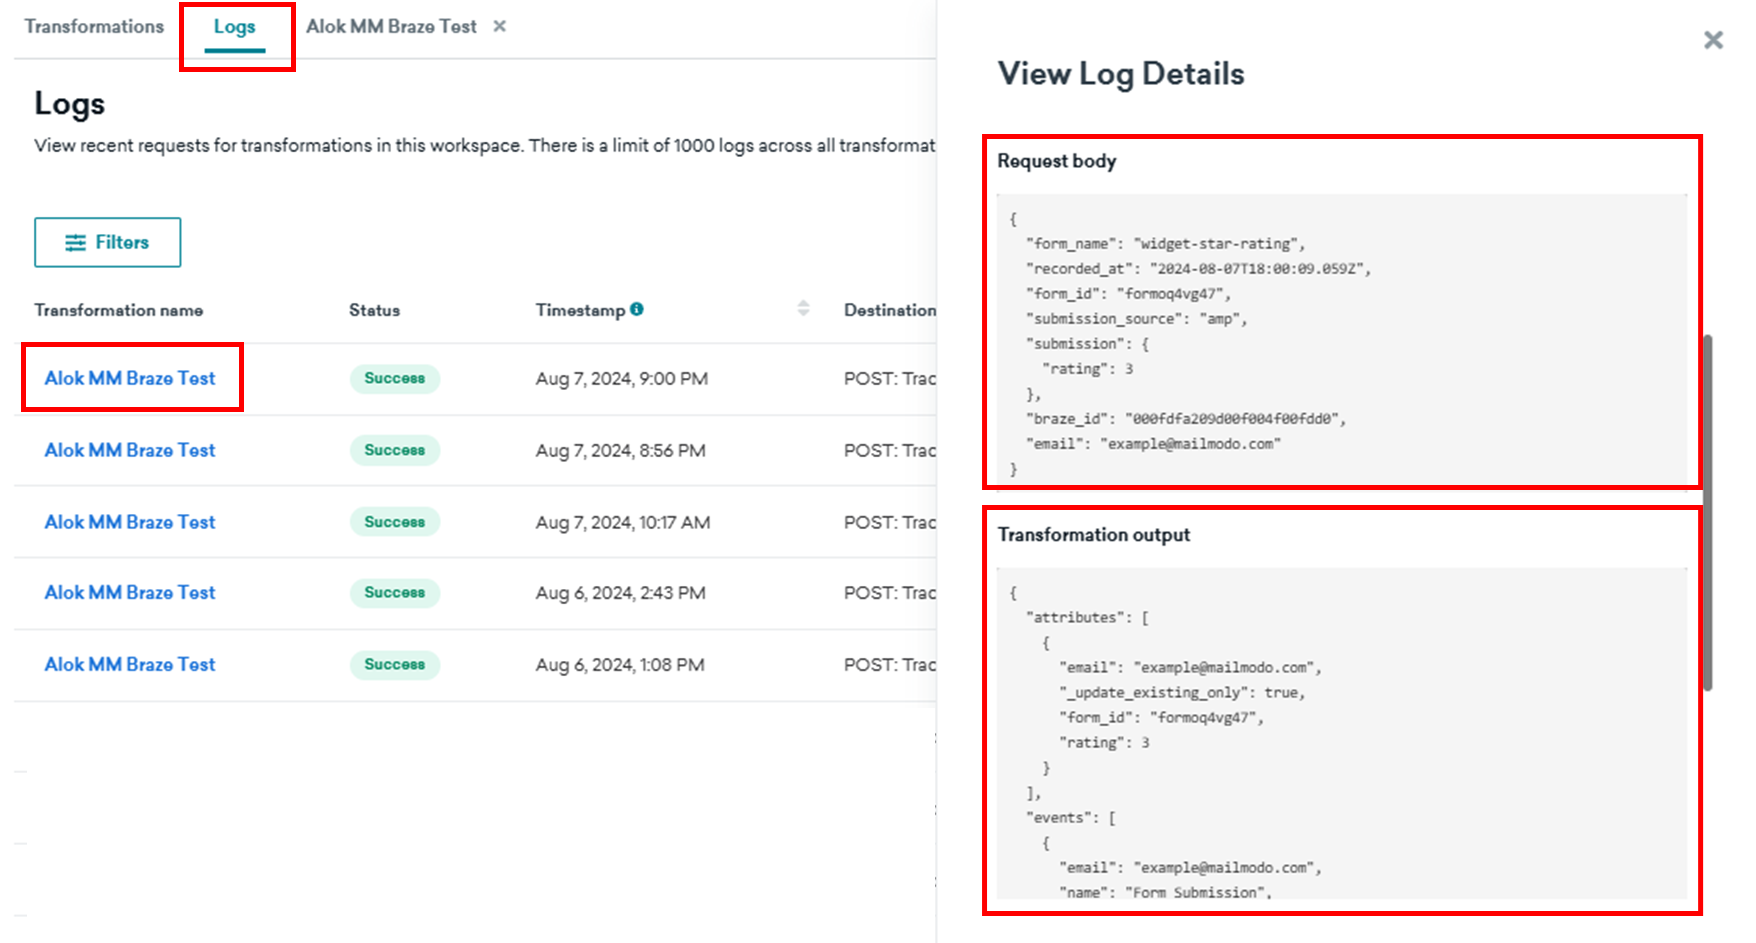
- Once activated, any submissions made to the form either as part of test email or actual campaigns from Braze will be processed by data transformation. You can view logs for the data transformation to see details of request received and output delivered.

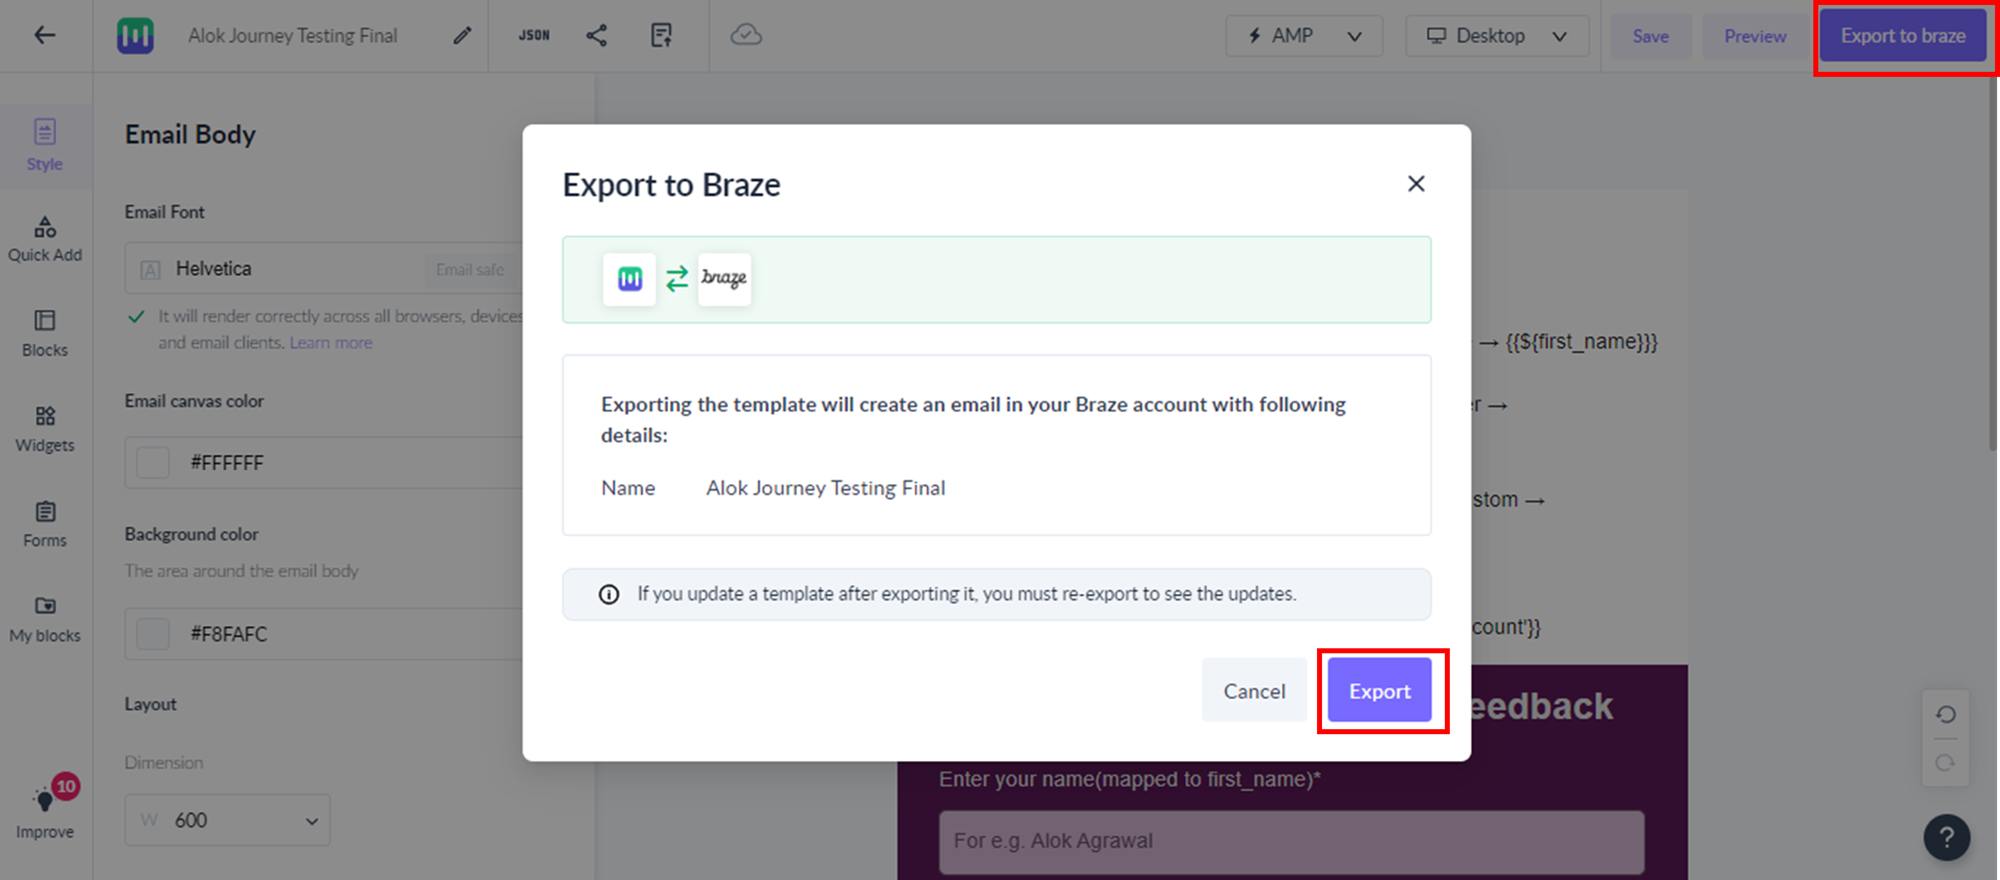
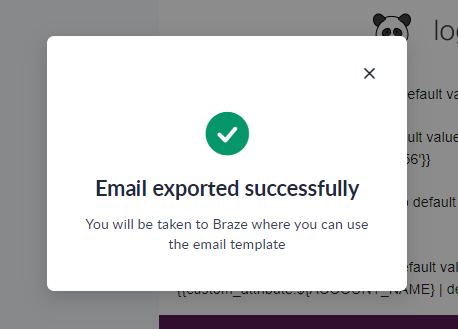
Step 6: Export the Template to Braze
Once you are done template creation, click on the Export option to push the template to Braze.
Step 7: View and Use the Template in Braze
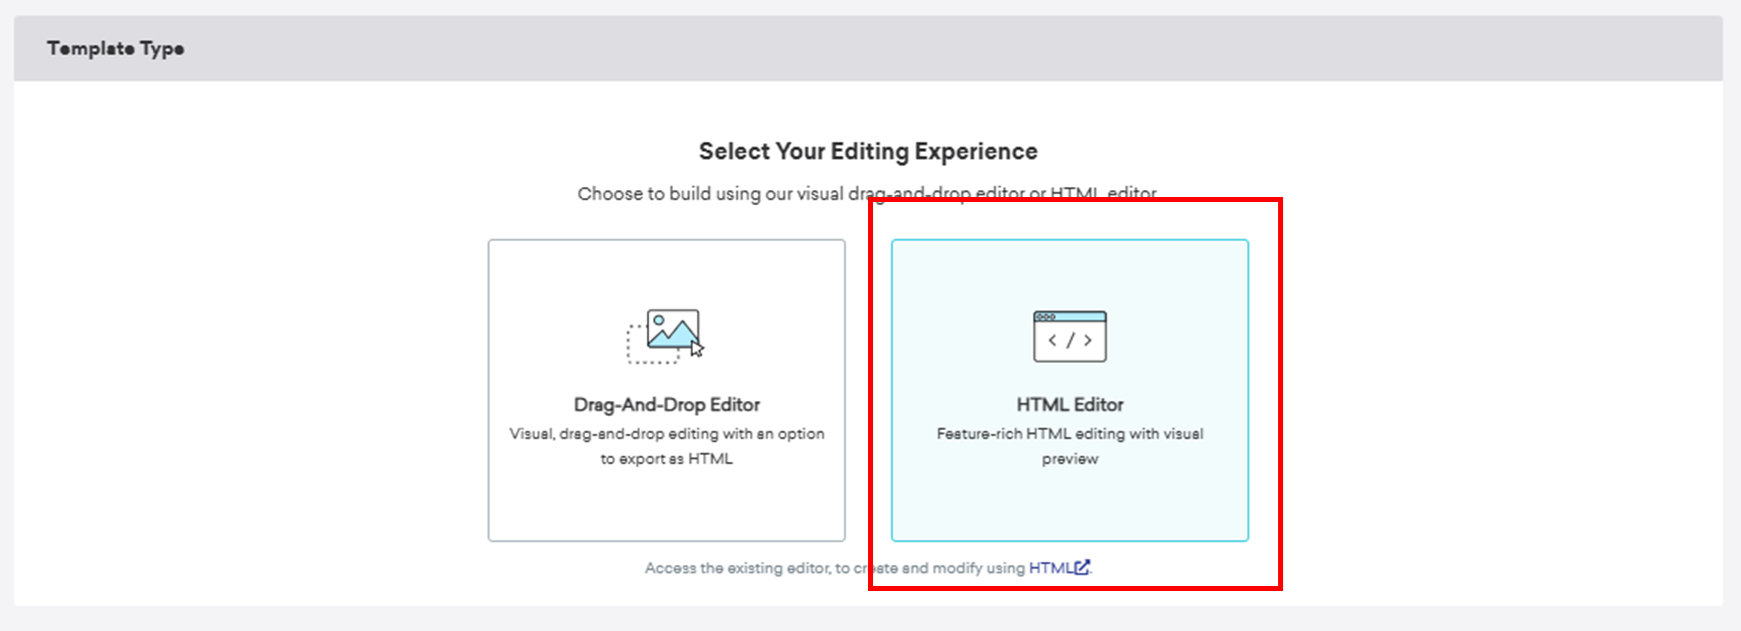
- Navigate to Templates → Email Templates → HTML Editor.
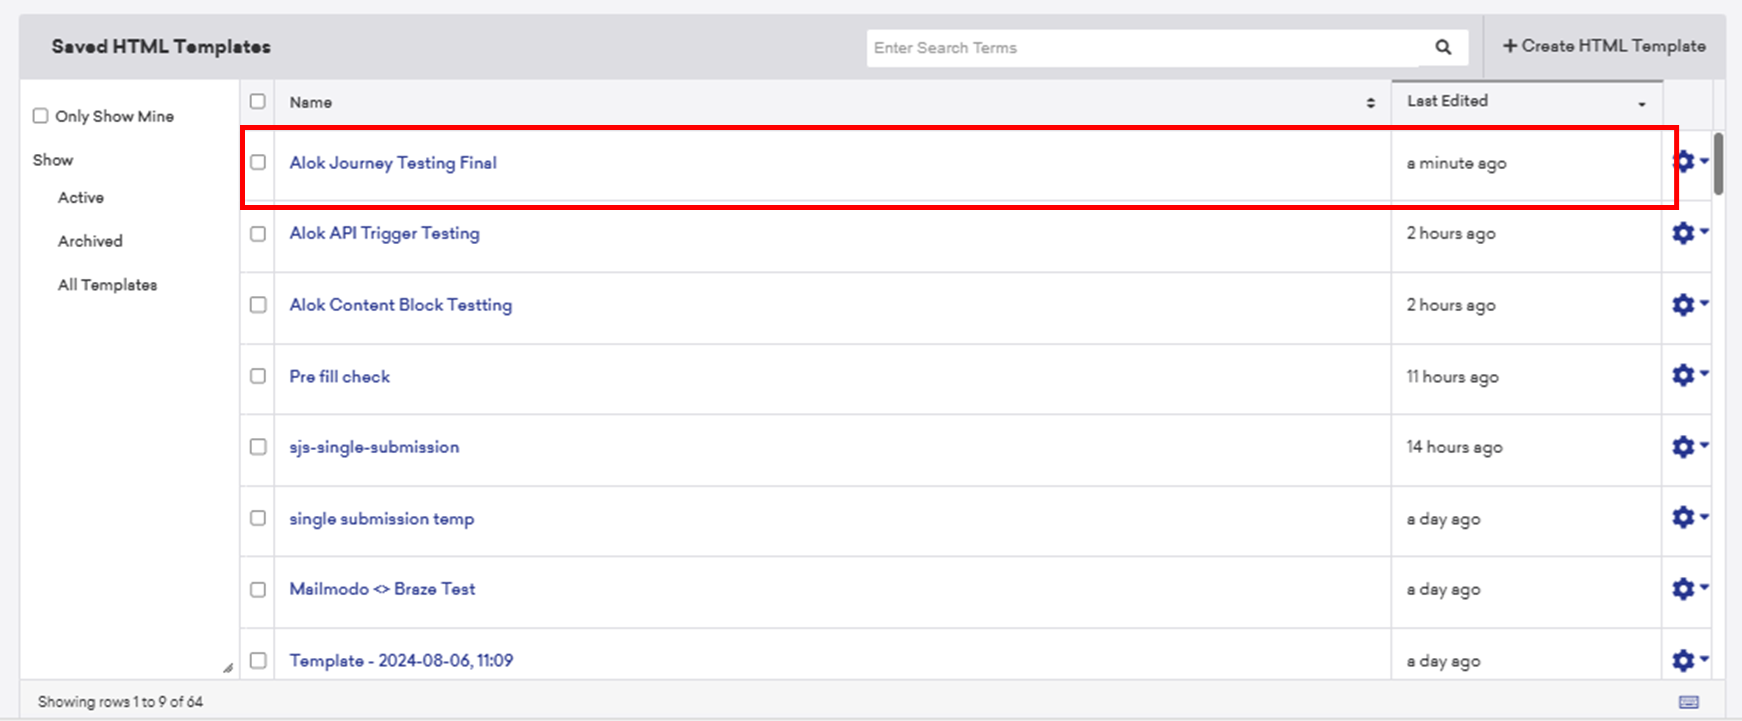
- You will find the recently exported template at the top
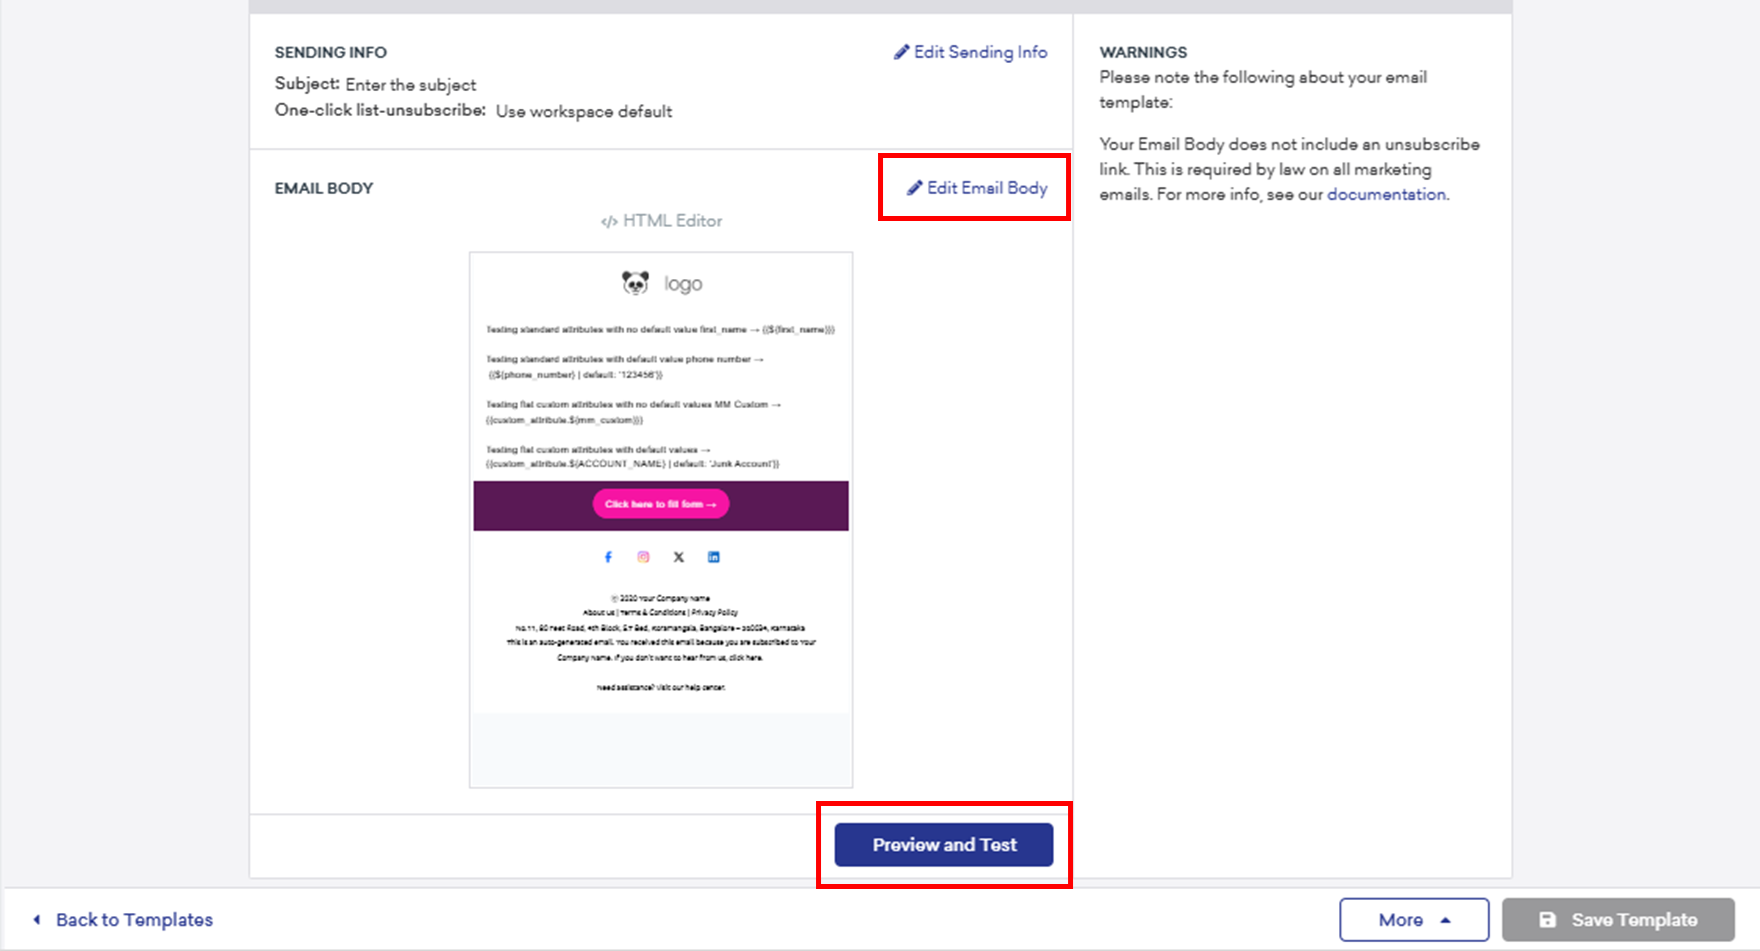
- You can view or edit the template and send test email using the Braze platform.
- Alternatively, you can use the template to send campaign to your audience.
Braze only shows preview for the HTML version of the template. To view the AMP version with personalization, send a test email or actual campaign.
Step 8: Use submission data to create segment or trigger canvas in Braze
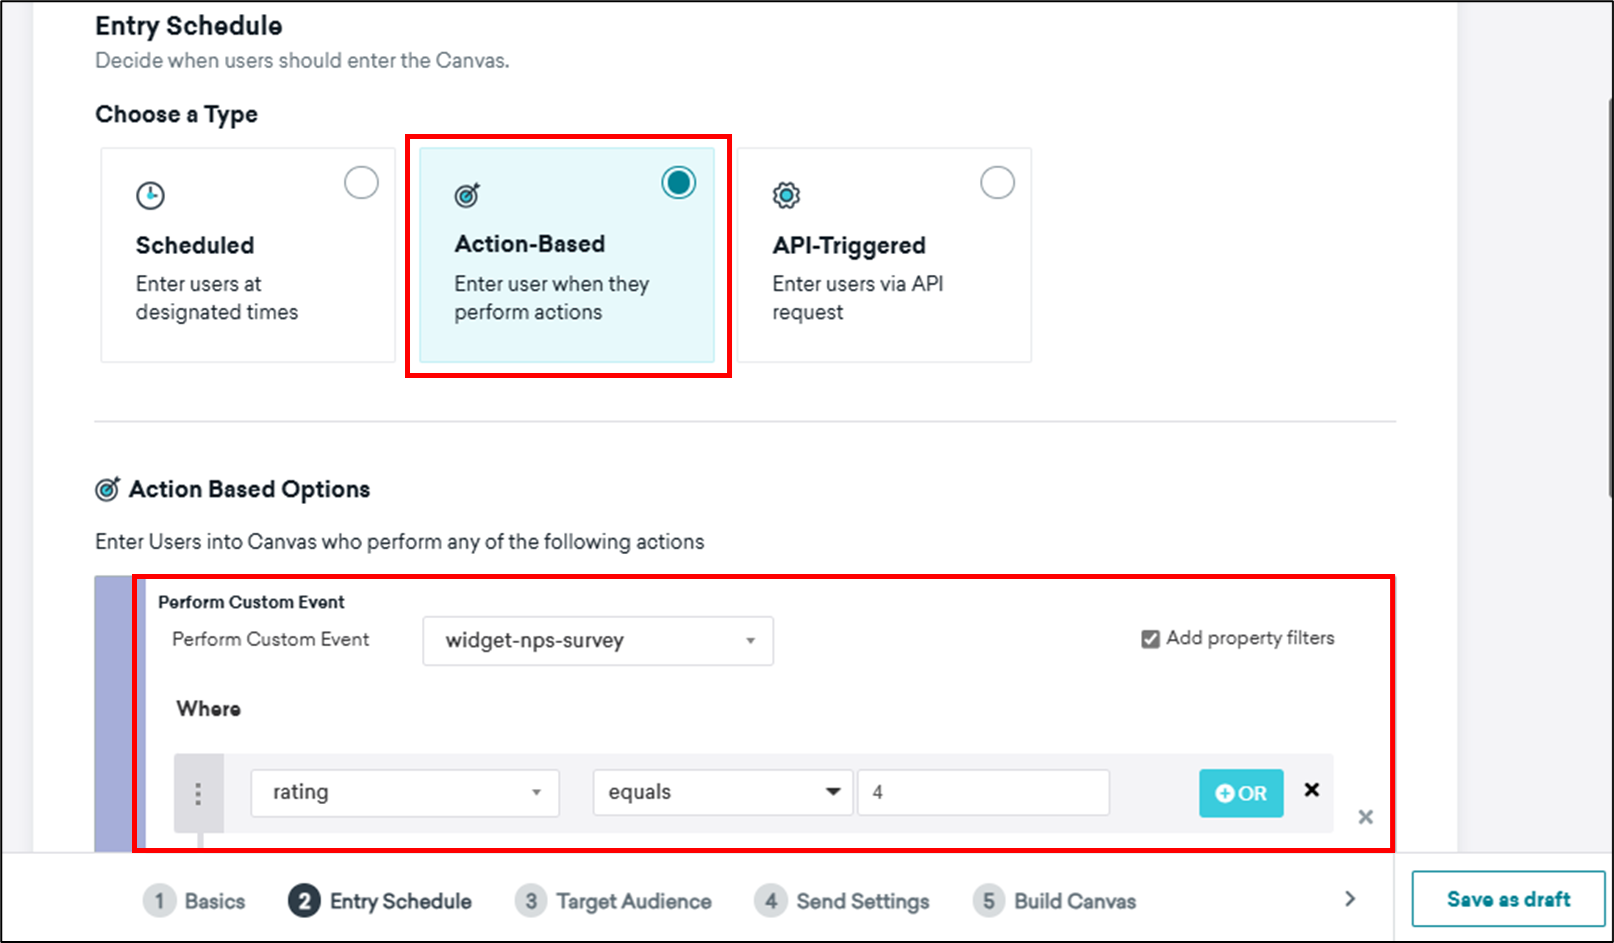
Whenever recipients submit forms, the submission data will be sent to the configured data transformation where appropriate attributes or events will be updated. Given below highlights how the data can be used in journey and segmentation:
- User the properties or events to filter users in the segment
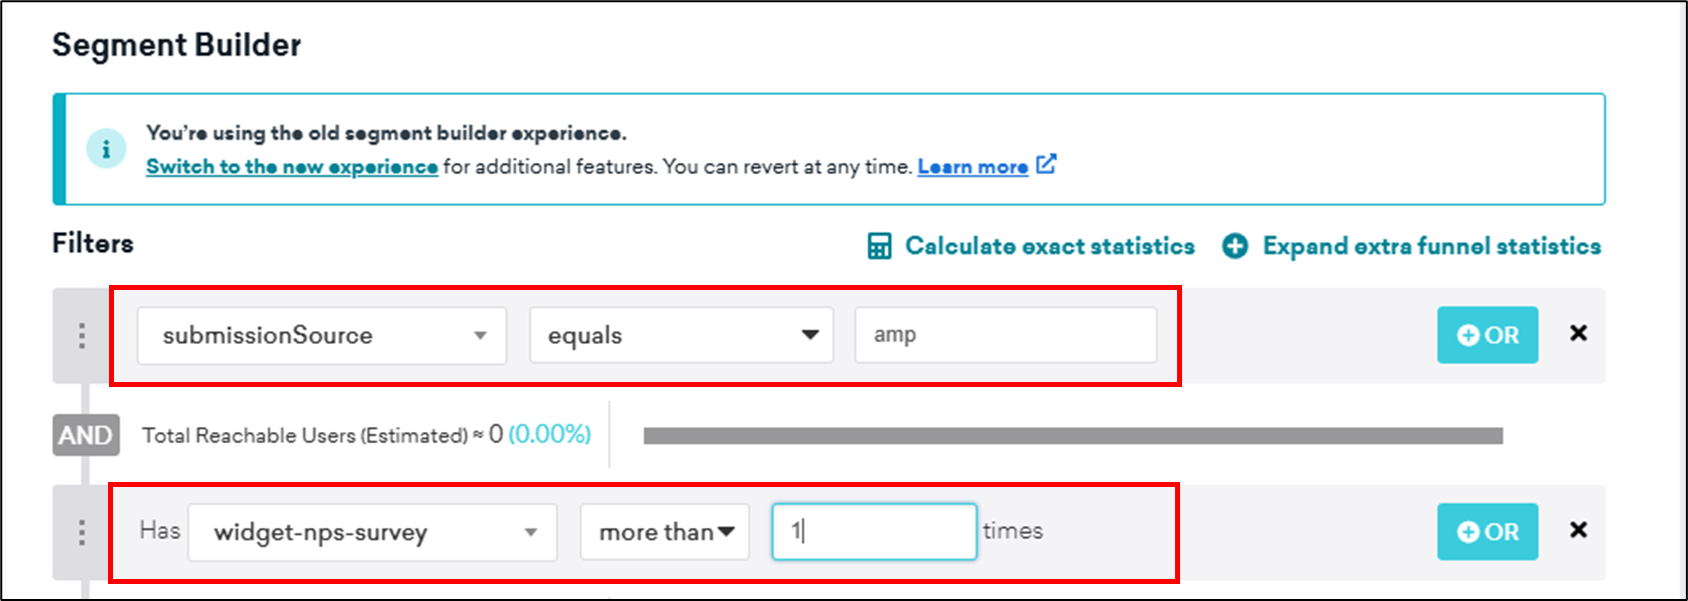
- User the events to enroll users to the Canvas campaign
By following above steps, you can effectively integrate Braze with Mailmodo, create interactive email campaigns, and leverage the power of both platforms to engage your audience and drive higher conversion for your email program.